
Practical ideas from FARM SHOW MagazineSubscribe · Free issue · Send us your shop tip
Subscribe to FARM SHOW
Issues / Vol. 21, No. 2 (1997)

Vol. 21, No. 2 (1997)

Money-Saving Repairs & Maintenance Shortcuts · Printed section pp. 32–34

35 selected entries · Complete text of selected entries

This issue’s section includes reader tips and feature-length shop stories. Held items and editorial notices are not reproduced.

Archive text: prices, coupons, availability and contact details reflect the original publication, not current offers. Reader methods are not universal instructions; follow manufacturer guidance and proper safety practices.

Reader shop tips

From the archive · Full text
Reader shop tip

Mel Selin

Mel Selin, Camrose, Alberta

“I had trouble with the steering on a 1979 DX 110 Deutz tractor. I bought a new steering pump for $1,300 but it still wouldn’t work so I talked to the dealer. He said the control unit under the dash was worn out and that a new one would be $2,800. I purchased a used one for $750 and installed it. The tractor still wouldn’t steer. The dealer said the used unit must have been faulty. I asked if there were any filters to clean out besides the hydraulic filters. He said no but when I started tracing the hydraulic lines I found a plugged filter in the suction line to the steering pump. It was so full of metal filings from the old steering pump that no oil could get through. I cleaned it out, reinstalled it, and the tractor steered perfectly. When I told the dealer about it he didn’t even know the filter was there. I spent a lot of money for nothing.”

From the archive · Full text
Reader shop tip 1 of 2

Loren Konda

Individual tip 1 of 2 from this reader’s published contribution.
Loren Konda, New Effington, S. Dak.

“I’ve found a way to get rusted bolts loose that works a lot better than cussing. I mix equal parts of WD-40, carb cleaner, and brake parts cleaner and spray it on. Works every time. Just let it soak in for about 3 hrs.

From the archive · Full text
Reader shop tip 2 of 2

Loren Konda

Individual tip 2 of 2 from this reader’s published contribution.
Loren Konda, New Effington, S. Dak.

“One modification I made to our shop was to add an upstairs floor for storage of extra parts. Doubled our storage area for little cost.”

From the archive · Full text
Reader shop tip

Ed Panchyshak

Ed Panchyshak, Windsor, Ont.

“I saw this idea in Popular Mechanics and was able to locate one of the tools at a local tire store. It’s called a Blade Buster and it makes it easy to take off a mower blade, leaving both hands free. Works much better than using a stick or a towel or your foot. It simply clamps to the side of the mower deck with a hand-tightened 3/8-in. bolt. Slips on and off in seconds. I bought it for about $10. It’s made by Universal Industrial Products Co., Pioneer, Ohio 43554-0628, ph 419 737-2324.”

From the archive · Full text
Reader shop tip

J.R. & Bill Colby

J.R. & Bill Colby, Newbury, Mass.

“After rebuilding an engine, we use a lawn mower gas tank to restart it. That way we don’t have to reinstall the hood and other components. Makes it easy to get at the engine for initial adjustment.”

From the archive · Full text
Reader shop tip 1 of 2

Lamar B. Fahnestock

Individual tip 1 of 2 from this reader’s published contribution.
Lamar B. Fahnestock, Lebanon, Penn.

“I put a roller on the back of my loader bucket to prevent damage to our paved driveway when moving snow. The rollers extend down about 1/2 in. below the bucket.

From the archive · Full text
Reader shop tip 2 of 2

Lamar B. Fahnestock

Individual tip 2 of 2 from this reader’s published contribution.
Lamar B. Fahnestock, Lebanon, Penn.

“I also attached short sections of plastic pipe to my rear grader blade, also to pre-vent damage to driveway. I just cut a short slit in the pipe sections, slipped them on over the bottom of the blade, and put a bolt through them.”

From the archive · Full text
Reader shop tip

Ed Gruber

Ed Gruber, Delphi, Ind.

“I made a front hitch for my IHC Cub tractor. It lets me move equipment around the yard. I made it out of a 14-in. long piece of 2 by 2 by 1/4-in. angle iron cut to fit below the front axle and bolted to the front axle pivot block. Two bolts hold it in place.”

From the archive · Full text
Reader shop tip

Allen Miller

Allen Miller, Leon, Iowa

“My Deere 530 round baler came with only one twine tie tube which takes too long to tie a bale. I modified it by welding a 6-in. piece of 2-in. dia. pipe alongside the factory twine arm so it places two lengths of twine 2 in. apart on bale. The same knife cuts it off. I also increased twine tie arm travel speed. Bales now get tied twice as fast.”

From the archive · Full text
Reader shop tip

Matthew Friesen

Matthew Friesen, Winkler, Manitoba

“We bought a large shop vac that has more than paid for itself for all kinds of uses. We improved performance by stretching a piece of pantyhose over the filter. We got the idea from FARM SHOW. Works great.”

From the archive · Full text
Reader shop tip

Kenneth Kasten

Kenneth Kasten, Germantown, Wis.

“I have come up with a modification for tractor tire rims that saves a lot of aggravation but it’s important that you only do this with the tire and tube removed from the wheel. What I do is weld a short 1 1/2-in. dia. pipe nipple over the valve stem hole. You have to grind down the nipple so it fits the curvature of the rim. Once in place, it protects the valve stem from tearing off when hit by an ice chunk or tree branch, or whatever. I put a well-greased pipe cap over the nipple once the tire is reinstalled. An added benefit is that it keeps the rim hole from rusting.”

From the archive · Full text
Reader shop tip

Larry Evans

Larry Evans, Ty Ty, Ga.

“Here’s a handy way to make height-adjustable, fold-flat sawhorses. I put a hinge at the top of one set of legs. A length of chain runs between the two sets of legs at the bottom. There’s an eye hook on one side that makes it easy to change the length of the chain. Shortening up the length of the chain makes the sawhorse taller. When you’re all done, they fold up flat so they don’t take up a lot of room.”

From the archive · Full text
Reader shop tip

Richard R. Quiram

Richard R. Quiram, Fort Myers, Fla.

“The needles on my New Holland 570 square baler were badly grooved from plastic twine. I took them off and ground them out with a die grinder to enlarge the eyes enough so I could install stainless steel rollers in them, preventing any further groov-ing damage and feeding twine more smoothly. I got the rollers from a local bait and tackle store that rerpairs deep sea fishing poles. The rollers are used as guides on the poles. Total cost was $12.”

From the archive · Full text
Reader shop tip

Frank Grant Aumsville

Frank Grant Aumsville, Ore.

“To hold a chain on a jack when needing a portable press - or to straighten out tubing - just weld a short pipe coupler to a 90° “L”. Then cut a slot in the top of the “L” for the chain to lay in. The coupler has to be big enough to fit over the stem on your hydraulic jack.”

From the archive · Full text
Reader shop tip

Rob McDonald

Rob McDonald, North Lancaster, Ontario

“Our Rovibec feed cart would always plug up at the auger. We replaced the auger and it didn’t help at all. Dad and I were looking at it one day and noticed that the main apron chain seemed to bring material into the auger too fast. To solve the problem, we replaced the main 9-in. sprocket with an 11-in. sprocket. Now the apron and beaters move much slower so the auger has no trouble keeping up.”

From the archive · Full text
Reader shop tip

Keith P. Mayer

Keith P. Mayer, Naper, Neb.

“I own two GM pickups powered by 6.2-liter diesel engines. The engines work great and burn less fuel than comparable gas engines. The only thing I don’t like about them is the glow plug starting system.

“The problem is that the glow plugs burn out - either one at a time or the whole sys- tem goes at once - requiring costly replacement. After a plug burns out it often swells on the end which makes it difficult to re-move from the head. If the tip breaks off you may even have to remove the head to retrieve the tip.

“After I got tired of repairing the system I started spraying ether into the air intake. I came up with a system that lets me inject ether from the cab. It requires only 25 in. of 1/8-in. diameter copper tubing. Using a 1/4-in. bit, I drilled a hole through the firewall about 2 in. to the left of the throttle cable hole.

“I super glued a plastic tube to the nozzle on an 8-oz. can of ether on the floor in front of the 4-WD selector lever. The tube sprays into the copper tubing. The copper tubing protrudes into the bottom of the air cleaner housing inside the air filter.

“When used properly this starting aid will provide faster starts, less wear on the starter, less battery drain, and longer battery and alternator life compared to glow plugs and be much less expensive to maintain. Under no circumstances should both ether and glow plugs be used at the same time, so if you decide to convert you must disconnect any working plugs or disconnect the entire system.

“The same idea would also probably work on Ford pickups equipped with 6.9 and 7.3-liter diesel engines.”

From the archive · Full text
Reader shop tip

Alan MacLean

Alan MacLean, Kingston, Ontario

“Large holes can be bored on a lathe without having to use a time-consuming face plate mounting. A 1 1/2-in. long piece of pipe, faced square, and with an inside diameter slightly larger than the outside diameter of the desired hole is accurately positioned on the plate. Attach to the plate with 3 1/2-in. long welds positioned 120 degrees apart. Put the pipe in a 3-jaw universal chuck and bore the hole. Use a disc grinder to carefully remove the tach welds.”

From the archive · Full text
Reader shop tip

Lynn Smith

Lynn Smith, Salmon, Idaho

“I found a quick, failproof way to hook up the hydraulic hoses on our Farmhand loader whenever we want to attach the bucket to the loader. The loader has four hoses - two on each side of the tractor- that operate hydraulic cylinders. The hoses had threaded ends so it took some time to hook them up. One hose attaches to a male connector and the other to a female connector. It’s easy to get them mixed up.

“I solved the problem by putting Pioneer quick-coupler ends on the hoses which makes the job go fast. I put male and female ends on the hoses, alternating ends on the hoses so there’s only one way to hook up. Takes all the guesswork out of hooking up the hoses.”

From the archive · Full text
Reader shop tip

Harvey Lorton

Harvey Lorton, Greenfield, Ill.

“My sons, Dan and Gary, and I make the most of a 10 by 12-ft. storage area we have above the office of our 40 by 50-ft. shop with a handy elevator we built to get up to it.

“It’ll hold two people who weigh 200 lbs. apiece, with plenty of capacity left over to handle parts and equipment. It’ll hold probably 600 lbs. altogether.

“It consists of a 3-ft. sq. lift platform with an angle iron frame with 2-in. boards bolted on. It slides up and down on a frame made from two 15-ft. lengths of T-beam secured to the wall. Angle iron is fitted to the inside of the T-beam flanges to serve as a track for the lift to ride in. Two sealed ball bearings mount underneath the platform on either side to run in the angle iron, while two more sealed ball bearings mount on top to run on the back side of the T-beams.

“A big 50-tooth sprocket off an old auger and a smaller 7-tooth dia. sprocket below it serve as the gear reduction drive for a 1-in. dia. cross shaft at top of the frame. Spools attached to both ends of the shaft wind 1/8-in. winch cable to raise and lower the lift.

“The elevator is powered by a 3/4 hp electric motor that drives the big pulley. The elevator is equipped with a spring-loaded brake that applies or releases pressure on the pulley with a solenoid wired into the electric motor.

“The elevator is operated from a waste-high, push-button control arm. Power cable is wound around a pulley attached to the upper T-beam and a weighted pulley below it so it raises and lowers with the lift without tangling.”

From the archive · Full text
Reader shop tip

Ron Stelmarski

Ron Stelmarski, Chesterland, Ohio

“We sell high quality rust replacement patch parts for domestic and foreign trucks, pickups and automobiles. We use only galvaneel, zinc over baked metal, to ensure that our parts will virtually never rust. As an example, we have tremendous demand for rocker panels and cab corners for 1973 through 1987 Chevy pickups. Rocker panels retail for $20 and cab corners for $12 plus S&H. We have over 100,000 parts available for immediate delivery. Send $5 (refundable with order) for illustrated cata-logue with instructions on installing our parts.”

Contact: FARM SHOW Followup, TABCO, 11655 Chillicothe Rd., Chesterland, Ohio 44026 (ph 216 729-51511).

From the archive · Full text
Reader shop tip

Steve Westhoff

Steve Westhoff, LeMars, Iowa

Steve turned an ordinary pliers into one of the most useful tools around his farm.

“I cut the handles down 1 in. and welded a 9/16-in. round end wrench head on one and a 1/2-in. head on the other. They’re the two most common wrench sizes you need around the farm and the modification means you’ve always got your pliers as well as a 9/16 and 1/2 in. wrench with you. It’s really handy and cost little or nothing to do.”

From the archive · Full text
Reader shop tip

Gary Crawford

Gary Crawford, Lyons, Kan.

“I discovered a slick, quick way to realign the feeder chains on my 1981 Gleaner N6 combine. On this combine and many others, three feeder chains run around the drive sprockets. As sprockets and chains wear, the outer chain has a tendency to jump a tooth, especially in heavy crops. My dealer used to tell me to loosen all the chains so I could readjust the slipped one. I streamlined the process by using a pipe wrench to rotate the drive shaft that runs to the header and laying a 5/8 or 3/4-in. dia. brightly colored 1-ft. length of pipe at the pinch point between the chain and sprocket. As one man rotates the driveshaft and another holds the pipe, the feeder chain will jump the tooth and snaps back into place. Whether you rotate the shaft clockwise or counterclockwise depends on which way the chain jumped the tooth in the first place. This will work on front or back feeder chains as well as conveyor chains.”

From the archive · Full text
Reader shop tip

Jerome Bruha

Jerome Bruha, Comstock, Neb.

“The only complaint we have with our 1986 OMC 590 baler is that the #80 roller chain is re-ally a pain to repair because the spring loaded idler won’t loosen completely. Rather than take the idler completely apart, which is extremely time-consuming, we came up with a shortcut. We loop a piece of baling wire around broken ends of the chain. Simply twisting the wire with a pliers tightens the chain enough to allow you to replace the broken link in a jiffy.”

From the archive · Full text
Reader shop tip

Steve Matthews

Steve Matthews, Berthoud, Colo.

Steve made a nifty adjustable welding table that mounts on a 4-in. pipe in his shop.

An old corn chopper flywheel, which is about 4-ft. in dia., slips up and down on the pipe which is cemented in the floor and runs up to the roof. Steve made a locking collar out of a piece of pipe so he can lock it in place at any height.

“It makes a dandy welding table because it spins like a lazy Susan,” notes Steve. He also slipped a large disc blade onto the pipe and welded it in place above the flywheel to hold tools.

From the archive · Full text
Reader shop tip

Ed Engdahl

Ed Engdahl, Aurelia, Iowa

“I’ve discovered a way to remove hex nuts from axles on any 18-wheeler without using a hammer and chisel. Works great to take off wheels to repair axles or bearings.

“Wedge an appropriate-size file between the outside hub and the front of the nut to be removed. Then simply turn the wheel counterclockwise to loosen the nut. To replace nuts, simply reverse the procedure.

“Works like a charm on any vehicle with hex-shaped axle nuts. You won’t cut up nuts - and possibly your hands - as you can using a hammer and chisel.”

From the archive · Full text
Reader shop tip

Carol A. Brannaman

Carol A. Brannaman, Mount Vernon, Iowa

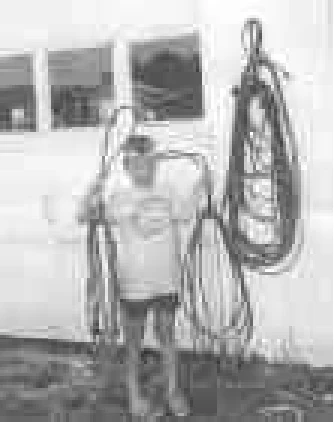
Preventing tangles in extension cords has never been easier, thanks to this idea Carol came up with after she hauled away a pickup-full of old V-belts from a neighbor’s farm sale.

“A few days later, I had to get an extension cord from our shop and, of course, came away with two that were tangled together. Then, it struck me that looping a V-belt through cords like a rubber band could prevent tangles. It worked so well I rescued all those old belts from our burn pile. In the seven or eight months since I discovered it, I’ve used the belts to hang dozens of cords and have even hung garden hoses with them. I’ve discovered 1/2-in. thick V-belts (not too badly worn and with some pliability left in them) work best.”

From the archive · Full text
Reader shop tip

Charlie Stough

Charlie Stough, Thermopolis, Wyo.

“There are many problems with the thermal linear actuator used to engage the 4-WD on late 1980’s GM pickups through current models. It’s an electro-mechanical part with an atrocious failure record. GM replaces over 100,000 a year. There are a few replacement parts on the market but they, too, are mechanically complicated so they’re hard to install, not very reliable, and relatively expensive.

“We’ve come up with a solution to the problem. It’s called the PAD (positive actu-ating device), a non-mechanical, static unit that’s guaranteed for life. It replaces the thermal linear actuator. After installation, both front axles turn at all times, even in 2-WD. The front driveshaft is constantly engaged at the front differential, but disengaged at the transfer case until you activate 4-WD. This doesn’t cause additional wear to U-joints or front driveline and you shouldn’t notice any real drop in gas mileage.

“Any shade tree mechanic can install a PAD in 10 or 15 minutes. They sell for $64.99.”

Contact: Precision Auto Parts, 210 Suite 4, Highway 20 South, Thermopolis, Wyo. 82443 (ph 307 864-3490).

From the archive · Full text
Reader shop tip

Michael Risner

Michael Risner, Knox, Ind.

“We’ve got two Case-IH Cyclo planters, a 500 (12-row) and a 900 (6-row). Both have trouble with seed spacing. That’s because the plastic wheels on each of the brushes wear out because there’s too much pressure on them, causing the brush to bind when it runs too close to the seed drum.

“To solve the problem, we made a shaft out of 1/4-in. dia. threaded rod. We drilled out the ends of the wheel assembly and inserted the shaft all the way through. It puts the wheels under even pressure so there’s no binding. We first tried this idea out in 1990 and it improved seed spacing so much we’ve since modified both planters. It costs less than $5 per row.”

From the archive · Full text
Reader shop tip

William Fannon

William Fannon, Plymington Gap, Va.

“Here’s a quick, simple, low-cost way to light new fire in weak magnetos on older tractors. I’ve used it on Farmall M’s, H’s, and A’s but it could be used on any tractor equipped with a magneto system.

“The first thing you need to do is get a 6-volt ignition coil from any auto parts store for around $20. Then, disconnect the remote kill switch on the magneto. Wire the positive lead from the ignition coil to the points on the magneto, which act as a ground for the system. Wire the coil’s negative lead to an electric on-off toggle switch and run the wire back to any hot point on the tractor’s electrical system, such as the starter switch. With the flip of the on-off switch, you’ve immediately got plenty of power to start the tractor. Works like a charm and only costs about $25. Note: The wire from the points to the coil needs to be connected to the positive or negative terminal on the coil according to battery ground. The above description is for a positive ground system A negative ground system would be wired just the opposite.”

Shop feature stories

From the archive · Full text
Feature story

“Feederhouse Caddy” Makes Combine Repairs Easier

Featured source:

“Our new feederhouse caddy allows you to remove the feederhouse from a combine and work on it without having to use jacks, chains, or pry bars. It’s the safest and fastest feederhouse removal system on the market,” says Dave Lott, Precision Balance, Minneapolis, Kan.

The caddy consists of a 4-ft. sq. steel base that rolls on four wheels. The caddy has an angle iron bracket on front that attaches to the bottom of the feederhouse. The back of the caddy has a telescoping backrest that can be raised or lowered by adjusting a pair of lift screws.

Fits Deere 4400 to 9600 models, IH and Case-IH 1420-2188 models, Massey Ferguson 750 - 860 models, and R Series Gleaners.

Sells for $600 plus S&H.

Contact: FARM SHOW Followup, Precision Balance, 1290 N. 150th Road, Minneapolis, Kan. 67467 (ph 913 392-2100).

From the archive · Full text
Feature story

Low-Cost Portable Light Stand

Featured source:

Jerome Thiemann used an old car brake rotor, a 5-ft. long steel pipe threaded at both ends, and a “pony pipe” clamp to make a low-cost portable light stand.

“It works so nice that I can hardly believe it. I can quickly move the light up or down anywhere on the pipe just by squeezing the spring-loaded jaw on the bottom half of the clamp,” says Thiemann.

The car brake rotor serves as the base for the pipe. He welded a 3-in. sq., 3/16-in. thick metal plate across the hole at the middle of the rotor, then welded a short 3/ 4-in. dia. pipe coupling to the plate. He welded a metal plate to the pipe clamp to hold the light.

“The brake rotor is light enough that I can easily carry it yet is heavy enough to keep the light stand from tipping over.”

From the archive · Full text
Feature story

Handy “Crusher” For Used Oil Filters

Featured source:

You can crush used oil filters to a fraction of their original size with this new “economy crusher”, says Bagley Equipment, Lodi, Calif.

It consists of a 6-ton, manually-operated hydraulic bottle jack that mounts on top of a 16-gal. steel drum. You place the filter inside the crusher housing on top of the barrel and then pump the hand jack. Oil from the filter is deposited into the drum. It takes 10 to 35 seconds to crush the filter. Crushes filters up to 6 in. in diameter. Sells for $350 plus S&H.

A 10-ton air-over-hydraulic crusher is available for larger truck filters up to 12 in. tall. Sells for $1,095 plus S&H.

Contact: FARM SHOW Followup, Bagley Equipment, 2370 Maggio Circle No. 4, Lodi, Calif. 95240 (ph 209 367-4800; fax 5424).

From the archive · Full text
Feature story

Magnetic “Socket Inserts”

Featured source:

New magnetic “socket inserts” hold nuts and bolts tight inside the socket, making it easier to reach out-of-the-way locations. The “Brocket” socket insert is a yellow plastic insert with a round magnet imbedded in the middle of it. Fits 6-point hex sockets and 12-point sockets and can be used on both standard and deep sockets.

A set of inserts in nine different sizes sells for $12.95 plus $1.50 S&H. Metric sizes 10 to 19 also available at the same price.

Contact: FARM SHOW Followup, Vasichek Enterprises, LLC, Box 197, 121 1st St. West, Michigan, N. Dak. 58259 (ph and fax 701 259-2288).

From the archive · Full text
Feature story

Cold-Treating: New Way To Make Steel Harder

Featured source:

Heat-treating is a common way to make wear surfaces last longer. But have you ever heard of “cold treating”?

A California company says it can make steel parts last up to 5 times longer by sub-jecting them to temperatures of 300° below zero, using a computer-controlled liquid nitrogen freeze chamber.

The process causes a chemical reaction on parts that have already been heat-treated conventionally.

“We’re successfully using it on gears, cams, bearings, pistons, drill bits and many other high wear parts. What’s more, we’re currently testing the process on combine sickle bars, tillage sweeps and other farm equipment parts,” says Rob Brechman of Breco Cryogenic Services, Clovis, Calf.

Among other things, the process causes fine carbide particles to fill in tiny voids in metal, resulting in longer wear life, he explains.

“You can substantially reduce machine downtime related to tool and wear part replacement,” he notes.

Price begins at about $1.50 apiece for steel tooling and wear parts weighing 0 to 4 oz. and runs through $440 for treating complete 3 and 4-cyl. engines. Minimum order of $50.

Contact: FARM SHOW Followup, Breco Cryogenic Services, 6387 East Silaxo, Clovis, Calif. 93611 (ph/fax 209 322-1710).

From the archive · Full text
Feature story

New Tool Makes It Easy To Pull Stalk Rollers

Featured source:

If you’ve ever spent hours hammering or cutting worn stalk rollers off a Deere corn header, you’ll like this new hydraulic tool that pops them off in minutes.

D & R’s “Stalk Roller Puller” works on all Deere heads except for 1997 models with the bolt-on knife option. It was invented by Shawboro, N.C., farmer Harvey Roberts and machinist David Dunavant.

The problem with Deere heads is that stalk rollers are an integral part of the row unit, bolting directly onto the roller shaft out of the gear drive. The design makes removal to weld on new flighting difficult and you can even damage the gear box or bearing doing so.

“Each one can take as much as an hour to remove with conventional means,” notes Dunavant.

The Stalk Roller Puller consists of a 10-ton porta-power jack in a special holder. It operates a 12-in. by 2-in. hydraulic cylinder with a 1 1/2-in. dia. ram that pushes on a rod between two extractor hooks. The rod pushes on the end of the stalk roller while the hooks pull it off.

Standard painted model sells for $175, nickel plated for $225 excluding porta-power jack. Add $20 S&H. Do-it-yourself plans are also available.

Contact: FARM SHOW Followup, Dunavant’s Welding & Steel Inc., P.O. Box 54, Shawboro, N.C. 27973 (ph 919 338-6533).