Practical ideas from FARM SHOW MagazineSubscribe · Free issue · Send us your shop tip
Subscribe to FARM SHOW
Issues / Vol. 29, No. 2 (2005)

Vol. 29, No. 2 (2005)

Money-Saving Repairs & Maintenance Shortcuts · Printed section pp. 36–39

31 selected entries · Complete text of selected entries

This issue’s section includes reader tips and feature-length shop stories. Held items and editorial notices are not reproduced.

Archive text: prices, coupons, availability and contact details reflect the original publication, not current offers. Reader methods are not universal instructions; follow manufacturer guidance and proper safety practices.

Reader shop tips

From the archive · Full text
Reader shop tip

Eugene Keener

Eugene Keener, Smithville, Ohio

“Welding cast iron is much easier than people think. Instead of using a ni-rod, I use a no. 7018 in a DC reverse polarity mode. I treat the cast iron the same as if I were using ni-rod. However, the 7018 rod is much cheaper and holds better. Of course, if it’s a small cast item, it’s best to heat the whole item to 400° or so and it’ll weld much better. If the casting is too big to do that, I just weld a little at a time – an inch or so in length – then take a ballpeen hammer or a pointed chipping hammer - and mark it so it stretches out and doesn’t pull loose from the rigid cast. I don’t start welding another section until I can put my bare hand on the last one. This prevents the piece from getting too hot.”

From the archive · Full text
Reader shop tip

Paul D. Peachey

Paul D. Peachey, Belleville, Penn.

He cuts up rubber cow mats to make mud flaps for his 18-wheeler, just cutting them to fit. He says they’re heavy enough to last a long while. And they’re cheap.

From the archive · Full text
Reader shop tip 1 of 2

Dan Churchill

Individual tip 1 of 2 from this reader’s published contribution.
Dan Churchill, Quesnel, B.C.

“You can call me old-fashioned but I still like to lightly sand and treat with linseed oil the wood handles on my rakes, pitchforks, shovels, etc. I do it periodically, as needed.

From the archive · Full text
Reader shop tip 2 of 2

Dan Churchill

Individual tip 2 of 2 from this reader’s published contribution.
Dan Churchill, Quesnel, B.C.

“One winter tip that helps a lot is to use a small torch to ‘wax’ all my shovels, smowplow blades, the inside of my tractor bucket, etc. I just lightly heat the tool and then rub a block of wax all over, then heat it till it flows. This trick really helps keep sloppy wet snow from sticking and it protects the metal. It’ll even keep wet clay from sticking to shovels and posthole diggers.”

From the archive · Full text
Reader shop tip

Glen R. Hoskins

Glen R. Hoskins, 24697 Hwy D, Hughesville, Mo. 65334 ph 660-827-1255

Glen recently sent us a new tool that he invented and now manufactures. The “Pli Wrench” is an ordinary set of pliers with a closed-end wrench attached to both ends of the handles.

“There’s a 9/16 and 1/2-in. wrench attached to each end. They really come in handy around the farm or house. I sell the wrenches for $15.99 apiece plus $4 S&H. Each handle is covered with a rubber grip for easy use.”

From the archive · Full text
Reader shop tip

Lewis Leon Dick

Lewis Leon Dick, Mount Hope, Kan.

“When working on an engine or other piece of equipment, I spread an old blanket out underneath. It catches dropped nuts, washers and other small parts, keeping them from rolling away. Makes them easy to find.”

From the archive · Full text
Reader shop tip

Matthew Platt

Matthew Platt, Roxbury, Conn.

“When working on a machine with hard-to-reach bolts, I use a piece of 3/16-in. dia. steel wire – bent into a snug hook at one end – to hold the bolt shank. I use it to insert the bolt and than to hold the bolt in place until I can get a nut started. The nice thing about this idea is that you can bend the wire around obstacles as needed. If necessary, you can file the wire on the hook flat to to work better on bolt heads and carriage bolt shanks.”

From the archive · Full text
Reader shop tip

Buzz Kutzler

Buzz Kutzler, Heron, S. Dak.

“If you use a rollbar-type side delivery rake - such as a New Holland - with sealed end bearings, you need to check your rake for dry bearings. After raking for an hour or more, stop and place your hand on all of the bearings. The bearings that are warm are running out of grease. To save a lot of money and time, it’s a simple job to drill and tap holes into the face of the bearings and install a zerk so you can grease them. If you grease them once a year or so, they’ll last longer than you will.”

From the archive · Full text
Reader shop tip

Joe Price

Joe Price, Somerset, Ky.

“The fuel injector on our 1967 International Harvester 504 tractor constantly got dirty which caused it to fail numerous times. One time both ends of the injector blew off. About a year ago a mechanic told us we could solve the problem by putting transmission fluid in the gas tank, so we did and it solved the problem. Apparently the transmission fluid cuts right through the scum and cleans the injector out. We put the transmission fluid in at a ratio of about one quart per 15 gallons of fuel. We do this about twice a year. It’s a cheap way to solve the problem.”

From the archive · Full text
Reader shop tip

Wayne Hagen

Wayne Hagen, Hagen Mfg. Ltd., Lake Alma, Sask.

“I’ve designed and built some neat tools for doing auto body work. They

include an English Wheel, which I use to shape larger sheets of auto body metal; a bead roller, which puts various beads or ribs in metal to make it stronger and also improve its looks; a pneumatic planishing hammer, which is used to sculpture sheet metal; an automotive frame straightener, which pulls on the frame and body steel to correct damage to frames; a manual metal roller; and a 12-ton press.

“Tools like these are used in TV shows such as ‘American Hotrod’, ‘Rides’, and ‘American Chopper.’ I offer plans that give

you the satisfaction of building your own tools at a fraction of the original cost.

“I sell plans for other shop tools, too. Most of them have been featured in FARM SHOW over the years. All these tools are hydraulic-driven. They include a 4-ft. brake and shear combination, a bar shear, a 12-in. throat punch, a light wall tubing roller, and a light wall tubing bender.

“

From the archive · Full text
Reader shop tip

Gerald Puff

Gerald Puff, Harrisville, Mich.

“I’ve come up with an easier way to repair broken blades on my sicklebar mower. The blade tends to break at the rivet holes. When replacing a blade section, rather than welding at the spot that broke, I cut a short length from another blade and weld it to an area without holes. Then I grind off the weld to make a smooth surface.”

From the archive · Full text
Reader shop tip

T.E. Salsman

T.E. Salsman, Richmond, Ky.

“Empty freon tanks, obtained free from refrigeration repairmen, make excellent hydraulic oil or fuel tanks. Holes are drilled to fit pipe bushing threads, after the necessary openings are located. The bushings are welded, brazed, or soldered to the tank. The original valve serves as a fuel connection or oil drain. Fuel tanks should have an in-line filter because of possible rust. The photo shows a tank with fittings in place ready for brazing.”

From the archive · Full text
Reader shop tip

Robert Hittle

Robert Hittle, Liberal, Kansas

“I came up with a fold-up bracket that lets me use my portable chop saw with a saw horse. The chop saw mounts on a hinged metal rack that’s welded to the top part of the saw horse. Both the rack and chop saw swing down out of the way when not in use. The sawhorse has an electric outlet on it with an extension cord wrapped around it to provide electricity. To use the chop saw I just unroll the cord and plug it into the chop saw.

“The same sawhorse has a pipe vise mounted at one end of it.”

From the archive · Full text
Reader shop tip 3 of 3

Ken Scharabok

Individual tip 3 of 3 from this reader’s published contribution.
Ken Scharabok, Waverly, Tenn.

“I do most of my welding at my bench vise. I added a lug to one of the vise’s hold-down bolts to securely attach a ground.”

From the archive · Full text
Reader shop tip 1 of 2

Don Catron

Individual tip 1 of 2 from this reader’s published contribution.
Don Catron, Bridgeport, Neb.

Don built a low-cost, portable tool rack that measures 6 ft. high and rides on four small caster wheels. A 20-in., 4-WD wheel hub serves as the base. Wheel bearings are welded into the hub and allow it to rotate. A 1-in. dia. shaft welds to the middle of the hub and is separated at various lengths by 5-in. long, 1 1/4-in. dia. spacers, to accommodate tools of varied length. A series of 12-in. dia. metal discs off a Krause disk, with its original one-way bearing still in it, fits upside down over the top of each spacer. The discs still have their original one-way bearings which allows each disc to rotate individually. A series of 3/4-in. dia. metal rods are welded to the edges of each disc 2 to 3 in. apart and are used to hang the tools.

A big nut on top of the shaft keeps everything solid.

“I use it to store everything from box end wrenches to pipe wrenches and crescent wrenches,” says Catron.

“The 3/4-in. dia. metal rods are the broken teeth off old side delivery rakes.

From the archive · Full text
Reader shop tip 2 of 2

Don Catron

Individual tip 2 of 2 from this reader’s published contribution.
Don Catron, Bridgeport, Neb.

He used the same idea to build bolt racks, except no rods are welded to the discs. One-way bearings were welded into the wheel hub and shaft. The discs are welded to the shaft and spaced 5 1/2 in. apart. A nut was welded on 1 1/4-in. well pipe, above and below each disc blade to hold it in place. The entire rack, as well as the individual discs, rotates freely.

“This idea makes it easy to find the right parts,” says Catron.

“I’ve made eight of these bolt racks, and they’re always full because I never throw a bolt away. My neighbors have often come to me for special-sized bolts that they can’t find anywhere else.”

From the archive · Full text
Reader shop tip

Family Handyman

Family Handyman

Here’s an idea we spotted in a recent issue of Family Handyman magazine. You can give your shovel-shoving foot a more comfortable pushing surface by cutting a slit in a scrap of 1-in. pvc pipe and slipping it over your shovel’s flange. If it won’t stay put, just add a bead of hot-melt glue.

Shop feature stories

From the archive · Full text
Feature story

Make Your Own Shock Absorbers

Featured source: George Hanson

George Hanson of Salem, Mo., recently called FARM SHOW to tell us about the shock absorber he made for his 1996 Polaris 2-WD 250 ATV.

“I built it for less than $5, and it works a lot better than the original shock, which was built from very thin material,” says Hanson.

Hanson says he uses the ATV to do farm chores such as fixing fence, feeding cattle, and other general farm work. He was riding it one day when the right front shock broke in half.

“I was left stranded and had to walk a mile back home just to get help so I could get it back home.

“I called the Polaris dealer but was told a new shock absorber would cost $97.50, not including tax. So I decided to make my own.”

Here are the parts used: 1) an 11 1/2-in. length of muffler tubing with an outside diameter of 1 1/2 in. - the same diameter as the factory shock; 2) a 1 31/64-in. freeze plug, purchased at an auto parts store; 3) a 1 3/4-in. dia. by 1/4-in. thick spacer; 4) two 1 1/4-in. dia. by 1/8-in. thick washers for the oil cushion; 5) a ram wiper cut from the sidewall of an old tire.

The only part of the original shock absorber that he used was the ram.

He welded the freeze plug into the bottom of the tubing, then checked to make sure there were no leaks. Then he removed the nut from the bottom of the ram and installed the two washers with the spacer between them. He put the round piece of rubber into the tubing to act as the ram wiper. Then he inserted the ram into the top of the tubing, filled it two thirds full of 10W oil, and welded the top end of the tubing shut. The last step was to reassemble the nut and bolt the unit back onto the ATV.

“The 1 1/4-in. dia. washers are smaller than the inside of the tubing, leaving room for oil to go by them which provides the shock action,” notes Hanson.

Contact: FARM SHOW Followup, George Hanson, RR 2, Box 539, Salem, Mo. 65560 (ph 573 729-6235).

From the archive · Full text
Feature story

Cordless Hand-Held Bandsaw

Featured source: Mark Newhall

I got a call recently from Scott McIntosh, Wixom, Mich., who wanted to tell me about the world’s first cordless bandsaw, which he invented and patented. Scott’s the ultimate do-it-yourselfer so he also decided to manufacture and market his new battery-powered saw. That means he’s now in competition with the “big boy” tool companies.

Scott says response from users has been fantastic and he asked if he could send us one of his new saws so we could test it out.

After it arrived, I took it over to my friend, Paul Tierney, a carpenter-turned-artisan who does a lot of metalwork. Paul’s a FARM SHOW-type guy who can build just about anything. I knew he’d give the new saw a good workout. (You can see some of Paul’s work at www.susanthesteelchicken.com.) The cordless saw is light enough to hold in one hand. It’s primary market is probably pipe fitters and others in the trades who work up on scaffolds and have to continually climb up and down to cut pipe. But McIntosh points out that it will cut all kinds of metal and anything else you would normally cut with a hacksaw, reciprocating saw, or a stationary bandsaw.

The saw’s 1/2-in. bandsaw blade will cut any pipe or material up to 2 1/2 in. thick. It weighs 8 lbs. and is just 15 in. long. It’s driven by a 21,000 rpm Johnson electric motor that gets power from an 18-volt battery. Comes with a 1-hr. quick charger. The blade can be changed in seconds.

After several days cutting metal rod, straps and other assorted pieces, here’s what Paul had to say about the saw, which sells for $349.

“It’s well-built, small and lightweight. I used another portable bandsaw - not cordless - a few years ago that weighed about twice as much and didn’t work nearly as well as this one. I normally use a 4-in. grinder to cut through this type of material but this was much quieter and doesn’t throw sparks like a grinder wheel. The battery has good life and it comes with a great case. I was very impressed with how fast and easy it cuts. I can see that it would be especially handy for pipe fitters and anyone else with a lot of pipe to cut. Makes clean, square cuts.”

The only complaint Paul had about the saw is that he didn’t like the on-off safety switch. But he admits he doesn’t really like any safety switches on tools. We asked McIntosh about it and he said uses the same switch on his bandsaw as what’s used on Dewalt power tools.

Contact: FARM SHOW Followup, Scott McIntosh, Stout Tool Corp., 29233 Haas Rd., Suite A, Wixom, Mich. 48393 (ph 877 337-8688 or 248-767-0780; email: scottmcintosh @stouttool.com; website: www.stouttool .com).

From the archive · Full text
Feature story

Tractor Magnet Keeps Fluids Clean

Featured source: Steiner Tractor Parts

“Our new transmission pickup magnet keeps metal shavings out of your tractor’s hydraulic system to prolong the tractor’s life. It fits all Deere 10, 20, 30, 40, and 50 series tractors,” says Dan Steiner, Steiner Tractor Parts, Lennon, Mich.

The magnet is designed to fit inside the tractor’s original cylinder-shaped transmission oil filter.

“It’s an insurance policy against high maintenance costs and can save thousands of dollars on repairs,” says Steiner.

“Some older Deere tractor models have one reservoir and filter for both the hydraulic and transmission oil while others have separate reservoirs and filters because some metal shavings are so fine that they can go right through the filter.

The magnet can be removed and cleaned every time you change the filter.”

Sells for $69.95 plus S&H. Contact: FARM SHOW Followup, Steiner Tractor Parts, Inc., P.O. Box 449, Lennon, Mich. 48449 (ph 800 234-3280 or 810 621-3000; email: [email protected]; website: www.steinertractor.com).

From the archive · Full text
Feature story

IH Cub Repowered With Diesel

Featured source: Mike Schnoebelen

Faced with replacing the 18-hp gas engine in his Cub 184, Mike Schnoebelen opted to power it up with a new Yanmar 3-cylinder diesel.

“It fits fine, and I didn’t have to cut any frame rails, so I knew if I wanted to put the old motor back, I could,” explains Schnoebelen.

“It probably cost me $2,300 with the engine, hoses and other parts, but I got 24 hp and new technology. It was still a lot cheaper than buying a new tractor.”

He made new motor mounts, modified the flywheel, built a mount for the hydraulic pump, and made air intake and exhaust fixtures. With a career in metal fabrication and a well-fixed shop, complete with a metal lathe, modifying the engine and tractor was relatively easy.

Modifying the flywheel was the most complicated step. The new flywheel had a different bolt pattern from the existing clutch and pilot bearing. Schnoebelen discovered that a roller bearing from an old Chevy 350 matched up to the new flywheel. He did have to cut and heat shrink a piece of flat steel to fill in the recessed flywheel in order to get the clutch and pressure plate to fit.

Schnoebelen built a new mount for the formerly direct gear-drive hydraulic pump. To power it, he installed a pulley drive off the front of the crankshaft with two pulleys sized to provide the correct rpm’s. As it was positioned close to the same spot as on the original engine, he was able to use the original hydraulic outlet pipe, though he did need a new return hose.

Because the new diesel was shorter than its predecessor, Schnoebelen had to fabricate a shroud from the fan to the radiator. He also fabricated air intakes from the air cleaner to the manifold and from the manifold to the muffler.

Wiring in the diesel was also relatively simple. He wired the glow plug and the fuel shutoff through the starter solenoid. He connected the glow plug switch to the crank position and the fuel shut off to the shut off position of the key.

“The new engine works great,” says Schnoebelen.

“The old engine was a flat head, C-60 with a thermo siphon instead of a water pump. It always ran hot. This is a better setup.”

Contact: FARM SHOW Followup, Mike Schnoebelen, 2955 Hwy #22, Riverside, Iowa 52327 (ph 319 648-5113).

From the archive · Full text
Feature story

High Capacity Cordless Grease Gun

Featured source: Dick Kluge

“It works twice as fast as any other cordless grease gun on the market, yet requires only about half as much effort to use,” says Dick Kluge, Groton Enterprises, Groton, S. Dak., about the new Alemite 575 12-volt cordless grease gun. He’s a dealer for the product and exhibited it at the recent Fort Wayne, Ind., farm show.

The unit weighs 6.8 lbs. and comes with a dual 12-volt battery and a 36-in. long super flexible rubber hose. It delivers grease under high pressure - up to 6,500 psi - at a high flow rate of 5 1/4 oz. per min. at 1,000 psi. It can be loaded either by replacing the 14 oz. cartridge or with a bulk fill hose.

“Its weight is balanced nicely which makes it easy to use. And it works fast,” says Groton.

“It takes only about four minutes to pump out a cartridge of grease. Pull the trigger once and you get one shot of grease. Holding the trigger will cause it to pump a steady stream of grease.

“You can get six cartridges out of each battery charge. You can use one battery while you’re charging up the other one. By the time you pump six cartridges of grease the other battery will be charged up.”

Sells for $219 plus S&H.

Contact: FARMSHOW Followup, Dick Kluge, Groton Enterprises, 13340 407th Ave., Groton, S. Dak. 57445 (ph 605 397-8589).

From the archive · Full text
Feature story

Turn-A-Tool Carousel

Featured source: Kathy Marquardt

If finding the right tool often gives you headaches, Kathy Marquardt may have just the right medicine. Her Turn-A-Tool Carousel displays a ton of tools and stores them in less than 4 sq. ft. of floor space. Best of all, you can adapt the carousel to match any set of tools.

“I got tired of looking for tools, so I decided to build something that would let me find them quickly,” recalls Marquardt, an electrical and mechanical engineer.

“People liked the way it looked, so I started building them to sell.”

What makes her tool carousel unique is its use of Velcro for easy customization. The carousel itself stands 53 in. tall on a wooden base and spins on a 12-in. dia. lazy Susan. Two U-shaped 1-in. wide steel straps mounted to the lazy Susan bolt to a 12 1/2-in. diameter, 43-in. tall fabric covered tube core.

“The Velcro lets me easily adapt the hangers for different size tools,” says Marquardt.

“It will hold shop tools, household repair tools, sewing accessories, even cooking tools.”

Each Turn-A-Tool Carousel comes with more than 70 tool holders, not counting plastic pouches. Holders vary from a belt of 13 1-in. diameter steel rings to individual 2-in. diameter plastic rings. Plastic pouches, slip cords and more are all backed with Velcro to be attached as needed. Marquardt even includes extra Velcro strips for customizing the carousel further.

The carousels sell for $216 plus $38 shipping. Marquardt is also planning to market smaller counter top carousels to hold jewelry and other items.

Contact: FARM SHOW Followup, Kathy Marquardt, 1205 118th Place SW, Oklahoma City, Okla. 73170 (ph 405 692-0585).

From the archive · Full text
Feature story

He Uses A Tire To Store His Roto Rooter

Featured source: Tom Hicswa

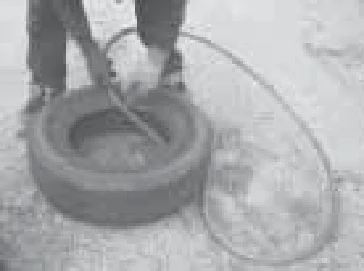
“It makes Roto Rooter lines much easier to handle and store,” says Tom Hicswa, Hammonton, N.J., who stores Roto Rooter lines for cleaning sewer lines in an old 15-in. tire, with drain holes drilled into it.

He simply drilled a series of 1 1/4-in. dia. holes about 12 in. apart all the way around the circumference of the tire. When he’s done cleaning out a sewer pipe, he disconnects the 10-ft. sections of line and coils them one after another inside the tire. Then he uses a hose to wash it off. The water drains out through the holes in the tire.

“It keeps all the lines neatly stored in one place and off the ground, out of the dirt and water. And it’s always ready for the next time I need it,” says Hicswa.

“I use the Roto Rooter on a sewer line that runs from my house to my septic tank, and also occasionally to help neighbors. Once I’ve coiled the Roto Rooter inside the tire I roll it into my barn or pickup until the next time I need it. The tire doesn’t take up much space.”

Contact: FARM SHOW Followup, Tom Hicswa, 2169 Elwood Rd., Hammonton, N.J. 08037 (ph 609 561-7623).

From the archive · Full text
Feature story

Make Your Own Mini Blacksmith Forge

Featured source:

“I need a small forge for jobs around the shop and decided to make one out of an old Weber barbeque grill,” says Paul Tierney, Bloomington, Minn.

He didn’t want to have to put a crank on it for air so he started experimenting with compressed air. He first lined the bottom of the barbeque with fire brick that rests on a piece of plate steel set into the bottom of the barbeque. Then he plumbed in a 1-in. dia. air pipe that comes up through the bottom of the kettle and extends up through the center of the metal plate. On top of the air pipe is a small 2-in. dia. diffuser that spreads the air out through the firebox, fanning the coal-fired flames. The diffuser is held in place – just above the upper end of the pipe – by small pieces of steel rod welded to the top of the pipe. To heat up the charcoal fire, he just opens the air valve when needed.

“It’s important to bring the air hose in from the side because sparks and ash fall down into the pipe at the center. The pipe is open at the bottom. Air comes into the side at a 45° angle.”

Tierney built a small tray around the lip of the Weber to hold tools and he can still put the cover back on when he’s not using it. Since the forge stands next to a wood stove in his shop, he mounted an exhaust hood over it and tapped into the stove’s flue pipe to carry exhaust from the forge out of the shop.

Contact: FARM SHOW Followup, Paul Tierney, 10020 Pleasant Ave. So., Bloomington, Minn. 55420 (ph 952-888-8526).

“I use a small forge to make clevises, gate latches, hooks, hinges, and other things out of metal. When you’re working with 1/2 in. thick metal – or heavier – it takes a lot of cranking to get the fire hot enough to bend it. I was looking for a squirrel cage fan that I could use to feed air into my forge when I got the idea of simply using compressed air. I plumbed it into the bottom of the fire pot. It’s now so easy to start and control the fire I can’t imagine doing it any other way. Works great.”

Contact: FARM SHOW Followup, William N. Adams, 4680 20th Ave., Mandan, N.Dak. 58554.

If you need a small forge for a little bit of blacksmith work, you can make one quick from an old pickup brake drum.

“Most people already have all the bits and pieces they’d need to make a good small forge,” says Jock Dempsey, blacksmith, consultant, guru and operator of anvilfire.com, a web-based blacksmith information service. He says the basic requirement is that the material you use be able to withstand the heat of the forge. The high quality cast iron used to make brake drums is more than adequate.

Once you have the drum on a stand, you need a way to blow air through your fire to create the high temperatures needed to soften and work steel.

“There are millions of variations for making a basic forge,” Dempsey continues.

“They all work, as long as you can get air to the fire.”

He suggests cutting a 1 1/2 to 2 1/2 in. hole in the forge as an air inlet. Automotive exhaust pipe can be used to make a manifold to carry air to the fire from your blower.

“You’ll need an air source that can supply a minimum of 150 cu. ft per minute for a small forge,” he adds.

You can use an electric hair dryer for an air source, as long as you plumb it in properly, which includes making your air duct long enough that heat from the forge doesn’t melt the plastic case of the dryer.

You can also use a small squirrel-cage fan or an air pressure line from your shop.

Another way to make a small forge is to use two disc blades.

“You use one blade for the base, weld on a length of pipe the right height for your forge, and weld the second blade on to hold your fire,” Dempsey says.

Contact: FARM SHOW Followup, Jock Dempsey, Dempsey’s Forge, 1684 Mitchell Mill Rd, Gladys, VA 24554-2938 (ph 434 283-5671; email: [email protected]; website: www.anvilfire.com).

From the archive · Full text
Feature story

Metal-Trapping Filter Magnet

Featured source: Billy Greghly

You can capture even the tiniest metal filings in any engine with this new wrap-around oil filter magnet.

The reusable FilterMag snaps the outside of the filter. The metal it attracts is pulled up against the inside of the canister wall without restricting oil flow.

“The magnets catch metal fragments that are too small for an oil filter to stop,” says Billy Gereghty, FilterMAG, Lake Havasu City, Ariz.

“Oil filters typically catch particles 40 microns and larger in size, whereas the FilterMag magnets catch particles all the way down to 2 microns in size. The magnets have a total surface area of 12 sq. in. so they cover a wide area of the filter. The filings are held against the inside of the filter housing until you’re ready to discard the filter.

“We offer nine different models for virtually every size and type of filter on the market including transmissions, oil pans, differentials, etc.

Retail prices range from $29.95 to $89.95. Contact: FARM SHOW Followup, TigerMAG/FilterMAG, Corporate Headquarters, Lake Havasu City, Ariz. 86405 (ph 800 345-8376 or 928 680-6933; email: [email protected]; website: www.filtermag.com).

From the archive · Full text
Feature story

Magnetic Wrist Band

Featured source: Rockler Woodworking and Hardware

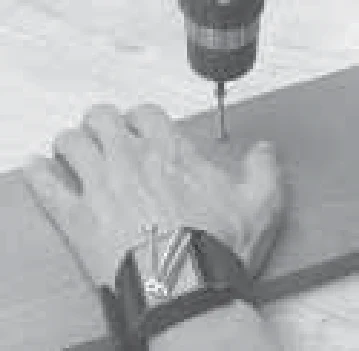
Tired of losing small nuts and bolts while working on shop projects? This new magnetic wrist band securely holds small parts while you work.

It consists of a 2-in. wide by 12-in. long nylon strap with a Velcro closure that fits comfortably on your wrist. The magnetic surface measures 2 by 1 1/8 in.

Sells for $7.99 plus S&H. The company also offers a 2-in. wide by 18-in. long magnetic tool holder for shop walls.

Sells for $14.99 plus S&H. Contact: FARM SHOW Followup, Rockler Woodworking and Hardware, 4365 Willow Drive, Medina, Minn. 55340 (ph 800 279-4441; website: www.rockler.com).

From the archive · Full text
Feature story

3-Point Generator Platform

Featured source: Wade Hoagland

Mounting a pto-powered generator on a 3-pt. hitch makes it a lot easier to get power wherever you need it, says Wade Hoagland, Mercer, Penn.

“It is a lot handier,” he reports.

“I don’t have to hook up a trailer and then hook up the pto. All I have to do is back up to the generator with the tractor and attach the hitch.”

Hoagland used scrap metal he had lying around, from 3/4-in. angle iron for the frame base to 1 1/4-in. black well pipe heated and bent into U-shapes for the side frames. Some steel screening protects the side of the generator. Pieces of sheet metal were secured over the top and back of the generator. A third piece connects to the top with a piano hinge so it tips up when needed to get at the controls and connections on the front of the generator. Cross supports on the frame were placed to allow the generator to be easily bolted in place.

“I had a top link bar that I used and I used 3/4-in. pins to connect to the side arms,” says Hoagland.

The most difficult part of the entire project was finding a PTO shaft that was short enough. He finally found one that was intended for use on a field sprayer at a tractor supply store.

“It has to be able to contract and extend as the unit is raised and lowered,” reports Hoagland.

“The generator platform works so well, I am making one for a friend. With the shrouds on, I have even used it in the rain.”

Contact: FARM SHOW Followup, Wade Hoagland, 793 Greenfield Rd., Mercer, Penn. 16137 (ph 724 981-7896; email: whoagland @rothbros.com).