Practical ideas from FARM SHOW MagazineSubscribe · Free issue · Send us your shop tip
Subscribe to FARM SHOW
Issues / Vol. 45, No. 1 (2021)

Vol. 45, No. 1 (2021)

Money-Saving Repairs & Maintenance Shortcuts · Printed section pp. 32–35

39 selected entries · Complete text of selected entries

This issue’s section includes reader tips and feature-length shop stories. Held items and editorial notices are not reproduced.

Archive text: prices, coupons, availability and contact details reflect the original publication, not current offers. Reader methods are not universal instructions; follow manufacturer guidance and proper safety practices.

Reader shop tips

From the archive · Full text
Reader shop tip

Gary Nye

Gary Nye, Landisburg, Penn.

“I’ve come up with a method for installing new hydraulic cylinders that eliminates the problem of air in the system. First, unhook the hoses and cap them. Remove the old cylinder. Install the new cylinder but only pin it to the base. Next, use a squeeze bottle with a narrow tip to fill the cavity in the cylinder at the pinned end with hydraulic fluid (you can get these plastic bottles at Harbor Freight). Then hook up the hose at the base. Next, use the controls to extend the cylinder to its full length and use the squeeze bottle to fill the cavity at the extended end. Attach that hose. Carefully retract the cylinder and pin that end. No air. Works like a charm.”

From the archive · Full text
Reader shop tip

Merrill Smith

Merrill Smith, Deer Park, Wash.

“My Yanmar 60-in. Rotovator would not clear the tires on my Ford tractor. To solve the problem, I made two 1-in. thick steel extensions for the 3-pt. hitch and the Rotovator. Solved the problem.”

From the archive · Full text
Reader shop tip

Steward Vander Vere

Steward Vander Vere, Allegan, Mich.

“I paid $20 for a 3-piece caster set designed for storing a snowmobile in tight quarters. The casters work great on my snowplow so I can roll it out of the way in my shop.”

From the archive · Full text
Reader shop tip

Bluffard A. Bradburn

Bluffard A. Bradburn, Waveland, Miss.

“I was having trouble with steering and hydraulics on my 3000 Ford tractor. I pulled the cover on the hydraulics and found that two filters were stopped up in the supply and return lines. The dealer wanted $800 for a new set of stainless steel filters. Instead, I just cleaned them and reinstalled. Problem solved.”

From the archive · Full text
Reader shop tip 1 of 4

Preston Williams

Individual tip 1 of 4 from this reader’s published contribution.
Preston Williams, Victoria, Va.

“The oil check light wouldn’t go off in my 2012 Chevy truck. I had a guy pull the sending unit and change the screen under it. Now it’s okay.

From the archive · Full text
Reader shop tip 2 of 4

Preston Williams

Individual tip 2 of 4 from this reader’s published contribution.
Preston Williams, Victoria, Va.

“I put two 8-ft. long LED light strips on each side of my 30 by 30-ft. shop and was amazed at how well it lit up the entire shop. Makes it much easier to work when you’ve got great light.

From the archive · Full text
Reader shop tip 3 of 4

Preston Williams

Individual tip 3 of 4 from this reader’s published contribution.
Preston Williams, Victoria, Va.

“I’m sure many other folks know this trick. To take slack out of barbed wire, just twist the wire into a circle somewhere in the middle. I use a pair of fencing pliers that have two holes in the end.

From the archive · Full text
Reader shop tip 4 of 4

Preston Williams

Individual tip 4 of 4 from this reader’s published contribution.
Preston Williams, Victoria, Va.

“I’ve got a Craftsman riding mower with a 22 hp. Kohler engine. After a few years, the smell of burnt oil started coming out of the engine compartment. Oil was dripping on the muffler from the OHV unit because a gasket was leaking. I replaced the gasket and installed a metal plate to direct any future dripping oil behind the muffler.”

From the archive · Full text
Reader shop tip

Donald Hemme

Donald Hemme, Redvale, Colo.

“The cheap and easy way to break tire beads is to put a Handyman jack on the bead and then jack up against a piece of equipment. The bead will pop right off.”

From the archive · Full text
Reader shop tip

Bob Weeks

Bob Weeks, Horton, Mich. (btvulcan@ gmail.com)

“I recently discovered a solution to a steering problem I was having with my TC55DA New Holland tractor. I found that the steering shaft spline was only engaging the steering motor receiver spline a fraction of an inch, which caused the splines to wear enough to begin slipping or binding.

“To remedy the problem, I cut the steering shaft in two and lengthened it by sandwiching it between two small angle iron pieces, welding them in place. For the first time since I bought the tractor, it now steers like it should. From what I’ve read on the internet, this problem has stumped dealers, mechanics, and owners for a number of years. If anyone wants to contact me for help fixing this problem, I’d be happy to hear from them.”

From the archive · Full text
Reader shop tip

Glen Goodson

Glen Goodson, Galax, Va.

“I read with interest the story in your last issue about how a reader’s Troy-Bilt tiller went through a flood and he couldn’t get it started after that because he thought the coil was bad. He made a clever repair using a 12-volt coil and a battery from a cordless drill. I repair small engines and have seen this problem a lot. People think the coil has gone bad but the problem is usually just rust. If you sand off the rust, it will fire again and last as long as the rest of the machine.”

From the archive · Full text
Reader shop tip

P.B.

P.B., New York via Farming Magazine

“I put a steel magnet in the bottom corner of my skidloader’s drive chain case oil compartment. The metal will draw out any metal shavings or dust in the oil, greatly extending the life of the transmission. This idea could be used in any oil reservoir where there’s room for a magnet.”

From the archive · Full text
Reader shop tip

Ron Ziegler

Ron Ziegler, Flying Z Ranch, Los Alamos, Calif.

“Our 1985 Ford truck stopped running because of an electrical problem, and with all the pollution control equipment it was impossible to find what was wrong. So we removed all the wiring and pollution control equipment, and then bought a new HEI all-in-one distributor (available at Amazon.com). This distributor has the coil and points inside it. It’s a one-wire distributor, so there’s only one wire to connect to the 12 volts coming from the ignition switch.

“To install the distributor, I located top dead center on the compression stroke of the engine’s number one cylinder. I noted where the rotor was pointing, and made sure to reinstall the new distributor with the rotor in the same position.

“Now the truck runs great. Problem solved for about $140.”

From the archive · Full text
Reader shop tip

Dennis Hartmann

Dennis Hartmann, Double D Machine Shop, Yankton, S. Dak.

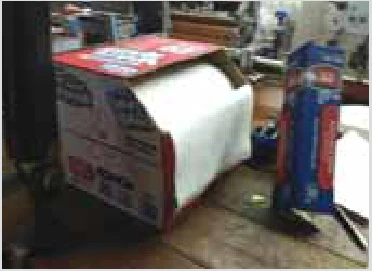
“I go to big box and auto parts stores and purchase 10-in. wide paper towels in big boxes that contain 200 towels apiece. One end of the box has a perforated opening on top to reach in and pull out the towel. However, the design makes the towels hard to reach and they get all wrinkled up as they’re pulled out.

“To solve the problem I use a utility knife to cut one corner off the box, leaving a nice, big opening that makes it much easier to remove the towels. It’s also easier to see when I’m almost out of towels.”

From the archive · Full text
Reader shop tip

Michael Heron

Michael Heron, Lloydminster, Sask.

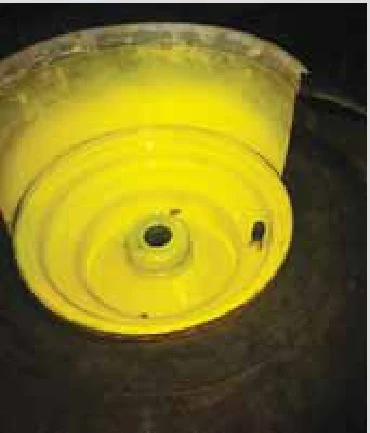
“To paint garden tractor wheels, I cut the bottom out of an ice cream pail, and then cut it in half vertically. It leaves a semi circular piece of plastic that fits snugly around part of the wheel rim. I paint one section of the rim at a time, and then move the plastic to another section.”

From the archive · Full text
Reader shop tip

Blair Equipment Co.

Blair Equipment Co., Swartz Creek, Mich. ph 800 426-7818; www.@ blairequipment.com

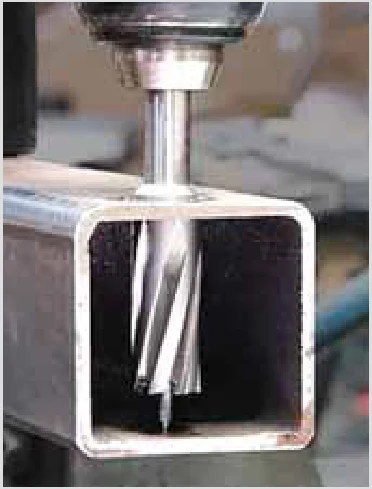
Their extended reach metal hole cutters provide up to 2 1/2 in. of additional reach. They allow you to drill holes in pipe, tubing and plate materials up to 1/4 in. thick. The company says they’re ideal for making single pass holes in hollow tubing because you can drill 2 perfectly lined up holes. They can be used in 3/8 or 1/2-in. hand drills or drill presses. Available individually or in a kit.

From the archive · Full text
Reader shop tip

Charles Hodel

Charles Hodel, Roanoke, Ill.

“I used to have problems with the accordion-style seed drop tubes on my 1993 Deere 750 grain drill, which I use to plant soybeans. Seed would get hung up inside the 1 1/4-in. inside dia. tubes and bounce around before dropping to the ground, which resulted in erratic seed placement.

“I solved the problem by replacing the original tubes with Shoup Mfg. seed tubes designed for Deere air seeders (www.shoupparts.com; ph 800 627-6137). They’re smooth on the inside for their entire length so seed won’t get hung up at all. The tubes are made of clear plastic with a black reinforcement material around them. I bought a 100-ft. coil of 1 1/4-in. inside dia. tubing for $160 and used an abrasive cut-off wheel to cut the tubes to length. I used the original drill hose clamps to install the new tubes.”

From the archive · Full text
Reader shop tip

Damian Lakatos

Damian Lakatos, Johnstown, Penn.

“When storing an aerosol paint can or any kind of aerosol can with a shaker ball inside it, I place the can on its side instead of vertically. It makes the material inside the can mix a lot better, which results in fewer clogged nozzles and less waste. It also reduces the shaking time.”

From the archive · Full text
Reader shop tip

Jerry Maurer

Jerry Maurer, Springfield, Ohio

“I had trouble getting on and off my zero-turn riding mower, because the operator isn’t supposed to step onto the mower deck.

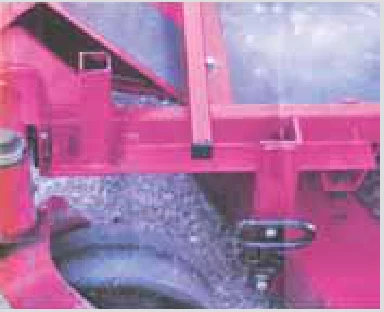
“To solve the problem, I bolted a support post to the side of the operator platform. I welded a “pocket” to the side made from 2-in. material. A removable 30-in. long, 1-in. square bar fits inside the tube. I then welded a length of 2-in. angle iron between the front wheel and deck, and bolted a fold-up military step onto it.

“Now to get onto the mower I just grab the 30-in. tube and the mower’s steering handle at the same time, and step safely onto the operator platform.”

From the archive · Full text
Reader shop tip

M. Freyer

M. Freyer, Dayville, Ct.

“I used NPT 3/4-in. speed rails to raise the handles on my Gravely walk-behind mower by about 5 in. The extra high handles save on my back.”

From the archive · Full text
Reader shop tip

Richard Zigler

Richard Zigler, Charles Town, W. Va.

“If you have aging plastic headlight lenses, don’t buy new ones or buy expensive repair kits. Just put a nickel-sized dollop of glass cooktop cleaner on a damp paper towel and ‘polish’ the lens, then clean off with another damp towel. It’ll make a big difference.”

From the archive · Full text
Reader shop tip

R.A. Knickel

R.A. Knickel, Camden, S.C.

“Around 1990 I had a Ford 600 tractor which had hydraulic lines running through the transmission. When they rusted out, it looked like it would be an expensive repair. The dealer’s service manager told me they could make up a kit to run the hydraulic lines on the outside of the tractor. I picked the tractor up the next day and he charged me just $70. That dealer has since gone out of business so I’m wondering if any FARM SHOW readers have ever heard of doing this and if anyone knows where I could get help doing this again. I’m sure other readers with old Fords would be interested as well.”

From the archive · Full text
Reader shop tip

Robert Scharlau

Robert Scharlau, Arcadia, Wis.

“You can improve implement hitch jack stands by welding an additional support to the base of the jack. The problem is that the weight of the implement often tips the jack to the side, putting a lot of pressure on the bottom of the jack. The solution is to weld a metal brace to the bottom of the jack that extends out in the direction where the most pressure is. It stops the side pressure on the jack. Attach it in such a way that when you rotate the jack to transport position, it straddles the hitch frame.”

From the archive · Full text
Reader shop tip

Richard Zigler

Richard Zigler, Charles Town, W.Va.

“In this age of IKEA and other self assembly furniture, sometimes you have to use force when using a hammer but don’t want to leave marks. To solve the problem, I slip a sock over the hammer head and fold it back to double the thickness. It gives the hammer a soft blow for tapping without leaving marks.”

Shop feature stories

From the archive · Full text
Feature story

Twin Pipe Creek Bridge

Featured source: Rex Gogerty

When the 70-year-old piling bridge under our farm road got too shaky for heavy loads, I had local contractors bid on replacement. The solution? Two 72-in. dia. corrugated metal drainage pipes held in place by concrete and packed clay. Mike Nolte at Nolte Service & Repair, first removed the deck of the old bridge and placed it 300 ft. upstream to carry light traffic during the 3-day construction. He filled the creek channel depression under the old bridge with rock and broken concrete and then weighted down the 28-ft. long pipes with more broken concrete and clay packed over the top. He poured concrete around the inlet end of the pipes. Nolte raised the grade of the approaches to the bridge with nearby pasture dirt and gravel, packing more clay over the pipes and then two layers of coarse and regular road gravel.

Total cost of the new bridge was $25,000. Contact: FARM SHOW Followup, Rex Gogerty, 33475 K Ave, Hubbard, Iowa 50122 (ph 641 487-7617; [email protected]); Mike Nolte, Nolte Service & Repair, Bondurant, Iowa (ph 515 249-6124).

From the archive · Full text
Feature story

Container “Machine Shed” Replaced Collapsed Hoop Building

Featured source: Dan Koch

After his hoop building collapsed last year under a heavy snow load, Minnesotan Dan Koch decided to put up a much sturdier structure on his property near Akeley, Minn.

He started with two locking 20-ft. shipping containers that he bought from a container reseller. Used containers generally sell for $1,500 to $3,500 apiece, depending on location.

Koch planned to run trusses between the two containers but he needed more clearance to store his New Holland baler, Oliver tractors, and other equipment underneath.

So he built up the roofs on each of the containers about 3 ft. and set the trusses on top of those. The benefit of the raised sides is that it provides more storage on top of the containers.

“I’ve got lots of storage now and it should never fall down,” says Koch.

“I designed it so I can add sliding doors later to either end.”

Contact: FARM SHOW Followup, Dan Koch, 19332 299th Ave, Akeley, MN 56433 ([email protected]).

From the archive · Full text
Feature story

Fold-Up Shop Elevator

Featured source: Gary Gradek

Gary Gradek, Ukiah, Calif., makes the most of an upper storage area in his 30 by 40-ft. shed with a shop elevator he built to get up to it. It’s operated by a 110-volt electric hoist he bought for about $100. When not in use it can be quickly folded up out of the way.

“It comes in handy for storing stuff that’s too awkward to carry up a ladder,” says Gradek.

“I came up with the idea after I built a 30-ft. wide by 16-ft. high by 4-ft. deep steel storage rack at one end of my shed. The hoist raises and lowers a 36 by 32-in. wooden platform that rides up or down a pair of tracks at one end of the storage rack. The hoist is rated at 220 lbs. However, I added a pulley on the carriage to raise the lifting capacity to 440 lbs. The hoist is not recommended for lifting people “I finished building the hoist in early November but have already used it to move containers full of stuff we don’t have room for in our house, including kids toys and Christmas decorations.”

The hoist came with a remote control and a 6-ft. cord, which Gradek lengthened to 12 ft. He used rectangular tubing and plywood to build the carriage and welded metal hinges on back of it so it can be folded up out of the way.

A pair of chains connect the carriage to a frame made from 2-in. square tubing. The frame is fitted with small wheels that ride on tracks made by welding sections of sliding barn door track together.

Gradek used 2-in. square tubing to build the storage rack and bolted it to the shed’s floor with concrete anchors. The rack supports 3 wooden shelves spaced about 4 ft. apart.

“I keep anything that’s on wheels on the shed’s floor, and made a cutout in the bottom shelf to make room for a big wheeled air compressor,” says Gradek.

“I used a pair of 2 by 12 boards to build a 24-in. wide walkway alongside the entire length of the middle shelf, so I can access anything stored on that shelf. I plan to install a guard rail on the walkway to make it safer to use.”

Contact: FARM SHOW Followup, Gary Gradek, Ukiah, Calif. (ph 707 695-6040; [email protected]).

From the archive · Full text
Feature story

Fabric Chain Stronger Than Steel

Featured source: Ralph Abato

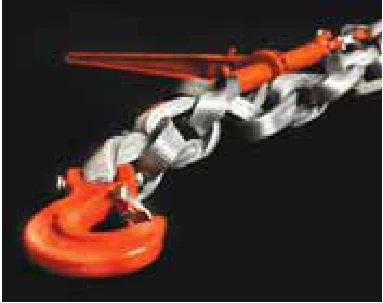
The world’s strongest fiber is being used to make DoNova textile chain, a fabric chain that floats on water. The specially woven fabric is stronger than steel and up to 85 percent lighter. It can be used anywhere chain would be used.

“Dyneema fiber is an ultra-high molecular weight polyethylene that we weave into a web. Each link is made out of 8 to 10 plies,” explains Ralph Abato, Doleco USA.

“Instead of a circle, each link is a Mobius strip. Run a finger along the inside of a link, and it becomes the outside. This effectively spreads the load across all the fibers.”

DoNova textile chain with a breaking strength of 44,000 lbs. gives it a working load limit of 22,000 lbs. when used for tie-downs, a 2:1 factor. When used for lifting a sling or towing, a 5:1 design factor is used, giving it an 8,800-lb. working load limit.

In addition to being easier on the person working with it, the textile chain is resistant to corrosive chemicals. It is also 15 percent more resistant to abrasion than steel and is nonconductive.

The soft and flexible chain is ideal for delicate loads and sensitive surfaces. Abato notes that new uses are constantly being found.

“Our customers have found many new applications for the DoNova chain,” he says.

“It is now being used in the fishing industry where they would use steel chain, but the steel doesn’t float like ours does.”

Textile chain lengths of more than 60 ft. can be handled by one person. Conventional binders and other steel chain components can be used to shorten or work with the textile chain. However, the company has used Dyneema fiber to make a DoRa ratcheting load binder. It’s 25 percent shorter than a standard load binder, but can extend twice as far. It eliminates the need to detach and reattach chains when tensioning cargo and fits into tighter spaces.

A widened hook support has also been developed for the textile chain. A special lashing strap can be used as a tensioning element, and a Doleco head sling secures loads without fastening points.

Abato acknowledges that the company’s textile fabric chain is 4 to 5 times the cost of high-grade steel chains.

“Making it is a much more labor intensive process with new technologies,” he says.

“However, if I had to use steel chain all day long, I would make the investment.”

Contact: FARM SHOW Followup, Doleco USA, 400 Oser Ave., Suite 1650, Hauppauge, N.Y. 11788 (ph 203 440-1940; [email protected]; www.doleco-usa.com).

From the archive · Full text
Feature story

Nifty Way To Store Hitch Pins

Featured source: Doug Johnson

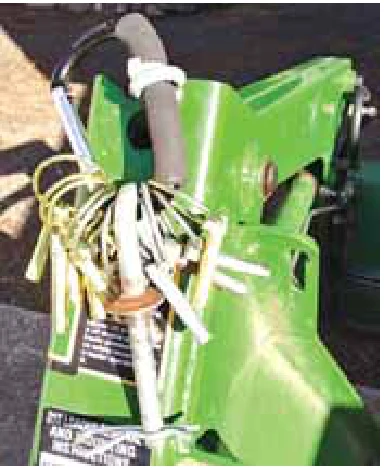
“Keeping track of hitch pins and lynch pins on our property, with 3 tractors and a Deere Gator, used to be almost impossible. Even when left in wagon hitches or on a 3-pt. hitch, the pins always seemed to magically disappear,” says Doug Johnson, Aberdeen, Wash., who came up with a simple solution.

“I found a 5-in. aluminum carabiner at Tractor Supply for $2 and installed an eye bolt on my tractor’s front-end loader post, as shown. That was 6 mos. ago, and I haven’t lost a single lynch pin or hitch pin since,” he says.

“I could have installed the carabiner on back of the tractor’s rollbar and accomplished the same thing, but since I often swap my loader bucket and forks back and forth, the loader post is more convenient.”

Contact: FARM SHOW Followup, Doug Johnson, 6608 Olympic Hwy., Aberdeen, Wash. 98520 (ph 360 616-1690; [email protected]).

From the archive · Full text
Feature story

Have You Seen This “Fix” For Grain Bin Plug-Ups?

Featured source: Guy Mills

A reader recently asked us if we’d run anything on the idea of using big air compressors to unplug grain bins. The idea surfaced about a year ago in a story by Chris Bennett at AgWeb.com. It’s a relatively simple idea for clearing out badly plugged bins without climbing inside. During a spring blizzard in 2019, a lot of snow got into a bin of stored corn on the farm of Nebraska corn grower Guy Mills. He removed several loads before the wet corn inside plugged up the unloading auger. At about the same time, he saw an employee of a local fertilizer company using a large commercial air compressor to loosen up a plugged bin and he decided to try it himself. He learned that to unplug a grain bin you need a lot of air. A typical farm compressor which puts out 50 cfm or so won’t get the job done. You need a commercial compressor that puts out 250 cfm. Those can cost up to $25,000 but Mills says you can usually rent one for about $50 a day. To get the job done, you need a piece of 3/4-in. steel pipe the length of your unloading auger, a short piece of 3/4–in. pipe the length of the dia. of your auger tube, and two 3/4 –in. elbows. You should also attach a valve to the end of the pipe to control air flow and have a pair of vise grips handy.

To use it, remove the auger and insert the pipe with an elbow and the short piece of pipe attached to the end. Push it all the way in and rotate it back and forth in the sump. Clamp the vise grips on the outside end of the pipe so you know which way the pipe stem is pointing inside the bin. Corn will fill the sump when you’re done blowing. The next step is to pull out the pipe, replace the short piece of pipe with the second elbow to blow corn backward out of the tube. Mills says to be careful because the force is amazing and grain will shoot out 50 ft. or more at high speed. Then reinsert the auger and you’re ready to unload. If the sump plugs up again, just repeat the process. Mills noted that in extreme cases where there are crop pillars inside the bin, you can cut a small hole in the side of the bin and insert a pipe to break them up. The beauty of the idea, said Mills, is that no one has to climb inside the bin and the idea is cheap and easy so anyone can do it. He has contacted some bin manufacturers and asked them to evaluate the process and possibly consider placing permanent airlines in new bin construction.

From the archive · Full text
Feature story

He Adapted 20-Volt Batteries To 18-Volt Tools

Featured source: Kent MacDougal, Yonges Island, S. Car.

“About 10 years ago I bought four 18-volt tools from Porter Cable – a reciprocating saw, drill, circular saw, and flashlight - along with 2 NiCad batteries and a charger. I used the reciprocating saw and drill more than the circular saw and the flashlight. However, the batteries on those tools died, and I missed them. Then I bought a 20-volt lithium battery package from Porter Cable, which included a drill and an impact driver with 2 batteries and a charger. But I still missed my old 18-volt tools.

“Because of changes made by Porter Cable, their 18-volt and 20-volt batteries are not interchangeable. The 18-volt battery plugs into the tool with four tabs (all negative) and one slot (positive), while the 20-volt battery has four slots (three negative and one positive). Both batteries have a spring-loaded latch that secures it to the tool.

“I took apart one of the old 18-volt batteries and soldered leads to the battery’s positive and negative contacts. I separated the battery case by removing 6 screws, and then pulled out the batteries and cut them free. They were attached to the 4-tab, 1-slot plug. I soldered 6-in. long jumper wires to the positive and the main negative, and crimped on electrical blade connectors. Then I glued the one-slot plug into the top half of the battery case.

“I used a dremel tool to cut off the bottom half of the battery case, and made sure the case’s spring-loaded catch would still engage by form fitting the 20-volt battery to the latch and spring assembly. Then I reattached the spring-loaded latch by screwing it onto the back of the battery case.

“I used plywood to make a horseshoe-shaped carrier that screws onto the 20-volt battery and slides into the rails on any of my 18-volt Porter Cable tools. I used a box cutter to mortise 4 hexagonal nuts that flush mount into the carrier and JB welded them in place. I attached the negative and positive contacts, slid the 20-volt battery onto the carrier, and inserted machine screws through existing holes in the battery case to put the assembly together.

“To use a 20-volt battery on an 18-volt tool, I just slip the carrier onto the 20-volt battery and then hook up the positive and negative wires to the 18-volt battery.

“While it now takes longer to switch out the batteries, I have all my old tools back, and the extra 2 volts provided by the 20-volt battery makes them sing!

“I can still use 20-volt batteries in 20-volt tools by disassembling the carrier.”

From the archive · Full text
Feature story

“Bumper Toolbox” Built Into Front Of Toyota Pickup

Featured source: James M. “Jimbo” Stephens

Judge James M.

“Jimbo” Stephens recently sent FARM SHOW photos of a handy “bumper toolbox” he built for his new Toyota Tundra pickup.

“When the pickup arrived, I realized the side rail toolboxes on my old pickup couldn’t be used due to the new swing-out toolbox design on new Tundras,” says Stephens.

“The pickup came with a big grille guard, so I decided to replace the center bar on it with a 36-in. long, 7-in. wide piece of toolbar off an old Deere planter. I cut the top off the toolbar and closed up the ends.

“An 8-in. length of ‘C’ channel purlin made the perfect lid. By mounting it so it flips outward, I was able to use the lid as a work table. It’s nice to have my tools right in front of me when working on a project.”

Stephens farms part time on 150 acres in northern Louisiana, where he serves as a Judge on the Louisiana Second Circuit Court of Appeals.

Contact: FARM SHOW Followup, Judge James M.

“Jimbo” Stephens ([email protected]).

From the archive · Full text
Feature story

Simple “Steering Fix” For Ford 8N Tractor

Featured source: Duane Spencer

“My 1951 Ford 8N tractor had bad steering joint ends when I bought it back in 1987. I modified the steering rod so that the tractor steers a lot tighter now, with no wheel wobble at all. Makes the tractor fun to drive again,” says Duane Spencer, DeFuniak Springs, Fla.

He bought the tractor to replace a 1949 Ford 8N with a bad transmission that he now uses for parts.

“I decided to use part of the steering rod on the 1949 model to replace the bad back joints on the 1951 model.”

The steering rods consist of a long rod with a short piece of hollow threaded rod between the back and the front joint for toe-in adjustment.

“I cut off pieces of the adjustment rods from the 1949 model and welded them in to lengthen the adjustment rods on the 1951 so I could use short-style rear joints which I was able to purchase (couldn’t find the longer rods).

“When I cut and welded the added length of the hollow rod, I used part of a mobile home tie-down rod to strengthen the weld. This repair made the steering a lot tighter.”

Contact: FARM SHOW Followup, Duane Spencer, 503 Kings Lake Blvd., DeFuniak Springs, Fla. 32433 ([email protected]).

From the archive · Full text
Feature story

Tac GlueTM Great For Fixes

Featured source: Seth Ross

Tac Glue™ adhesive won’t dry up in an open bottle and it works on most materials. It dries quickly once applied and sells at a reasonable price considering that it provides industrial strength, according to Tac Glue owner, Seth Ross, noting that it’s actually been on the market for more than 20 years.

“It’s a premium grade formula that’s very pure,” he says, noting that it’s anaerobic so it doesn’t harden until it’s applied, and has a long shelf life, especially when refrigerated.

Customers include people who fix vehicles or equipment because Tac Glue can be mixed with filler materials to be an epoxy replacement. The company’s brand, X-Fillers, has strong shear and tensile strength to rebuild radiators and automotive structural plastics. Baking soda can also be used as a filler for some projects.

Sporting customers use it for arrow fletching, lure making, and taxidermy, for example.

It’s ideal for all types of temporary repairs including sealing skin cuts. Artists, fishermen, hunters and farmers are all customers.

“In the field, people use it for temporary irrigation remedies,” he says.

“People have used it off-roading. It’s saved them, to fix a fan belt, or put on a radiator leak.”

Tac Glue comes in thin viscosity glue for most materials: plastic, rubber, metal, wood, stone, glass and ceramics, for example. A little bit goes a long way and the glue dries in seconds.

The gel version works best on porous materials like ceramic and wood, and it allows time to reposition the pieces being glued together.

Both versions cost $10 for a 20-gram bottle or $15 for a 50-gram bottle.

Contact: FARM SHOW Followup, Tac Glue, 1035 E. Village Way 114 PMB, Vista, Calif. 92084 (ph 888 886-7422; www.Tac Glue.com; [email protected]).

From the archive · Full text
Feature story

Engine Hoist “Scaffold” Works Great To Install Ceiling

Featured source: Dean Aasheim

Dean Aasheim, Canton, S. Dak., converted a rolling engine hoist into a handy scaffold that makes it easier to work on 14-ft. ceilings inside a building he added onto his mobile home.

The scaffold extends up to 9 ft. in height. It has a fixed set of 4 vertical 1 1/4-in. support pipes and a 4 by 8-ft. platform that can be raised or lowered to any spot on the pipes. Aasheim welded a short length of 1-in. tubing to the hoist’s arm, and also welded a long horizontal bar to an angle iron frame that supports the platform. A bolt that runs through the bar serves as a pivot point, allowing the platform to remain level as it’s raised or lowered.

The old engine hoist rides on 4 swivel caster wheels with a hand-pumped jack. He bolted together sheets of 1/2-in. plywood to form an enclosure that stabilizes the scaffold. The enclosure was made by bolting the plywood sheets onto angle iron brackets welded to each of the scaffold support pipes.

He cut 2 handholds into one end of the enclosure.

“To move the scaffold I jack up the hoist until the far end of the scaffold is just high enough to clear the floor, then grab the handholds and roll the scaffold around,” says Aasheim.

“With the platform set at 7 1/2 ft. I can stand and easily reach the top of the roof.”

Contact: FARM SHOW Followup, Dean Aasheim, 47822 289th St., Canton, S. Dak. 57013 (ph 605 408-4472).

From the archive · Full text
Feature story

Space-Saving Idea For Storing Metal Cut-Offs

Featured source: Eric Petrevich

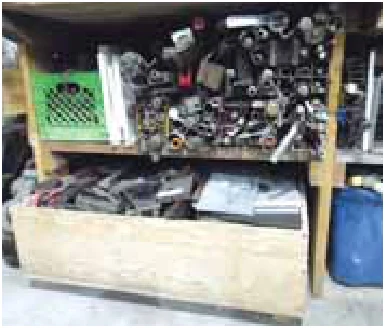
A New Jersey farmer-fabricator came up with a couple of space-saving ideas to store metal cut-offs in his shop. He says they were inexpensive to set up and make it easier to find whatever he needs when he needs it.

Eric Petrevich slides lengths of cut-off square tubing onto a shelf under his workbench and neatly stacks them. Then he slides smaller pieces of tubing, angle iron, metal rods, or flat stock inside the tubing, which holds them nicely. He also uses big plastic bins on the same shelf to store lighter stuff, such as aluminum and composite materials.

A large, homemade wooden “drawer” measuring 4 ft. long by 44 in. wide with 1-ft. high sides fits under the shelf and is used to store larger, irregular size pieces. The box sets on top of 3-in. high wooden skids, allowing Petrevich to use a pallet jack to move the box in or out from under the shelf.

“The drawer stores the cut-off pieces nicely out of the way, and whenever I need something I use the pallet jack to pull the drawer out,” says Petrevich.

“ I root through the cut-offs to find what I need, then slide the drawer back under the shelf. It saves a lot of space, and allows me to use more cut-offs, and find them easier than before.”

Contact: FARM SHOW Followup, Eric Petrevich, Glen Gardner, N.J. ([email protected]).

From the archive · Full text
Feature story

DIY Powder Coating Better Than Paint

Featured source: Todd Schminke

Todd Schminke says that if you have some metal parts to paint, you’re better off with “do it yourself” powder-coating. It’s cheaper, and the coating lasts longer. Schminke was frustrated when a receiver hitch holder he built started rusting. He was tired of his various receiver hitches rolling around in the back of his truck, so he designed and built a 5-hitch holder.

“I spray-painted it, but I wasn’t happy with the durability of the paint,” says Schminke.

“After a time, it started flaking and rusting.” By then, Schminke was selling his hitch holders. He prices them at $30 for a 2-hitch unit and $10 for each additional holding pocket. He looked into custom powder coating, but the cost was more than the hitches were worth. That’s when he came across a solution at www.eastwood.com. Eastwood sells a $900 professional powder coating system and a $5,400 4 by 4 by 6-ft. oven, but they also have starter kits for as little as $52.97. The kits include an 11,000-volt electrode gun, black powder and all the accessories needed. The company website also includes how-to information. All Schminke had to provide was a low-pressure air line and an oven capable of reaching 400 to 500F.

“It’s not bad to do,” he says.

“I use a standard home oven and powder coat all my hitch holders. I’ve even started doing some custom powder coating for others.” Contact: FARM SHOW Followup, Todd Schminke, 403 5th St. E, Newhall, Iowa 52315 (ph 319 223-7586; www.facebook.com/HeartNHand17).