Practical ideas from FARM SHOW MagazineSubscribe · Free issue · Send us your shop tip
Subscribe to FARM SHOW
Issues / Vol. 46, No. 3 (2022)

Vol. 46, No. 3 (2022)

Money-Saving Repairs & Maintenance Shortcuts · Printed section pp. 32–35

30 selected entries · Complete text of selected entries

This issue’s section includes reader tips and feature-length shop stories. Held items and editorial notices are not reproduced.

Archive text: prices, coupons, availability and contact details reflect the original publication, not current offers. Reader methods are not universal instructions; follow manufacturer guidance and proper safety practices.

Reader shop tips

From the archive · Full text
Reader shop tip

Doug Johnson

Doug Johnson, Aberdeen, Wash.

“No matter what kind of trailer you’re using, if the license plate is mounted down low under the taillights, you’re eventually going to break the plastic bracket and/or the frame holding it in place. After 60 years of having this problem, I finally came up with a simple solution using a standard door hinge welded to a piece of flat steel bar. Use a couple of bolts to attach the hinge to the trailer frame and drill two holes in the bar to match the license plate. Now when the license hits the ground or an object, it will just swing back out of the way and then return to hanging straight when clear.”

From the archive · Full text
Reader shop tip 1 of 3

John Rochester

Individual tip 1 of 3 from this reader’s published contribution.
John Rochester, Charlotte, N.C.

“When doing engine repairs, I use cable ties to hold hoses and wires out of the way.

From the archive · Full text
Reader shop tip 2 of 3

John Rochester

Individual tip 2 of 3 from this reader’s published contribution.
John Rochester, Charlotte, N.C.

“The new battery I put in my wife’s older car has no handle and is a real bear to lift out of the engine compartment. So, I cut a piece of 4-in. cargo strap and put it under the battery, so the ends stick out and give you something to hang on to. The cargo strap is non-conductive, so it doesn’t cause a problem.

From the archive · Full text
Reader shop tip 3 of 3

John Rochester

Individual tip 3 of 3 from this reader’s published contribution.
John Rochester, Charlotte, N.C.

“Here’s an easy way to make a portable workbench. I attach wood planks to either side of the bucket on my loader tractor and then lay a piece of plywood across them, held in place by couple of C-clamps. Comes in handy for all kinds of jobs.”

From the archive · Full text
Reader shop tip

Scott Geyer

Scott Geyer, Lakeville, Minn.

“A simple gate wheel helper we saw at a show features a rubber wheel mounted to a piece of bent metal tubing that is mounted to the open end of a gate as a helper to keep things moving smoothly.”

From the archive · Full text
Reader shop tip

Ken Goeldner

Ken Goeldner, Delmar, N.Y.

“When I had a snowplow installed on my truck several years ago, I was advised to liberally apply dielectric grease to the electrical connections between the plow and vehicle. Since then, I have also followed that advice on my trailer connections between trailers and vehicles. Works great - no more corroded connections.”

From the archive · Full text
Reader shop tip

Ken Todd

Ken Todd, Red Deer County, Alberta

“On page 89 of your Great Shop Ideas – Vol IV book, Tom Cogger talks about having trouble with crimped wire connectors not holding and advises using heat shrink to hold them in place.

“I have been a journeyman electrician for over 50 years and if the terminals (connectors) are not staying in place this tells me that they haven’t been properly crimped, usually caused by either not using the proper size crimping tool or terminal. You should be able to hold the wire in one hand and terminal in the other and not be able to pull them apart. Using heat shrink provides a mechanical connection but not a good electrical connection.”

From the archive · Full text
Reader shop tip

Jeff Binion

Jeff Binion, Newnan, GA

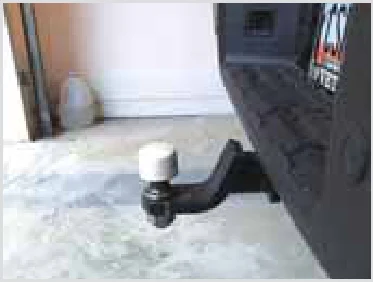
“I put a 2-in. pvc pipe cap on my truck’s trailer ball. The rear camera picks up the cap much better when backing up. Just ream it out a little with a Dremel tool for a snug fit. It also prevents hitting your shin on the greasy ball when you walk by.”

From the archive · Full text
Reader shop tip

John Humeniuk

John Humeniuk, Baudette, Minn.

“Keep spare tires in shape with pumped up inner tubes. If new tires have flattened out in storage, the inner tube gets them back in shape, making them easier to mount on rims.

“I also put tubes in tires when I take them off to store. A pumped-up inner tube keeps the mice nests out and doesn’t let them fill up with water.

“Keeping tubes pumped up assures me the tube is still good, too. If I buy a new spare tire, I put a new tube in it.”

From the archive · Full text
Reader shop tip

Tim Reisenauer

Tim Reisenauer, Kennewick, Wash.

“I’ve found that if I throw the rusty tools in my shop stove for a day and then pull them out before lighting the fire again, my glass bead blaster will do a better job cleaning them up.”

From the archive · Full text
Reader shop tip 1 of 2

John Rochester

Individual tip 1 of 2 from this reader’s published contribution.
John Rochester, Deerfield Beach, Fla.

“When using a four-way wheel wrench, it saves a lot of aggravation to mark the size used most often.

From the archive · Full text
Reader shop tip 2 of 2

John Rochester

Individual tip 2 of 2 from this reader’s published contribution.
John Rochester, Deerfield Beach, Fla.

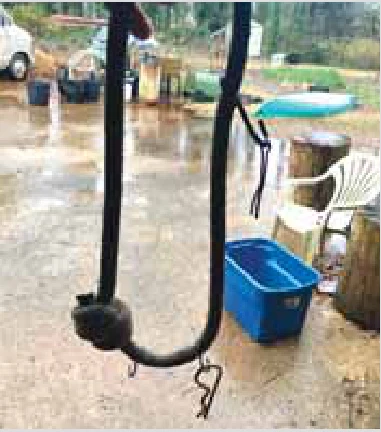
“This is a loop of 1/2-in. rope. It’s fitted with three different sizes of S hooks. It works much better than pliers for pulling cotter pins and clips.”

Shop feature stories

From the archive · Full text
Feature story

“Killer” Captures Harmful Dust

Featured source: Dust Killer Tools, Mohnton, Penn.

Silica dust is no joke for crews cutting pavers, stone, concrete or most other hardscapes. Dust Killer Tools eliminate the problem, capturing dust as it’s being made.

“When OSHA started talking about redrawing the rules on silica dust control, we started looking for solutions,” says Jeremy Martin, Dust Killer Tools.

“We didn’t find anything out there that worked. There were dust collector systems, but they didn’t capture a significant amount of dust.”

After a year of experimenting with different components, Martin and his team settled on a 2,000-cfm collector system with multiple hose inlets.

The 74-in. high Dust Killer has a 2,000-cfm vacuum motor with 4, 6, and 8-in. takeoffs. Along with two dust collection bags, it’s mounted on a 33-in. wide, 4-wheel trailer. The 33-in. by 66-in. trailer fits through most doors and gates. The 375-lb. system can handle a 20-in. table saw (8-in. hose), a 14-in. cutoff saw (6-in. hose) and a 4-in. grinder (4-in. hose) simultaneously. However, for maximum performance on the larger saws, Martin suggests capping the smaller hose.

“OSHA calls for only 25 cfm per inch of cutting/grinding blade diameter,” says Martin.” At 2,000 cfm, the Dust Killer easily exceeds that benchmark. In fact, we suggest the 25 cfm per inch for larger saws is insufficient.”

Martin explains that they developed the Dust Killer to avoid OSHA fines. While enforcement of OSHA regulations requiring control is loosely enforced, the fines can run $8,000 per person on the crew.

“We knew we couldn’t afford that,” says Martin.

However, once they started using the Dust Killer, fines became secondary.

“We would never go back to working without it,” says Martin.

“Our employees are happier, our clients are happier and there is less cleanup work. Even client neighbors appreciate it.”

A typical package for a Dust Killer plus hoses and attachments for multiple machines runs from $10,000 to $14,000, says Martin.

“We can price them by component as well as in various packages, depending on what tools are being run,” he says.

The company also offers the Dust Killer II. It’s more compact with a 1,300-cfm unit and a single collection bag. It offers only 6 and 8-in. inlets, and the trailer is only 42-in. long versus 62 in. It weighs about 260 lbs. and can handle a 20-in. table saw and a 4 to 7-in. grinder or two 14-in. cutoff saws simultaneously.

Dust Killer Tools has also developed several attachments. The Dust Shark is designed for use when cutting wall block or paver border pieces. The Dust Xtractor is for cutting pavers in place or for cutting control joints in concrete.

Contact: FARM SHOW Followup, Dust Killer Tools, 1785 Chestnut Hill Rd., Mohnton, Penn. 19540 (ph 717-983-3878; [email protected]; www.dustkiller. tools).

From the archive · Full text
Feature story

Springs Give Tailgate Lift Assist

Featured source: Bern Smith, Madison, Fla.

Lifting the tailgate on his trailer has been much easier since Bern Smith added a couple of springs. Instead of purchasing expensive encased springs that cost $150 to $250, Smith bought two 1 1/2 by 13-in. extension springs ($30), two 20-in. lengths of porch swing chain ($5), two quick links ($5) and two U-bolts ($5) to create his tailgate assist.

“The springs are attached to the porch swing chain and the quick links allow you to adjust the tension on the springs by changing where it is hooked on the chain and remove the tailgate without undoing the U-bolts,” he says.

U-bolts hold the quick link (and chain) on the trailer frame and the springs on the tailgate.

“I have no more strained arms or shoulders,” Smith says.

“The springs take the weight out of lifting the tailgate.”

Contact: FARM SHOW Followup, Bern Smith, Madison, Fla. ([email protected]).

From the archive · Full text
Feature story

Lift Makes Mower Repair Easy

Featured source: Gale Wells, Orland, Calif.

Gale Wells raises his riding lawn mower instead of lowering himself when repairs are needed. With a little fabrication, he turned his shop winch into a lift with the help of two chains and a ratchet strap.

“At 85 and with both knees replaced, getting down on the floor and up again is a big problem,” says Wells.

He solved the problem with a simple solution using his 5,000-lb. fabric winch hanging in his shop rafters. He normally uses the winch to drag equipment into the shop for repair.

“I made a spreader bar from 1 1/4-in. square tubing about the width of the mower and put an eyebolt in the center,” explains Wells.

“I welded a 1/4-in., 1 1/4 by 3-in. flat bar with a 5/16-in. slot, 1 1/4 in. deep, to each end of the spreader bar.”

Wells slipped links of 3-ft. lengths of 1/4-in. chain into the slots and attached hooks on their ends. He also glued rare earth magnets to the hooks, so once attached to the mower, they would stay in place until the chains pulled tight.

With the riding mower in place beneath the winch, Wells attaches the spreader bar, lowers the winch cable and hooks it to the spreader bar. After raising the cable just enough to tension the chains, he loops the ratchet strap under the rear fenders of the riding mower. Slipping the strap hooks around the winch cable, he puts it under tension also.

“When I push the button on the winch control, the mower goes to the rafters,” says Wells.

“To remove the deck, I roll a small table under the mower. I lower the mower until the deck touches the table, pull the pins on the deck, raise the mower and wheel the deck away.”

For safety, Wells fabricated two 3-legged jack stands with angle iron top bars. The pipe-in-pipe stands adjust in height from 24 to 36 in., in 1/2-in. increments.

“When I’m working on the mower, I place them under the axles to stabilize it when it’s hanging from the cables,” says Wells.

Contact: FARM SHOW Followup, Gale Wells, 710 Trinity St., Orland, Calif. 95963 (ph 530-865-2377; [email protected]).

From the archive · Full text
Feature story

Tillage Tool Used To Build Storage Loft

Featured source: Scott Ravenkamp, Verdigre, Neb.

A 40-ft. Calkins rod weeder was just what Scott Ravenkamp needed to make a storage loft for his new 40 by 56-ft. shop. The tillage tool was no longer being used.

“It’s built with decent iron, and the length was within 12 in. of what I needed,” says Ravenkamp.

The biggest challenge Ravenkamp faced was stripping off the excess steel. Many parts were bolted in place. Others, like the wing hinges and the hitch, had to be cut away.

Cutting the hinges distorted the steel ends on the wings but made the sections easier to handle. It also leveled the frame.

“I swapped the left and right wings to give me square tubing on the wing ends to butt-weld to the center section,” says Ravenkamp.

“I unbolted most of the arms that held the weeder bar but left a few for hanging equipment.”

Some of the salvaged parts were used to fill in an open space in the center frame. He plans to use more salvaged parts to make a railing for the loft.

Ravenkamp lifted the loft into place and set it on pallet racking legs he got from a neighbor. He attached the loft to the wall for increased stability, but not support, and laid down plywood sheets for flooring.

“I’m in the process of building a mechanical room under the loft,” says Ravenkamp.

“It’ll house pumps and the boiler for the radiant heat system I installed in the shop and house an air compressor. I’m also planning to add a bathroom under the loft. The rooms’ wooden walls will help support it.”

Contact: FARM SHOW Followup, Scott Ravenkamp, 52570 883 Rd., Verdigre, Neb. 68783 (ph 719-740-0705; [email protected]).

From the archive · Full text
Feature story

Knuckle Boom Crane Adapted To His Shop Floor

Featured source: Stephen Garver, Marion, Ark.

When Stephen Garver began considering installing a shop crane, he decided he could adapt a knuckle boom crane that would normally be mounted on a truck.

After finding one for sale on eBay, he set out to calculate the base size and weight he would need for his shop floor.

The crane itself weighed 7,500 lbs. and after some searching for expert advice, a Memphis engineer cautioned him that “wider is better than deeper” and helped him decide on an 8 by 8 by 6-ft. concrete base.

“I had a contractor come in and cut a hole in the floor,” says Garver.

“Then we dug it out, put in rebar and poured the concrete. It mushroomed out a little under the floor which made it 17 yards of cement, or 70,000 lbs.”

Garver fashioned an adapter and the base that went into the floor. A tow truck brought the crane inside the shop and set it on a 14-stud structure on 10-in. I-beams.

He installed a 30-hp. electric motor, converter box, 2,500-lb. pressure rated 12-gal. hydraulic pump, and a 40-gal. oil reservoir tank. After some frustration getting the motor to run the crane properly, he added a separate 20-hp. motor, then wired the two together which converted the three phases to single-phase and provided all the required power.

Garver says he has used the crane to pick up a Detroit 60 engine and 13-speed transmission weighing over 6,000 lbs. in one lift.

“It’s very handy and maneuverable,” he says.

“It extends to reach throughout my entire shop and 20 ft. out the shop door.

Maintenance is minimal because it’s indoors and out of the elements. I just grease it and change the oil.”

He estimates he spent around $15,000 on the project including the crane, concrete and electrical components. In time, he’d like to add remote control operation to the crane.

Contact: FARM SHOW Followup, Stephen Garver, 9158 Wheeler Rd., Marion, Ark. 72364 (ph 870-735-8265).

From the archive · Full text
Feature story

BBQ Grill Gets Second Life As Shop Storage

Featured source: Tony Bunniss, Webster, Minn.

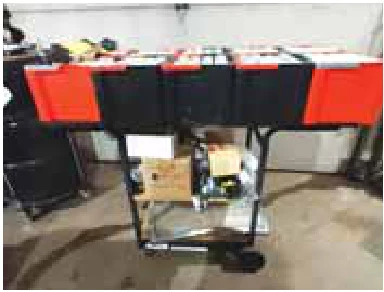
Tony Bunniss repurposed a BBQ grill into a movable shop table/storage unit.

“When my old BBQ grill died, and it was not feasible to fix it, I bought a new one but couldn’t throw the old one away,” says Bunniss.

Instead, he put the grill to use for organizing small parts in his shop for future repair projects.

“This ‘BBQ storage system’ has made it possible to organize some small parts in Black and Decker boxes on the top and store repair parts for some of my other projects on the shelves below,” explains Bunniss.

To modify the grill, Bunniss took the grill body off the frame and made a particleboard tabletop, screwing it onto the old framework. He also mounted two shelves below the tabletop and then painted the unit.

“I’ve had these boxes piled up around the shop, and it was a pain to go through the whole stack to find what I needed. The table is great because I can just gaze across the top and pick up one box instead of many.”

Each bin holds an assortment of supplies, including small screws for tech repairs.

Contact: FARM SHOW Followup, Tony Bunniss, Webster, Minn. ([email protected]).

From the archive · Full text
Feature story

He Used Pallet Racking To Frame A Building

Featured source: Scott Karkau, Mason, Mich.

“I built a large storage shed using pallet racks for the framework after seeing a much smaller shed built the same way at a local hardware store,” says Michigan idea man Scott Karkau.

“My father-in-law, who’d built a lot of things from scrap materials on his farm, didn’t think it would work, but he was really impressed when it was finished, even though it took nearly two years.”

The 80 by 100-ft. structure is 26-ft. tall with 18-ft. side walls. The main building is 50 by 100 ft. with a 30-ft. lean-to. A 50-ft. square loft forms a second story above two sections of the shop.

Karkau is a truck driver with very little framing or construction experience, but he says, “I’m full of ideas and a hoarder who scavenges all types of things, so gathering materials for my shed was a year-long adventure. I got 350 8-ft. and 12-ft. pallet rack cross members from an old warehouse for $400. As a bonus, the price included 100 sheets of 3/4 and 1/2-in. plywood, which I used for divider walls and adding a second floor to my building. I paid $3,000 for 25 used 50-ft. trusses and three 14-ft. by 14-ft. steel doors. Another $200 got me 120 used engineered trusses. Three sides of my barn are covered with insulated 2 1/2-in. thick siding that I got for $300.”

To round out his materials list Karkau purchased 30 new 18-ft. rack uprights, 27 engineered floor trusses, pole barn steel roofing and vinyl siding. The concrete flooring for half the shed and driveway approaches were his most expensive outlay at nearly $18,000.

Karkau used the pallet racks to frame the walls and provide support for the roof. The bases are bolted to 4-ft. deep concrete footings with uprights reinforced by cross members on the top, middle and bottom. He hired a crane and operator for five hours to set the trusses.”

With all materials and construction labor included, Karkau says his insulated 80-ft. by 100-ft. building cost him about $9 per sq. ft. to build. That’s less than half the $20 per sq. ft. a neighbor paid for his custom-built 50-ft. by 100-ft. shed with all new materials.

Karkau insulated ceilings in the loft, two shop areas and half of the main building with 285 sheets of 4-ft. by 8-ft. by 3-in. thick panels salvaged at no cost from a local Sam’s club. The building has 30 windows of various sizes and shapes that Karkau bought on clearance for about $1,600.

Contact: FARM SHOW Followup, Scott Karkau, 374 Harper Road, Mason, Mich. 48854 (ph 517-881-4979; [email protected]).

From the archive · Full text
Feature story

Simple Fix For Tubes In Tubeless Tires

Featured source: Tony Bunniss, Webster, Minn.

FARM SHOW contributor Tony Bunniss has developed a method to keep tubes inflated when used in tubeless tires.

When Bunniss worked at a John Deere Lawn and Garden dealership, he noticed that many customers came in with tires and wheels modified to have a tube inside because people were tired of their tubeless tires losing air so often.

As the air went out of the tube, it would pull the valve stem into the wheel where he couldn’t reach it to inflate or deflate. Lawn and garden wheels and tires are especially prone to this problem because they are only used seasonally.

“Tubeless tires are fine on lawn and garden equipment when the tire is new and the rim is clean,” explains Bunniss.

“However, that equipment sits around for a long time. It needs to be moved every so often, or a leak will develop. The older the tire gets, the more often it needs air.”

After repeatedly having the valve stem problem, Bunniss came up with a simple solution.

“After I install a new tube and inflate it, I just attach a hog ring to the valve stem, preventing it from ever being sucked into the wheel,” he explains.

“Before I attach the hog ring, I grind off the sharp points so that I don’t puncture the stem while installing it.”

Contact: FARM SHOW Followup, Tony Bunniss, Webster, Minn. ([email protected]).

From the archive · Full text
Feature story

Welding Table Moves With The Job

Featured source: Anthony Spiering, Powell, Wyo.

Anthony Spiering takes his welding table where it’s needed. He no longer carries the work to the table. The mounted shop hoist makes handling heavy projects even easier.

“My dad came up with the welding table idea, and it was one of my first projects when I started working with him in the farm shop,” says Spiering.

“I learned how to weld making it.”

Spiering used 3-in. oil field pipe for the 3 by 7-ft. frame and a sheet of 4 by 8-ft., 3/4-in. thick steel plate for the top. The top by itself weighs almost 1,000 lbs.

“The top has a 6-in. overhang on all sides for clamping work to it,” says Spiering.

“I’m tall, so I made the table 44-in. high.”

To avoid possible warping of the top if he welded it to the pipes, Spiering attached it using four 1/2-in. bolts.

“I drilled up through the pipe and tabletop, threading the tabletop holes,” he says.

“Once the bolts were installed, I ground the ends down flush. It hasn’t moved.”

An expanded metal shelf mounted to the under frame provides storage for a Miller Multimatic 200 welder, an Argon/CO2 tank and brackets for the torch and gas hose.

A heavy-duty extension cord feeds outlets mounted to the table for grinders and other electric tools in addition to the welder. Cross members on the under frame store C-clamps and other tools. At one end, Spiering mounted heavy-duty vises at the corners, one that swivels and a second that is stationary. The next add-on was born out of frustration, rather than planned.

“We got tired of tripping over our old 2,000-lb. shop hoist,” says Spiering.

“It always seemed to be in the way, so I decided to mount it on the table.”

He cut off the wheeled base and mounted it to a cut-down pivot axle from an old 600 Case combine. He welded a piece of flat steel to one side of the axle and bolted the hoist’s main frame to it. The vertical supports were bolted to the other side of the pivot axle.

Spiering attached the male post on which the axle swivels to the side of the table using a 2-in. sq. tube and a receiver hitch. Braces bolt to the top of the table for added support. To secure it in position, he simply drops a bolt through the respective, matching faceplates.

“I can spin it around as needed, yet quickly lock it in place,” says Spiering.

“If I need the hoist in the field, I can pull the pin on the receiver hitch, unbolt it and mount it on my pickup receiver hitch.”

Initially, Spiering mounted the table with 8-in. steel caster wheels at one end and fixed wheels at the other, but they made it hard to move. After seeing the motorized, electric farm cart from Kramble Industries in FARM SHOW (Vol. 45, No. 1) he considered mounting the table on a cart.

“It was impractical, but they sent me components that I was able to use,” says Spiering.

“I got their high torque motor, the controller that hooks to a 12-volt battery, and the throttle grip that mounts on a steering handle.”

Spiering fabricated a support base for the drive wheels and motor, to replace the caster wheels. He used square steel tubing, heavy angle iron and a pipe-in-pipe pivot that mounts to the table end frame. A T-handle with the throttle grip is mounted to the front of the motorized support base.

A pair of lawn mower wheels met his height needs, but they were not strong enough to support the table.

“The tires squatted under the weight so much that the table was no longer level,” says Spiering.

“I switched to a higher ply rating and filled them with foam, and they were fine.”

Spiering also geared down the motor. He connected the Kramble drive sprocket to one twice its size, which he mounted to a 1-in. shaft for the axle.

“I made the table 10-12 years ago and we’ve used it ever since,” says Spiering.

“The motorized drive made it even more versatile.”

Contact: FARM SHOW Followup, Anthony Spiering, 1168 Road 19, Powell, Wyo. 82435 (ph 307-254-2645; [email protected]).

From the archive · Full text
Feature story

Rerouted Gator Duct Takes In Cleaner Air

Featured source: Troy Hall, Lucas, Iowa

Troy Hall says his father Ken’s Deere XUV835 Gator is a great utility vehicle that does all sorts of work, but until recently it had one big drawback.

“The engine air intake was close to the rear wheel where it drew in a lot of dust and dirt when the vehicle was used on gravel roads and dusty fields,” Hall says.

“He was constantly cleaning the air filter because the engine was losing power.”

After thinking the problem through, Ken Hall came up with a solution. He loosened the clamp on the air filter housing and rotated it 125 degrees in the opposite direction toward the cab. Then he made a new duct that connects to the air intake tube on the engine and extends up about 18 in. between the cab and the box. The top opening draws in cleaner air from just below the cab’s rear window. A horizontal cap prevents moisture from entering the duct.

The duct, made from galvanized sheet metal and painted black, fastens to the back of the cab with two self-drilling TEK screws. Hall says the flat rectangular device fits snugly between the cab and the box and isn’t affected when the box is raised and lowered.

“We made changes to the prototype over a couple of months to perfect the design and the version we’re producing now incorporates those improvements,” Hall says.

“It worked so well that it’s on the market now as the Air Intake Relocation Kit (AIR Kit). We’ve sold them to several Gator owners who’ve been happy with them.” Hall adds that newer Gator models require an additional bracket to rotate the air intake tubes and he includes that with his kit.

“Drawing air from behind the cab is a lot better than from the underside of the vehicle. Now I don’t have to change the air filter nearly as often,” Hall adds.

Troy Hall says the AIR Kit currently sells for $50 plus shipping and can be ordered by calling or emailing him.

“Pricing may change if metal costs continue to go up,” Troy adds.

Contact: FARM SHOW Followup, Troy Hall, 13045 575th St., Lucas, Iowa 50151 (ph 641-766-6498; [email protected]).

From the archive · Full text
Feature story

Double Bench Grinder Saves Space

Featured source: Tony Bunniss, Webster, Minn.

“When I was setting up my shop, I knew I needed at least three different grinding wheels,” says FARM SHOW contributor Tony Bunniss.

“I had two electric grinders but wanted to make them a little more compact so that they didn’t take up valuable room.”

He knew he needed a silicon carbide wheel, wire brush wheel, and a general-purpose wheel to shape a high-speed steel cutter and drill bits.

Bunniss’ solution was a rotating mount for the two grinders.

He explains, “I have the silicon carbide and a regular wheel on one of the grinders, and they take care of any grinding I need to do on a carbide cutter or a high-speed steel, lathe cutters.”

The other grinder is set up with the wire brush and a regular wheel for general grinding.

“To rotate the grinders, I loosen the set screw with the welded ‘tee’ handle, back it out of the hole in the shaft, and rotate it 180 degrees,” says Bunniss.

“The mount has a built-in stop which will only allow the platform to turn 180 degrees to the stop and back, which prevents the cords from wrapping up on the post.”

Bunniss built the entire system out of scrap metal. That includes two pieces of pipe, with one machined to fit within the other. As he explains, “I used a 6-in. long by 3-in. OD pipe for the inside pipe that is welded to a 10-in. by 3/16-in. by 18-in. long channel iron for the platform. The outside pipe was machined to a loose fit for the 3-in. OD pipe and then welded to an 8-in. by 10-in. by 1/4-in. wall plate.”

Since the walls of his shop are poured concrete, getting a secure mount was a relatively easy process.

He made the stop by drilling two holes a little over 180 degrees from each other around the circumference of the side pump and then cutting out the metal between them with a metal saw.

Says Bunniss, “I could have accomplished the same thing with the milling machine and the rotary table, but I didn’t think it needed to be that accurate.”

Contact: FARM SHOW Followup, Tony Bunniss, Webster, Minn. ([email protected]).