Practical ideas from FARM SHOW MagazineSubscribe · Free issue · Send us your shop tip
Subscribe to FARM SHOW
Issues / Vol. 48, No. 6 (2024)

Vol. 48, No. 6 (2024)

Money-Saving Repairs & Maintenance Shortcuts · Printed section pp. 32–35

46 selected entries · Complete text of selected entries

This issue’s section includes reader tips and feature-length shop stories. Held items and editorial notices are not reproduced.

Archive text: prices, coupons, availability and contact details reflect the original publication, not current offers. Reader methods are not universal instructions; follow manufacturer guidance and proper safety practices.

Reader shop tips

From the archive · Full text
Reader shop tip

Dan Bjorkman

Dan Bjorkman, Bronson, Mich.

“I did a simple table saw upgrade that has made woodworking much easier. I bolted two table saws together. It gives me a larger work surface. It also simplifies my woodworking.

“I no longer have to change blades when making dados or cutting different types of material. I can keep dado blades on one table saw and a ripping blade on the other.”

From the archive · Full text
Reader shop tip

Dale Witham

Dale Witham, Rainier, Ore.

“After drum lines break on my logging Cats and skidder, I replace the line with a new or good, used 5/8-in. line. Usually, the lines are dry and in good shape, with a lot of life left in them. I reel up the lines on the drum, then take a cup of used motor oil and pour it across the top, allowing it to drip onto the wound-up lines. Since I’ve been doing this, the oiled lines will roll up more easily. There’s less over-wrap of lines. The winch lines lay where they’re supposed to.”

From the archive · Full text
Reader shop tip 1 of 4

Steven Janis

Individual tip 1 of 4 from this reader’s published contribution.
Steven Janis, Howell, Mich.

“When pulling an engine in the gravel driveway, casters don’t roll, and it’ll sink. Get a couple of 1/2-in. sheets of OSB and lay them end to end under the vehicle. Put the picker on them when you don’t have a concrete slab. Half or partial pieces can sometimes be substituted for a full sheet. This can be used to move or cart heavy items around.

From the archive · Full text
Reader shop tip 2 of 4

Steven Janis

Individual tip 2 of 4 from this reader’s published contribution.
Steven Janis, Howell, Mich.

“If you don’t have the skills to rebuild an engine, seek a local builder for classes to help you (for a fee). Learned skills, problems solved, and pride in yourself. I trained my son for backup skills. It wasn’t always easy, but he’s now done 20+ engines. We now have over 300 engines, 110 transmissions and 50 rear axles. We also build our own. It’s fun, rewarding work.

From the archive · Full text
Reader shop tip 3 of 4

Steven Janis

Individual tip 3 of 4 from this reader’s published contribution.
Steven Janis, Howell, Mich.

“I bought a gantry crane from Harbor Freight to help with body/chassis swaps. You just can’t use farm jacks and cement blocks all your life.

From the archive · Full text
Reader shop tip 4 of 4

Steven Janis

Individual tip 4 of 4 from this reader’s published contribution.
Steven Janis, Howell, Mich.

“If you have an old AMC/Jeep with low engine pressure, do a copper tube oil bypass under the intake manifold from the front oil passage to a drilled and tapped hole between the number six and eight cylinders in the valley. You can go from 5 lbs. to 30 lbs. pressure with this help. You may have to drill the block oil passage, which was cast too small to a 9/16 bore, and from there, the front cover mounts. Mine was 5/16 dia., which did not provide enough volume. The drill bit was too short, so I cut the end to fit an oil pump drive shaft.”

From the archive · Full text
Reader shop tip

Travis Weber

Travis Weber, Ontario

“It seems the plastic tube on the metal wire handles on pails disintegrates quickly with daily use. After dealing with sore finger joints, I discovered a 3 1/2-in. piece of 3/8 or 1/2-in. braided water hose makes a more comfortable handle and lasts much longer than the original plastic one.”

From the archive · Full text
Reader shop tip 1 of 2

Dr. Karl Spees

Individual tip 1 of 2 from this reader’s published contribution.
Dr. Karl Spees, Port Angeles, Wash.

“Three decades after taking a welding course, my stick welding machine and I periodically have issues. I had no idea what amperage I needed for a 3/32-in. 6013 rod. Also, my ground lead has spring weakness, dulled contacts and oxide build-up, which sometimes cause problems.

“I solved one problem by first watching a YouTube video by @TimWelds. He shared the amp setting windows, plus other critical factors.

From the archive · Full text
Reader shop tip 2 of 2

Dr. Karl Spees

Individual tip 2 of 2 from this reader’s published contribution.
Dr. Karl Spees, Port Angeles, Wash.

“I found a set of new jumper cables at a garage sale at a price too good to pass up. I connected both cables to my work and the other ends to my ground lead clamp. I had a fire extinguisher handy, just in case. The job went smoothly with Tim’s refresher course and a soundly grounded project.”

From the archive · Full text
Reader shop tip

William Ridgway

William Ridgway, Salem, Ind.

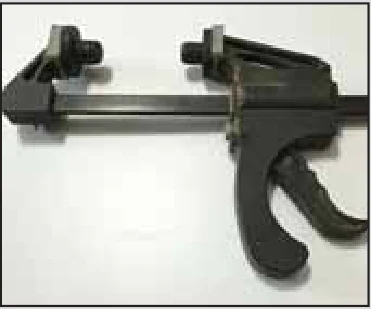
“My wife had trouble removing the battery from our Ryobi string trimmer. So, I glued some rubber feet onto the pads of an inexpensive squeeze clamp. Although it won’t win any beauty contests, it sure does work.”

From the archive · Full text
Reader shop tip

David J. Byler

David J. Byler, Brockway, Penn.

“For most lawn tractors with a 2-cyl. engine, the engine needs to be completely removed from the tractor to replace a faulty ignition coil. To save the customer labor costs, after consultation and permission, I cut out a section of the blower housing above the ignition coil to replace the coil without dismantling the tractor and removing the engine. Then, we drill and tap a new bolt hole to secure the cutout piece back in place. It looks like a factory job, and a happy customer is going home with an extra $300 in their pocket.”

From the archive · Full text
Reader shop tip

Loren Yoder

Loren Yoder, Grantsville, Md.

“The 1 3/8-in. hydraulic fittings on our 332 Deere skid steer are tough to access. I heated and bent the end of the wrench 90 degrees, then used another wrench for a handle. It worked great.”

From the archive · Full text
Reader shop tip 1 of 2

Keith Streeter

Individual tip 1 of 2 from this reader’s published contribution.
Keith Streeter, Warren, Vt.

“I save meat tubs and build shelves to slide the trays into. Then, I put labels on them so I know what’s inside.

From the archive · Full text
Reader shop tip 2 of 2

Keith Streeter

Individual tip 2 of 2 from this reader’s published contribution.
Keith Streeter, Warren, Vt.

“I cut some 2 by 8s, spaced 2 to 3 ft. apart, so I can stack sap buckets horizontally without them sticking together.”

From the archive · Full text
Reader shop tip

Paul Tylutki

Paul Tylutki

“All too often, we try to get the necessary balance when lifting awkward objects. I generally use a 2-in. ratchet tie-down as a leveler. It works wonderfully when trying to align.”

From the archive · Full text
Reader shop tip

John Hohmann

John Hohmann, Pataskala, Ohio

“To help maintain fastener connections in high-vibration settings, I apply a lock washer, tighten it with the nut, and then drill a small hole in the bolt just distal to the nut to prevent the fastener from loosening and failing. A cotter pin or even a nail goes through the hole in the bolt.”

From the archive · Full text
Reader shop tip 1 of 3

Allen Pederson

Individual tip 1 of 3 from this reader’s published contribution.
Allen Pederson, Nashua, Iowa

“I found a single field cultivator tooth with a spring on the highway. I bolted it to a tractor bucket to dig electric cable in.

From the archive · Full text
Reader shop tip 2 of 3

Allen Pederson

Individual tip 2 of 3 from this reader’s published contribution.
Allen Pederson, Nashua, Iowa

“Always carry a needle or stick pin in the lining of your billfold. Use it for slivers, to clean screens, etc.

From the archive · Full text
Reader shop tip 3 of 3

Allen Pederson

Individual tip 3 of 3 from this reader’s published contribution.
Allen Pederson, Nashua, Iowa

“Put bright paint or tape around dipstick holders. It’ll help make them quicker to find in the engine compartment.”

From the archive · Full text
Reader shop tip 1 of 3

Jeff Hootman

Individual tip 1 of 3 from this reader’s published contribution.
Jeff Hootman, Jeromesville, Ohio

“In 2015, I purchased a Cub Cadet three-stage snowblower. It seems to have been designed for someone 5 ft. 6 in. I’m 6 ft. tall. So, I built a subframe for my Wheel Horse garden tractors (1979 C-81). I can mount the snowblower on the front or back of either tractor, depending on whether I want to drive forward or backward. My driveway is 800 ft. long. It sure beats walking behind it, all hunched over.

From the archive · Full text
Reader shop tip 2 of 3

Jeff Hootman

Individual tip 2 of 3 from this reader’s published contribution.
Jeff Hootman, Jeromesville, Ohio

“The power windows on my 2002 Ford Taurus quit due to an electrical problem on the driver’s door. When they started to come down on their own, I had to do something. I removed the door panel and figured out the motor was still good. I used two double-pole double-throw switches and a momentary contact switch in the power lead to rewire both front windows. I drove it for 2 years like that.

From the archive · Full text
Reader shop tip 3 of 3

Jeff Hootman

Individual tip 3 of 3 from this reader’s published contribution.
Jeff Hootman, Jeromesville, Ohio

“I used 16-ft. stock panels from Tractor Supply and Harbor Freight tires to make a place to park my garden tractors and lawn mower.”

From the archive · Full text
Reader shop tip

John Kiminski

John Kiminski, North Brookfield, Mass.

“If you have an air compressor that’s hard to start in cold weather, tee in a ball valve at the outlet pump pipe. Open it when it first starts for about 20 to 30 seconds, then close it for normal operation. I use this on 3/4 and 5-hp. compressors.”

From the archive · Full text
Reader shop tip

Max McCaw

Max McCaw, Coal Valley, Ill.

“To rewind my string trimmer, I pull off what string I need for both sides. Insert and wind both at the same time. After winding, I cut the loop and install it. It’s a lot easier than winding one at a time. A spray of silicone lube keeps the string from binding in the spool.”

From the archive · Full text
Reader shop tip 1 of 2

William Nadeau

Individual tip 1 of 2 from this reader’s published contribution.
William Nadeau, Warren, Maine

“My induction heater works well on rusted nuts and bolts without a flamer.

From the archive · Full text
Reader shop tip 2 of 2

William Nadeau

Individual tip 2 of 2 from this reader’s published contribution.
William Nadeau, Warren, Maine

“I’ve used my heavy-duty nut splitter on up to 3/4-in. nuts. It only takes a minute and saves the bolt.”

From the archive · Full text
Reader shop tip

Roger Hathcoat

Roger Hathcoat, Nowata, Okla.

“I had a problem with my older Massey Ferguson tractor dying after running for only half an hour. I flushed the fuel tank, installed new coils, and tried other fixes. Nothing worked.

“A friend described having a similar problem with his pickup. He suggested I ‘pop’ the distributor cap and look for a black spot on top of the rotor bug.

“Sure enough, there was the black spot. I installed a new rotor bug, and the problem was solved. After several years of headaches, it was a few bucks well spent.”

From the archive · Full text
Reader shop tip

Jim Stone

Jim Stone, Warrenton, Ga.

“We’ve always used bailer twine around the farm, and inevitably, it’ll become a tangled mess which eventually just gets thrown away. Our simple solution is to put the twine in an old 5-gal. oil bucket and run the string through the spout on the lid. No more mess, no more fuss. It’ll feed without knots until it’s completely consumed. Sometimes, I run it through the plastic handle to make it more accessible.”

From the archive · Full text
Reader shop tip 1 of 3

Warren Zimmerman

Individual tip 1 of 3 from this reader’s published contribution.
Warren Zimmerman, Wheeling, Mo.

“Case IH Maxxum tractors have a foam seal under the cab roof that deteriorates and drastically reduces A/C cooling capability. No longer OEM, I used Emseal sealing foam to repair them.

From the archive · Full text
Reader shop tip 2 of 3

Warren Zimmerman

Individual tip 2 of 3 from this reader’s published contribution.
Warren Zimmerman, Wheeling, Mo.

“A 630 Bobcat skid steer hydrostat pump had the input shaft seal retaining snap ring groove destroyed. Rather than buying a new housing or pump, I ground down the housing flush with the mounting flange and had a fab shop cut out a different mounting bracket with only a small hole around the input shaft. That held in the seal instead.

From the archive · Full text
Reader shop tip 3 of 3

Warren Zimmerman

Individual tip 3 of 3 from this reader’s published contribution.
Warren Zimmerman, Wheeling, Mo.

“I’ve added small flat free wheels to each front corner of my 7-ft. Brush Hog. It now doesn’t gouge or cut in like it used to.”

Shop feature stories

From the archive · Full text
Feature story

Shop-Made Grill For Allis-Chalmers 185

Featured source: Doug Barlow, Trenton, Fla.

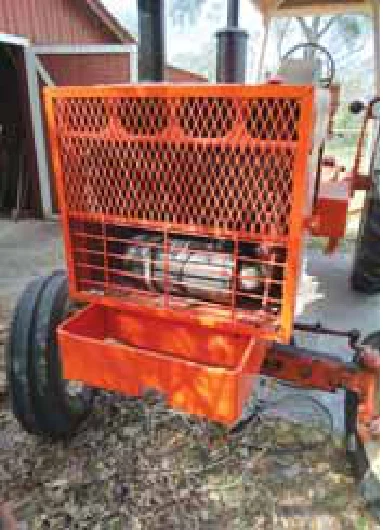
Replacement grills for older tractors are hard to find, so Doug Barlow made his own. All it took was a good eye, steady hands, angle iron, cattle panel and expanded sheet metal.

“The front grill on the Allis-Chalmers 185 I was rebuilding was missing,” says Barlow.

“The company that used to make a fiberglass replica seemed to have gone out of business, so I decided to make my own.”

Barlow used scrap 1-in. angle iron for the frame and filled the top half with a piece of 1/8-in. expanded sheet metal. However, the bottom half of the grill covers the air filter housing, and he wanted it visible.

“I used the expanded sheet metal for the top half for protection,” he says.

“I used a section of cattle panel for the bottom half to see the air filter housing and would be reminded when I needed to change the filter.”

Barlow designed his replacement grill to match the flanges that held eyebolts for the original grill.

“It took very little time, turned out great and is durable,” he says. I like it so much that I don’t want an original now.”

Contact: FARM SHOW Followup, Doug Barlow, Trenton, Fla. ([email protected]).

From the archive · Full text
Feature story

Low-Cost Shop Elevator Makes Storage Easy

Featured source: Bill Boyce, Texarkana, Ark.

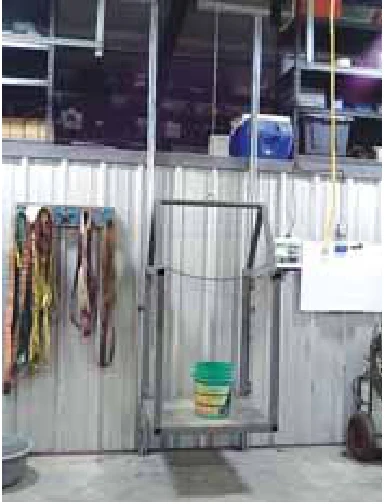
Bill Boyce of Texarkana, Ark., built an inexpensive elevator to access an overhead storage area in his shop.

“I made the elevator frame from 2-in. by 2-in. tubing that was leftover from another project,” he says.

“The power is supplied by a repurposed 2,500-lb. winch from a side-by-side.”

Boyce attached the “car” to common sliding barn door roller channels with the matching rollers.

“These were purchased new, and they keep the car very stable,” he says.

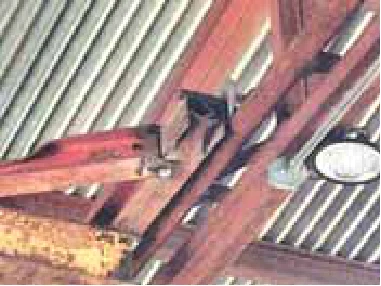
“I attached the channels to the wall’s framework, and the winch is mounted to a truss beam above the car. The winch is controlled by a corded remote that travels with the car.”

The project took him about 2 days. Boyce’s main expense was purchasing the barn door tracks and rollers, which cost about $275. He estimates that other costs came to $50.

“The winch to raise and lower the car, the battery to power the winch, and the metal to build the car were all repurposed items I had on hand. So, my total cost was about $325.”

Boyce’s winch is rated at 2,500 lbs.

“I use the elevator to move heavier items to the overhead storage area in my shop, items that would be awkward to carry up the stairs.” Overall, the project has worked exactly as planned.

“My only advice to someone would be to build a sturdy car and have a secure mounting for the winch.”

Contact: FARM SHOW Followup, Bill Boyce, 13194 Hwy 296, Texarkana, Ark. 71854 (ph 870-645-2254; bboyce@swat. coop).

From the archive · Full text
Feature story

Repurposed Fans Help Around Shop

Featured source: William Greyerbiehl, Bad Axe, Mich.

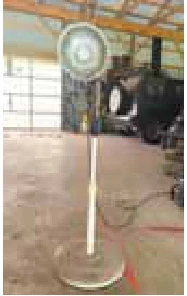
William Greyerbiehl of Bad Axe, Mich., repurposed two broken XL tall shop fans for his workshop.

“I turned a fan base into a holder for my trouble light,” he says.

“When working on my vehicles, I’m always looking for a place to hang a light. The thought came to me that I could use that disabled fan. The fan has an adjustment to raise or lower it for the best work height. It’s simple to do; you just put a block of wood where the fan motor was.” He repurposed the second fan to keep his workshop comfortable.

“I had no room on the floor, and it was getting in my way,” he says.

“So, I got to thinking for a place to put it and decided to hang it from the ceiling above my woodstove. When the fan gets going, it moves heat around my shop.”

Contact: FARM SHOW Followup, William Greyerbiehl, Bad Axe, Mich. 48413 (ph 989-550-8391).

From the archive · Full text
Feature story

Pickup Sideboards Made From Diamond Plate

Featured source: Peter Sowinski, Hammondsport, N.Y.

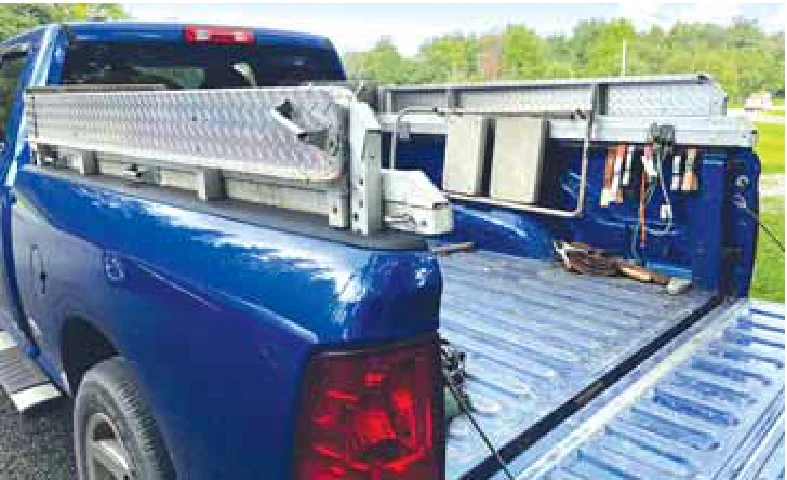
“I’m always hauling items that have to be tied down in the truck box, so I made rugged side panels out of used diamond plate truck running boards,” says New York antique dealer Peter Sowinski.

“They protect the top of the truck box, and the aluminum handles I mounted on the sides work great to attach tie-down straps.” Hooks on the inside hold a ladder, straps and other tools.

Sowinski says nothing he hauls in the box of his Ram pickup will damage or dent the custom side panel extensions. He bought the used boards at an auction along with other scrap aluminum and formed the parts into rugged 14-in. high-side box extensions.

Mounting brackets on the original running boards elevate the side boards about 4 in. above the top of the truck box. That space is filled with two pieces of square aluminum tubing that run the length of the box. Both pieces are bolted to aluminum posts and bolted into the stake pockets on each end of the pickup box. Sowinski cut two 2-in. by 8-in. planks for the front panel and bolted each end to the corners of the diamond plate sides. He says the sides and front are so sturdy they don’t even squeak or rattle.

Contact: FARM SHOW Followup, Peter Sowinski, Wild Goose Chase Antiques, Hammondsport, N.Y.

From the archive · Full text
Feature story

Ontario Farmers Solve Tractor Fuel Intake Problem

Featured source: Wayne Hopper and Bill Garniss, Brussels, Ontario, Canada

In April 2023, Brussels, Ontario, farmer Wayne Hopper bought a used Deere 8650 4-WD tractor from a farmer near Aylmer, Ontario, thinking he’d gotten a good deal. However, as he drove it to a dealer in Walton, Ontario, to hook up a field cultivator, the tractor stalled on the road. Hopper says he was disgusted, so he called the seller, who told him to change the fuel filters because they’d been a problem.

“That fixed the problem for a few hours, but the darn tractor stalled again,” Hopper says.

“At that point, I was thinking I probably bought a lemon.” He called Huron Tractor, a Deere dealer in Blyth, Ontario, for help. Mechanics discovered the fuel tanks had sludge in the bottom that needed to be dumped.

“The cost to do that was $6,000, but that got the tractor running,” Hopper says.

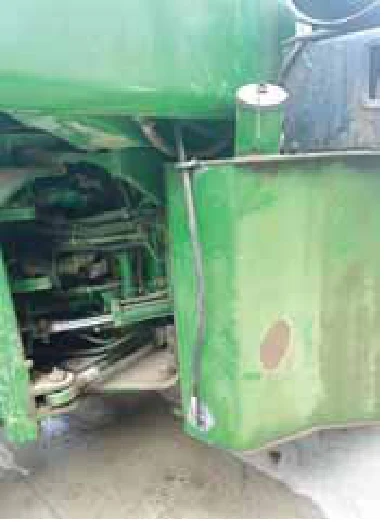
In the spring of 2024, Hopper used the tractor for tillage, and he says, “The same engine stalling crap started again. I drilled a hole in the fuel cap and attached a rubber hose, drawing fuel out of the tank so the tractor would run. Then I had a mechanic from Huron Tractor out again to keep it running. That was another $1,000.”

Hopper told his neighbor Bill Garniss about the issue, and together, they decided the problem wasn’t the tank or the filters but probably involved the steel fuel pickup line in the tank. Hopper says, “We decided the line was either crushed or broken. Bill drilled a hole in the side of the fuel tank about 2 in. up from the bottom. We installed a fitting with an external hose to bring fuel up to the lift pump and filters.”

Hopper says the tractor ran perfectly after they installed the new line, and he didn’t experience any more stalling issues during spring 2024 field work.

“Bill and I figured the farmer sold the tractor because neither he nor his dealer could figure out the problem,” Hopper says.

“Meanwhile, Bill and I, a couple of dumb farmers from Ontario scratching our heads and thinking out loud, fixed the problem. Apparently, the dealers don’t know everything.”

Contact: FARM SHOW Followup, Wayne Hopper, Brussels, Ontario, Canada.

From the archive · Full text
Feature story

Shop Built Overhead Bridge Crane

Featured source: Frank Surber, Peacock, Texas

Frank Surber built a new shop in 2023 and soon found that two jib cranes, two chain hoists and an unwieldy forklift so large that he couldn’t turn it around inside were causing more problems than they were doing good. Surber built a heavy-duty bridge crane suspended from two ceiling trusses to solve his hoisting needs.

Surber says his crane design is similar to an old roller coaster where the wheels are profiled to fit the outside of pipe that serves as a track.

“I built my trusses strong enough, so I didn’t need extra rails or beams for the crane to hang from or ride on,” Surber says.

“My truss calculations show they can support a 10,000 lb. load at the center of my 68-ft. span. My 14-ft. bridge will hold 6,000 lbs. at the center of the span, but I’m only planning on installing a 1-ton hoist.

He used 2 7/8-in. oilfield pipe to produce rails that the crane rides on. To attach the pipe to the roof trusses, Surber welded 1/2-in. by 3-in. flat bars spaced every 2 ft. across the building’s span.

Surber made the rollers out of 3 1/2-in. round bar, first boring a 2-in. hole through the center, then welding flanges on each end. He machined the locations for 6306 bearings with a 30 bore by 72 OD and 19 mm wide. He used two old cross rails from a Globe 8,000-lb. four-post lift for end trucks and bracing the bridge.

Surber says he built the crane without any special plans, and it was just what he needed.

Contact: FARM SHOW Followup, Frank Surber, Peacock, Texas.

From the archive · Full text
Feature story

Paint Sprayer Powered By Cordless Drill

Featured source: Graco

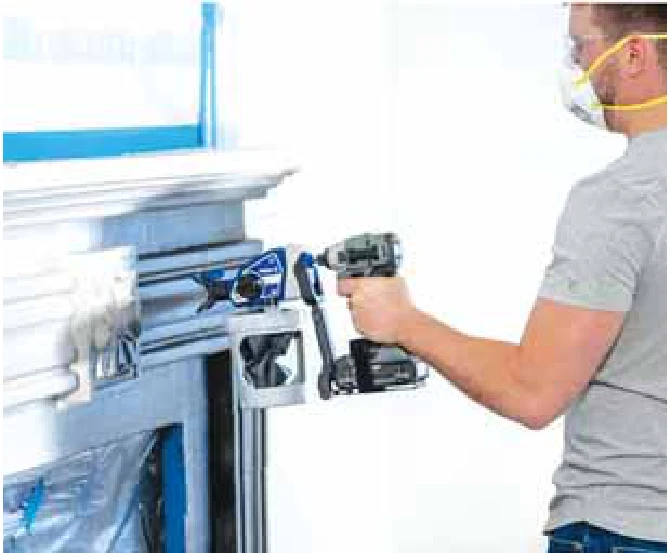
Graco has released the TrueCoat 360 Cordless Connect Drill Sprayer, a paint sprayer that pairs with a cordless drill for easy, mess-free painting.

The entire product line of paint sprayers lets you achieve professional quality results at home without the inconvenience of rollers and brushes. Graco claims it’s possible to finish painting projects up to 15 times faster with its airless sprayer without the risk of drips or added cleanup hassle. It’s well-suited for tackling doors, trim, furniture, interior walls, ceilings, decks and fences and lets you achieve a professional-level finish with a single coat—no paint thinning necessary.

The TrueCoat 360 is compatible with most major brands of drills, drivers and impact drivers. It’s built with a stainless-steel piston pump for a full range of pressure for unthinned paint or stain. Thanks to VacuValve Technology, it’s possible to spray in any direction without losing primer, even upside down. The sprayer comes with a reversible spray tip for maximum efficiency in case of a clog. The included FlexLiner Paint bag offers fast cleanup and can be recycled or reused.

Customer reviews indicate many users love the TrueCoat 360. It’s praised for its consistent spraying capabilities and convenience of use without a cord. Some shared that cleanup is straightforward but tedious. In a few cases, customers had clogging problems that rendered the sprayer useless after a few uses.

Every purchase comes with one paint tip and stain tip, an inlet filter, two 32-oz FlexLiner bags, an easy-fill funnel and strainer, seal lube and a quick start guide. It retails for $189 and can be found at Lowes and Home Depot. Five corded models range from $189 for a DIY single-speed sprayer to $539 for a corded PRO line model. There’s also a $919 PRO cordless variation that runs off a DeWalt battery.

Contact: FARM SHOW Followup, Graco (ph 800-690-2894; www.graco.com/us/en.html).

From the archive · Full text
Feature story

Offset Socket Extension Gets In Tight Places

Featured source: Anex Offset Socket Extension

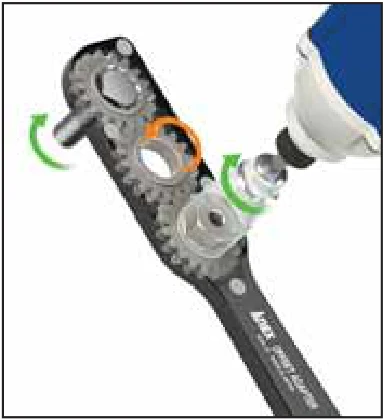
The Anex offset socket extension lets you use your power ratchet/driver in places it wouldn’t otherwise fit. It’s just over 9 in. long, less than 2 in. wide and only 3/8 in. thick, so it gets into tight spaces. The gear drive power transfer is also handy for use with pass-through sockets on threaded rod or long bolts.

The offset socket extension is made in Japan and can be found on Amazon. Prices vary from $95 to $150, depending on included items. It’s also available on eBay with a slightly different combination of adapters and sockets. Prices vary. The carbon steel tool is powder-coated black with silver adapters for sockets.

While the extension tool weighs less than 3/4 lb., one reviewer pointed out that it requires two hands to operate, one on the wrench and one on the driver. See their video for details on a workaround. They used an older driver with a bracket to attach the tool to the driver, allowing them to use it with one hand.

An Amazon reviewer noted that the tool was a great alternative to using a hand ratchet wrench in a space that allows only one or two clicks.

Contact: FARM SHOW Followup, Anex Offset Socket Extension (www.amazon.com or www.eBay.com).

From the archive · Full text
Feature story

Air Filter Cleaner Saves Money And Time

Featured source: Shawn Peterson, Woonsocket, S.D.

As a farmer, Shawn Peterson was frustrated with how long it took him to clean farm equipment air filters every day before heading to the field to harvest corn and soybeans. So, 14 years ago, he built his own cleaner and started manufacturing and selling Air Filter Cleaner Tool Kits from his South Dakota farm business, Pete Industries LLC.

“This is one of the first that rotates and regulates air pressure. Others are attachments for air compressor wands which risk filter damage,” says McKenzy Peterson, marketing executive for the family business.

“Our tool is precision machined to prevent high-pressure damage. It won’t harm the filter.”

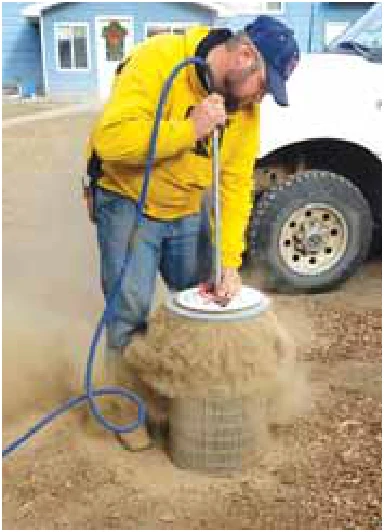
The rotating nozzle has three ports with a quick-connect mechanism to hold interchangeable arms. The arms are cut to size, keeping them 1 to 1 1/2 in. away from the inside of the radial sealed air filter. Six solid tapered disks make up the lid to seal the top of various filter sizes ranging from 4 to 11-in. ID. When the tool is attached to an air compressor and the ball valve is open, raise and lower the 25-in. galvanized shaft inside the filter while the nozzle spins, blowing air from the arms and removing dust and debris from the inside out.

It only takes about a minute per filter compared to the 10 to 20 min. her dad used to take cleaning filters, Peterson says. The cleaner is built with durable materials that won’t break. The rotating nozzle is composed of stainless steel and Delrin®, some of the toughest materials known to mankind.

“It’s an investment that solves a problem and pays for itself, as its price of $289 is comparable to filter costs,” she says. With the Air Filter Cleaner, filters can be safely reused longer.

Plus, clean filters reduce fuel consumption by as much as 5 gal./hour, according to published research studies. That adds up significantly when considering all the equipment used during harvest and the price of diesel.

The standard-sized Air Filter Cleaner tool is perfect for heavy equipment filters in many industries, including agriculture, construction, mining, forestry and more. The Petersons also make and sell a larger version for $325, which is mainly used for manufacturing filters up to 14-in. ID in large dust collection systems and for powder coaters. The XL Air Filter Cleaner tool offers an optional 40-in. shaft in addition to the 25-in. shaft. Custom shafts of any size can be manufactured upon request.

“We offer a lifetime warranty on the rotating end,” Peterson says.

“The Air Filter Cleaner is a strong tool to last farmers their whole lives.”

It can be ordered on the business website, which includes videos of the cleaner in action.

Contact: FARM SHOW Followup, Air Filter Cleaner, Pete Industries LLC, 115 Twin Lakes Rd., Woonsocket, S.D. 57385 (ph 605-796-4288; [email protected]; www.airfiltercleanersd.com).

From the archive · Full text
Feature story

Custom Work Benches Built To Last

Featured source: Peter Dyck, Arcadia, Fla.

Dyco Ventures of Arcadia, Fla., builds heavy-duty workbenches, welding carts, and other parts storage solutions. Founder Peter Dyck built the benches for personal use in 2003 but quickly realized that others would benefit from the design. He began the company in 2006, focusing on helping friends and local businesses, but word spread quickly. The product line has since expanded to include parts cabinets, welding tables, upper cabinets and more.

“We also build truck toolboxes with drawers,” says company representative Jadin Dyck.

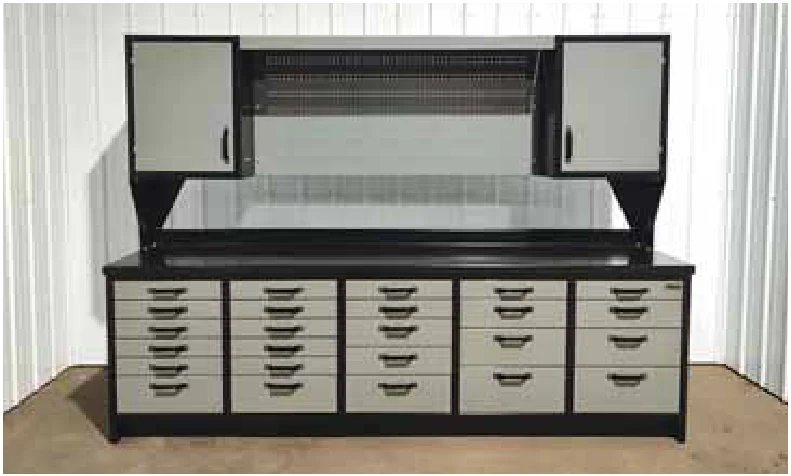
“They’re something we stock here, but the workbenches are made to order and shipped to the customer’s door.” Dyco workbenches offer 300-lb. capacity drawers, heavy-duty frames with welded square tubing, and optional cabinets and pegboards. They include a solid wood substrate under a powder-coated steel top (an optional upgrade to a stainless-steel top is available) and heavy-duty drawers with a four-bearing glide for smoother operation. Customers have a choice of seven different drawer options for each drawer bank. All design, construction, finishing, crafting, and shipping occur at a single location. Each workbench has a high-quality, powder-coated finish available in seven standard colors. Each arrives fully assembled and ready for use. The workbenches are built to order, so it’s best to reach out directly for a quote based on your specific requirements.

“Customers can fill out a quote request form online or call us,” says Dyck.

“Our product is heavy-duty, built for a lifetime of use, and we build it right here in the USA. Prices start at $2,000 and can go up to around $15,000 with custom options.” Contact: FARM SHOW Followup, Dyco Ventures, 2692 NE Nat Ave., Arcadia, Fla., 34266 (ph 863-491-7211; [email protected]; www.dycoventures.com).

From the archive · Full text
Feature story

His Handcart Also Moves Sideways

Featured source: Charles Bowen, Valley City, N.D.

Charles Bowen’s handcart can go forward or back but can also roll left or right. His custom design is ideal for moving large materials through a narrow doorway.

“I’ve been a welder all my life and often wondered if I could move long tubes, steel plate or plywood sheets through a doorway without taking them off the cart,” says Bowen.

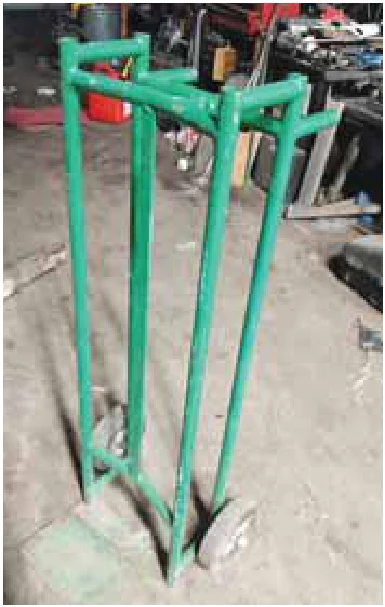
Bowen gave the idea a lot of thought and devised a working solution. His handcart is about 54 in. high and about 18 in. wide with a standard-size nose plate. However, that’s about all that’s standard about his handcart.

Most handcarts have a simple two-dimensional frame, i.e., uprights with hand holds attached at the top and the nose plate attached at the bottom. Usually, wheels are mounted to the rear of the frame.

Bowen designed and fabricated a handcart with a two-part frame, mostly from 1-in. OD black pipe. The standard upright and nose plate are connected to a rear frame with rotating uprights and hand holds.

Short stubs on the top and bottom of both sides extend to the rear from the front frame. Each stub ends at a T.

Bowen bored out the Ts to hold 3/4-in. black pipe uprights and allow them to rotate in place. Wheels are attached near the bottom of the rear uprights. At the top of these uprights, hand grips extend to the rear and the inside of the frame. A U-shaped piece of steel slips over the inside grips and retains them in place when moving the handcart forward and back.

“When I want to move the handcart to the side, I remove the retainer and rotate the rear grips into the center position,” says Bowen.

“When I replace the retainer, the wheels are locked in the side rolling position.”

Contact: FARM SHOW Followup, Charles Bowen, 3175 117th Ave. SE, Valley City, N.D. 58072 (ph 701-840-7678; [email protected]).

From the archive · Full text
Feature story

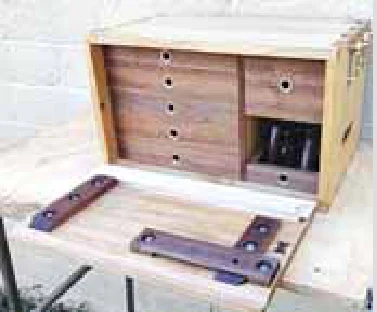
Handmade Tool Chest Doubles As A Workbench

Featured source: Dr. Al

Dr. Al knows of many different sizes and types of toolboxes he could’ve bought for his personal use, but since he’s an accomplished woodworker, he decided to make one of his own design.

“Mine is a combined tool chest and workbench, made out of sweet chestnut and American black walnut,” Al says.

“I did all the woodwork with hand tools except for a few cuts with a bandsaw and all the metalwork with power tools.”

The front of the box doubles for what Al calls a shooting board for shooting square edges and miters. It has drawers holding various hand tools he uses to make simple wooden boxes.

The back of the chest has a handmade vice with a leather jaw. The uprights provide a firm surface to clamp against rather than a solid back while allowing for wood movement because of the narrow slats. The diagonal piece stops racking while he planes on the top surface of the chest. Al says the vice holds boards securely for sawing or planing on the edges and ends. Wide boards can be held by removing the middle vice screw.

The vice can also be flipped around so the leather jaw faces out and the vice screws are placed in the slotted holes. It can then be raised, providing a stop, so boards can be securely held while still giving access to the top surface.

Al says he built the box entirely with hand tools to practice his hand-tool woodworking skills. He says he learned many techniques while working on the project part-time over a year.

“This was the first project where I cut dovetails without any saw guide,” Al says.

“It’s also the first project where I’ve cut those intricate dovetails on thick wood and the first project where I made wooden drawers with half-lap joints. One of the wood pieces had a blemish that Al repaired with two different Dutchman graving pieces, one a decorative butterfly in a contrasting wood and a discrete version for grain-matched repair.

To eliminate dust, Al finished the tool chest surfaces with a smoothing plane rather than sandpaper. He used a Scotch-Brite pad to rub surfaces between coats of finish with equal parts of pure tung oil, satin varnish and white spirit.

Al says the chest is the largest and most difficult project he’s ever done, and he’s extremely pleased with the results.

“I even tried photolithography for the first time to etch numbers into the top of each drawer to help fit them in the right place after they’re removed when the chest is in use.”

Contact: FARM SHOW Followup, Dr. Al (www.cgtk.co.uk/woodwork/handtools/traveltoolchest).

From the archive · Full text
Feature story

Make Moving Snowplows Easy

Featured source: Buyers Products Company

If mounting the snowplow on your pickup takes longer than moving snow, you might want to invest $100 in a Rol-A-Blade caster set. Each of the three small dollies has a groove in the molded poly center to hold the plow in place. The cast nylon casters (including a locking caster) on the dollies make it easy to move the plow in place to align it with the pickup. With a heavy-duty, powder-coated steel cart and a 350-lb. weight capacity for each dolly, Rol-A-Blade can hold plows of all sizes. It can easily move and store the plow during the off-season. Buyers Products Company manufactures it, and it’s sold through many of the Ohio company’s distributors, as well as online through Amazon and other sites. Prices start at $100 online. Customers like the ease of movement and the plow installation on the truck, but several mentioned that the wheels could be more durable and larger.