Practical ideas from FARM SHOW MagazineSubscribe · Free issue · Send us your shop tip
Subscribe to FARM SHOW
Issues / Vol. 26, No. 2 (2002)

Vol. 26, No. 2 (2002)

Money-Saving Repairs & Maintenance Shortcuts · Printed section pp. 38–41

34 selected entries · Complete text of selected entries

This issue’s section includes reader tips and feature-length shop stories. Held items and editorial notices are not reproduced.

Archive text: prices, coupons, availability and contact details reflect the original publication, not current offers. Reader methods are not universal instructions; follow manufacturer guidance and proper safety practices.

Reader shop tips

From the archive · Full text
Reader shop tip

Rex Gogerty

Rex Gogerty, Hubbard, Iowa

“There are a million uses for duct but here’s a use I came up with for a roll of tape I carry on my tractor. I ran a bunch of tape from a set of hoses to a hook on the back of my tractor. This tie-up kept the hoses from rubbing on the 3-pt. quick hitch.”

From the archive · Full text
Reader shop tip

Bob Sampson

Bob Sampson, Petersburg, Ill.

There are a lot of old furnace circulation fans around. Bob found a way to use one as a cooling fan in his shop. The problem was getting it placed just right. Sampson solved the problem by mounting one on a 2-wheeled stand fitted with an adjustable third leg that lets him wheel the fan around the shop and aim it wherever he needs it.

“The high-capacity fan really keeps the shop cool on hot days,” says Sampson.

From the archive · Full text
Reader shop tip

Dan Pierce

Dan Pierce, St. Clair, Mo.

“In the last issue of FARM SHOW, a fellow reported that his 2000 Deere Gator was leaking gas into the oil. I thought an experience I had with an Allis Chalmers 720 tractor might help. It was leaking gas into the crankcase. We tried everything to solve the problem but it turned out to be a leak in the fuel pump. The pump mounts at the top of the engine. It only leaks when the engine is not running. It turned out to be the diaphragm leaking. Once I fixed that, the problem was solved.”

From the archive · Full text
Reader shop tip

Greg Hemming

Greg Hemming, Esterhazy, Sask.

“I’ve had trouble with water getting into gas or diesel fuel tanks on tractors with a small vent hole in the fuel cap. When it rains or there’s a lot of moisture in the air, I have a problem if the tractor’s outside. I solved the problem with a straight-sided liter-sized plastic pop bottle. I cut off the bottom 5 in., then made a couple V-shaped notches along the edge to vent it. Since I came up with the idea, I haven’t had any more problems with water.”

From the archive · Full text
Reader shop tip

Leon Leinbach

Leon Leinbach, New Tripoli, Penn.

“We made a modification to our Deere 6650 forage harvester. These machines do not blow haylage very well because of the long spout and insufficient airflow from the blower. We simply added a small squirrel cage fan under the spout about halfway back and run it at about 1,900 rpm’s. It can now blow haylage to the back of the wagon. The fan is powered by two DC 24-volt electric motors, each with one horsepower. We added two 24-volt alternators, one to the engine and one to the chopper drive. The fan starts when the cutterhead is engaged. Total cost was abound $1,750. Hydraulic power may have worked as well but this machine does not have auxiliary hydraulics.”

From the archive · Full text
Reader shop tip

Olaf Nieslony

Olaf Nieslony, Barrhead, Alberta

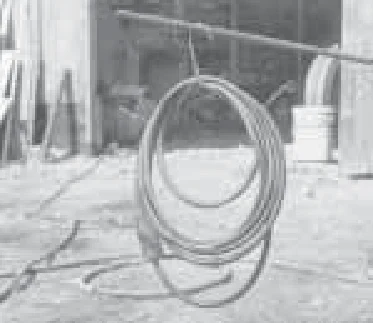
Here’s a handy way to hang hoses, electric cords, and ropes. Just take an ordinary wire hanger. Flatten the wires together, leaving the hook in place. Twist the wires on either side and then bend each side into a “V”. The coil of hose hangs over the the two “V”s and you use the hook to hang it up. What’s nice about this simple idea is that it wraps around the hose on both sides, keeping it from unraveling.

From the archive · Full text
Reader shop tip

Neil Everts

Neil Everts, New London, Wis.

“To conserve space in my small shop, I came up with a sawhorse that slides out from under my work bench. By laying a piece of plywood on top of the sawhorse, I can also use it as a table. The sawhorse slides back and forth on a pair of 2 1/4-in. long, 1/2-in. dia. pipes that serve as rollers.

“

From the archive · Full text
Reader shop tip

Jimmy Yokum

Jimmy Yokum, Petersburg, W. Va.

“I use Aldor replacement spark plugs in any tractor that has spark plug fouling problems and low compression (A.L. Doering Spark Plug Corp., 120 Marine St., Farmingdale, N.Y. 11735 ph 800 886-7074; Website: www.aldorsparkplug.com). These spark plugs are engineered specifically for engines that require a more efficient spark. They’re equipped with a Thermo reactor head that produces extra thrust ignition to provide faster starting, increased power, increased fuel economy, and reduced emissions. The thermo-reactor head produces a hotter spark when the engine is cool so these spark plugs will even burn in oil. As soon as the engine reaches operating temperature, the spark goes back to its normal heat range so that it doesn’t damage the engine.”

From the archive · Full text
Reader shop tip

Dean Veitch

Dean Veitch, Prince George, B.C.

“A few years ago I bought a used 1979 Deere 2130 tractor equipped with hydraulic front wheel assist (Deere offered hydraulic front wheel assist tractors only for a few years before switching to a mechanical drive system). The hydraulic assist models worked off a complicated system of valves, controlled by a module powered by the tractor ’s two 6-volt batteries.

“After a couple years the front wheel assist quit working, and at the same time I also had trouble starting the tractor in cold weather. I had replaced the batteries with ones I bought at a Caterpillar dealer. He told me the problem was probably due to a faulty module, which would have cost about $400 to replace.

“One day I used a voltage meter to test the batteries and found that one was low, apparently due to an internal short. Evidently the front wheel assist wouldn’t work because the module wasn’t getting enough voltage, and that was also why I couldn’t start the tractor in cold weather. I replaced the battery with a new one which solved both problems.”

From the archive · Full text
Reader shop tip 1 of 4

Walt Hanefeld

Individual tip 1 of 4 from this reader’s published contribution.
Walt Hanefeld, Continental, Ohio

“The 2 1/2-in. dia. exhaust pipe on my Silver King tractor goes down through the hood and screws into the exhaust manifold. Whenever it rained, water would follow down the pipe and leak into the engine manifold and into the crankcase. To solve the problem, I brazed a belt tensioner idler pulley off a 1988 GM car engine onto the bottom part of the pipe to form an umbrella just above the manifold. I pressed the bearing out of the pulley, then used a hole saw to enlarge the hole so I could slip the pulley over the pipe. I’ve also used this idea on two other tractors. It works great.

From the archive · Full text
Reader shop tip 2 of 4

Walt Hanefeld

Individual tip 2 of 4 from this reader’s published contribution.
Walt Hanefeld, Continental, Ohio

“I first read about Helicoil inserts in FARM SHOW (Vol. 23, No. 5) and now use them to repair stripped threads (Emhart, Heli-Coil, 510 River Rd., Shelton, Ct. 06484 ph 203 924-9341).

From the archive · Full text
Reader shop tip 3 of 4

Walt Hanefeld

Individual tip 3 of 4 from this reader’s published contribution.
Walt Hanefeld, Continental, Ohio

I also use Speedy Sleeves to repair shafts whenever a seal wears a groove in the shaft which causes the seal to leak. Speedy Sleeves provide a new surface for the seal to run on so it doesn’t leak. They can be found at most stores that sell ball bearings.

From the archive · Full text
Reader shop tip 4 of 4

Walt Hanefeld

Individual tip 4 of 4 from this reader’s published contribution.
Walt Hanefeld, Continental, Ohio

“I came up with a handy way to operate air tools in my 2 1/2-car garage-shop. I ran 1/2-in. dia. PVC lines up one wall, along the ceiling, and down the opposite wall. An air compressor is hooked up to a ‘T’ coupler that’s mounted on one wall. There’s also a T coupler on the ceiling, with an air hose hanging down from it, and a coupler on the other wall. Every time I want to use an air tool I just plug it into a coupler. It’s really handy to use because I don’t have to drag air hoses across the floor. I used PVC lines instead of other material because PVC doesn’t draw as much moisture. I use a brass ball shut-off valve to keep air from leaking out of the compressor, and an in-line water filter to keep water out of the lines. I use brass fittings wherever I can in order to further help keep rust out of the lines.”

From the archive · Full text
Reader shop tip

Raymond A. Miettinen

Raymond A. Miettinen, Republic, Mich.

“A U-joint went out on the front driveshaft on my Ford 3/4-ton pickup, which ruined a bearing mount on the transfer case. It would’ve cost a lot to repair so I solved the problem myself. I took the transfer case apart, then cut a 1 1/2-in. wide strip from a coffee can and used a disc grinder to cut notches into it to fit over the gussets. I fitted it around the ribs and used clay to seal it. I centered the new bearing, then installed the snap ring and old bearing on top. I poured lead around the bearing and also put a new seal on the outside. Now it works fine and cost very little. I drilled holes and put small bolts in the gussets in order to make a good bond for the lead.”

From the archive · Full text
Reader shop tip

Ralph Bertram

Ralph Bertram, Winslow, Ind.

“I made a portable shop light by bolting a track light on top of a music stand. I ran a cord up through the music stand and into the light. Now, if I’m working on a car, I set the light right next to the fender. I also use it often for welding work.”

From the archive · Full text
Reader shop tip

Marvin Vlietstra

Marvin Vlietstra, Kalamazoo, Mich.

“We often use our skid steer loaders in wet manure, which gets into the sealed wheel bearings and contaminates the lubricant, ruining the bearings. The only way to get at the grease zerks was to take off the wheels, which is a big job. To solve the problem, we drilled and tapped a hole in the axle housing and then ran a length of copper tubing from the hole to the skid loader’s fenders. Now we grease the bearings much more frequently and as a result the bearings last much longer.

From the archive · Full text
Reader shop tip

E. Yastrubecki

E. Yastrubecki, Paynton, Sask.

“The bottom rear roller bearings starting turning on the shaft on my Hesston 5500 baler. Rather than replace the entire roller, which would have been expensive, I built the shaft back up with JB Weld. It worked 100 percent. I haven’t had any problems in the two years since I made the repair. Best of all, it cost almost nothing. JB Weld is very versatile and long lasting. I’ve found lots of uses for it. It’s hard to believe it works as well as it does.”

From the archive · Full text
Reader shop tip

Vernon Bratton

Vernon Bratton, San Antonio, Texas

“I’ve found that ordinary distilled white vinegar works great for getting rid of rust. I can pour it onto rusted metal one day and the next day the rust is gone. However, the rust will eventually come back again if I don’t treat it again with something. I’ve used it on a lot of things including bolts, tools, old horseshoes, and hand saw blades. One drawback is that if the vinegar spills on my clothes, I can’t wash it out.”

From the archive · Full text
Reader shop tip

Teddy and TJ Shambaugh

Teddy and TJ Shambaugh, Cerro Gordo, Ill.

“To make a low-cost creeper for our shop, we mounted the seat off an old riding mower on an angle iron frame supported by four castor wheels. The seat swivels on a short length of pipe bolted to the center of the frame. The seat cushion was all torn up so we removed it. It works good for working on wheel bearings on semi trucks, changing sweeps on field cultivators, etc. Parts and tools can be carried on a metal screen under the seat.”

From the archive · Full text
Reader shop tip

Richard and Larry Martin

Richard and Larry Martin, Lincoln, Ill.

“We use an engine block heater to warm up our trucks and tractors before we start them on cold winter mornings. To save on electricity, we installed an electric-operated timer that turns the heater on automatically at pre-selected times, usually about two hours before we want to use the vehicle.

“

From the archive · Full text
Reader shop tip

Intromark

Intromark, Inc., 217 Ninth St., Pittsburgh, Pa. 15222 ph 800 851-6030; Website

www.intromark.com): “Our new Propane-To-Air adapter turns 4 to 40-lb. propane tanks into compressed air tanks. It allows you to reuse older propane tanks with or without an overfill protection device. The unit connects directly to the tank. After purging the propane completely from the tank, you attach the adapter and fill the tank using any standard tire inflation nozzle. The converted container works great to inflate tires, blow dust and dirt off surfaces, or complete any task that requires a blast of air.

“The kit includes an adapter with pressure gauge, a 5-ft. hose, and tire chuck. Sells for $19.95 plus S&H.”

From the archive · Full text
Reader shop tip

Dennis Westphal

Dennis Westphal, 538 Eaken Ave., Buffalo, Minn. 55313 (ph 763 682-5630 or 612 418-5521; E-mail: [email protected])

“My son Dan and I recently came up with a handy plastic storage case that makes it easy to store chainsaw chains and keep them from getting tangled up after they’ve been removed from the bar. The case is built in two halves that slide together over the chain and measures 1 1/2 in. wide by 1/2 in. deep. It measures 15 in. long when fully closed and has a hole at one end so you can hang it on a wall. The case will accept chains up to 24 in. long. It sells for $1.50 plus S&H.”

From the archive · Full text
Reader shop tip

Richard Senters

Richard Senters, 216 S. Chestnut St., Beloit, Kansas 67420 (ph 785 738-5462)

“I recently designed an air vent that installs in the lid of a 5-gal. bucket and keeps the bucket’s contents from sloshing out unevenly when pouring.

“I start with an empty bucket. The first step is to remove the core from a tire valve stem.

Then I drill a hole in the bucket lid that’s the same size as the middle stem of the valve. To ‘seat’ the valve stem, I stick it up through the hole and then drop a string down through the valve and tie a large washer to the end under the valve. Then I pull upon the string until the valve stem is sealed in the lid.

“When not in use, I put the valve stem cap back on the valve.”

From the archive · Full text
Reader shop tip

Neal McCleary

Neal McCleary, 325 McCleary Rd., Elkton, Md. 21921 (ph 410 398-3556)

“A manually-controlled selector valve purchased from Northern Tool Equipment (ph 800 556-7885) allows us to use one remote outlet on our tractors to operate two hydraulic cylinders. The valve costs less than $100, compared to electric/hydraulic converters that that can cost up to $500.

“The photos show the selector valve mounts on a steel plate that bolts to the tractor. A pair of hydraulic hoses run from the valve’s two center-mounted plug-ins to a single remote outlet on the tractor. Hydraulic hoses run from the cylinders to a pair of plug-ins on each side of the valve. The photos show the valve with the knob on top of it in the ‘up’ position. I can control either cylinder by pulling up or pushing down on the knob.”

From the archive · Full text
Reader shop tip

Doug Phillips

Doug Phillips, Zearing, Iowa

“I used a 1/2-in. dia. wooden dowel to keep the V-belt on back of my Deere 8820 combine, from flopping around too much. The V-belt drives the combine’s straw chopper and is located alongside the back part of the combine. The 8820 combine normally comes factory-equipped with two hollow metal “bumpers” that mount vertically on the side of the combine, one above the other, The bumpers are designed to keep the belt from contacting the side of the combine and ruining the paint job. However, I bought the combine used with only the bottom bumper still in place.

“The belt bounced around quite a bit on top of the bumper. I was worried it might catch on the bumper and cause the straw chopper to plug up. I made a quick fix in the field one day by sticking a broom handle into the lower bumper. Later I replaced the broom handle with a dowel.”

Shop feature stories

From the archive · Full text
Feature story

“Tractor Doctor” Makes House Calls

Featured source:

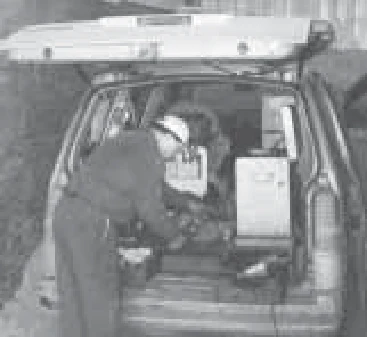
For nearly five years, Bob Baker has operated an unusual tractor and machinery repair business from his home near Clay, New York. He bills himself as “The Tractor Doctor,” and like a country doctor of old, he makes house calls. Nearly all his work is done at the customer’s location, whether it be a shop, garage or driveway.

Baker specializes in Belarus tractors, having worked at a Belarus dealership for about 25 years.

“I’ve worked as a mechanic since 1976 and grew up helping my father do machinery maintenance and repair work on our farm,” he says.

“I’ve been to Russia for service training on Belarus. But I also work on Zetors and I have a lot of experience with most of the U.S.-made tractors, too.”

Baker prefers working on tractors from the pre-electronic era, but will take on just about any job.

“Once in a while a customer wants me to do the work in my own shop,” he says.

“But most of the time, I can make the necessary repairs at the farm for less than if they had to truck the tractor to a repair shop.”

He notes that many customers don’t have inside storage for their tractors, forcing him to work outdoors in winter.

“I carry a 50,000 btu kerosene heater with me if I need to warm up parts or fluids,” he says.

Customers pay an hourly rate from the time he leaves home until the time he returns.

“My hourly rate is lower than that charged by most repair shops,” he says.

“And since they don’t have to pay for trucking, they usually come out ahead.”

Some of his customers work right alongside him and that usually saves them some money, too.

“They can also watch to make sure I’m doing the work like they want it done. And it gives me a chance to visit with them about the machine, what went wrong and what they might have done to prevent it,” he says.

“Some just come out to talk while I’m working, but most realize they’re paying for all the time I’m there, so unless they’re helping out, they don’t take up too much of my time just talking.”

He runs a few newspaper ads to promote his business, but much of his new business comes from satisfied customers telling their friends and neighbors.

Baker himself puts in eight to ten hours most days and says there’s seldom been a day when wasn’t busy since he left his job with the dealership.

Contact: FARM SHOW Followup, Bob Baker, 8694 Burnett Road, Clay, N.Y. 13041 (ph/fax 315 699-2459).

From the archive · Full text
Feature story

“Lazy Susan” Tool Cart

Featured source:

No matter what tool Jan Parker needs it doesn’t take long to find it, thanks to his “Lazy Susan” tool cart.

“It’s much faster and easier than digging through a tool chest, looking for a wrench or socket that might not even be in there,” says the Reedsville, Ohio, farmer.

The cart measures 4 by 5 ft. and carries a 7-ft. high, 4-ft. wide steel frame that holds the “Lazy Susan” - four panels of plywood with all eight sides fitted with tools. The plywood panels attach to a metal shaft that runs vertically down the middle of the frame. The bottom end of the rod rotates on a bearing installed in the floor.

He hangs tools by category on all eight sides, with wrenches on one side, sockets on another side, screwdrivers on a third side, etc.

“I arrange the tools so the smallest one is on the left and the largest on the right,” says Parker.

“If I’m working on a tractor or other equipment where I need to use several different tools, I just pull the cart over there with me instead of having to walk back and forth all the time. I mounted 500-watt Quartz lights and electrical receptacles on top of the Lazy Susan’s frame so no matter where I’m working I’ll always have plenty of light. I had been using a rolling tool chest, but I got tired of sorting through the drawers looking for what I needed.

“On some panels I just drive nails to hold tools. I attached 2 by 6’s sideways to some panels and bored holes in them for hanging screwdrivers, chisels, pliers, etc.”

Contact: FARM SHOW Followup, Jan A. Parker, Box 41484 St. Rt. 7, Reedsville, Ohio 45772 (ph 740 667-3881).

From the archive · Full text
Feature story

Battery-Powered “Go-Anywhere” Welder

Featured source:

Here’s a truly portable welder you can use anytime, any place and you don’t need a powerline connection or a noisy generator to power it.

Called GOWELD, the handy new welder operates on two or three 12-volt deep cycle batteries and uses any available welding wire, either self-shielding (flux-core, FCAW) or gas shielded (solid, MIG/MAG).

The GOWELD system, from Broco, Inc., Rancho Cucamonga, California, features state-of-the-art technology that allows permanent, quality welds. The welder has a number of settings for wire speed and amperage.

GOWELD welds material ranges in thickness from 1/8 to 1/2 in. An accessory voltage control unit (coming by the end of this year) gives GOWELD what the company calls “true variable output voltage” that allows it to weld metal as thin as 18 gauge without burning through.

The goal in developing GOWELD was to design a highly portable welding tool that will operate anywhere, in any weather so repairs can be done easily in the field or job site.

Tom Joos, GOWELD product manager, recommends the system for professional welders, heavy equipment service technicians, contractors, HVAC techs, miners, farmers, ranchers, ornamental iron workers, and do-it-yourselfers.

The company introduced GOWELD to the market in January, 2002. Price is $695.00, about the same as a mid-priced 220 V 3 phase MIG/MAG machine.

Contact: FARM SHOW Followup, Tom Joos, product manager, Broco Inc., 8690 Red Oak St., Rancho Cucamonga, Calif. (ph 909 483-3222 or toll-free 800 845-7259; E-mail: [email protected]; Website: www.brocoinc.com).

From the archive · Full text
Feature story

Expert Welder “Explains” Electrodes

Featured source:

Expert welder Stan McDonald, inventor of a variety of welding and shop tools, recently wrote the following explanation of different arc welding rods.

“People are always asking me what the difference is between rods so I finally decided to write it down,” says McDonald.

Electrode Identification Electrodes are identified using the A.W.S. (American Welding Society) numbering system and are generally made in sizes from 1/16 to 5/ 16 in. For example, a common electrode is a 1/8-in. E6011. The numbers and letters tell you what it is: The rod is 1/8-in. dia. The “E” stands for arc welding electrode.

Next will be either a 4 or 5 digit number stamped on the electrode. The first two numbers of a 4-digit number and the first 3 digits of a 5-digit number indicate the minimum tensile strength of the weld that the rod will produce.

40 • FARM SHOW • web site: www.farmshow.com • e-mail: [email protected] • phone 1-800-834-9665 Expert Welder “Explains” Electrodes So, “E60xx” indicates a tensile strength of 60,000 psi.

“E110xx” would be 110,000 psi.

The next-to-last digit indicates the position the electrode can be used in.

• Exx1x is for use in all positions • Exx2x is for use in flat and horizontal positions • Exx3x is for flat welding The last two digits together indicate the type of coating on the elecrode and the welding current the electrode can be used with. Such as DC straight (DC-), DC reverse (DC+), or AC. SMAW welding (shielded metal arc welding) is performed using either AC or DC current. Since DC current flows in one direction, DC current can be DC straight (electrode negative) or DC reversed (electrode positive). With DC reversed (DC+ or DCRP), the weld penetration will be deep. With DC straight (DC- or DCSP) the weld will have a faster melt off and deposit rate, and thus will have medium penetration. AC current changes its polarity 120 times a second by itself so the polarity cannot be changed like DC current.

Electrodes & Currents Used Here are examples of the type of current each will work with: Exx10 - DC+ (DC reverse or DCRP) Exx11 - AC or DC- (DC straight or DCSP) Exx12 - AC or DC-Exx13 - AC, DC-, or DC+ Exx14 – AC, DC-, or DC+ Exx15 – DC+ Exx16 – AC or DC+ Exx18 – AC, DC-, or DC+ Exx20 – AC, DC-, or DC+ Exx24 – AC, DC-, or DC+ Exx27 – AC, DC-, or DC+ Exx28 – AC or DC+ Commonly Used Electrodes Here are four widely used electrodes for welding of mild steel.

E6010 – This electrode is used for all position welding using DCRP. It produces a deep penetrating weld and works well on dirty, rusted or painted metals.

E6011 – This electrode has the same characteristics of the E6010, but can be used with AC and DC currents.

E6013 – This electrode can be used with AC and DC currents. It produces a medium penetrating weld with a superior weld bead appearance.

E7018 – This electrode is known as a low hydrogen electrode and can be used with AC or DC. The coating on the electrode has a low moisture content that reduces the introduction of hydrogen into the weld. The electrode can produce welds of X-ray quality with medium penetrration.

Contact: FARM SHOW Followup, Stan McDonald, 402 Rosedale Ave., Foxboro, Ont. K0K 2B0 Canada (ph 613 968-9516; E-mail: [email protected]).

From the archive · Full text
Feature story

Pickup “PowerBox” Provides Portable Power

Featured source:

If you routinely need reliable portable power for service and repairs, check out the new PowerBox from Dynamic Power Source, New Albany, Indiana.

The PowerBox is a combination generator and air compressor to power air tools, electric tools and even a welder. It mounts behind the cab in a pickup bed, just like a toolbox. It contains an electric-start engine and 12-volt battery, generator, compressor, 10-gal. air storage tank, and a 12 1/2-gal. fuel tank. There’s also storage for tools and welding.

The base model features a 20 hp Kohler engine, which powers a 10 kva generator, producing 8,500 watts, and two air pumps, producing a steady flow of 8.6 cubic ft. per minute. Maximum welding power from this unit is 315 amps. It comes equipped to provide both 120 and 240 single-phase power and 230-volt three-phase power, as well. It also has both 1 1/4 in. and 1 3/8 in. regulated air outlets.

Two larger size units are available. Welders are optional. You can choose from stick, MIG or TIG welding kits and you can add a plasma arc cutter or an FCAW welding feeder kit.

Prices range from $4,500 to $13,500 or more, depending on welder and compressor options and engines ordered.

Contact: FARM SHOW Followup, Garry Collins, PowerBox, Dynamic Power Source, Box 936, New Albany, Ind. 47151 (ph toll-free 877 693-7269; Website: www.187 powerbox.com).

From the archive · Full text
Feature story

Gearbox Engine Stand Handles Big Repairs

Featured source:

Every engine repair shop needs a good engine stand. Matt Throener of Matt’s Ag Service, Carnegie, Oklahoma, made his own.

He started by making a sturdy frame out of 4-in. sq. steel tubing. Then he mounted a final drive gearbox from an 860 Allis Chalmers cotton picker on the stand.

“You can find this same gearbox on a Gleaner G combine,” Throener says.

“It has a 21 to 1 gear reduction in it. I put a hand crank and chain on it so I can rotate the engine 360 degrees with hardly any effort.”

On the engine side of the gearbox shaft, Throener attached a mounting plate on it fitted with a length of 3-in. heavy walled pipe. He makes individual brackets to fit the mounting holes on the engines he’s repairing. In the center of the bracket, he attaches a length of 2 5/8-in. drill stem pipe that fits into the 3-in. pipe on the mounting plate. To attach an engine to the stand, he lifts it from the tractor with an overhead hoist and moves it to the stand. Then he mounts the adaptor on the engine and slides it onto the engine stand, securing it with a bolt..

“I had a 903 Cummins V-8 on it recently and it held rock solid,” he says.

“I could rotate the engine to any position and it was still solid and secure.”

He says making mounting brackets for the engines takes very little time, and once he’s made one, he can use it over and over.

“If I have a heavy long block engine, like a 6 cylinder in-line diesel, I have to be a little more careful. The stand is solid enough, but when you’re rotating it, you can feel the weight of the engine on the crank.

“The stand is big enough and sturdy enough to hold the entire engine, including the flywheel and accessories on it,” he says.

Contact: FARM SHOW Followup, Matt Throener, Matt’s Ag Service, Rt. 2, Box 55, Carnegie, Okla. 73015 (ph 580 654-1212; fax 580 654-2117).

From the archive · Full text
Feature story

“Power Pack” Helps Turn Pickup Into A Service Truck

Featured source:

Here’s one of the slickest systems we’ve ever seen for turning your pickup into a service truck. The Anaconda “Power Pack” looks like a standard pickup toolbox but actually contains a generator, air compressor, and welder. Measuring 27 in. deep, the toolbox rests on top of the pickup’s bedrails and is installed with two bolts on each side.

Inside the lockable compartment is a Kohler 5000-watt generator set, an Ingersoll Rand air compressor that delivers 11.3 cfm at 90 psi, and a Miller 130 amp portable wire feed welder. Fits all full-size pickups, long or shortbed, and can also be mounted on a flatbed truck or trailer.

The unit comes with a remote starter and a driver ’s side panel for controlling all machinery in the Power Pack.

“It’s a compact unit that leaves a lot of room in your pickup bed, and comes with top-of-the-line components,” says Tom Hartman, Anaconda Power Pack.

“The bottom of the toolbox is 8 in. off the floor so there’s room to slide cargo under it. The basic unit, without a welder, sells for $7,800. We do sell the Miller 130 amp portable wire feed welder for $920. However, the welder storage compartment is large enough that farmers can buy any other kind of welder they want from their local dealer. If you don’t need a welder you can use the space for another air tank or a bigger fuel tank.”

Contact: FARM SHOW Followup, Anaconda Power Pack, 1080 Nimitzview Drive, Suite 404A, Cincinnati, Ohio 45230 (ph 888 834-5854 or 513 233-9223; fax 513 233-9223;Website: www.anaconda powerpack.com/index.htm).

From the archive · Full text
Feature story

Ford Blower Drive Repair

Featured source:

“Snowblowers installed on many Ford compact tractors from 1980 to 1984 were built by Bervac in Quebec, Canada. They went out of business and Ford no longer stocks parts for these blowers. Parts can only be purchased from a supplier in North Dakota who bought up all the spare parts and charges plenty for them,” says Ron Burkholder, Kawartha Lakes, Ontario.

“I own a Ford 1200. The blower is pretty reliable except for the drive from the front pulley of the engine. I had to rebuild the drive about once a year at a cost of about $1,300 per year. So I decided to solve the problem permanently by mounting a Honda 11 hp. engine directly on the blower.

“Three V-belts run from the engine output shaft to the blower input shaft. The engine has a 6:1 reducer mounted right on the block. At full throttle, this gives me 600 rpm’s, which is just about right.

“The biggest challenge was building the clutch. I mounted the engine on a 1/2-in. thick steel plate that slides back and forth and pivots on the blower. The sliding plate is positioned so the belts just touch the pulley.

To push the engine up to engage the belts, I used a 1 1/2-in. air cylinder with a 3-in. stroke. I purchased a small air compressor for $20 and use it to charge a 20-lb. propane tank, that mounts on a frame at back. It acts as a reservoir. A 3-way valve in the cab controls the cylinder.

“I can now blow snow like never before. With the old drive connected to the 16 hp. engine in the tractor, I had to use first or second gear on the tractor to keep rpm’s up to power the blower. I always feared breaking the drive chain, electric clutch or the clutch shaft itself. Now I run the tractor in 5th or 6th gear with the engine just over an idle. The Honda engine is controlled from the cab with a throttle cable and kill switch. I have to start the engine before getting into the cab.”

Burkholder has a Website with photos and a detailed explanation of what he did.

Contact: FARM SHOW Followup, Ron Burkholder, 9 Columbus St. S., RR 2, Kawartha Lakes, Ontario K9V 4R2 Canada (ph 705 324-7967; E-mail: [email protected]; Website: www.members.tripod.com/rburkholder/)