Practical ideas from FARM SHOW MagazineSubscribe · Free issue · Send us your shop tip
Subscribe to FARM SHOW
Issues / Vol. 32, No. 2 (2008)

Vol. 32, No. 2 (2008)

Money-Saving Repairs & Maintenance Shortcuts · Printed section pp. 36–39

31 selected entries · Complete text of selected entries

This issue’s section includes reader tips and feature-length shop stories. Held items and editorial notices are not reproduced.

Archive text: prices, coupons, availability and contact details reflect the original publication, not current offers. Reader methods are not universal instructions; follow manufacturer guidance and proper safety practices.

Reader shop tips

From the archive · Full text
Reader shop tip

Jim Lacey

Jim Lacey, Dell Rapids, S.Dak.

“A few years ago, a fuel filter plugged on one of our Dodge Cummins pickups. It cost us $2,000 to replace the injection pump. After that I put a gauge in the line after the filter, so I could be aware of dropping fuel pressure and know when to change the filter without guessing. I’ve found that when the pressure drops 3 psi under load it’s time to change the filter.

“This gauge cost less than $30 and took only a little time to install. I think it was a pretty good investment. The gauge is fastened to the top of the dash so it’s easily visible.”

From the archive · Full text
Reader shop tip

Maurice Leighton

Maurice Leighton, Citrus Heights, Ca- lif.

An old microwave is an excellent place to store welding rods to keep them moisture free, says Leighton. He disabled the microwave element so it could not be accidentally turned on. However, the light is still wired to make it easy to see. He installed a plywood bottom with two shelves above it to hold rods.

From the archive · Full text
Reader shop tip

Lamar F. Walden

Lamar F. Walden, Tulare, Calif.

“This is an old one but the concept might help someone. In 1986 I bought a 1978 Oldsmobile 98 4-door diesel sedan. It had a 200 turbo transmission with no overdrive. I made a few long trips and didn’t get very good mileage. So I changed the 200 Turbo to a 200R4 with a lockup converter. On my next trip, I aver-aged 35 mpg. The rear ratio of 2.41 to 1 and the lockup converter did the job.”

From the archive · Full text
Reader shop tip

Duane Thies

Duane Thies, Winside, Neb.

You can buy 12-volt electric scissor jacks for about $60 from several sources (www.northern tool.com; 800-221-0516). The jacks lift up to 2,000 lbs. and have a cord that plugs into a 12-volt power port and a control module on a cord that has up-down control buttons.

“These units work great as jacks, but they can also be used in many other ways by disassembling them. The working part of the jack is a 12-volt motor and gear reduction that drives a threaded rod through a threaded block. With a little imagination, it can be used on a utility vehicle, like a Deere Gator, to dump the box or raise and lower a blade, mower deck, or 3-pt. hitch. It can also be used to turn spouts, open and close slides, pull drawbar pins, operate levers, and so on. It can be adapted to anything with a 12-volt power source. The best thing about it is that it’s easier to install than using hydraulics.”

From the archive · Full text
Reader shop tip

Tom Christensen

Tom Christensen, Blackfoot, Idaho

“As a last resort, for starting a car, truck or tractor when it’s 30 below zero and you don’t have an extension cord or block heater, drain the anti-freeze out, bring it indoors and warm it up to room temperature. Then pour it back into the car and it’ll start up just like it’s summer. Alternately, you could drain out a gallon or so and replace it with antifreeze from a warm vehicle.”

From the archive · Full text
Reader shop tip

Jerry Murray

Jerry Murray, Centerview, Mo.

“When using a multimeter electrical tester, you need a flat surface to set the meter on or someone has to hold it for you so you can see the dial while you use the probes. Since that doesn’t always work out, I use rubber bands to secure the meter to my wrist. I can then handle the probes freely and the meter is easy to see.”

From the archive · Full text
Reader shop tip 1 of 2

Nelson Wenger

Individual tip 1 of 2 from this reader’s published contribution.
Nelson Wenger, Dalton, Ohio

“To store parts and owner’s manuals, I built this 6-ft. long, 6-in. sq. metal drawer that slides into the toolbar on my Case IH 6-row air planter. Its weight is enough to keep it from bounc- ing out of the toolbar when I’m planting. The drawer could be made to any length.

From the archive · Full text
Reader shop tip 2 of 2

Nelson Wenger

Individual tip 2 of 2 from this reader’s published contribution.
Nelson Wenger, Dalton, Ohio

“I use 1-quart oil bottles as storage bins for bolts and small parts in my shop, and built a big plywood shelf divider system to keep them neat and organized. The items are arranged according to their size, with each row of bottles representing a different size. Uniform color caps on each row of bottles make it easy to tell the difference. Bigger 1-gal. jugs could be used for larger items.”

From the archive · Full text
Reader shop tip

Robert Frantz

Robert Frantz, Warsaw, Ind.

“I got tired of having to shift the tongue over by hand on my Deere 24T baler every time I moved from the field to the road. I had two clevis ends from a Deere rotary mower that was never used so I welded them on the baler. Then I bought a 12-in. hydraulic cylinder at a sale for $10, as well as a hose holder and hydraulic hoses. I mounted a restrictor in the line so it won’t move too fast. It works perfect.”

From the archive · Full text
Reader shop tip

Richard Heimberger

Richard Heimberger, Lucas, Ohio

“I have an old drill press with a table that’s adjustable up and down. There was no way to move it except by hand, which was very difficult as the table is heavy, especially with the vise attached to it. I adapted an old lever jack from a 1965 Plymouth car to make a device that I use to raise and lower the table. I made a sleeve to go around the post so it’s loose enough to slide and attached the jack to it. Now I can easily place the table to any height I want. The table is still free to swing to any desired location, as it rides loose on top of the sleeve.”

From the archive · Full text
Reader shop tip

Clarence Peterson

Clarence Peterson, Menasha, Wis.

“The plastic suction hose on my pressure washer tends to curl up, keeping it from reaching the bottom of a 1-gal. jug filled with cleaning fluid. To keep the hose nice and straight I attached a 1-ft. length of copper pipe to it. I drilled two holes through the copper pipe and also through the plastic hose, then put a cotter pin through both holes to secure the pipe and hose together. A hose clamp would work, too.”

From the archive · Full text
Reader shop tip

Isaac Temple

Isaac Temple, Morrison, Ill.

“To take dents out of an auger, I remove the flighting and use a scissors jack with a steel plate welded on top it with a long handle. After measuring the dent, I push the jack in and then turn the jack handle.”

From the archive · Full text
Reader shop tip

Elmer Goheen

Elmer Goheen, Hillman, Mich.

“I use a pressure blaster that I built from a design that I found in a catalog, and for the most part it works good. The only problem is that I wear a welding helmet to protect my face and my breath fogs it up.

“I solved the problem by breathing through a 3-ft. length of 1/2-in. dia. clear plastic hose. I put one end in my mouth and the other end in my pants or shirt. It’s not a very high tech idea, but it works. You could also put a sock or piece of cloth over the end. I inserted a hard plastic mouthpiece into the top end of the hose, which makes it easier to hold in my mouth.”

From the archive · Full text
Reader shop tip

Jeff Lang

Jeff Lang, Newport News, Va.

“In a re-cent issue of FARM SHOW a reader wrote about how he made a small power sander by cutting a notch into one end of a steel rod and inserting a piece of emery cloth, then pinching the end of the rod shut. He then put the rod in a drill chuck. I modified the idea by using a long, skinny cotter pin. It works very well. Recently I used this idea to clean an alternator pulley by folding a 6-in. strip of emery cloth in half. It allows me to have clean emery cloth whenever I reverse the drill. Also, tearing a small notch in one side of the cloth allows me to reach the bottom of holes.”

From the archive · Full text
Reader shop tip

Ian Brent Letterly

Ian Brent Letterly, Lanark, Ontario

“I have a small shed with a concrete floor. To move equipment, I use snowmobile dollies. Just a little shove and the equipment rolls around easily.”

From the archive · Full text
Reader shop tip

Norman Roth

Norman Roth, Wellesley, Ontario

“To loosen up rusted bolts I use industrial strength hydrogen peroxide on them. The hydrogen peroxide softens the rust quickly. However, it doesn’t work if oil is used first. I got this tip from reading FARM SHOW.”

From the archive · Full text
Reader shop tip

Jeffrey M. Heiser

Jeffrey M. Heiser, Vesper, Wis.

“To remove bearing races from a blind hole, run a bead of weld on the race and allow it to cool, then flip the piece over. The race will fall out, or else you can pull it out by hand.”

From the archive · Full text
Reader shop tip

Don B. Dallman

Don B. Dallman, Nokesville, Va.

“My granddaughter had 81 leftover baby food jars that she had saved. I put them to use in my shop by building an octagon-shaped, rotating screw-and-parts holder that really works well. The rotating drum is made from 1 by 4’s attached to a length of 1/2-in. dia. conduit that hangs horizontally from the basement’s ceiling joists. I poked holes in the jar lids, then used ‘liquid nail’ to stick the lids to the boards. I also stapled them on for extra strength. To remove a screw or part I simply rotate the holder until the jar I need is at the bottom.

“I never thought that I would fill all the jars, but I did. Now I’m collecting more jars so that I can make another unit for my garage.”

Shop feature stories

From the archive · Full text
Feature story

Valve Kits And More From TractorKits.com

Featured source: Jim Jones

With more than 280 rebuild, rebore and valve kits available at his online store, chances are that Jim Jones has any engine part you might need. But if he doesn’t have it in stock, he’ll probably know where to get it. For more than 20 years, he and his dad operated a tractor salvage business that grew into a new parts business.

“As people bought salvaged parts, they needed kits to repair them,” explains Jones, who no longer runs a salvage yard.

“We have hundreds of kits for agricultural, industrial and construction parts.”

Parts can be ordered direct from the website. For those without computer access or those who prefer a human voice, Jones will answer questions and take orders over the phone.

“Most people would rather talk to a person than order from a computer,” he says.

If you’re not sure about the part you need, he suggests calling before beginning a repair. For example, he notes that with Allis Chalmers diesels, .010 and .0120 undersize bearings were largely an industry standard, but .030 and .040 bearings were used in limited applications.

“Don’t throw the crank away before checking with us,” he says.

“Also, our engine kits can be assembled with ‘combination bearings’, rods and mains of different sizes.”

Prices for kits range from $200 to more than $1,500, depending on the complexity of the engine.

“There’s not much to a kit for a Massey Ferguson 3-cylinder diesel from Perkins,” notes Jones.

“But when you get into the bigger International Harvester and Deere diesels, the kits get relatively more involved.”

Kits are drop shipped from the warehouse. He charges a flat $25 fee for all shipping within the lower 48 states.

Contact: FARM SHOW Followup, Jim Jones, RR 2, Box 159, Ainsworth, Neb. 69210 (ph 402 387-0849; www.tractor kits.com).

From the archive · Full text
Feature story

Wheel-Mounting Alignment Kit

Featured source: Spoerl Mfg.

Anyone who’s ever tried to mount a wheel on a hub knows that it almost takes three hands to do the job. This new wheel alignment kit is designed to make it easy.

The EZ-On wheel alignment kit is designed to be used on hubs with 1/2 or 9/16-in. lug bolts.

Kit includes two 1/2-in. alignment pins and two 9/16-in. alignment pins. You screw the two pins onto lug bolts, install the wheel onto the pins and push it onto the hub, then re-move alignment pins and screw on the nuts.

“It’s easy to use, and the pins keep the wheel off the hub so you won’t scratch the paint on the hub. The pins are made of 1018 steel and are zinc-coated so they won’t rust,” says inventor Mike Spoerl of Sherrill, Iowa.

The kit sells for $19.95 plus S&H. Contact: FARM SHOW Followup, Spoerl Mfg., 13978 Hammerand Rd., Sherrill, Iowa 52073 (ph 563 552-2866; [email protected]).

From the archive · Full text
Feature story

Grease Zerk “Protector”

Featured source: Don Peterson

This new grease zerk cap keeps dirt off the zerk, so you won’t have to clean it off before greasing or worry about injecting dirt in with the grease.

Made from corrosion-resistant rubber, the “Zerkap” snaps over the head of the zerk and locks around the neck, creating a watertight seal. A flare at the bottom of the unit scrapes away any excess grease that remains after greasing and seals around the zerk fitting. The flare also prevents grease from getting on the cap.

Inventor Don Peterson, Midwest Companies, Inc., Merrillville, Ind., says, “If you just wipe the zerk off and then grease it, there may already be dirt inside the zerk so when you grease it you’re just pushing the dirt down farther into the bearing.”

Peterson originally developed the Zerkap for the trucking industry.

“One problem with trucks on the highway is that liquid calcium chloride, which is often applied before a big snow, can get inside zerks and rust them out. We had such a good response from truckers that we decided to introduce the Zerkap to farmers,” says Peterson.

“The only limitation is that we can’t guarantee that rocks won’t knock the Zerkap off on an implement such as a disk that’s down in the dirt all the time.”

Peterson says he welcomes any feedback from customers.

The Zerkap comes in green, black, and yellow and will soon also be available in red. A “clamshell” of 25 sells for $10 plus S&H; a plastic tube of 20 sells for $8 plus S&H.

Contact: FARM SHOW Followup, Midwest Companies, Inc., P. O. Box 11569, Merrillville, Ind. 46411 (ph 866 650-6560 or 219 650-6500; fax 219 650-6590; [email protected]; www.zerkap.com).

From the archive · Full text
Feature story

Old Magnetos Spark New Business

Featured source: Dave Crabill

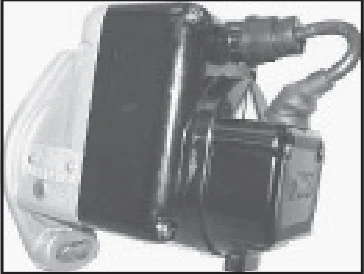
Need an old magneto rebuilt? Have an old magneto you don’t know what to do with? Either way, check with Dave Crabill. He and his wife Marilyn have built up a part-time business repairing magnetos.

“We will repair or rebuild anything we can get parts for,” says Crabill.

“Our basic line is Wico, but we do Fairbanks Morse, International, Case and even Splitdorf units as old as 1926. I have a guy who makes the coils for them.”

When he can’t get new parts or custom built ones like the Splitdorf coils, Crabill refurbishes used magnetos. That’s one reason he likes his customers to call before they throw out the old magneto. Repairing it may be the only option.

“We buy old magnetos, even broken ones and set them aside because someday we may need the parts,” says Crabill.

“People contact us or bring them to tractor shows, and we buy them there.”

Often a total rebuild isn’t needed, he says. In the case of a show tractor, a rebuild is probably best, he advises, as many old tractors don’t have the original magneto. A Fairbanks Morse may have been substituted for a Wico.

“Some of the Splitdorfs are getting so rare that you can’t get a replacement,” says Crabill.

Repair or rebuild has a big impact on price. While repair is parts and labor by the hour, a full rebuild usually runs around $250.

Contact: FARM SHOW Followup, D & M Magneto, 216 Allen St., Monroeville, Ind. 46773 (ph 260 623-3187; [email protected]).

From the archive · Full text
Feature story

Great Fence Staple Puller

Featured source: Rudy Lehman

Rudy Lehman called FARM SHOW the other day to tell us about a nifty way he’s found to pull staples on fenceposts.

He uses a modified “Superbar” - a flat spring crowbar. He widens out the nail notch with a grinder. Widening out the notch lets it fit around staples no matter how they’re angled. He slips onto each side of the staple and then pulls out on the wire. The staples pop out easily and quickly.

“You can angle it any direction. It pulls the staples out so neatly they can usually be used again. It’s a lightweight, easy solution to what’s often an annoying job,” says Lehman.

Contact: FARM SHOW Followup, Rudy Lehman, P.O. Box 2, Site 12, RR1, Rocky Mountain House, Alberta, Canada T4T 2A1.

From the archive · Full text
Feature story

Underground Antifreeze Helps Start Van

Featured source: George Friesen

On cold winter days George Friesen of La Crete, Alberta, pumps anti-freeze out of the ground to start his van.

Friesen has a solar-powered home so he didn’t have enough electricity to power a plug-in engine heater. He solved the problem by coming up with a way to warm up the engine using anti-freeze pumped up from underground pipes.

He buried 200 ft. of 1/2-in. dia. water hose 10 ft. deep underground. The hose is filled with a total of about 4 gal. of anti-freeze. The two ends of the hose come up out of the ground through a 3-in. dia. pipe that provides frost protection. Quick couplers are used to connect the hose ends to the van’s heater hoses.

A 12-volt pump plugs into the van’s battery and is used to pump anti-freeze through hoses from the ground into the engine and then back into the ground again.

“I’ve used this system for two winters and it works fine. It’s safe to use and warms up the engine nicely,” says Friesen.

“I let the pump run for about 20 minutes before I start the van.

“One time the outdoor temperature was almost 40 degrees Fahrenheit below zero. But after the pump had operated for only about 20 minutes, the water running through the engine had already warmed up to 22 degrees Fahrenheit above zero.”

Friesen says it’s not an expensive system and it works fine, as long as you have enough water hose and enough anti-freeze underground.

“The more hose you have underground the better, because the cold water in the hoses will have more time to warm up as it circulates,” he notes.

Contact: FARM SHOW Followup, George W. Friesen, P.O. Box 1448, La Crete, Alberta, Canada T0H 2H0 (ph 780 928-4174; fax 780 928-4174).

From the archive · Full text
Feature story

Easy Way To Get Fuel Flowing

Featured source: Eldon England

“Before retiring, I ran a small engine repair service and one of the most common problems I saw was fuel system problems in riding mowers,” says Eldon England, Jameson, Mo.

“Many small tractors have the gas tank under the seat with a small diaphragm-type fuel pump built onto the carburetor. These work very well once the engine is running but after a mower sits for a while, the diaphragms tend to dry up. This can result in hard starting even after just a few days. Sometimes you have to prime the carburetor manually to start one of these engines.

“I solved the problem on many tractors - including my own Sears Craftsman 16 hp twin cylinder - by installing an outboard motor primer bulb in the gas line. Before starting the engine on my tractor, I lift the hood to squeeze the bulb a few times to get gas to the fuel pump. It starts every time, even after sitting through the winter months.

“A more elaborate cure is to install a small electric fuel pump available at any auto parts store. It can be installed anywhere under the hood with a small push button installed on the dash, wired directly to the battery with a 30-amp inline fuse for safety. Then you just hold the button down until the entine starts.

“Both methods work well on any mower or smaller machine with the gas tank installed at a level lower than the carburetor.”

Contact: FARM SHOW Followup, Eldon England, 21377 Granite Ave., Jameson, Mo. 64647 (ph 660 442-6036).

From the archive · Full text
Feature story

Water Tank Makes Great Metal Polishers

Featured source: Robert Ferreira

Old water pressure tanks make great metal polishers, says Robert Ferreira of Crystal River, Fla. The retired electronics engineer melts down lawn mower engines and casts the metal into art work. To polish off the rough edges, he throws the small sculptures into his homemade polisher.

Ferreira cuts a hole in the side and adds edges to the piece he cut out to make a secure door that he can bolt tight.

Mounted on a 2-by-4 wood frame, the tank spins slowly, powered by an old 1/4 hp motor and a couple of pulleys from a clothes dryer. Ferreira fills the tank with ground corn cobs and runs the polisher several hours to polish an item. Or, he places the item in a plastic gallon jug filled with metal grit and ball bearings, and then puts the jug in the polisher.

Most people have the materials right in their shop to build a polisher, Ferreira says.

“Make stuff out of what you can get for nothing. That’s the joy of it,” he says.

Contact: FARM SHOW Followup, Robert Ferreira, 9775 W. Sunny Day Ct., Crystal River, Florida 34428 (ph 352 795-0049; [email protected]).

From the archive · Full text
Feature story

How To Repair Broken Sickle Guards

Featured source: Jim Taylor

Jim Taylor teaches advanced welding at Morrisville State College in Morrisville, New York. When one of his students came in with a 5-gal. pail full of broken combine sickle guards, the class decided to make a jig that would allow them to cut and weld the broken guards together.

“The student’s dad had saved the broken guards and put them in a pail in his shop. After we rebuilt the guards he bolted them back onto his Deere soybean header. We made both two and three-section guards. He saved a lot of money because new triple guards sell for $45 apiece or more, and new double guards for at least $20,” says Taylor.

The jig is made from an 8-in. length of 3/ 8-in. thick angle iron and has a length of 7/8-in. dia. round bar welded onto one edge of it. The rod is there to line everything up. They set the grooved side of an unbroken guard down over the bar, then drill a pair of holes in the jig and insert studs through them. They put a nut on each stud to keep the guard in place, then weld in new material on both sides of the broken guard. When they’re done they unbolt the guards from the jig.

“It works good. In fact, the student said his dad has had better luck using the sickle guards we welded together than he did with new ones, because they weren’t as likely to break,” says Taylor.

“The round bar has to be in precisely the right place in order to hold everything together correctly.”

Contact: FARM SHOW Followup, Jim Taylor, P. O. Box 123, Bouckville, N.Y. 13310 (ph 315 527-8262; Taylorjd@Morris ville.edu).

From the archive · Full text
Feature story

Screws With An Extra “Bite”

Featured source: Larry Harsila

These new-style screws come with patented thread serrations, which allows them to more easily penetrate wood.

“Spax” screws feature a special 4-cut point thread serration near the tip.

“They’re more expensive than ordinary screws but worth the extra cost,” says Larry Harsila, Altenloh, Brinck & Co., Inc., Bryan, Ohio.

“The 4-cut thread serrations help move fibers of wood around for better holding power. They also reduce the amount of torque needed to drive the screws in. Most times you won’t even need to drill a pilot hole to avoid splitting the wood.”

Another advantage is the screw head design, which can accommodate both a Phillips screwdriver and a square drive bit.

“The screw head is quite deep so your screw driver fits into it better and is far less likely to spin out,” says Harsila.

The company also offers a variety of other screw designs for specific jobs and material types. For example, its MDF screw is specially designed for medium density fiber-board and won’t split the fiberboard even when used close to the edge. Screws designed for outdoors use have an additional barrier coating on them that resists corrosion. Multi-material screws for use in wood or light gauge metal can be used in masonry block or concrete, provided you pre-drill a hole. Lag screws with built-in washers are also available.

Spax screws are available at Home Depot and Menards.

Contact: FARM SHOW Followup, Altenloh, Brinck & Co., Inc., 02105 Williams County Road 12-C, Bryan, Ohio 43506 (ph 888 222-7729 or 419 630-2490; fax 419 630-2491; [email protected] rr [email protected]; www.spax.com/usa).

From the archive · Full text
Feature story

Rollers Make Great Cutting Table

Featured source: T.C. Mallett

T.C. Mallett, Austin, Texas, converted a pair of 10-ft. long used conveyor roller sections into a cutting table that can be used with a metal chop saw or a mitre saw.

Either saw sits in the middle of one 10-ft. roller section. The other roller section was cut in half to provide two 5-ft. sec-tions. All sections mount on wheels.

“It really comes in handy for cutting long materials such as 30-ft. sections of oil field pipe or long lumber, because I can move the other 5-ft. sections wherever I need them,” says Mallett.

“I can easily lift either saw out of the conveyor and exchange it, depending on whether I’m cutting steel or wood.”

He started with two 10-ft. long conveyor roller sections that are about 30 in. wide. He welded legs and caster wheels under each corner on one complete section. Then he removed a number of rollers from the middle and welded a section of expanded mesh below the opening, to serve as a platform for the saw. Each saw sits on a couple of 2 by 4’s that keep the cutting surface exactly level with the conveyor’s roller tops.

The other 10-ft. conveyor section was cut in half to provide two 5-ft. sections. He welded legs and caster wheels on them, too.

To collect debris, he mounted an old metal tub under the saw. It’s held on with S-hooks which makes it easy to lift off and dump. He also mounted a curved shield, which was originally part of a protein feed tub for cattle, to deflect dust and chips. It’s held on with zip ties.

“It’s one of the handiest things I’ve ever done for my shop,” says Mallett.

“The caster wheels let me roll the cutting table anywhere I want and also serve as an additional table surface for other projects when needed. I set the conveyor rollers at a 35 1/2-in. height to match the height of my welding table. That way if I want to extend a piece of what I’m cutting over to the welding table, everything will be at the same working height.”

Contact: FARM SHOW Followup, T.C. Mallett, 3209 Silverleaf Drive, Austin, Texas 78757 (ph 512 914-9818; [email protected]).

From the archive · Full text
Feature story

Simple System For Removing Rust With Electricity

Featured source: Craig Mathews

Using electrolysis - soda, water and electricity - to clean rusty parts isn’t new, but Craig Mathews has tweaked the set up to make it more efficient.

“I created a fixture to hang and change out items,” explains the Northridge, Calif., gas engine collector.

“I have something in the tank year round.”

Mathews first learned about the easy, inexpensive way to remove rust on the internet nine years ago. Start with a nonconductive container such as a plastic 5-gal. bucket. Add water and one cup of Arm & Hammer Super Washing Soda detergent booster. The part to be cleaned is suspended in the water with the negative lead clip from a battery charger attached to it. The charger’s positive lead clip is attached to a piece of metal above the water. When plugged in, electrolysis pulls rust away from the metal object.

“It’s like reverse plating,” Mathews says, noting that by reversing the battery charger leads, new parts can be made to look old.

As a mechanical engineer, Mathews modified the setup to establish a good connection and make the process more efficient.

“I made a grid of rebar rods to suspend parts from,” he explains.

“The key is to not let the part touch the rods.”

He attaches the battery charger clips to the rods. Insulators connecting the rods separate the positive and negative currents.

The rods become covered with the rust and grime pulled from the parts and need to be cleaned off occasionally to get them back to bare metal. On larger jobs, they may need to be cleaned during the process. Still, they last a long time and parts of the setup can be changed as needed.

“I’ve bolted 10 to 15 parts together for a big batch,” Mathews says. It takes a week or two for the parts to get clean. Using a garbage can, he suspended a 1913 Root and Vandervoort cylinder head in the solution for a month, occasionally pulling it out and brushing it off. The valves, which were completely rusted in place, pulled out easily and the engine was rust-free. A small charger works, he says, but he recommends a battery charger up to 20 amps for most jobs.

“This doesn’t hurt the metal,” Mathews says, noting that some processes remove the metal or make it brittle.

“Electrolysis takes off nothing but the corrosion.”

However, he cautions, electrolysis only works on all steel or cast iron items, not non-ferrous materials that contain copper, zinc and other materials. He adds that the process emits hydrogen gas so it should be set up outdoors or in a very well ventilated area.

The solution can be used up to year; just keep adding water. When changing the liquid, throw the iron rich, phosphate solution on brown spots of the lawn for fertilizer, Mathews suggests.

Besides rust, Mathews has removed paint, dirt and hard-to-remove grease from old parts.

Contact: FARM SHOW Followup, Craig Mathews, 18207 Acre St., Northridge, Calif. 91325 (ph 818 252-3394; [email protected]).

From the archive · Full text
Feature story

Gear Down Your Pickup For Better Mileage

Featured source: Jeremy Ayers

Swap out the stock ring and pinion gear in your pickup’s drive axle with a lower ratio gear, and you can drop your rpm’s and raise your miles per gallon. Jeremy Ayers, J.T.’s Parts and Accessories, has the parts to do the job.

“We’ve got gears for virtually any vehicle,” says Ayers.

“Anytime you take a truck with a 4.10 ratio and gear it down, engine rpm’s drop. If you’re on the freeway for any distance and you drop 200 rpm’s, that equates to significant fuel savings. Depending on the truck, it can be one to three miles per gallon savings or more.”

He admits that in going from a 4.10 to a 3.42 ratio you lose a little power on the low end, but he says that power isn’t likely to be missed by most. Especially if you use your trucks for daily driving and only tow loads a few times a year.

“With any new diesel, you have so much power that it is really insignificant,” he adds.

“Most consumers feel trucks have too much gear power from the factory.”

Ayers suggests installation of ring and pinion kits be left to professionals. He estimates that only about 20 percent of his customers do the installation themselves.

“It costs a fair amount of money, and it’s not something you want to screw up on a new truck,” he says.

“The price depends on whether it is 2 or 4-WD and if it’s a master install kit with bearings or a mini without.”

Prices range from $465 on the low end for a 2-WD without replacing bearings. A worst-case scenario with bearings replaced would run $1,495 on a late model Dodge with 4-WD. Tack on another $800 for labor, says Ayers.

“Most kits are ordered with bearings simply for peace of mind,” he says. He points out that removing bearings from a pinion or the carrier can be tricky if not impossible. Also, they can be hard to find locally. That can mean extra time with a truck torn down waiting for bearings to arrive.

Contact: FARM SHOW Followup, J.T.’s Parts and Accessories, 406 S Wenatchee Ave., Wenatchee, Wash. 98801 (ph 509 888-2953 or toll free 866 349-6801; fax 866 399-7532; info @justdifferentials.com; www.ringpinion.biz).