Practical ideas from FARM SHOW MagazineSubscribe · Free issue · Send us your shop tip
Subscribe to FARM SHOW
Issues / Vol. 46, No. 5 (2022)

Vol. 46, No. 5 (2022)

Money-Saving Repairs & Maintenance Shortcuts · Printed section pp. 32–35

43 selected entries · Complete text of selected entries

This issue’s section includes reader tips and feature-length shop stories. Held items and editorial notices are not reproduced.

Archive text: prices, coupons, availability and contact details reflect the original publication, not current offers. Reader methods are not universal instructions; follow manufacturer guidance and proper safety practices.

Reader shop tips

From the archive · Full text
Reader shop tip

Kenneth Stadler

Kenneth Stadler, Clio, Mich.

“When the plastic strap breaks and you lose the cap to your fuel can, rather than buy an expensive replacement can or spout, I just use an old 12 ga. shotgun shell as a cover (or plug) depending on the spout size. They’re cheap and keep the dirt out of the fuel.”

From the archive · Full text
Reader shop tip

Mark Yax

Mark Yax, Solon, Ohio

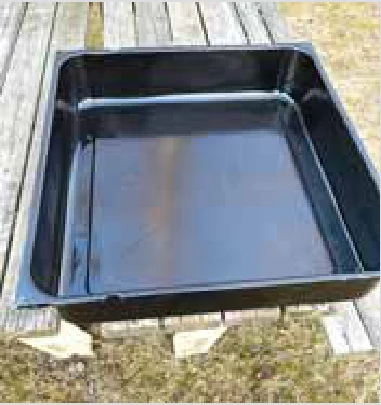
“I had an electric stove that I was tossing out. When removing the bottom drawer, I noticed that the stamped steel tub would make a nice drain pan or parts washing tub. I removed the front door panel and cut off the ears that held it on with my angle grinder. The only other thing I had to do was to weld up some small holes. This should work well for changing the oil in some of my equipment as it holds quite a bit. I will also use it for cleaning some larger parts.”

From the archive · Full text
Reader shop tip

Jim Maybach

Jim Maybach, Red Wing, Minn.

“When sealed ball joints go dry, I inject 80-90W gear lube into the joint using a hypodermic needle. If it’s a big joint, leave the needle in the boot, refill the syringe and inject more.”

From the archive · Full text
Reader shop tip

Nathan Miller

Nathan Miller, Kalona, Iowa

“Someone dropped a loader bucket on my 8-ft. fiberglass ladder and broke the leg, so I took 16 ga. aluminum sheet metal and bent it to fit the profile and spread Sikaflex-221 across the repair area the size of the aluminum, clamped and pop-riveted it. Now years later it’s still as good as new.”

From the archive · Full text
Reader shop tip

Anthony Coleman

Anthony Coleman, Fork S.C.

“When rebuilding my Argo, the bearings would cut into the axle where the seal runs. I would just weld up the cut and then turn the axle down in my lathe. It took only about 30 min. per axle. There are eight of them and it saved me $100 each.”

From the archive · Full text
Reader shop tip

Tom Hansen

Tom Hansen, New Hartford, Iowa

“I welded a socket to a 3/4-in. drive extension and put crossbars on the extension and a big washer on the handle with a hose clamp to keep it all from falling through the grates.”

From the archive · Full text
Reader shop tip

May Wes Company

May Wes Company, Hutchinson, Minn.

(www.maywes.com; ph. 800-788-6483) “Our rear debris screen for Bobcat skid loaders shields the radiator, helps with overheating, and is made from UV-resistant HDPE. Less expensive than OEM shields and made for ag, landscape and forestry applications, the shield easily installs by drilling and bolting into place. Made in the USA.”

From the archive · Full text
Reader shop tip

David Simpler

David Simpler, Elkton, Md.

“I bought a used 6-ft. Bush Hog for some woods work and needed it in good working condition but the blades were like an old sway-back butcher knife. I bought new ones and went to take the nuts off. The impact gun just spun the nuts, so I had someone hold a 24-in. pipe wrench on the head of the bolt. It still spun and flattened the teeth on my pipe wrench. Now mad, I got my torch out, burned them off the best I could, and got the blades off but needed to burn more up closer to drive the bolt through the top of the mount. Finally, a light switch came on and my brain engaged. I should have welded the bolt head to the blade, then ground it off once out, or used a grinder to cut two flats on the head of the bolt for a wrench.”

From the archive · Full text
Reader shop tip

Daniel Alderfer

Daniel Alderfer, Carbondale, Colo.

“If you’re having trouble with small hydraulic leaks, I’ve had excellent experiences using the BlueDevil Hydraulic Stop Leak to swell existing O-rings, etc.”

From the archive · Full text
Reader shop tip

Ron Shank

Ron Shank, Morrison, Ill.

“I read the tip by a reader who suggested heating a zerk to get it to take grease. Extreme caution should be used in doing this. I found out the hard way while heating a seized loader pin. Pressure blew the ball out of the zerk, requiring surgery to remove it from my arm. It could’ve been an eye or worse.”

From the archive · Full text
Reader shop tip 1 of 2

Tim Ojala

Individual tip 1 of 2 from this reader’s published contribution.
Tim Ojala, New Ipswich, N.H.

“We do tree cutting and sometimes I have four saws on the job. I take the boot off the saw and mark one edge with a black marker. Then, if the saw chain needs sharpening, I turn the boot black edge up. This helps to not have dull saws on the job.

From the archive · Full text
Reader shop tip 2 of 2

Tim Ojala

Individual tip 2 of 2 from this reader’s published contribution.
Tim Ojala, New Ipswich, N.H.

“I used to dread putting tire chains on our tractor, loader and forklift in the winter. I found it works well to lay out the chains on the ground behind the wheel and then back up onto the chain and attach each end of the chain to the wheel with rubber tie downs or rope. Then I back up until the chain comes around the tire.”

From the archive · Full text
Reader shop tip

Herb Gurski

Herb Gurski, Calgary, Alta.

“I needed a way to hold nuts and bolts for storage and to take them out of the shop when needed. So, I washed out some used liter-sized oil containers and cut off the spout at about a 45-degree angle. It enlarges the opening and leaves a little lip or handle on the end. I put them in a plastic milk crate, nine at a time. Makes them easy to store and carry out to the field. I write the contents on top of each container.”

From the archive · Full text
Reader shop tip

Jack Griffith

Jack Griffith, Venus, Texas

“To center a drill when drilling into a stepped hole, I stack fender washers on the bit that match the diameter of the hole I’m drilling into the bottom of. In this case, I used a stack of nuts to put the washers at the depth I wanted to drill the hole. ”

From the archive · Full text
Reader shop tip

Don Buse

Don Buse, Mount Morris, Ill.

“My dad purchased this 1003 Simplicity rototiller back in about 1977. It was used so it’s 45 plus years old. The Briggs and Stratton 3-hp. engine wore out 10 or 12 years ago, so I put an old blower motor on it off of a furnace with a regular household switch to turn it on and off. It worked fine except for dragging a 100-ft. electric cord around. About 6 years ago, I got tired of dragging the cord around and put this Predator engine on it from Harbor Freight. It works great and starts well and there’s no cord. All I had to do is buy a pulley and new belt to make the conversion. I think the holes all lined up pretty well.”

From the archive · Full text
Reader shop tip

Paul Halferty

Paul Halferty, Ottumwa, Iowa

“The steering on my riding mower got a little stiff so I figured I’d grease the spindles. One took grease easily but the other would not. I removed the zerk and clamped it in a vise. I snapped the grease gun on it, and it took grease. Screwed the zerk back onto the spindle and it still wouldn’t take grease. I thought there must be caked dried grease in the spindle housing, so I jacked up the front end of the mower and rotated the steering wheel. Still no grease. I finally figured that maybe the spindle had been tightened down too much so that it bottomed out in the spindle. When I backed it off a hair, it took grease.”

From the archive · Full text
Reader shop tip

Ben Parks

Ben Parks, Austin, Texas

“I had problems with the thinner gauge alternator bracket on my older 4-cyl. Chevy engine. It kept loosening up, so I had to constantly retighten the bolts to retention the belts. Then I found Davis Speed Equipment. They specialize in making brackets and other parts for Chevrolet inline 6 and 4-cyl. engines from 1937-89 (www.davisspeedequipment.com; ph 608-469-4927). Their brackets are made of thicker gauge steel in a one-piece design that’s easy to install and works much better. Bolts don’t come loose.”

From the archive · Full text
Reader shop tip

Mark Zielinski

Mark Zielinski, Harbor Creek, Penn.

“I bought a used 2-post car lift for my shop and now I wouldn’t ever want to be without it. It eliminates using a creeper and oil changes or brake jobs are much easier. Time, labor and back saver.”

From the archive · Full text
Reader shop tip 1 of 2

Michael Munson

Individual tip 1 of 2 from this reader’s published contribution.
Michael Munson, Preston, Idaho

“I made an oil removal system for small engines that don’t have drain plugs, like push lawn mowers. It eliminates the need to dump them over on their sides to drain oil. I cut a hole in the lid of a 5-gal. bucket and inserted a short piece of 3/8-in. metal brake line that’s fitted with rubber 3/8-in. hose that’s long enough to reach down into the crankcase through the filler opening. To suck out the oil, I insert a shop vac hose into the bucket to create suction. Works great and makes the job much neater.

From the archive · Full text
Reader shop tip 2 of 2

Michael Munson

Individual tip 2 of 2 from this reader’s published contribution.
Michael Munson, Preston, Idaho

“I use the tops from gear oil bottles to add oil to small engines and chainsaws. The tops will screw onto quart oil bottles making it much easier to get oil into small engines without spilling.”

From the archive · Full text
Reader shop tip

Dan Erdman

Dan Erdman, Claresholm, Alta.

“My riding lawn mower drive belt had been slipping. I’d put belt dressing on, and it would work for a while and then continue slipping. This morning I put a new drive belt on, and it started slipping.

“So, I took the pulley belt off and slipped a 1/4-in. thick O-ring about 4 in. in dia., over the drive pulley. We use O-rings like that on our Cat dozers. I slipped the belt back on and started up the mower. I did as much mowing in 1/2 hour as I’d been doing in 2 or 3. It works great now.

“I wanted to share this with other FARM SHOW readers as it may help with a slipping belt on mowers or other equipment.”

From the archive · Full text
Reader shop tip

Tom Chaney

Tom Chaney, Chrisman, Ill.

“When the wobble box pin yoke shattered on my old 990 IH haybine, I figured I was out of business. I couldn’t justify a new machine and no parts were available for the 990.

“This spring the solution hit me. I took 2-in. wide, 1/4-in. flat iron and made 90-degree bends in several pieces and welded them together to make a sleeve to fit over the yoke. One bend went around the front of the yoke, while the other went over the back of it, to the rear of the pin. I welded a nut for filler to the strap that went around the shattered side of the yoke.

“I had to replace the yoke pin that floats in the sickle bar pulling it back and forth. The original was notched for the bolt that pulled the yoke sides together. The notch allowed the bolt to also secure the pin in place.

“I notched the replacement pin with a plasma cutter. Then I drilled a hole through the sleeve to match the hole in the remaining side of the yoke. I bolted it all together and went to the field.

“My first pin couldn’t handle the stress, so I replaced it with a second one that was hardened steel. I put it back together and mowed four acres. It has worked since without a problem.”

From the archive · Full text
Reader shop tip 1 of 3

Dan Erdman

Individual tip 1 of 3 from this reader’s published contribution.
Dan Erdman, Claresholm, Alta.

“I mark extra tires with a piece of masking tape with sizes and other information. This helps me find what I need at a glance. A good tire rack saves space also.

From the archive · Full text
Reader shop tip 2 of 3

Dan Erdman

Individual tip 2 of 3 from this reader’s published contribution.
Dan Erdman, Claresholm, Alta.

“Check around your area for a battery shop that deals with big companies. Many times these companies put in new batteries on a schedule rather than based on the condition of the battery.

“When I need a battery, I go to a local shop that works with mining companies.

The battery shop takes the old batteries in exchange, checks them out, recharges them, and sells them.

“I can get a heavy-duty, recharged battery for $60, and it comes with a 90-day guarantee. I bought a set of batteries 4 years ago, and they’re still working great.

From the archive · Full text
Reader shop tip 3 of 3

Dan Erdman

Individual tip 3 of 3 from this reader’s published contribution.
Dan Erdman, Claresholm, Alta.

“When I get a new battery, I block off the positive post area with masking tape and then paint that area red. I believe it’s a great safety measure and simple to do. I hope this idea will prevent an explosion or acid burn.”

From the archive · Full text
Reader shop tip

David Heapy

David Heapy, Litchfield, Neb.

“To turn the heat up in my shop on snowy, cold winter mornings, I have two thermostats – one is set at 38 degrees for nights and is hooked in parallel with one that’s set at 60 degrees for work. The 60-degree one is hooked to a small contact that is energized by a 110-volt remote plug, which completes the connection to the heater and overrides the setting on the other thermostat.

“When I get up in the morning, I just walk over to the window with my remote and turn the heat up. I also have a little red light in the circuit that I can see from the house window, so I know when it’s turned on.”

From the archive · Full text
Reader shop tip

Dennis Simontachi

Dennis Simontachi, Lakeview, Ore.

“I had to replace the clutch on a 1987 Homelite 410 chainsaw. I made a clutch removal tool out of a 1 1/4-in. steel pipe, cutting out notches to fit the clutch. I welded a 1/4-in. steel plate to the other end with a hex-head bolt attached so I could use a torque wrench when reinstalling. It worked great, despite the ugly welds.”

From the archive · Full text
Reader shop tip

John Rochester

John Rochester, Deerfield, Fla.

“A reader in a recent issue talked about putting a magnet into the oil pan to attract metal fillings. An even better idea is to put the magnet on the outside of the drain pan near the drain plug. It lets you use a larger magnet, and you can easily remove it before draining oil, so the filings drain out with the oil.”

From the archive · Full text
Reader shop tip

Ralph Volkman

Ralph Volkman, Black Creek, Wis.

“I’ve used the same small rag to apply wood stain for a couple of years. The trick is that I wrap it around a magnet and stick it to the underside of the can cover so it’s inside the can. It doesn’t dry out and you don’t lose the stain that has soaked into the rag.”

Shop feature stories

From the archive · Full text
Feature story

Bead Blaster Does Double Duty

Featured source: Dan Erdman, Claresholm, Alta. Canada

Dan Erdman’s homemade air blaster serves double duty setting tire beads and cleaning air filters. His 12-in. dia. and 24-in. long air tank has a 2-in. ball valve that dumps a lot of air fast for either chore.

“Big filters can run $100 to $200 each,” says Erdman.

“Some guys replace them whenever they plug, but I just blast them. When that air hits a filter, there’s a cloud of dirt.”

Erdman has to take care not to damage the filter. He can control the flow of air with the ball valve. He simply sets the filter in place ahead of a 2-in. pipe screwed into the ball valve.

“I slip a small square of plywood with a hole slightly larger than the pipe over it,” adds Erdman.

“This keeps the pipe aimed at the filter. Ring clamps on the pipe to either side of the board hold it in place.”

To use the air blaster to set beads on tires, he screws a shop-made air diffuser onto the ball valve. It’s simply a piece of pipe that he split and hammered one end flat. After welding filler steel into the gaps, he had a diffuser about 4 in. wide with a narrow opening of about 1/4 in.

“I remove the valve core and attach a free flow air chuck to the valve and let air flow,” says Erdman.

“I put the diffuser between the edge of the rim and the tire bead and give it a blast. Once the bead sets, I replace the valve core and bring the tire up to pressure.”

Erdman suggests buying a deep pressure air bead tire mount tank at Northern Hydraulics or Princess Auto.

“If you don’t know pressure welding, don’t make your own as I did,” says the journeyman welder.

The only problem Erdman has had with his blaster is the size of the air tank. With big and very dirty filters, he may have to refill the tank. He has an idea for fixing that problem but hasn’t done it yet.

“I have a 250-gal. propane tank that I’ve thought about using,” he says.

“Having enough air wouldn’t be a problem with that tank.”

Contact: FARM SHOW Followup, Dan Erdman, Box 1620, Claresholm, Alta. Canada T0L 0T0 (ph 403-382-1020; [email protected]).

From the archive · Full text
Feature story

Handy Remote Electrical Outlet

Featured source: Harley Willett, Dallas, Texas

Harley Willett had a dull chainsaw with no outlet to power the sharpener, so the Texas man got creative.

“I was looking at the trailer hitch on my 2007 Dodge 2500,” Willett says.

“I thought if I could plug it in there, I could work on the tailgate. It’s a great work surface, as long as you can supply power,” he says. The ability to work on the tailgate meant he wouldn’t have to balance the sharpener under the hood to clip onto the battery. So, he went shopping. He bought a Buyers TC2007P trailer connector from Surplus Center, 6 ft. of 12-ga. landscape wire from Home Depot, and a pair of alligator clips. The total bill was about ten dollars.

“Almost all of the newer trucks have the 7-pin connectors that support battery connections, which means this would work,” he says. Willett says the TC2007P is marked inside with the correct pins for battery and ground, which worked well with his Dodge truck. Ford, Chevy, and other truck models may be different.

“Most trailer battery connections are fused for about 10 amps,” he says, “so make sure what you’re using doesn’t overload the wiring.” Willett’s inspiration for this idea came from wiring up his trailer.

“I put one of those trailer connector boxes on it and noticed it had all the wiring codes right in it,” he says.

“I know someone has a 12-volt blender and will figure out how to plug it in to literally have a tailgate party,” he says with a laugh.

“I’m not doing this to make money,” Willett says.

“I just wanted to share an idea I thought would work well for others.” Contact: FARM SHOW Followup, Harley Willett, Dallas, Texas, 75214 (ph 214-696-4685; [email protected]).

From the archive · Full text
Feature story

Automated Hydraulic Implement Jack

Featured source: Simol USA Corporation, Brooklyn, N.Y.

Italy-based Simol Corporation developed the Novel Jack to take some of the frustration of connecting implements to a tractor.

The Novel Jack has an ISOBUS connector that plugs into the tractor, says Giovanni Gabella of Simol USA.

The jack attaches to the underside of the implement tongue and can be operated from the tractor cab.

Push a button and the Novel Jack will lift the implement tongue to the right height to connect to the tractor.

The Novel Jack also has sensors to help operators avoid tipping over in transit. The system’s tilt sensors record the incline variations of a connected implement while moving through the field. Too much tilt and a sensor will go off to alert the operator.

For questions regarding price or ordering Novel Jack, contact the company directly.

Contact: FARM SHOW Followup, Mario Giacomelli, Simol USA Corporation, 18 Bridge Street, Unit 2A, Brooklyn, N.Y. 11201 (ph 437-981-8594; [email protected]; www.simolnoveljack.com).

From the archive · Full text
Feature story

Tree-Mounted Machinery Lift

Featured source: Marshall R. Berkoski, Cantril, Iowa

It’s easy for Marshall Berkoski to get under the equipment he’s working on with the help of an old forklift mast and a big tree. When his old forklift was vandalized to the point of no repair, Berkoski salvaged what he could. The vandals had broken off knobs, smashed dials, and removed levers.

“I tried reselling it, but I had no takers,” says Berkoski.

“So, I took the hydraulic pump off the engine and put it on a stand. I took the hydraulic controls from the dash and replaced the levers.”

He also salvaged the oil reserve tank, hoses, and mast. He connected the pump to a 16-hp. Briggs & Stratton engine and ran a 10-ft. piece of pipe from the pump to the forklift mast, which he tied to a big tree.

“I used channel iron to extend the forks and added a pipe to the side of one of the forks,” says Berkoski.

“This lets me drive my lawn mower on, and the rear wheels sit on the saddle formed by the pipe and the fork. This ensures access to the blade spindles.”

The tree gets double duty, as does the lift. Berkoski has a chain hoist hanging from a large branch. He uses it to unload stuff from his pickup.

He also uses the lift for other equipment. When his 3-pt. mounted finish mower was clumping up grass, he set it on the lift and raised it for easier modifications.

“At first, I took out the drop chains, which reduced some clumping,” says Berkoski.

“I then removed a shield welded to the bottom of the deck at the edge of the blades. It hung down lower than the blades. Cutting it out made a world of difference. Working on it was easy with the lift.”

Contact: FARM SHOW Followup, Marshall R. Berkoski, 110 W 5th St., Cantril, Iowa 52542 (ph 319-397-2205).

From the archive · Full text
Feature story

Double-Duty Fold-Out Worktable

Featured source: Chadd Bond, Jones Creek, Texas

Chadd Bond has a 6 by 12-ft. worktable with a built-in table saw and routers. The custom builder designed it to work with 4 by 8-ft. sheets of plywood.

“I can fold it down to 3 by 6 ft. to store in my shop or haul in my cargo trailer with other tools,” says Bond.

“I do a lot of kitchen cabinets and closet storage units. It’s handy to have on-site and also at home in my shop.”

Bond had seen a similar table on YouTube and patterned his after it, but with the table saw and routers added. He started with 2-in. steel tubing for the frame. The base unit is 3 by 6-ft. with a 3 by 3-ft. wing to either side and a 3 by 6-ft. wing to the rear.

Each wing locks into place as it’s lifted. Support arms to either side are two short lengths of tubing hinged by a single bolt and attached to the main frame and wing with turnbuckles. The weight of the wing locks the arms in place. To lower the wing, Bond lifts it and kicks the hinged tubing up.

The turnbuckles are welded to either end of the support arm tubing. Eyebolts on the other ends of the turnbuckles bolt to the legs of the main table and wing frames.

“The tables need to be parallel with each other,” says Bond.

“I can adjust the couplers on the turnbuckles if they aren’t in alignment.”

Bond wanted caster wheels under the table for moving it onto his trailer or around his shop. However, he wanted the table to rest on rigid feet when in use or transit. His solution was to have the legs extend past the lower horizontal tubing of the frame. He then hinged a second set of tubing with castor wheels to the insides and parallel to the long sides of the frame.

Resting on its feet, the table is stable. For transit, Bond pushes down on arms welded to the castor wheel tubing and the wheels raise the table off its feet. A corner latch on a spring secures the arms to the frame ends.

With the frame in place, Bond added tops to the center table and the wings. He used a double layer of 1/2-in., pressure-treated plywood topped by a layer of countertop Formica.

After removing the table from a 10-in. table saw, he mounted it under the main table. He also mounted two routers under the right-hand wing.

“The disadvantage is that I lost about half an inch of blade diameter due to the thicker tabletop,” says Bond.

“I mounted two routers so if I’m making a cabinet door, I can set up two different bits and just go from one to the other.”

“It was easy to make and saved money over buying a kit,” says Bond.

With the two routers, the table saw, steel, and other materials, Bond estimates he has about $1,000 invested in the table. He says it’s been well worth it.

“I use it every day,” he says.

“It’s super portable, but with a weight of around 300 lbs., it’s also super solid.”

Contact: FARM SHOW Followup, Chadd Bond, 6602 Gaffney Dr., Jones Creek, Texas 77541 (ph 970-683-8772; [email protected]).

From the archive · Full text
Feature story

“Easy Access” Truck Tire Step

Featured source: Aaron DeWard, Grand Rapids, Mich.

“The Tire Step helps you access places on trucks and other equipment that are hard to reach,” says Aaron DeWard of Unique Truck Equipment in Grand Rapids, Michigan.

“While some people get tempted to stand on top of tires, we’d rather give you some stability and prevent falls.”

The step has a flat platform that rests on top of the tire, and multiple steps to get up to the platform safely.

It won’t scuff up tire rims either. DeWard says it has rubber pads that push up against the tire rim for added stability.

“For people who might need access to a tire where the rim doesn’t protrude out, we sell an adapter bar that covers the total width of a tire. The bar presses up against the tire for added stability.”

The Tire Step is made of aluminum and folds up easily for storage. When it’s unfolded, it looks like a mini-staircase.

“There are single-step, two-step, and three-step versions. The right one depends on how high a particular tire might be,” says DeWard.

He says semi-owners are the largest target audience for the Big Truck Tire Step.

“The Tire Step is welded together and assembled here in the United States,” DeWard says.

“It’s been tested to handle up to 400 lbs.

“One thing people are surprised at is how light the step feels,” he says.

“It’s very easy to handle.”

The Big Truck Tire steps are available direct from the company and range in price from $235 for the one-step model up to $580 for the three-step model.

Contact: FARM SHOW Followup, Aaron DeWard, Unique Truck Equipment, Inc., P.O. Box 8798, Grand Rapids, Mich. 49518 (ph 616-531-8868; [email protected]; www.uniquetruck.com).

From the archive · Full text
Feature story

Foam Cleaner Minimizes Damage To Paint

Featured source: Dakota Ag Innovations, Mitchell, S.D.

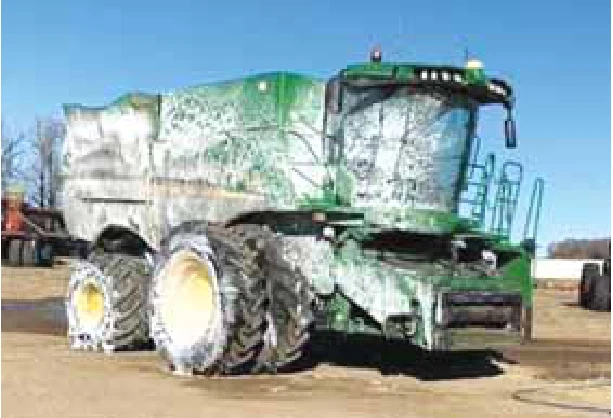
Instead of scrubbing or pressure washing dirty tractors, combines or other equipment, you can foam them using Dakota Ag’s foam, says Lynn Odland, President of Dakota Ag Innovations. Grime, grease and contaminants are cleaned off without harming electronics or paint in half the time of regular power washing. Dakota Wash HD includes derivatives of soy and corn in its formulations.

He first used the ag ingredients to create Dakota Shine 22 years ago (FARM SHOW Vol. 31, No. 6), which brings life back to faded, dull paint. It’s sold in 26 countries for construction and ag equipment clean-up.

“Out of necessity, we came up with Power of Foam. Customers needed a faster and more effective way to get rid of grime and crud. Most heavy degreasers are alkaline based and the more you use them the duller paint gets. Also, whenever you power wash equipment (3,000 psi or more), the pressure can damage electronics,” he says.

“Dakota Wash gently lifts contaminates and cuts wash time in half. Many of the major equipment OEMs are already using it.”

There are two application options. For customers who only need it occasionally to clean skid steers, trucks or farm equipment, the Power Cannon quick attaches to a power washer wand. The concentrate in the bottle mixes with the water and it only takes a couple of minutes to foam a tractor. After a couple of more minutes, when the foam starts sliding, rinse it off from the bottom up with the regular pressure washer nozzle. The Power Canon ($90) comes with a gallon of concentrate, enough to do two combines.

A Wall Unit foam package ($1,800) is available for larger fleets. It connects to an air compressor and pulls 5 gals. of concentrate mixed with 50 gals. of water out of a drum and includes a 75-ft. hose capable of blowing foam 25 ft.

“One of the important things we found is that Dakota Wash HD neutralizes farm chemicals and fertilizers, ” Odland says.

“We are truly ag-powered. Power of Foam is biodegradable, user-friendly and non-hazardous,” he concludes.

The website includes videos of it in use along with other products, including the aluminum cleaner being used on grain and stock trailers. Products can be ordered through the website or at many dealer locations found on the site’s store locator.

Contact: FARM SHOW Followup, Dakota Ag Innovations, 40690 253rd Street, Mitchell, S.D. 57301 (ph 888-996-7801; [email protected]; www.poweroffoam.com).

From the archive · Full text
Feature story

Weatherproof Power And Light Pole

Featured source: Tom Hohl, Hermantown, Minn.

Tom Hohl built a sturdy, weatherproof power and light pole for his backyard to provide trouble-free service in all kinds of weather.

“We get plenty of rain, damp weather and wind in the woods about 7 mos. of the year and during the other five there’s snow and ice, so I needed a light pole that could handle all those conditions,” Hohl says. His solution consists of a 16-ft. long green treated 4 by 6 pole that carries 20-amp power through waterproof conduit to an outlet, switch and two high-intensity LED lights. The outlet/switch box and lights are covered with metal roofing left over from when he built a covered woodshed and sugar shack.

His backyard power station gets plenty of use because the light illuminates his wood-burning stove, wood piles and woodshed.

“We check and restock the stove every night during the 8-mo. heating season. The high-intensity LEDs provide excellent light in a 75-ft. arc so we can always see what we’re doing without using a flashlight,” Hohl says.

He uses the outlet to run power tools in the yard and to operate his sap pump in the spring when they make maple syrup. The sturdy pole is set 4 ft. deep in the ground and surrounded by concrete, so it isn’t going anywhere anytime soon.

“The poplars and pine sway in the wind, but this post doesn’t move a bit,” he adds.

Contact: FARM SHOW Followup, Tom Hohl, Hermantown, Minn.

From the archive · Full text
Feature story

Central Shelves Keep His Shop Organized

Featured source: Charles Pearcy, Weatherford, Texas

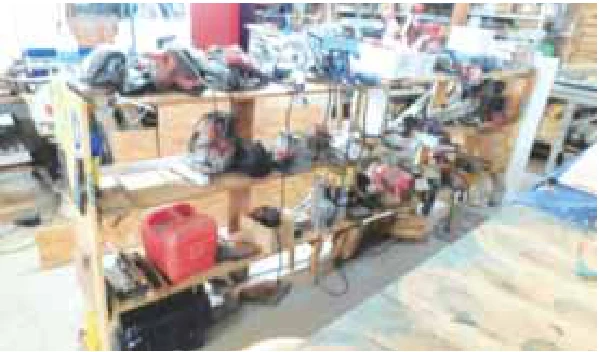
Keep your portable power tools organized on a freestanding shelf rack in the center of your shop. It’s such a simple idea, that Charles Pearcy, 81, can’t figure out why he didn’t do it a long time ago.

“I got tired of looking for tools all over the shop,” says the Weatherford, Texas, woodworker. He and a friend, Jeff Meador, build rustic furniture out of mesquite and pecan wood and iron and have several cutting and sanding tools and supplies.

The shelf is located between two rows of large power tools, most of which are on castors so they can be moved easily.

Pearcy made the three 12-ft. long shelves out of 1 by 12’s left over from another project.

He added vertical boards and diagonal bracing to prevent sagging and 2-ft. boards on the 4-ft. ends for stability. Tools are easy to access from both sides of the rack. The vertical ends also work well to hang measuring tools.

Besides being able to find tools, the handy shelves keep Pearcy motivated to put everything away at the end of the day.

“All in all, it works well in my shop, saving me steps and time hunting tools. I only wish I’d thought of it sooner,” he says.

Contact: FARM SHOW Followup, Charles Pearcy, 211 W. Couts St., Weatherford, Texas 76086 (ph 817-596-3344; [email protected]).

From the archive · Full text
Feature story

Blower Brush Makes Cleanup Easier

Featured source: Ben Parks, Austin, Texas

“When using my leaf blower to clean up around the garage, porch, or outdoors, I often have to stop and get a broom to clean away cobwebs, stubborn dirt, and debris in corners that the blower just won’t move,” says Ben Parks, Austin, Texas.

“So, I hit on the idea of attaching a large paintbrush to the end of the nozzle with a sheet metal screw and large hose clamp. It works well.

“Now when using the blower, I can sweep and blow at the same time to get cobwebs and other debris, and it doesn’t affect the blower when used for regular blowing. Works great. You could also attach a whisk broom.”

Contact: FARM SHOW Followup, Ben Parks, 8305 Valleyfield Dr., Austin, Texas 78724 ([email protected]).

From the archive · Full text
Feature story

Roll Away Rotary Mower

Featured source: Jim Ruen, La Crescent, Minn.

“I store my Woods rotary mower in the lower level of my barn, but my tractor ROPS prevents backing in with it. I built this simple carrier to move the mower in and out.

“I sandwiched two 6-ft. scrap 2 by 6’s and nailed them to two 2-ft. 4 by 4-in. cross ties to which I attached casters.

“The carrier lets me back up to the doorway, raise the mower and slip the support under both edges of the 5-ft. deck.

“Once the mower is lowered onto the carrier, I unhook it from the pto. It’s easy to push into storage and later back into position for mounting. My only cost was the casters.”