From the archive · Full text
Reader shop tip 1 of 2
Stephen Zonies
“What do you do when your old plow truck’s ignition fails during a Nor’ Easter blizzard? I wired it to a pair of standard on-off light switches. Worked great.
Money-Saving Repairs & Maintenance Shortcuts · Printed section pp. 32–35
28 selected entries · Complete text of selected entries
This issue’s section includes reader tips and feature-length shop stories. Held items and editorial notices are not reproduced.
“What do you do when your old plow truck’s ignition fails during a Nor’ Easter blizzard? I wired it to a pair of standard on-off light switches. Worked great.
“Later, when one of the coil springs broke and I knew I wouldn’t be able to fix it for weeks, a precision cut log worked as a temporary ‘spring’. It sure made for a stiff ride, but at least the pickup wasn’t tilting over to the side.”
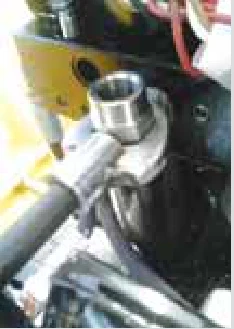
“I created a tool to install a vent elbow into a snowplow hydraulic pump unit. The location is tight, and I needed a straight-on tool that would accept a 6-in. extension. I cut the head off an open-end 7/8-in. wrench.
Then I notched a 14 mm socket to accept the wrench head. I welded the two together and I had a great tool that has been used more than 100 times since I’m a snowplow tech. You could easily make different sizes if needed.”
“I came up with a couple of easy ways to make a solid base for a grinder or other shop tool using a 5-gal. bucket or small oil drum. First, I screw a round piece of plywood to the bottom of the post and then fill the bucket with gravel before putting the lid back on. It’s easy to roll around the shop when needed.
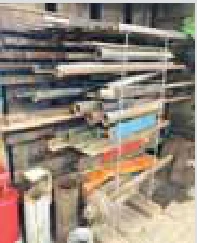
“Here’s an easy way to organize your scrap metal for projects. Use a couple of pieces of welded hog fencing, standing parallel and held in place with clamps or plumber’s tape.”
“When putting a washer and nut on a bolt pointing downward, it’s hard to keep the washer on the bolt while trying to put the nut on. I solved the problem by putting an inexpensive magnet (you can get two for 99 cents at Harbor Freight) on top of the bolt. This magnetizes the area, holding the washer up so I can easily put the bolt on.”
“Hooks on cargo straps would not stay in place on my truck and trailer even when I laid something heavy over it. So, I made up wire stays out of coat hangers to hold them in place. Works great.”
“I started to develop a ragged cough and asthma-like symptoms. I realized they flared up after I used my fairly large sandblaster cabinet.
“It has a factory vacuum system, but I found a fine layer of dust around the outlet on the vacuum motor. I cleaned up everything, made sure the large factory bag-type filter was ok, then rechecked after about an hour of use later.
“Sure enough, an ultra-fine layer of dust had formed again, meaning the most dangerous particles that can cause lung damage were getting blown into the air and all over the shop.
“If you think about the particles that accumulate inside the blaster, such as lead from old paint, rust, metal dust, silica, and ten other kinds of dangerous things, you quickly realize they’re nothing to mess with. If you can find dust with your fingers, it’s also in your lungs.
“A HEPA-type filter might work, but I can’t find anything like it for my blaster. My short-term fix is to wear a full-face mask with replaceable cartridges whenever I use the blaster. I also open the shop doors to ventilate the entire shop when I finish.
“My longer-term fix is to vent the exhaust from the vacuum outdoors. It’s a similar problem to one outlined in a recent Best Buy report about woodworking dust collection systems. Filters in vacuum systems rarely do more than catch the big chunks. Lead made that old paint shine and last, but it’s extremely dangerous when turned into dust.”
“A handy way to reinstall heavy wheels is to find a bolt that is 5 or 6 in. longer than the studs with the same thread. Cut the head off the bolt and file the edges clean, screw the threaded part of the long bolt into the hub, then use that long bolt to guide the wheel onto the hub. Insert two or three bolts into the wheel and then remove the guide bolt.
“I had a Wood-Mizer sawmill, and the original engine was an Onan with a lot of hours. It was hard getting parts, so I replaced it with a Honda which had the same 23 hp. All I had to do for the swap was add a small lift plate made of 2-in. channel iron, and it ran just fine.”
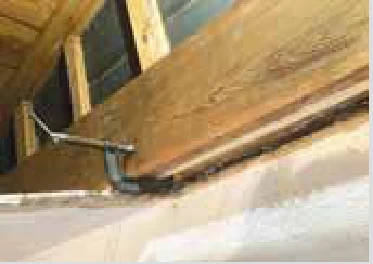
“Instead of buying an expensive lift for my shop, I bolted one end of a 2 by 4 to the trusses in the shop so it hangs down vertically. I mounted a boat winch to the lower end. I can now lift heavy equipment quickly and easily, using a step stool to crank the winch. I use it to lift mowers, generators, pumps, and much more up onto a rolling worktable that I move under the item once it’s lifted.”
“Some older IH tractors have a problem with transmission oil leaking into the shuttle shift or TA cavity and overfilling it. The official fix is to split the tractor and drill a hole at a specific height to allow the oil level to equalize. What worked for me on an IH 340 was to drain the oil from both and replace the two drain plugs with compression fittings with a hose between, connecting the two compartments. They now share oil at the same level, and I didn’t have to split the tractor.”
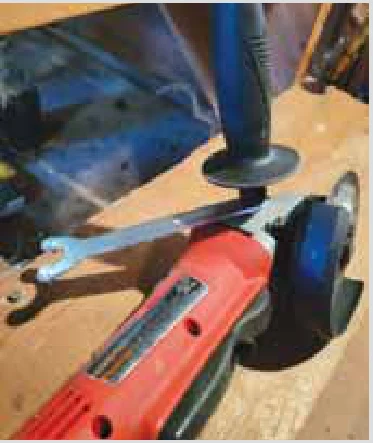
“I was always losing the wrench for my grinder. I simply drilled a bigger hole at the end of the wrench and screwed it onto the handle.
“Last spring, I needed to put a new front tire on my riding mower. I had to use a Sawzall to get it off, but I couldn’t get the new tire over the rim. I had grilled burgers a little earlier, and the grill was still hot, so I put the tire in there for 15 min. at about 200 degrees, and then it popped on easy.”
“I put a 3/4-hp. reduction motor from a flex auger on my drill press. It used to struggle to drill a 1/2-in. hole, but now it’ll easily drill a 1-in. hole spinning at about 130 rpm’s.”
“I use a large C-clamp to hold planks in place while I nail or bolt them into place. Makes the job a whole lot easier.”
“I built a handy device to organize tools above my welding table,” says Hastings, Minn., farmer Robert Bauer.
“I put a barn door hinge on one end of a 30-in. piece of 2 by 4 and screwed the other part of the hinge to the wall. The 2 by 4 has a power strip on it along with hooks to hold all of my grinders. I frequently use several grinders when I’m building something, so this way, they’re all hanging right in front of me and plugged in. I put a bungee cord on both sides so the hanger can swing both ways, and I can adjust it anywhere I want.”
Bauer has an upper level in his shop that he uses for storage and says, “I can’t always carry heavy items up 12 steps, so I built an elevator out of the 3-stage lifting mechanism from the front of an old Hyster forklift. I rescued the old rig when it was heading for the junkyard. I removed the hydraulic lift mechanism and made brackets for the back so I could weld it to a 16-in. steel post embedded in my shop floor. I use an electric motor to run the hydraulic pump and control it with a handheld switch.” Bauer shortened the forks to 20-in long and welded the vertical back portions to the outside of the lift arms. The 24-in. deep by 48-in. wide lift platform is made of plate steel. The lift capacity is probably 2,000 lbs. or more, and it’s rock solid, without any sway or movement, Bauer says.
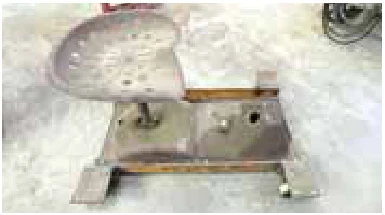
For projects where he needs to sit down, Bauer made a sturdy wheeled dolly.
“I’ve probably got the only shop dolly in the country made from the seat and part of the gearcase from a Farmall F-20,” Bauer says.
“The tractor was wrecked and not worth repairing, so I cut away the gearcase and seat, then made an angle iron frame with mounting points for the casters.” Contact: FARM SHOW Followup, Robert Bauer, 10162 160th St. E., Hastings, Minn. 55033.
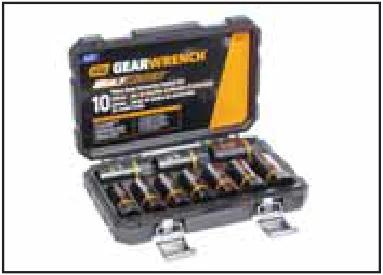
For rusted, rounded or seized bolts and nuts, Gear Wrench offers their 10-piece 1/2-in. drive Bolt Biter extraction deep sockets. Nuts and worn bolts can make it almost impossible to fit a wrench or socket tight enough to withstand hand or impact torque energy. Using a soft-faced hammer, Bolt Biter sockets can be tapped into position over any amount of rust and corrosion for secure holding power. Their tapered flute design bites into the flat side of a nut or bolt to easily seat on rusted fasteners. Acme’s sockets are built from chrome molybdenum alloy steel for extra strength and durability and feature a bi-directional flower-shaped design that can be used to loosen or tighten damaged fasteners. A black oxide finish helps them resist corrosion. Sockets fit both SAE and metric nuts. The square drive comes with a hex base in case the targeted bolts can’t be accessed with an impact. A wrench or pliers fit the exterior of the sockets if needed. Bolt Biter deep sockets in a 10-piece case sell for $149.99 plus S&H. Contact: FARM SHOW Followup, Acme Tools, 1603 12th Avenue N., Grand Forks, N.D. 58203 (ph 877-345-2263; [email protected]; www.acmetools.com).
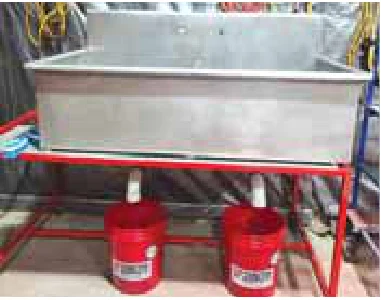
Lori Lynn Parkin and her husband put a lot of time into refurbishing Farmall tractors, removing rusted and paint-scarred parts that require solvents for cleaning. For years they used a small tank for soaking parts, but Lori Lynn found an old commercial-quality stainless washing sink on Facebook Market Place that she says works a whole lot better. She says the stainless tub is ideal because it’s nearly 4 ft. wide, 2 ft. across, and about 18 in. deep. Solvents they use to clean parts don’t affect the tub surfaces, and it’s easy to clean.
They built a sturdy base about 2 ft. tall, so the sink sits high enough off the floor to drain solvents into 5-gal. pails for straining and reuse. They also made a large metal grate to cover the bottom of the sink so parts as large as tractor wheel weights can be completely immersed in solvent to remove rust and old paint.
Contact: FARM SHOW Followup, Parkin Farms, Tremont, Ill.
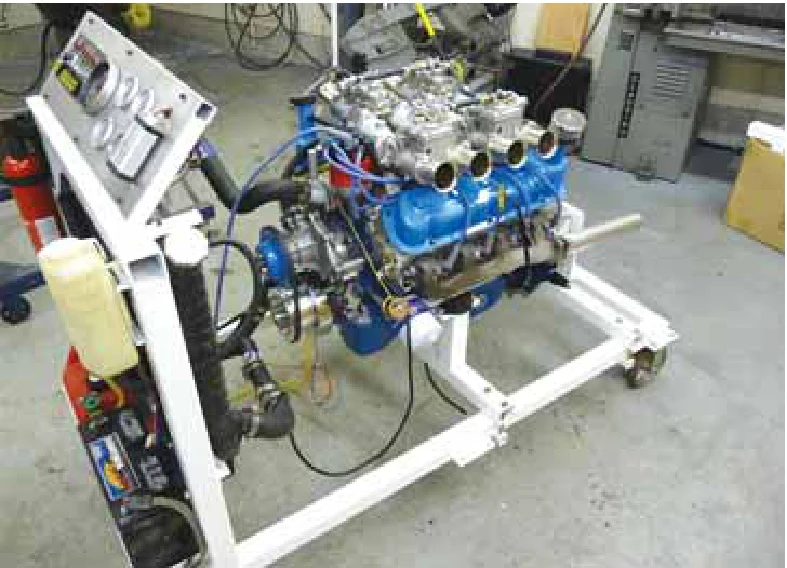
Testing an engine before he installed it seemed like a good idea to Brian Laine, so he built an engine run-in stand. He can bolt a motor in place, fire it up, and run it for break-in, tuning and general troubleshooting, all before final installation.
“You can buy engine run-in stands, but they aren’t cheap, and as they are large, they involve the added expense of shipping,” says Laine.
Laine posted photos and complete details of the building process on his website. As he has multiple times in the past (most recently Vol. 47, No. 2), he’s sharing an overview of the project with FARM SHOW readers.
“I made the frame with 2-in. square tubing with a base of 30 by 60 in.,” says Laine.
“The caster wheels lifted it 7 1/2 in. off the ground, providing room for the engine hoist to roll beneath it.”
The frame uses adjustable crossbars with upright arms with motor mounts for the engine to be tested. At the front of the stand, two upright arms with a crossbar provide support for a control panel. Laine mounted a radiator with a fan and a radiator overflow tank to the uprights. Space beneath the radiator provides room for a battery with a disconnect switch, an electric fuel pump with regulator and pressure gauge, and a fuel filter. For safety’s sake, he also mounted a fire extinguisher to an upright, as well as a ground.
“I used some 3/4-in. square tubing for the control panel frame, which I covered with an aluminum sheet,” says Laine.
“I mounted a tachometer from a boat and a TachMatch to accommodate engines with a different number of cylinders, a voltmeter, an oil pressure gauge, and a water temperature gauge. I put in an extra hole for future use and temporarily filled it with a mechanical oil pressure gauge.”
He also installed a starter button and several switches with on-indicator lamps and a fuse per switch. He wired it with an on/off switch for the ignition that also powers the other gauges, a starter switch, a fuel pump switch, and a fan switch. As with the gauges, he added a couple of extra switches for future use.
“I used relays in the wiring to switch the fan and another to switch ignition current,” says Laine.
“I used a salvaged starter relay, so the cable connecting the battery to the starter is only active when the starter button is pushed. This is necessary for cars without starter relays but is also compatible with cars that use a solenoid on the starter.”
Before having the stand powder coated to protect it from oil and gas exposure, Laine fabricated three common motor adapters, one for a flathead Ford V8, one for small-block Ford, and the last for a Datsun A-series engine transmission. They were simply cradles with inexpensive rubber transmission mounts. The cradles clamp to the main 2 by 2-in. frame, allowing them to be adjusted to match the motor.
“At the transmission end, I made a plate that bolts where the transmission typically mounts,” says Laine.
“I drilled patterns in the plate for three common Chevy and Ford patterns. The plate connects to the frame via the same rubber mounts used for the engine cradles.”
As Laine used the stand, he made changes as needed. The second motor tested was a Ford 302 stroker motor. It required he add an MSD ignition and coil, as he was using a magnetically triggered distributor that couldn’t directly run a coil.
“The stand saved a lot of work on the 302,” says Laine.
“I made an assembly error on the motor. I was able to find the problem before installing it and having to pull it again. The motor had an oil pressure issue, and it was nice to have both electrical and mechanical gauges to confirm proper operation of the gauge and the sender.”
While working on the 302, Laine quickly discovered the need for a few more changes. One was rewiring the gauges for power separate from the ignition. He also saw the need for a muffler and a way to run exhaust out of the shop.
While working on his third engine, a Datsun A-series, he added a Massey Ferguson tractor muffler. Given the small engine size, Laine mounted it and the transmission to the stand.
Laine placed a link to drawings of the stand on the project page on his website.
“There isn’t complete detail, since some of the parts were fabricated on the fly without drawings,” he says.
Contact: FARM SHOW Followup, Brian Laine, 7921 Wade Rd., Arlington, Wash. 98223 ([email protected]; www.lainefamily.com).
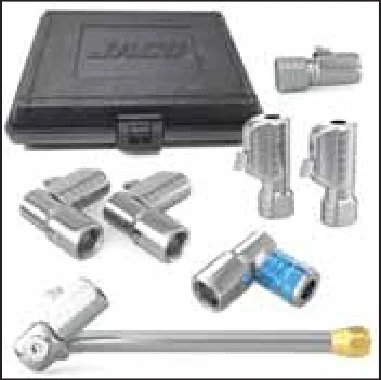
The Lightning S-Series air chuck from Jaco Superior Products makes tire inflation easier than ever. Push it on, and it locks in place, even under high pressure or if the air hose is moved. The chuck is available by itself or with the FlowPro digital tire inflator with pressure gauge.
The Lightning air chuck is open-flow with 1/4-in. F-NPT (tapered) threaded fitting for a faster and tighter connection with air lines. Air flows freely through it as soon as the air source is turned on. It’s not designed for use with air tank-style compressors without the use of a hand-operated inflation tool.
The internal locking system of the chuck uses military-grade clamps to grab and hold the tire valve stem. The high-density alloy air chuck also features a quick-release valve. It detaches as fast as it locks on, with no air release for extreme precision inflation.
The Lightning air chuck has a base price of $22.95 for a twin pack. For $2 more, the S2 offers a 360-degree swivel head, eliminating air hose tension.
Access to hard-to-reach valve stems is made easier with the L2 model and the Lighting T Dually tire air chuck. Both are priced at $27.95. The L2 has a 90-degree body plus the 360-degree swivel. The T Dually has the 360-degree swivel head on a 7-in. neck.
Other Lightning air chucks are available for Presta and Shrader bike tire valve stems, as well as with tire inflator extension nozzles.
The Lightning tire air chuck kit features seven of the S-Series air chucks, including the T Dually. It’s priced at $89.95.
The Lightning lock-on air chuck comes standard with Jaco’s FlowPro digital tire inflator with pressure gauge. The FlowPro 100 psi maximum pressure gauge is equipped with a 21-in. flexible hose. The 200 psi FlowPro is equipped with an 18-in. stainless steel braided hose. Both have a push-to-inflate thumb trigger and an air bleeder valve.
The FlowPro is calibrated, and performance tested to plus or minus 1 percent accuracy. The 2.5-in. digital gauge displays pressure readings in 0.5 psi increments. The second generation FlowPro 2.0 with a maximum pressure readout of 200 psi has a readout resolution of 0.10 psi.
The two AAA batteries needed for the gauge are included. They provide a super bright blue LCD backlight display needed in dark garages and shops and for night use.
The FlowPro is air compressor-ready with 1/4-in. NPT-compatible accessories. However, it’s not compatible with 12-volt mini tire inflators. It can be used as a stand-alone tire pressure gauge. It doesn’t need to be connected to an air compressor to measure pressure or deflate air.
Prices for the FlowPro start at $35.95 with a maximum 100 psi pressure. The 200 psi FlowPro and FlowPro 2.0 gauges are priced at $39.95.
Contact: FARM SHOW Followup, Jaco Superior Products, 3721 Evergreen Parkway, Suite 1, Evergreen, Colo. 80439 (ph 303-386-4364; [email protected]; www.jacosuperiorproducts.com).
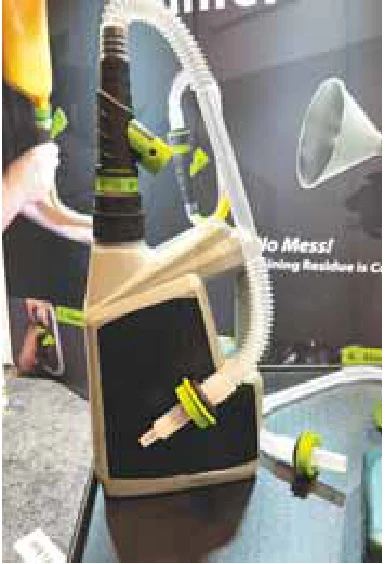
With its screw-on cap and how it’s designed to close, the Screw-On Funnel eliminates oil leaks and drips. Adapters that come with it ensure that the funnel works with 98 percent of oil bottles.
“It’s the only screw-on model we’ve found on the market,” says Ryan Gill, operations officer for Express Products in Grandville, Mich. Two Canadian brothers developed the prototype a couple of years ago, and the Michigan company purchased the rights, modified the design and patented the Screw-On Funnel.
“The neat thing about it is that it’s not just a funnel. It closes up on itself to retain fluids in there so you can use it, and it won’t leak after,” Gill says.
“Because you screw it onto the bottle, it’s protected from the outside environment. So, it keeps the fluids clean with no bugs, dust or contaminants.”
The durable, bendable 29-in. long 3/4-in hose also makes it easy to fill oil tanks in hard-to-reach places. A breather valve can be opened to prevent a vapor lock and speed up the flow. In addition to adapters to screw the funnel onto different types of bottles, a smaller tip can be added for transmission fluid.
Besides using it for oil, diesel truck operators use it for DEF. At about $20/retail, customers often buy more than one funnel to use for different applications, Gill says.
The new product can be found at truck stops and some farm supply companies, as well as through the Express Products website and Amazon.
Contact: FARM SHOW Followup, Screw-On Funnel, 2606 Sanford Ave. SW, Grandville, Mich. 49418 (ph 616-532-4906; [email protected]; www.screwonfunnel.com).
SKF Lincoln’s Automatic Electric Cartridge Pump (AECP) automatically greases equipment on the go using ordinary grease gun cartridges.
“You can use it anywhere you would use a grease gun, from balers, combines, skid steers, mini excavators, to street sweepers and construction equipment,” says Jordan Butler, SKF product line manager.
The AECP accommodates standard 14.1-oz. grease gun tubes and consistencies from NLGI 0 to 2. It can be mounted in any position, works with a piston pump, and is powered by the tractor’s 12-volt battery system. The pump pushes grease from the cartridge through tubing and divider valves to selected grease points.
Each of the points is individually metered by adjustment screws in the progressive divider valve. They determine the piston travel distance which controls and ratios out the amount of grease delivered. A cab-mounted controller manages run and pulse times, provides a manual cycle capability, and features a low-level detector that alerts the operator when a tube change is required.
“Our target market was compact equipment with limited space to install automatic lubricating systems,” says Owen Mostoller, SKF national accounts manager.
“Another large application was combines, but over time this has transitioned to farm sprayers and applicators due to the environment they operate in and the corrosiveness of the sprays.”
Mostoller explains what sets the AECP apart from its competitors is other systems use their own distinct reservoirs and filling devices while the SKF equipment holds a standard grease tube.
“It’s convenient to throw an extra tube in the cab or toolbox,” Mostoller says.
“When the controller signals that it’s run empty, you just slap in another tube and carry on. You don’t need to carry a bulk pail or filling device.”
The AECP is readily available in North America through numerous supporting dealers and distributors.
The cost of the complete unit including installation for a standard skid loader is approximately $5,000.
Customers are urged to use the distributor locator tab and contact form on the SKF website for further information and support.
Contact: FARM SHOW Followup, SKF Lincoln (www.skf.com/us/products/lubrication-management/system-components/pumps-and-pump-units/aecp).
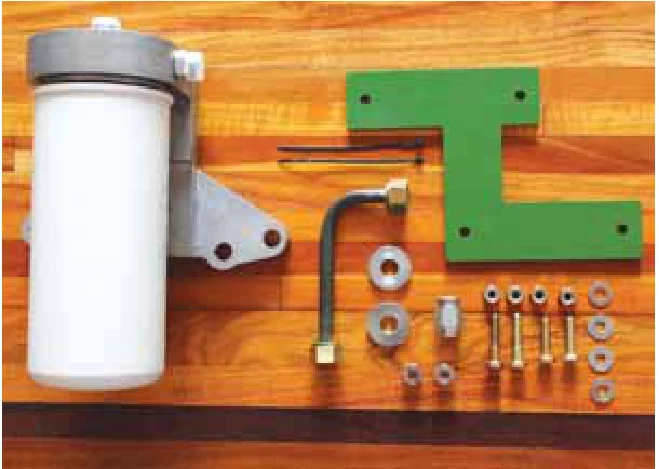
DKC Solutions has the solution to time-consuming fuel filter replacements on Deere tractors. Their filter conversion system eliminates the hassle once and for all.
“Replacing the fuel filter on most Deere engines introduces air into the fuel system since the filter is installed dry,” says Dave Christianson, DKC Solutions.
“You have to bleed the fuel system to prevent a stall. Our conversion system lets you fill the filter with diesel fuel, spin it on, fire up the tractor and go.”
DKC Solutions was founded in 2021 to make the use of spin-on filters a reality on Deere diesels. The prototype was machined out of a block of aluminum and designed to mount to the engine block where the original filter was mounted. It was connected to the fuel lines and evaluated for possible improvements.
“We decided to cast the adaptor from one piece, to make it look like it came with the tractor from the factory,” says Christianson.
“We used 6160 aluminum, so it can handle the heat and vibration it gets and work dependably, as expected.”
Christianson says the $240 kit comes with everything needed, including a premium filter that holds more fuel than conventional filters.
Contact: FARM SHOW Followup, DKC Fuel Solutions, 520 Sumner Ave., Humboldt, Iowa 50548 (ph 515-890-2318; [email protected]; www.dkcfuelsolutions.com).
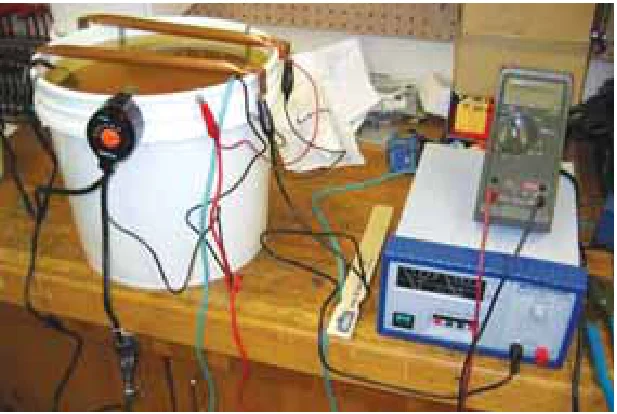
When Brian Laine decided to metal plate motorcycle parts at home, buying a metal plating kit was just the first step. A 3-gal. Copy Cad kit from Caswell Plating cost $290 (www.caswellplating.com). He spent a day driving around to gather an aerator pump from a pet shop, brass wire, rubber gloves, distilled water, beads from a fishing store, copper tubing, and several other things. Plating also needs a variable power supply, which he had.
“I found out an extra heater would be nice, as the degreasing tank should be 140 degrees at a minimum and ideally 190 degrees,” says Laine.
“The included heater only gets the solution up to 160 degrees in ambient conditions.”
To prepare parts, Laine used sandblasting or tumbling, although he suggests bead blasting would have been preferable. A plastic brush for cleaning parts was included in the kit, but he also used a wire brush on a grinder.
Once prepped, kit directions required computing the surface area in square inches. This is needed to compute the current required at 25mA per sq. in.
Parts are first immersed in the degreaser tank before misting to ensure no beading occurs. Then they’re placed in the plating tank for about 30 min.
“When plating is done, you dunk rinse them, blow off the big drops and let them sit, as they can show a fingerprint for the first couple of hours,” says Laine.
“I wanted a matte finish, so I didn’t use the brightener included in the kit. Without it, they came out duller than I wanted. To get the effect I wanted, I used steel wool on each part, although bead blasting might have had the same effect and been much less tedious.”
Laine was satisfied with the job done. He notes that Caswell sells other solutions that will apply a color. Additionally, the kit can also be used to deplate metal by reversing the electrical current.
“I ended up spending about three times as much money and a huge amount of time compared to having a local company treat the parts,” admits Laine.
“Still, it’s interesting to do stuff yourself, and I’m set up for the future now.”
As with many other projects, Laine has detailed the entire conversion process with lots of pictures on his website.
Contact: FARM SHOW Followup, Brian Laine, 7921 Wade Rd., Arlington, Wash. 98223 ([email protected]; www.lainefamily.com).
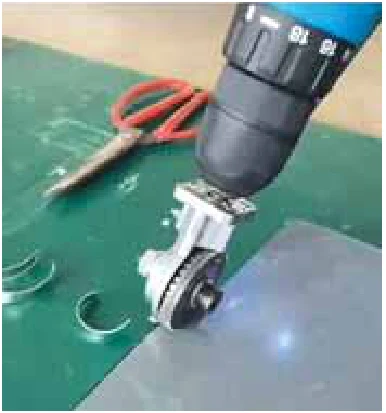
Online store Zemte sells electric drill shears designed for cutting various materials. Attach it to any 12V or 21V lithium electric drill for convenient use.
The shears come equipped with a robust metal gearhead that’s designed for rugged use. By ensuring your fingers have no contact with the saw blade, it reduces the risk of hand injuries.
It’s a double-headed sheet metal nibbler that claims to make cutting jobs faster, easier, and safer by giving you a precision burr edge. The cutting head can be used for straight and circle cuts to allow for beautifully smooth shearing without burrs.
Made from high manganese gear steel, the drill shears are advertised as the perfect tool for car and house maintenance projects, including cutting metal roofs, HVAC vent pipes, and other forms of sheet metal. The shears also have a positioning slot for accurate sizing when using a wide range of metal pieces.
The drill bit is designed for compactness, making it easy to store in a toolbox when not in use. It’s not recommended for use on plastic, stainless steel, or special high-hardness alloy materials. If you use it for stainless steel, ensure the material is 0.5mm or thinner.
Customer reviews show many believe the tool is surprisingly functional for its relatively low cost. Some took issue with the fact that it could only cut through flat surfaces and was ineffective on ridges in metal roofing.
At publication, the tool was sold on Zemte for $38.99, with discounts for purchasing more than one. Each purchase is covered by the company’s 100 percent satisfaction guarantee.
Contact: FARM SHOW Followup, Zemte Store (www.zemtestore.com).
When Dan Erdman needed to turn an oversized nut on a hydraulic cylinder, he used an oversized powered “wrench” that he made out of a hydraulic cylinder. Until he recently sold it, he used it for years, whenever he needed to crack a really big nut.
“I built it for breaking 4 to 5-in. nuts on large hydraulic cylinder rams when I needed to change the packing or rebuild a cylinder,” explains Erdman.
“Those nuts take a lot of torque.”
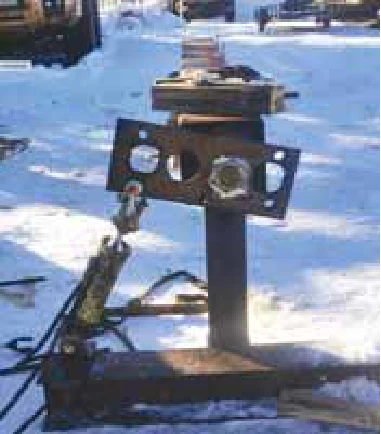
Erdman put 8 by 8-in. sq. box steel tubing legs on either end of a 15-ft. length of 12-in. sq. box tubing. At the working end, he welded a length of 8-in. wide flange I-beam perpendicular to and centered on the leg. It serves as a stabilizing foot for the leg and as a base for the cylinder/wrench.
Erdman fabricated an insert for the 12 by 12-in. tubing to anchor the hydraulic cylinder that needed repair. It consisted of two 3/4-in. thick steel plates sized to fit inside the steel tubing with 4-in. spacing between them. They connected at one end with a large bracket. He drilled holes in the center of the other ends and welded a steel rod in place.
“When I needed to work on a cylinder, I slipped the clevis end over the rod and pinned it in place,” says Erdman.
“Then I pushed the insert and cylinder into the tubing.”
The head of the hydraulic wrench is a 12 by 36-in., 1-in. thick steel plate. Erdman drilled holes in all four corners of the plate and cut out a hole the size of the nut to be turned.
“I cut out a piece of cereal box the size of the nut and used it as a template to cut a hole in the 1-in. steel plate,” says Erdman.
“Over time, I cut multiple holes out of the plate to match different nut sizes.”
To crack the nut, Erdman would slip the plate with the hole over the nut. Once he pinned the cylinder/wrench ram through a corner hole in the plate, he could activate the cylinder. As the ram extended, the plate turned, turning the nut as it did. When the large cylinder repair was finished, Erdman simply reversed the process to retighten the nut.
“I always marked the ramrod and the nut to bring it back to the right torque when reassembling,” says Erdman.
Contact: FARM SHOW Followup, Dan Erdman, Box 1620, Claresholm, Alta., Canada T0L 0T0 (ph 403-382-1020; [email protected]).
When extreme winds put a bow in the top panel of Dale McLaen’s overhead door, a space the size of his hand opened up between it and the door header. The space let cold air and snow blow into the shop. The 21-ft. wide, 12-ft. tall, heavy-duty door was at the south end of his shop.
“The door already had wind bracing on every panel, so I needed to come up with a way to remove the bow and reinforce it,” says McLaen.
“I could’ve replaced all the braces, but since they had bowed in once, I’m reasonably sure it would have happened again.”
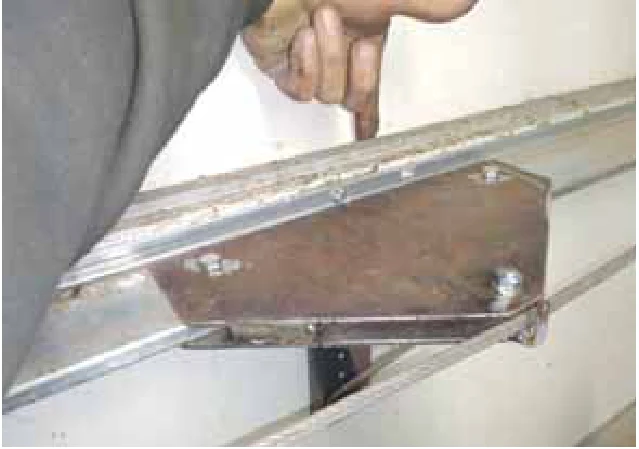
McLaen fabricated a bracket out of two steel plates sufficiently spaced to sandwich the door’s top wind reinforcement channel. Roughly triangular in shape, the bracket protrudes about 6 in. from the door with a bolt and hook at its apex.
“I wrapped a cable with a turnbuckle at one end around the ends of the wind reinforcement channel and over the bracket, between the bolt and hook on the tip to form a truss,” says McLaen.
“Tightening the turnbuckle pushed the top of the door back into line.”
He estimates it took him about a day to design and build the truss and a couple of hours to install and adjust it. His design included a leg brace that extends down on the channel side of the bracket. It helps stabilize the truss under tension.
Unlike replacing the braces, the cable truss is both permanent and can be readjusted if needed. He didn’t add any trusses to the lower part of the door, as the bow wasn’t as bad there. He notes that it would be easy to do so if needed.
“The door now seals tight against the opening like it did when it was new,” says McLaen.
“It doesn’t bow in when the wind blows, and the shop stays warm.”
Contact: FARM SHOW Followup, Dale McLaen, 13756 Hwy 11, Rutland, N.D. 58067 (ph 701-678-5232).