From the archive · Full text
Reader shop tip 1 of 3
John Rochester
“When picking up many small items, a dustpan works great. Dustpans also work to scoop water off the floor and into a bucket.
Money-Saving Repairs & Maintenance Shortcuts · Printed section pp. 32–35
29 selected entries · Complete text of selected entries
This issue’s section includes reader tips and feature-length shop stories. Held items and editorial notices are not reproduced.
“When picking up many small items, a dustpan works great. Dustpans also work to scoop water off the floor and into a bucket.
“If you don’t finish a project and will be going back to it the next day, set up a table near it and place only the tools you’ll need to finish on it. They’ll be nearby and ready to go when you are.
“Use a mill cut board instead of a square to mark cuts.”
“After putting four new tires on my skid steer, I had recurring problems with two losing air over time. I finally figured it out. Those little needle/toothpick-like bits on the tread are also on the bead of the tire. They were just big enough on those two tires to give a path for air to escape.
“I broke the bead on the tires from the rim, blew them out with air, and opened them up enough to pull the tips off with a needle nose plier.
“I put a nice coat of bead sealer on the tire beads and set them for 24 hours to ensure a good seal. I’ve had no problems losing air since.
“I would encourage FARM SHOW readers to check the bead on tires before mounting. Pull those little needle-like bits off first and eliminate a potential problem
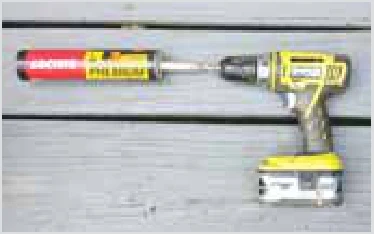
“I’m sure many readers have used just a small amount of caulking, tried to seal the tube, and then discovered it had set. This technique works for me.
“First, clear the hardened material using an appropriately sized drill bit. Clean before it sets. Although this is much easier, be careful. The bit’s flutes are sharp, too.
If there’s still good stuff left in the tube, cap off the nozzle with a wire nut, toothpaste cap, lamp finial or other cap-like item. Most are threaded for a snug fit and come in several sizes for a hermetically sealed cap. Tin foil with a rubber band over that will help even more.”
“We’ve always used bailer twine around the farm, and inevitably, it’ll become a tangled mess which eventually just gets thrown away. Our simple solution is to put the twine in an old 5-gal. oil bucket and run the string through the spout on the lid. No more mess, no more fuss. It’ll feed without knots until it’s completely consumed. Sometimes, I run it through the plastic handle to make it more accessible.”
“Case IH Maxxum tractors have a foam seal under the cab roof that deteriorates and drastically reduces A/C cooling capability. No longer OEM, I used Emseal sealing foam to repair them.
“A 630 Bobcat skid steer hydrostat pump had the input shaft seal retaining snap ring groove destroyed. Rather than buying a new housing or pump, I ground down the housing flush with the mounting flange and had a fab shop cut out a different mounting bracket with only a small hole around the input shaft. That held in the seal instead.
“I’ve added small flat free wheels to each front corner of my 7-ft. Brush Hog. It now doesn’t gouge or cut in like it used to.”
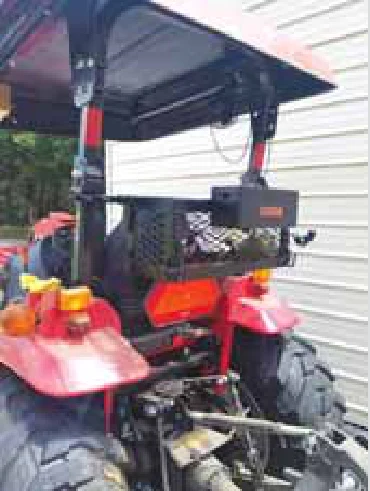
“This storage box from Amazon is a great addition to my tractor. Excellent purchase that allows me to carry tools and other supplies away from the shop.”
“I removed the carburetor on my Stihl MS 291 using a cheap deep-well socket and turned it down to fit the holes.”
“Before removing the power adjust wheels and tires from a 1965 Deere 1010 tractor, I purchased a service manual and read it instead of trying to figure it out on my own.
“My money-saving methods consist of repairing everything I can in my shop and realizing that sometimes I lack the tools or the special expertise to complete a project, so I ask for help.
“I label all parts and hardware so I can locate them. This saves more steps than you can imagine.”
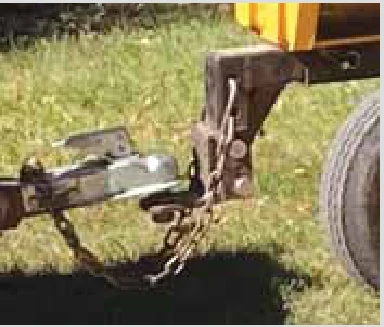
“I like to take a trailer to toss wood into when I head to the woods with my splitter. That has meant making two trips with my ATV or pushing the splitter ahead of the ATV while towing the trailer. I installed a hitch on the splitter to tow them both in line.
“I welded a 2-in. receiver tube to the underside of the splitting beam on my wood splitter. I placed the receiver tube 2 in. from the end of the splitter so it doesn’t interfere when I tip it into a vertical position.
“I use a step-down ball mount to attach the trailer. I can toss the split wood directly into the trailer with it in place and the splitter in a horizontal position.
“The step-down mount has come in handy for other uses as well. I have dirt and snow blades that mount on receiver hitches on the front and back of my ATV. I remove the ball mount and put the step-down mount in a horizontal position. This lets me offset the blade by 6 to 8 in., making it easy to move dirt into ditches alongside the ATV.”
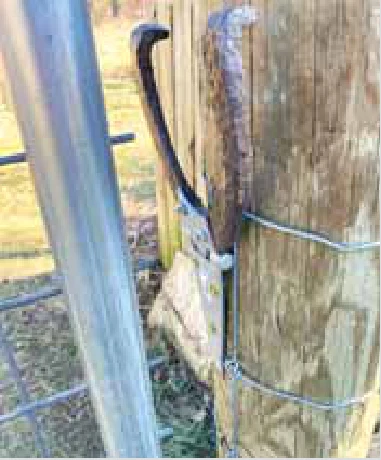
“An old horseshoe and a barn door hinge made a great gate latch for our backyard fence. It was a simple fix that worked much better than the chain and snap I’d been using. There are a lot of horseshoe latch ideas on the internet, but I think this one is as simple as they come.
“Any size heavy-duty hinge will work, but the key is that it has only 270 degrees of travel. This way, when the horseshoe latch is lowered, it only goes a little past the halfway point.
“I figured out which side of the hinge plate would travel to that point and drilled two holes in the horseshoe to match the two holes in the hinge plate nearest the hinge pin.
“I bolted the two together temporarily, marked the excess hinge plate, cut it off and ground the edge smooth with an angle grinder. I also had to grind off a ridge on the horseshoe that prevented it from reaching a vertical position when mounted.
“Bolted back tight, it took only a few minutes to screw the new latch on the gate post. It works great, and I no longer have to deal with a snap that freezes up in the winter.”
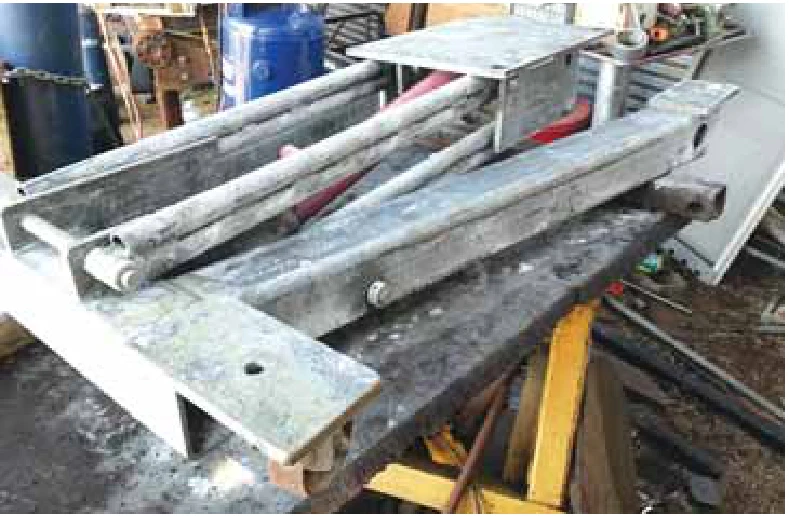
A friend called Frank Surber a few years ago and asked if he could install a clutch and rear main seal in his Mack truck. Surber said, “Sure, come on over.” Then he realized he didn’t have the heavy-duty jack he’d used several years ago, and his neighbor’s jack, which he thought he could borrow, was broken.
“I offered to rebuild the one my neighbor had, but he’d already taken it for repair, and it wouldn’t be back when I needed it,” Surber says.
“I decided it was easier to build my own rather than hunt for one to borrow or rent.”
Surber knew what parts he needed for the build, so he went to his scrap pile. He pulled a couple of 4-in. by 4-in. by 1/4-in. square tubes, various lengths of 1-in. pipe, a large piece of 1/2-in. plate steel and a few feet of 3/4-in. 1018 cold roll rod for the pivot shafts. His storage van had four heavy-duty casters, two rigid and two swivel, and an 8-ton engine hoist jack. He also had a chromed cylinder rod for the pivots and set collars that he’d made for another project.
“I guess it was a stroke of luck that I had all the parts I needed, and all I had to do was put it together,” Surber says. He used two 1-in. holes in his welding table as a jig to hold the 1-in. pipes so he could weld them together to make the link arms. After the ends cooled, he reamed the bores with a #7 tap handle. He preassembled the parts, tack-welded the connection points, and checked to make sure it worked.
“Right from the start, it worked great,” Surber says, “which really didn’t surprise me because I always double-check measurements on everything I build.”
Surber removed surface rust with KBS rust blast to provide a smooth pre-paint primer surface. He says that leaves a zinc coating that can be brushed off or left in place. He didn’t have etching primer, so he just rubbed off the surface residue and left the remaining material as primer. He finished the lift in machinery gray with a full coat of KBS rust seal.
Surber says it only took him a couple of hours to build the jack, and when his friend arrived to have him work on the Mack, the new tool worked exactly as planned.
Contact: FARM SHOW Followup, Frank Surber, Peacock, Texas.
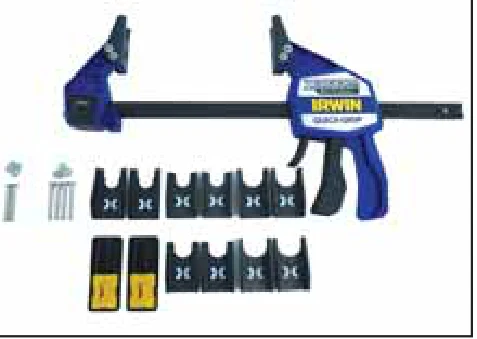
Connecting hydraulic couplers when line pressure has built up can be nearly impossible. The QC Mate Quick Coupler Hand Clamp from XBoom solves the problem quickly and safely.
The QC Mate has specially shaped clamp jaws that mount to a ratcheting hand clamp with up to 600 lb. clamping force. The jaws are 13-ga. steel tubing with large structural side gussets.
The QC Mate is available in both 12 and 18-in. spacing to handle a wide variety of machine types and hydraulic block and coupler styles. It’s compatible with all standard Flat-Face Hydraulic Couplers and Ag Style Hydraulic Couplers within listed sizes.
When selecting the correct QC Mate jaw size, it’s important to note that the NPT size (used for couplers) differs from the coupler’s outer diameter. Select the jaw size that coincides with your coupler’s NPT size. A 1/2-in. NPT jaw option that fits a 1/2-in. quick coupler has an actual jaw/width diameter of 0.87 in., which is needed to fit the coupler’s outside diameter.
Duo Jaws are designed to fit two different coupler sizes without changing the jaws on a QC Mate clamp.
Customer reviews on the Skid Steer Solutions website were very positive, with 95 out of 115 giving the QC Mate Quick Coupler Hand Clamp five stars. It’s priced at $89.00 on that website.
Contact: FARM SHOW Followup, Skid Steer Solutions, 2314 E. Bakerview Rd., Bellingham, Wash. 98226 (ph toll-free 866-966-2538; [email protected]; www.skidsteersolutions.com).
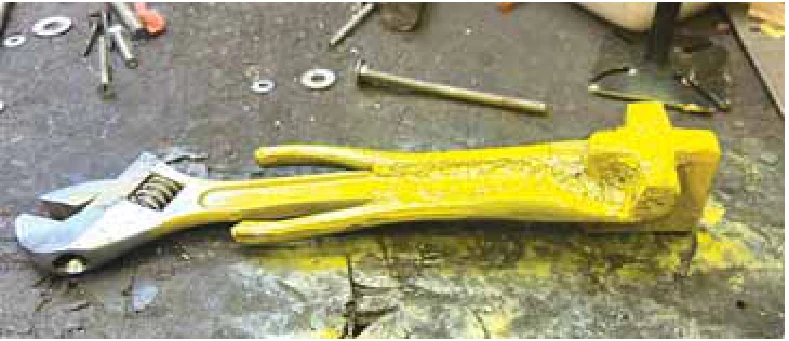
C.J. Shortridge of Dagsboro, Del., made a homemade barrel bung wrench that turns into an adjustable multi-tool.
“I got inspiration because I needed something easier to use than two adjustable wrenches for taking the plugs out of 55-gal. drums and tightening them again. My solution was to add an adjustable wrench to it.”
The process was simple.
“I cut metal to fit the patterns on barrel bungs, then welded and ground it for the final fit.” All he needed was an extra adjustable wrench and scrap metal already lying around.
“It works as well as planned,” he says.
“I wouldn’t do anything differently.”
Contact: FARM SHOW Followup, C.J. Shortridge, Dagsboro, Del. (ph 443-359-0199).
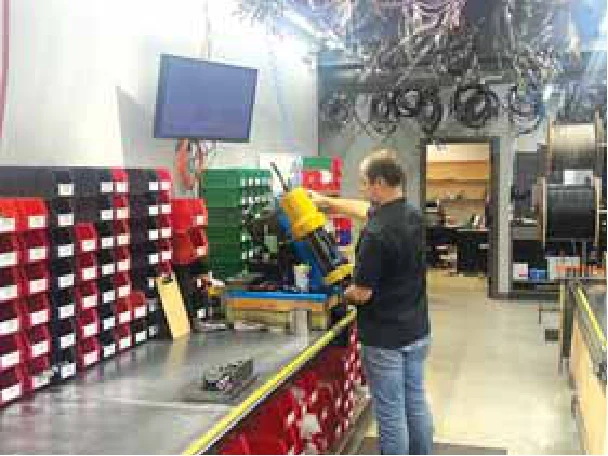
Bunker Hill Cables of Holmes County, Ohio, sells individual cables directly to customers. These include affordably-priced replacements for name-brand equipment, duplicates of obsolete cables, and custom work for customer-specific applications.
Bunker Hill Cables is a Division of Bunker Hills Engine, a John Deere engine service dealer that sells and services Yanmar, Iveco, PSI, PSI Heavy Duty, Ford industrial engines, Kohler standby generators and engines, and more. The company began in 2014 when its founders bought out a local engine shop, which included an Orscheln F.A.S.T. dealership that built custom cables while customers waited.
“Customers were bringing us cables for skid loaders, tractors, log skidders, winch controls, and other types of equipment,” says Kevin Schrock, company representative.
“Over time, we noticed different customers wanting the same cables, so we began stocking certain items so they didn’t have to wait.”
Schrock believes a big part of the company’s appeal is price.
“We understand that equipment downtime costs you money. When buying from Bunker Hill Cables, you buy directly from the manufacturer, not a distributor. The cables we were seeing most often would cost $300 to $400 if you bought the name-brand part from the equipment dealer. We were building a cable of the same quality and selling it over the counter for less than half that price. This saves you both time and money.”
Customer enthusiasm pushed their business beyond the shop.
“We decided that if a farmer in Holmes County liked saving money on a cable for his skid loader, so would farmers all across the country. In the fall of 2015, we officially created Bunker Hill Cables and started offering our products on eBay. Sales boomed almost instantly, and we have been developing and adding new products ever since.”
Most standard cables run between $100 to $200. There’s also a small machine shop for custom work.
“All of our stock cables are priced on our website, and there are several build-to-order cables ranging from 3 series (10-32 thread) to 8 series (3/8-24 thread),” says Schrock. The shop offers free 2nd-day air shipping on online cable orders across the continental U.S.
“We stock all of our standard cables and ship the same day on orders placed Monday through Friday. Since we build all the cables here at our shop, it also gives us the flexibility to build a custom cable and ship it the same day when it needs to be done.”
Today, Bunker Hill Cables continues expanding its ability to meet customer needs.
“We’re more than an internet business,” Schrock says.
“There are people here you can call and talk to. We also have a showroom. Many customers from neighboring states make the trip to Holmes County to bring in their cables, and most times, we can get them made while they wait.”
Contact: FARM SHOW Followup, Bunker Hill Cables, 4239 US Route 62, Millersburg, Ohio 44654 (ph 330-893-0355 or toll-free 866-434-0047; [email protected]; www.bunkerhillcables.com).
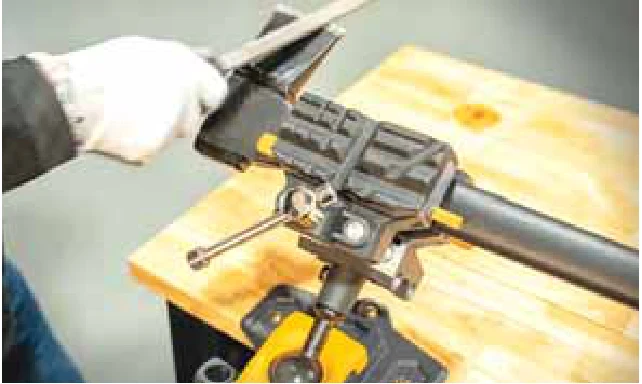
The IQ vise™, introduced by Work IQ Tools™, puts a modern spin of functionality and infinite positioning on a common farm shop tool. The unique design earned the 2024 Rising Star Award presented to the top new product at the National Hardware Show.
“The all-metal IQ Vise has a ball and socket joint that is extremely sturdy with a hardened steel ball,” says Brandon Smith, director of business development.
“It has all of the functionality of a normal bench vise, and with it placed on the edge (of a bench), you can lean it over to work on items like chainsaws or string trimmers.”
It has a patented locking pin for heavy-duty holding strength that accommodates 130 ft.- lbs. torque. To adapt to different uses, Work IQ Tools offers five double-sided job-specific jaw covers. For example, the Pipe-Fit™ Jaws have a metal jaw on one side for welding and grinding galvanized or black pipe and a rubber-coated side for tubular and copper pipes, which is heat resistant when sweating joints. The woodworking jaws are wider and taller, with a stiff foam side to hold molding and other irregularly shaped objects.
“It’s more ergonomic,” Smith says of the vise’s design, adding that some customers use grants to purchase the vise because of its safety and ergonomic features, allowing you to move the workpiece to you instead of moving your body to the workpiece. The vise sells for $280, and the jaw covers are additional.
Work IQ Tools also offers IQ Connect™ ($109), a hands-free system to hold accessories such as a cellphone to watch or make a how-to video while working on a project, a 5-in. magnifying glass, and a detachable flashlight.
IQ Connect can be plugged into one of four ports on the vise, screwed or clamped onto a bench, or used with a magnetic mount when working on farm equipment or vehicles, for example.
Work IQ Tools products come with a 5-year warranty and can be purchased from the Minneapolis-based online store and at stores such as Ace Hardware, Do It Best and various other hardware stores. Check the website for details on where to find them near you and videos of them in action.
Contact: FARM SHOW Followup, Work IQ Tools, Minneapolis, Minn. (ph 866-202-4746; [email protected]; www.workiqtools.com).
Matt Stewart got the idea for a MIG gun holder from a friend a few years ago. When he decided to make his own, he added a holder for MIG gun pliers. Using pieces of scrap he had lying around, it didn’t cost him anything, but it quickly proved handy to have.
“I started with a rusty, old, vise grip-style C-clamp,” says Stewart.
“For parts, I cut 2-in. lengths of 1 by 1-in. angle iron, Schedule 40 1 7/8-in. O.D. steel tubing and 1/8-in. wall 1 by 1-in. square tubing.”
The idea was to weld the angle iron to one jaw of the C-clamp for a secure attachment to the welding table. To do that, he needed a flat spot on the angle iron.
“I made a few passes on the center of the angle with a hack saw and then filed them down,” he says.
“I tightened the clamp jaw on the flat spot and welded it in place.”
He used a second C-clamp to hold the round tubing to the side of the jaw arm and welded it in place at an angle to accommodate the MIG gun.
“I rearranged the second C-clamp to hold the square tubing in a vertical position on the other side of the jaw arm and spot welded it in place,” says Stewart.
“The holder only took a few minutes of time, but it works great. The MIG gun is held securely, as is the pliers.”
Stewart made a video of the build for his YouTube channel (@mattthescrapwhisperer). It proved popular enough that he later made a second one as a giveaway when his YouTube channel hit 1,000 subscribers.
Contact: FARM SHOW Followup, Matt Stewart, 1215 E. Skyfield Dr., Huachuca City, Ariz. 85616 (ph 360-813-2171; [email protected]).
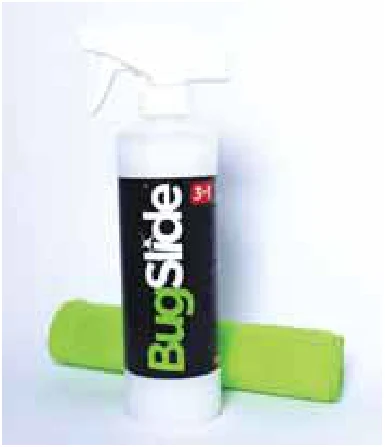
Farmers, musicians and car enthusiasts are catching on to a product motorcyclists have been using for a couple of decades. BugSlide® was created by a Wisconsin man who rode a motorcycle and was looking for a way to remove bugs. Working with a chemist, he developed a product that removes bugs, cleans and polishes without the harsh petroleum chemicals found in most bug-cleaning products.
“It’s designed to be an everyday cleaner, says Laurie Ziegler, director of sales for the Maple Plain, Minn., company Everline Products, LLC.
“The polymer base builds up and repels dust and bugs, so they release easier.”
Just spray it on and wipe, or let it set for about 30 seconds to loosen baked-on bugs or dirt, then wipe with a microfiber cloth. BugSlide is safe for all nonporous materials such as glass, chrome, plastic, aluminum, stainless steel, fiberglass, plexiglass, leather and vinyl. The Minnesota-made product dries crystal clear with a UV filter for added protection and has no yellowing, buildup or powdery residue.
Farmers are discovering BugSlide and how it can protect their tractors, farm equipment and semis. Musicians clean and polish instruments such as guitars.
“I use it in my house to clean stainless steel appliances and countertops. I like it because there are no harsh chemicals,” Ziegler says, adding she keeps a bottle in her car to keep her windshield bug-free and clean.
BugSlide comes in different sizes, from a 4-oz. travel kit with a cloth for $12 to the most popular 16-oz. size with a cloth for $22, and three sizes of refill bottles. It’s available in most Harley-Davidson dealerships, Cycle Gear and J&P Cycle stores, and independent shops throughout the U.S. and on Amazon. The company also sells it through its online store.
Contact: FARM SHOW Followup, Everline Products, LLC, Maple Plain, Minn. (ph 888-908-2847; [email protected]; www.bugslide.com).
The Link Latch offers a revolutionary alternative to conventional bungee cords through straps crafted from premium food-grade silicone.
“Unlike one-trick bungee cords, the Link Latch adapts to a multitude of applications,” says company representative Armanda Hughes.
“They work for light-duty indoor or outdoor use, both for the home and professional projects. These can include securing cargo, organizing gear or bundling items together. You can bid farewell to the limitations of traditional bungee cords that wear out or snap over time.”
The silicone construction is gentle on every surface, ensuring a secure hold on delicate surfaces or items that require extra transport care. Still, the latches are resistant to UV rays and extreme temperatures. Premium silicone means the latches are hand-washable and won’t crack, break, split or get brittle with age. Instead, they’re soft enough to prevent scratching while robust enough to keep things secure.
“With the Link Latch, there’s no more wrestling with tangled bungee cords,” says Hughes.
“It remains neatly coiled and ready for use whenever you need it, saving you time and frustration.” Each set of two can expand from a minimum size of 8 in. to 36 in. with the quick-pull Link Latch design.
To use, first adjust the length of the Link Latch band. Next, interlock each hook, pulling back until you feel a click. Firmly push the two clips together, then separate them. The end loop can be looped back through the clip if there’s extra band. The link latch hook can be removed, and the end loop can be secured to other objects and tie-down points while the holes in the band can accommodate the hooks. Finally, link the clips to self-enclose or add more Link Latches for a longer chain.
The Link Latch is a product of Mella Home.
“It’s a women-owned business, and we’ve innovated silicone solutions to everyday challenges,” says Hughes.
“Our products stand out not just for their uniqueness but also for their consistent performance, earning the trust of countless customers.”
Customer reviews aren’t shy about calling the Link Latch genius. They rave about the adjustable sizing, the durability of silicone (especially with UV), and versatility. Others found that the holes stretched, causing the hooks to fall out over time.
The Link Latch retails for $27.99 per three-pack on Amazon and the Mella Home website. It comes with a 1-year warranty. FARM SHOW readers can receive 25 percent off with the code “link25.” A similar Mella Home product, the Lid Latch, secures pot lids for a spill-resistant travel option. It’s made from food-grade silicone and retails for $16.99 per two-pack.
Contact: FARM SHOW Followup, Mella Home ([email protected]; www.mellahome.com).
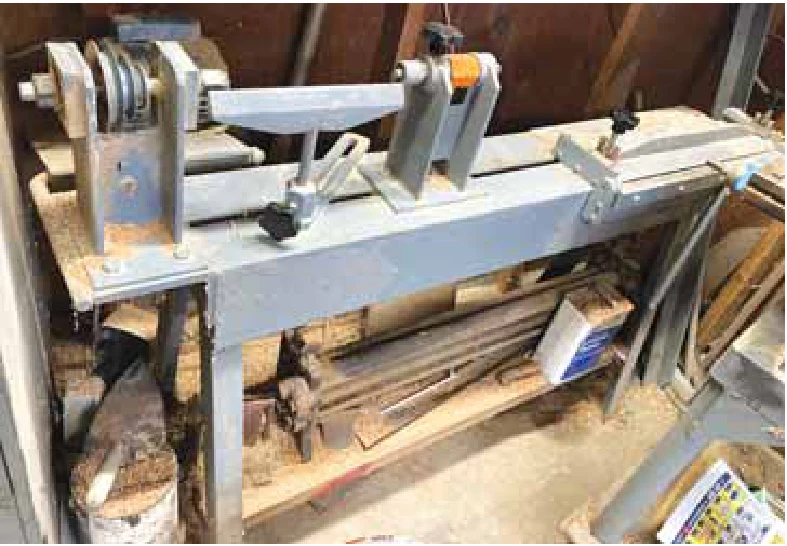
When the wood lathe he bought chattered with vibration, Norman Sieting got busy and built his own. With 2 by 2-in., 1/4-in. thick angle iron legs and a 4 by 6-in. angle iron bed, he didn’t worry about chatter. He used 1/4-in. H-beam steel for the headstock and tailstock. The lathe is 4 ft. long and can turn a 16-in. piece of wood. All he purchased for the job were the V-belt pulleys, bearings and the live center on the tailstock.
“I used 4-in. wide H-beam for the headstock and 3-in. wide H-beam for the tailstock and welded base plates to them to bolt to the bed,” says Sieting.
“I milled a channel out of the tailstock H-beam and mounted the live center on the end of a 1-in. threaded rod.” Making the headstock required making room in the center of the H-beam for the pulleys and boring holes in the sides for its spindle. Three-in. square blocks of 1/2-in. steel were welded to either side of the headstock after being bored out for the bearings. Sieting milled a brass sprue for the headstock. The sprue can be unscrewed and replaced with a 6-in. chuck. He also made the tool rest. It’s a 6-in. length of leftover grader blade tapered at each end. He mounted it to a shaft on a slotted length of steel that bolts to the bed. It’s easily adjusted up or down and in or out. The electric motor is mounted on a plate with a short pipe welded to one edge of the underside. The pipe rides free on a steel arm welded to the end of the lathe. The arm is 1/2-in. round stock bent at a right angle around the corner of the lathe. When a V-belt is in place, the motor’s weight tensions the belt. Sieting simply tilts the motor forward to release tension when changing belts. With only occasional need for the full 4-ft. bed for turning wood, Sieting fabricated a 2-ft. metal brake to fit on one end of the lathe bed. The brake bed is a 24-in. long piece of 4 by 6-in. angle iron that bolts to the lathe bed. The top steel plate is 24 in. long, 1 by 6 in. and tapered at the long edges. A 24-in. long, 1 by 2-in. piece of steel is bolted to the top plate from its underside. It’s a reinforcing bridge for the top plate, tapered at each end.
“The bridge keeps the top plate flat when pressure is applied to the brake,” says Sieting. Turn knobs in the keepers on the ends of the top plate, screw into the angle iron bed to hold down the top plate and the material being shaped. When the turn knob is loosened, springs on bolts that extend through the keepers to the angle iron bed raise the top plate so material can be slid into place. The brake apron is a 24-in. length of 2 by 3-in. bar stock anchored to the keepers at pivot points. A lever on the apron provides the leverage needed to bend most metal Sieting works with. Contact: FARM SHOW Followup, Norman Sieting, 6112 Walker Rd. NW, Rapid City, Mich. 49676 (ph 231-564-1031; [email protected]).
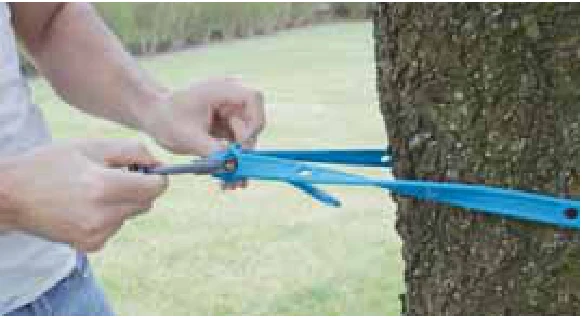
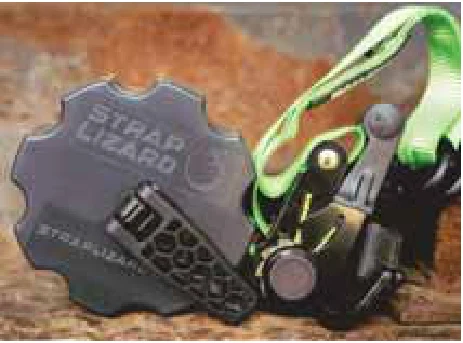
The idea for Strap Lizard came out of frustration with tangled ratchet straps, wasted time tying strap ends, and knots coming untied. The Minnesota inventors couldn’t find a product on the market that solved these issues.
Strap Lizard is designed to work with your existing straps between 1 and 1 3/8 in. wide, up to 16 ft. long, and with a 1,000 lb. capacity rating. The directions are simple: tighten the ratchet using the fold-out handle, wind up the excess strap, and clip the Strap Lizard to the load.
Reviewers on the website rate Strap Lizard 4.8 out of 5 stars. One reviewer says, “Really solved the problem of loose straps swinging around. I was tying down my ATV, and it worked slick. I plan on buying a few more for friends.”
Strap Lizard (ratchet strap not included) sells for $14.50 with free S&H. Bulk orders of 12 or more are $12.50 each. Custom-branded Strap Lizards are also offered; contact the company for more information.
Contact: FARM SHOW Followup, Strap Lizard ([email protected]; www.straplizard.com).
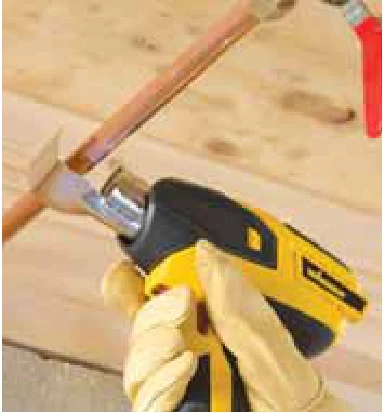
The new Wagner® Furno 550 battery-powered heat gun makes fixing frozen pipes, rusted bolts, and other challenges easy. As a leader in advanced paint applicators and heat guns, Travis Johnson, product manager, says the cordless heat gun lives up to the company’s high standards.
“It was just released in July 2024 to help consumers and contractors have a more mobile solution,” he says.
The Furno 550 includes quality features such as an LED work light and a display panel that allows users to select one of five temperature settings up to 1,000 F. A lock-off safety ensures it won’t turn on accidentally. The lock-on function and integrated feet allow it to be used hands-free.
The most outstanding difference may be how long the Furno runs on a battery compared to other heat guns. It operates up to 19 min. on the lowest setting and 7 min. at the highest setting on the 2-amp battery that comes with it.
“You can get larger batteries to lengthen the time,” Johnson says. The Furno runs on Bosch batteries that customers may already have with other cordless tools.
The heat gun comes with two nozzles. A flare nozzle works well for wide heat distribution, and the curved deflector wraps around a pipe.
The Furno 550 sells for $210 and is available through Wagner’s website, Amazon, Walmart, TSC and other companies.
Contact: FARM SHOW Followup, Wagner SprayTech Corp., 1770 Fernbrook Ln., Plymouth, Minn. 55447 (ph 763-519-3555; www.wagnerspraytech.com).
At nearly 80, Steve Vargo had no interest in having to jump off his IH 706, so he engineered an emergency stop. He did so after backing it out of his shed and finding himself without steering or brakes. Headed downhill, jumping might have been his only alternative.
“Luckily, I had a manure pallet on the rear, and it stopped the tractor,” says Vargo.
“A friend of mine had to jump while his tractor and bush hog went down into the holler. I’ve heard of lots of others with the same problem.”
In Vargo’s part of West Virginia, the holler or valleys are steep and can be deep.
“All it takes is a piece of dirt in the hydraulic oil filter,” says Vargo.
“The same problem can be caused if the pump fails or the relief valve sticks open. You lose the hydraulic pressure in the steering, brakes and transmission. All the tractor can do is free-wheel.”
When Vargo approached a semi-trailer mechanic about it, he was told nothing could be done. That was all the challenge he needed to find a solution.
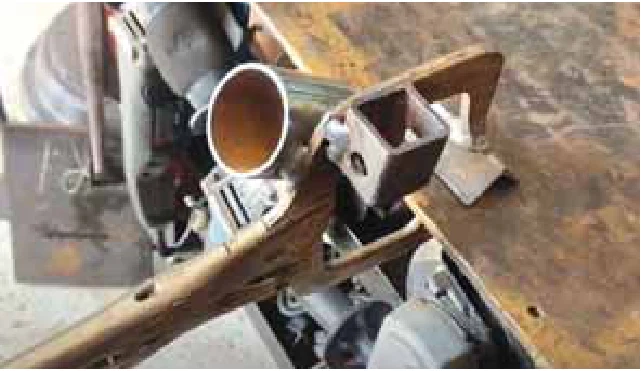
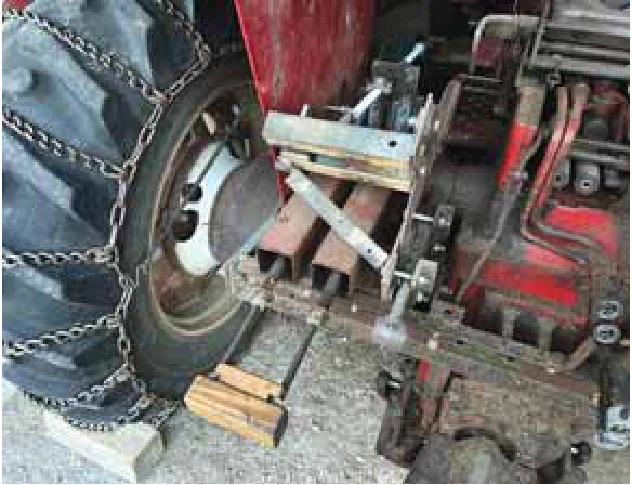
He installed a brake assembly and drum from the back axle of a semi-trailer on the left axle of his tractor. The brake assembly is mounted to a 1/2-in. steel plate bolted to the tractor frame. The drum with a section of the rim is mounted to the tractor’s wheel, so when the wheel turns, so does the drum.
“I had considered using a hand-operated lever to activate the brake, but I didn’t want to rely on it,” says Vargo.
“I decided to use the tractor hydraulics to activate it. I was worried I wouldn’t have the brake assembly centered and it would drag. I made jigs out of wood and centered them so I knew how to cut the steel plate.”
His activation system was fabricated largely from salvaged parts. The system consists of two coil springs from the struts on a car housed in square steel tubes. The tubes are welded to steel plates that bolt to the axle housing.
The activation trigger is the tractor’s left 3-pt. rocker arm. A threaded push rod connected to the rocker arm maintains pressure on the coiled springs, keeping the lever on the brake assembly locked. When the hydraulics fail, the rocker arm drops and the system goes to work. The springs release, unlocking the lever on the brake assembly and activating the brake drum to stop the tractor.
“I tested it out on a hill, and it worked fine,” says Vargo.
“I had to measure space carefully to install it, as I had only a quarter inch to spare.”
Contact: FARM SHOW Followup, Steve Vargo, 2135 McGraws Run Rd., Valley Grove, W.Va. 26060 (ph 304-336-7144).