From the archive · Full text
Reader shop tip
Fritz Groszkruger
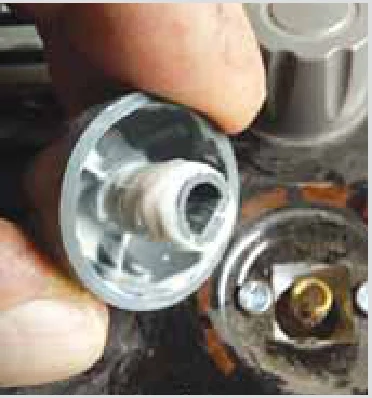
“This is a knob from a space heater. The side of the tube busted out. I used J-B Weld reinforced with dental floss to make it better than new.”
Money-Saving Repairs & Maintenance Shortcuts · Printed section pp. 32–35
28 selected entries · Complete text of selected entries
This issue’s section includes reader tips and feature-length shop stories. Held items and editorial notices are not reproduced.
“This is a knob from a space heater. The side of the tube busted out. I used J-B Weld reinforced with dental floss to make it better than new.”
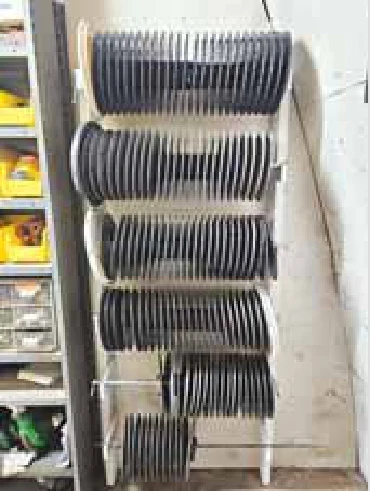
“We needed a better way to store planter plates, so we built this simple wall-mounted rack. Longtime friend and employee Mardy Dosland came up with the idea of using conduit and lids from 5-gal. pails.
“I used 2 by 4s for the uprights and 1 by 3s for the support arms. I notched them to hold the conduit lengths and drilled them to accommodate small retention bolts.
“The bucket lids that sandwich each set of planter plates are a little larger than the plates. They let us set groups of plates on the ground with the conduit vertical, making it easy to lift the plates off the conduit and return them.”
“The ends of my landing gear handles on my trailers and equipment rust, then destroy my gloves and hands. Replacing the entire handle is costly, and finding the correct length can be difficult. I thought covering the ends might help. I had scraps of PVC Schedule 40 or 80 (I’m not sure which, but it’s thick) that I cut to length. I used a portable propane torch to carefully heat the inside of the handle, then slid the PVC onto it as it cooled. It formed to the rusted part and stayed tight.”
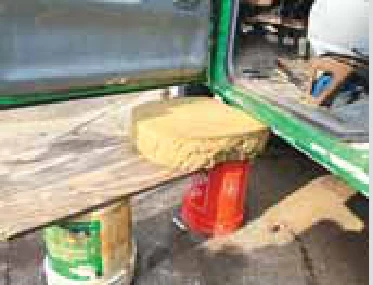
“Two 5-gal. buckets, plywood and foam from a seat cushion make a quick, comfortable bench for working while lying on your back.
“If you’re looking for more stable storage, glue a piece of wood to a jar or can. A larger piece of wood (maybe 2 by 6) works better for heavier items.
“A toothpick trimmed square is really good for fine-touch glue application.”
“Putting a cable tie on a pen or pencil makes it easier to pick up with gloves on or with arthritic hands.”
“An easy way to manage zip ties is to store them in a scrap piece of pipe and hold them in place with a rubber band or, for better durability, a piece of shock cord. Individual ties can easily be added or removed as needed.”
“I have a tip for anyone with a diesel that has a weak battery or is otherwise hard to start. I was working on a customer’s diesel and, as I started it, happened to turn the steering wheel. It started right up.
“I realized that turning the steering wheel gave the hydraulic oil a place to go, reducing the effort needed to start the engine.”
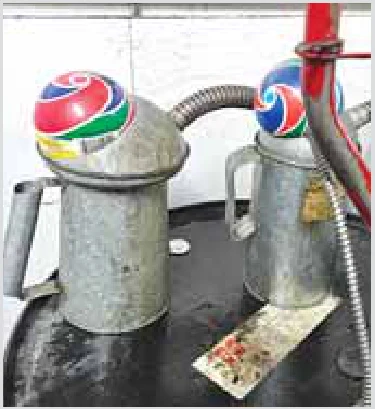
“I insert a kid’s foam ball into the fill space of an oil can. It’s an easy way to keep out dirt. It plugs the hole but is easy to remove for refilling.
“I also keep a 1-gal. glass drink dispenser in the shop, filled with diesel fuel. It’s handy for filling new filters and a lot easier than pouring fuel from a fuel can.”
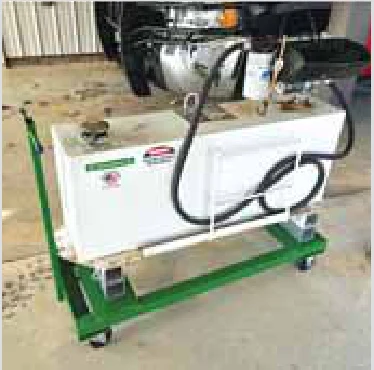
“Moving my auxiliary diesel fuel tank in and out of my truck bed with forks can be tricky. It came with angle-iron pieces at each end and along the sides of the tank. I bolted a piece of 1/8-in. steel plate to the angle irons.
“I attached a piece of heavy-duty angle iron to the front of the steel plate to provide a little more protection when approaching the tank with forks. I also added a double set of 3 by 3-in. tubing under the ends of the plate. The tubing creates plenty of space for my forks to set the tank down in the truck bed. The space is also helpful when I set the tank down on a caster cart for storage in my shed.
“I added some 1/2-in. round stock on the side to retain coiled hose. It’s easy to slip the hose out when pumping fuel, but it keeps it from getting messed up when not in use.
“I picked up a mineral feeder at the farm store and attached it to the top of the tank. It’s a great place to store the fuel pump wiring.”
“I needed a hydraulic on the back of my Ford 8N to run my backhoe. My 8N has a loader with a front-mount pump and a two-way hydraulic system to dump/curl the bucket. I added some Pioneer male ends to the steel lines for the loader bucket and got some long hoses with female ends that’ll reach the back of the tractor. When I need the backhoe, I unplug the loader bucket and plug it in. The loader still goes up and down, and the backhoe works. For less than $100 for the hoses and Pioneer ends, I added a hydraulic to the back of my tractor.
“To run waste oil through a pre-emissions diesel, I use an oil pump from a small-block Chevy, with minor mods, to pump the oil through a filter, then mix it with my diesel and run it year-round with no problems.
This makes the diesel I have to buy last twice as long. When you’re broke, you find interesting ways to save money.
“I added a waste oil burner to my wood stove in my shop. It consists of a holding tank removed from a faulty water heater, some scrap galvanized pipe, and a hole cut in the top of the stove, into which the pipe is welded. This runs waste oil down onto the wood fire and really cranks up the heat from the stove. I’m also able to get rid of all the nastiest oil (including sludge, oil with water in it, or milky oil) and have no oil waste. I also drain filters into my holding tank and burn what comes out of the filters.”
“For servicing a push mower, I use a tree with a low branch. I simply pull a rope over the branch, tie it around the front wheels and the push handle on the ground, then lift the front of the mower vertically and tie it off. I can sit on a stool to change a blade or clean under the deck.”
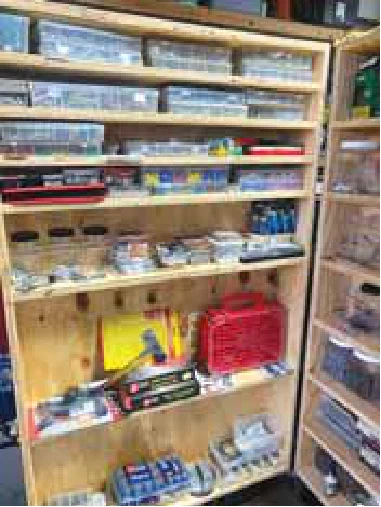
Leonard Wranosky converted old Baker scaffolding into a rolling storage unit. The scaffolding is only 29 1/2-in. wide and easily adjustable. It includes lockable casters and can be stacked.
“I used the scaffolding for a framework to build a tool storage cabinet that’s about 7 ft. long and 6 ft. tall,” says Wranosky.
“I attached 2 by 4s to the scaffolding and 3/4-in. plywood for the walls, with a foot-deep cabinet extension on one end.”
Wranosky used 2-ft. deep roll-out shelves in the main cabinet. He designed the double front doors with 6-in. recessed interior shelving. He mounted a whiteboard at the extended end. A corkboard in the center makes it easy to post notes, business cards and other reminders. A set of Sharpies attached to the whiteboard is handy for planning.
On the back side, Wranosky mounted a bench with a bar across the top to hang extension cords, electrical wiring and other supplies for small jobs.
“I didn’t have a plan when I started,” notes Wranosky.
“If I have something on my mind, I’ll start it. I may change my mind as I go. I did the cabinet on a whim over a month or so of time.”
He’s more than satisfied with how it turned out. Tools and supplies are easy to find, and the cabinet is stable. He admits he may not be finished with it yet.
“I’m thinking about expanding it,” notes Wranosky.
“I may do another platform on top of the cabinet for things I seldom use.”
Contact: FARM SHOW Followup, Leonard Wranosky, 3560 Ross Dr., Columbiaville, Mich. 48421 (ph 586-531-3225).
TrueLine Manufacturing specializes in custom fabrication for others, but it also uses that expertise to meet its own needs. When Walter and Albert Hofer see market potential, they add the item to their product line. That was the case with their Radiator Cleaning Wand.
“We came up with it a few years ago,” says Albert.
“We were trying to figure out how to clean a radiator properly without damaging the fins, which is easy to do with a pressure washer. Air does a good job, but we thought mixing water with it would be even better.”
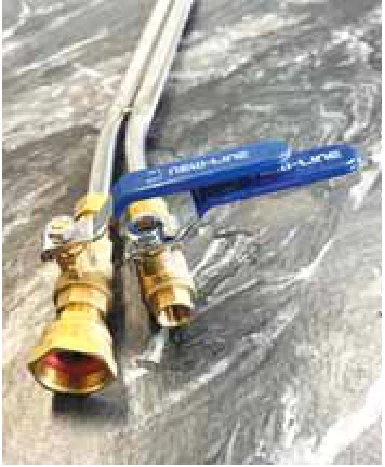
The Hofers first considered a mixing valve but abandoned the idea as overly complicated. They developed a system comparable to an acetylene torch, with two 3-ft. long pipes, each controlled by a ball valve, in a single wand. One pipe is connected to a standard garden hose, while the other is connected to an air compressor line. They suggest using 120 to 180 psi of air and normal tap water pressure.
“We squished them together to get added pressure,” says Albert.
“The 1/4-in. thick design also makes it easy to slip into tight spaces. It’ll blow water 30 ft.”
The air and water exit the wand at a right angle. The mixture of water and air pressure creates turbulence at the radiator. As the water builds up, the air pressure pushes through the fins more.
The Radiator Cleaning Wand is priced at $325 USD and available directly from the company.
Contact: FARM SHOW Followup, TrueLine Manufacturing, 41328 Range Rd. 41, Rimbey, Alberta, Canada T0C 2J0 (ph 403-588-9420; www.truelinemfg.ca).
Jim Deardorff has preached the gospel of reducing rust and corrosion through high-quality metal finishes for more than 30 years. With 14 stories in FARM SHOW, mostly on products and techniques to protect metal, he’s our resident coatings expert. One of his favorite methods for preventing rust is to apply a primer with a fluorescence additive (Vol. 16, No. 5) and shine a black light on it. His concept is now being introduced commercially.
“Rust-Oleum Corporation has introduced V7400, the first self-inspector coating,” says Deardorff of Superior Coatings.
“V7400 is a high-solids alkyd coating that can be brushed, rolled, or sprayed. It produces a smooth, hard, durable finish, guaranteed to stop rust for two years or more.”
What makes V7400 special is that it’s formulated with a defect indicator based on UV-activated blacklight fluorescence. The additive was developed by Deardorff in the early 1990s. At the time, he was working with the University of Missouri and Ciba-Geigy in Tarrytown, N.Y., to produce a fluorescent response for paintings and coatings. With the additive in the paint, workers using a black light can identify film-coverage defects much more effectively and efficiently.
“The average worker with 20/20 vision can locate a coating defect approximately 50 microns in size,” says Deardorff.
“However, it requires good lighting and adequate time for a careful visual inspection. The same worker using a black light with this additive in place can easily locate the same defect, even in low light or during production painting operations.”
He lists some of the benefits, including ensuring complete coverage of welds, joints, and corners. Using a black light also reduces material waste from over-application, improves maintenance recoating, and reduces premature coating failure. He recommends The uvBeast black light (Vol. 48, No. 2).
Deardorff estimates that black-light enhancement improves defect detection by up to 1,000% over the human eye alone. Undetected defects allow rust to develop.
“According to a University of Windsor study, rust can penetrate metal up to 2 in. per year,” says Deardorff.
“Detecting defects stops rust before it can start. With a good finish, you can reduce unplanned repairs and early replacement expense and enhance trade-in and resale value.”
Contact: FARM SHOW Followup, Superior Coatings Co., 205 McCormick St., Chillicothe, Mo. 64601 (ph 660-973-9489; [email protected]; www.classicblast.com).
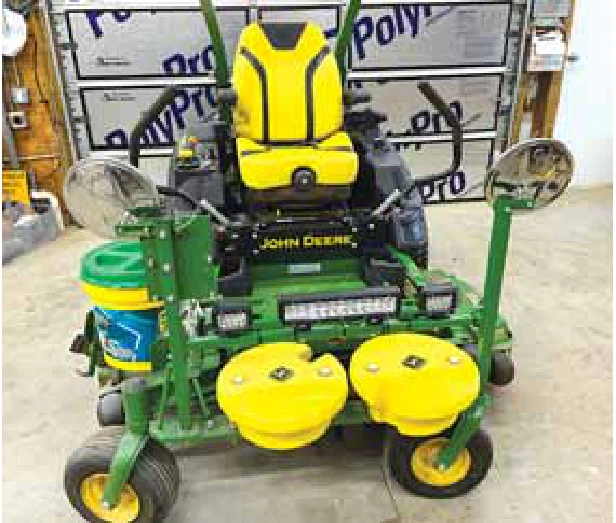
A weighted front end was just one of several upgrades Dale Freeman made to his zero-turn mower. He also added 8-in. dia. mirrors to each side and a bank of high-visibility LEDs.
“I have hilly terrain and decided to add front-end weights for increased stability,” says Freeman.
Freeman mounted a 1/2-in. thick steel weight-support plate between the front caster wheels. He beveled the front corners of the plate to remove sharp edges. The plate is supported by two 1/2 by 3-in. steel plates, bolted at one end to the mower deck and at the other to the weight-support plate.
Additional support is provided by what Freeman calls tangs. They’re short lengths of round stock, tack-welded between slotted fixtures bolted to the mower’s I-beam frame and similar slotted fixtures on the weight support plate.
“I drilled a hole in the support plate, as well as cutting a slot for mounting bolts for each set of tractor weights I planned to use,” says Freeman.
“I used the hole to align the weight, and the slot ensured the second bolt would align, even if my dimensions were off a bit.”
He added 1-in. square tubing posts at either end of the support plate, with T-joint welds and round-stock braces. Mirrors were added to the top of each post, and a steel plate to hold Freeman’s cell phone was added to the right-hand post.
“I mow along a road, and the mirrors help me watch traffic coming up behind,” says Freeman.
“The braces at the bottom of the posts reduce vibration. My cell phone holder is a 5-in. deep plastic drink holder. A pin through the mounting plate keeps the phone from bouncing out.”
A square-tubing crosspiece adds stability and reduces mirror vibration. It also provides a base for LED lights that enhance visibility and ensure safer operation.
The vertical tubes are capped to keep out rain.
“I always plug vertical tubing with a cap,” says Freeman.
“I love plastic caps for steel tubing. I bought a couple hundred online, so I always have some handy. I also cut half-circles out of tubing welded to a horizontal piece. It leaves an opening for moisture to drain out.”
Contact: FARM SHOW Followup, Dale Freeman, Monroe, Va.
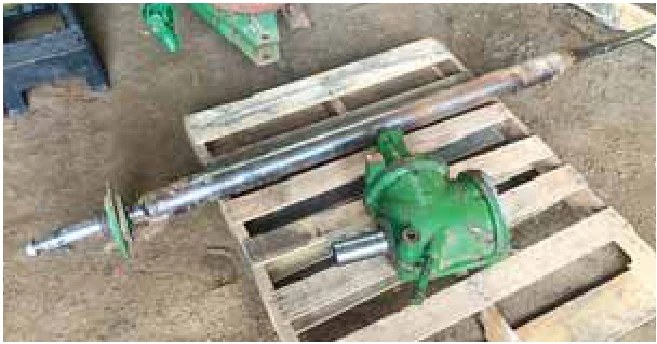
Roger Gutschmidt warns owners of Deere 9600 combines to watch for bad countershafts. Early signs include worn bolt holes in the bracket that holds the gearbox on the shaft.
“When my customer brought the combine in, the bolts on the bracket were loose, and the gearbox wiggled,” says Gutschmidt.
“I took it apart and pulled the shaft out about a foot. I checked the splines on the shaft and the gearbox, and everything looked fine.”
After putting everything back in place, he built up the bolt holes, assuming the loose bolts were the problem. He was wrong. When the combine returned to the field, it took about five acres before the gearbox was out of control.
“I told him I would fix it at no cost, but for parts,” says Gutschmidt.
“I talked to a service rep, and he suggested the shaft might be bent. He advised taking it apart completely and offered to help.”
This time, Gutschmidt pulled the countershaft out completely. That meant removing the large pulley on the opposite end of the shaft from the gearbox. It’s a heavy cast-iron pulley that sits on the tapered shaft.
“I was using a 3/4 impact on it, and when I pounded it, it flew off like a rocket and just missed my head,” recalls Gutschmidt.
“The second time, I chained it so it wouldn’t go too far.”
The 16-ft. long countershaft has a 4-in. diameter at the gearbox but tapers to 3 in. at the far end. Gutschmidt figured any bend would likely be on the tapered end. Rolling it on a flat surface gave no indication of a problem. However, when he mounted it in his metal lathe with a 3 1/8 spindle bore and a large chuck, the bend was clear. As Gutschmidt turned the countershaft from slow to fast, his service technician friend looked through the spindle bore with a flashlight.
“About 10 in. of the countershaft goes through the gearbox,” says Gutschmidt.
“When we spun it, that end was out of round, which had put a strain on the bolts and everything else with every rotation.”
Gutschmidt ordered a new shaft from A&I Parts for half the price Deere would have charged. He rebuilt the bracket and reassembled everything. When he installed new bolts through the bracket into the gearbox, he added rubber bumpers.
“I asked my combine specialist friend what would have caused the problem,” says Gutschmidt.
“He said slugging the machine can do it, as can putting the separator into gear under a wide-open throttle.”
Gutschmidt notes that the countershaft is really the heart of the combine.
“If it isn’t working, you might as well junk the combine,” he says.
“But if you can find the problem, you can fix it. If you see vibration and don’t have a turning lathe big enough, take it to your local machine shop and check for a bend.”
Contact: FARM SHOW Followup, Roger Gutschmidt, Gutschmidt Manufacturing, 202 Elm St. East, Box 311, Gackle, N.D. 58442 (ph 701-269-0537).
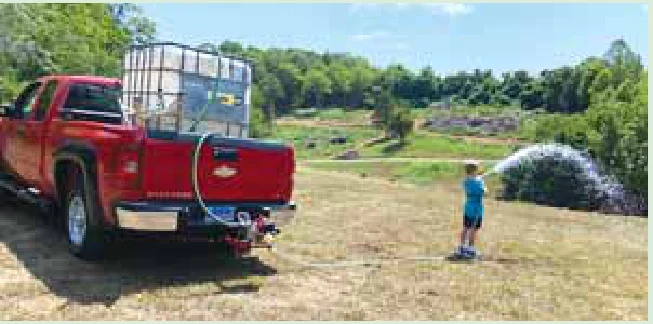
Dale Freeman has water on command with his receiver-hitch-mounted water pump. He can fill an IBC tote in his truck from the local river or use the pump to spray water where it’s needed.
“I don’t have to set the pump on the ground when using it and worry about it turning over,” says Freeman.
“I also don’t have to worry about forgetting it when I drive off.”
Freeman set up his pump for his pickup, but notes it would work just as well on an ATV or a side-by-side, provided it’s equipped with a receiver hitch.
“I bought a 30-gpm, 4-cyl. Honda water pump and bolted the base plate to a piece of 2-in. square tubing,” says Freeman.
“The pipe extends 2 in. beyond the pump end of the plate. I welded a second length of 2-in. tubing at a right angle to the extension so it can slip into a 2-in. receiver hitch.”
To make the pump even more versatile, Freeman slid a short length of 2 1/2-in. galvanized tubing over the 2 by 2-in. tube.
If he wants to use his pump with a vehicle equipped with the larger receiver hitch, he simply moves the sleeve to the end of the 2-in. tube, pins it in place, and adds a length of 2 1/2-in. tubing.
The pump slides straight into the 2-in. receiver hitch on his pickup without interfering with the tailgate. However, when used on his Honda Pioneer side-by-side, the receiver hitch position prevents the tailgate from dropping.
Freeman came up with a novel solution, something he calls his gooseneck hitch. He started with a standard 2-in. sq. ball hitch insert and modified it with a piece of 2 1/2-in. receiver hitch tubing. He cut a piece from one side, then slid the other sides over the ball hitch insert and welded it in place at a 45-degree angle. His next step was to cut a 45-degree bevel on a length of 2-in. sq. tubing and weld a short length of 2 1/2-in. sq. tubing across the bevel to serve as a receiver for the water pump.
“The gooseneck extension moved the water pump back enough to clear the tailgate when it’s lowered,” says Freeman.
He refers to the pump and tote as his personal rescue equipment.
“I can put the tote in my truck, slide in the pump, and run down to the river for water,” says Freeman.
“If we have heavy rains, I can take it to a source for potable water and bring water to those who need it. If there’s a small grass fire, I can get water to it quickly.”
Contact: FARM SHOW Followup, Dale Freeman, Monroe, Va.
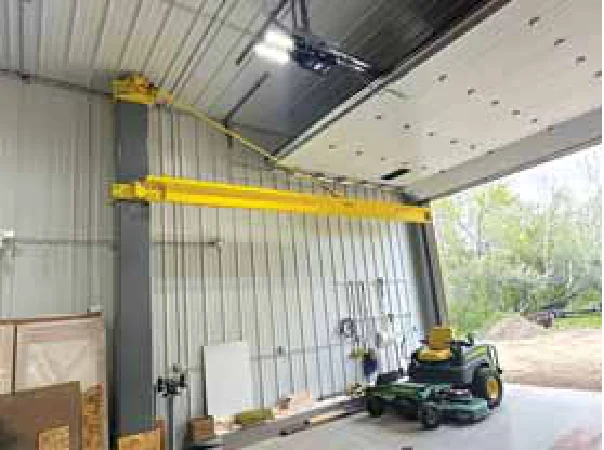
The jib-style shop hoist in Roger Gutschmidt’s shop has handled heavy lifting for 38 years, thanks in part to the subframe embedded in concrete. It was only the first of many he has built for neighbors and, more recently, for his brother.
“I really like my overhead hoist for lifting motors out or other objects from a pickup bed,” says Gutschmidt.
“I didn’t build it as strong as I should have, but it has done its job since 1988.”
When he began receiving requests from others to build shop hoists, he had an engineer review his plans. While his subframe remained essentially unchanged, the engineer recommended a stronger vertical beam. In the years since, he estimates he’s made around 30 subframes for hoists.
“The subframe is a combination of rebar and vertical bolts that extend through a 1/2-in. thick skeleton top steel plate,” says Gutschmidt.
“To install it, we dig a 5-ft. deep, 4-ft. dia. hole and place the subframe with the skeleton plate below the surface. The skeleton plate ensures we can fill the hole to the top with concrete without concern for a void forming under the plate.”
A second steel plate, set over the protruding bolts, serves as the base for the vertical post and sandwiches the skeleton plate.
When his brother installed his shop hoist, he used 1/2-in. thick, 15-in. square steel tubing for the vertical leg. A 20-ft. I-beam jib pivots in a bracket on the tubing. A tie-rod support to the jib extends to a similar pivoting bracket at the top of the leg.
“I welded the brackets and painted everything,” says Gutschmidt.
“My brother and nephew installed it. It’s incredibly strong. It could lift 4 tons 20 ft. out on the jib.”
The leg serves double duty in the shop. Ends are sealed with 1/2-in. thick steel plates. Air couplings were installed in the tubing.
“They use the leg as a pressure tank for their air compressor,” says Gutschmidt.
Contact: FARM SHOW Followup, Roger Gutschmidt, Gutschmidt Manufacturing, 202 Elm St. E., Box 311, Gackle, N.D. 58442 (ph 701-269-0537).
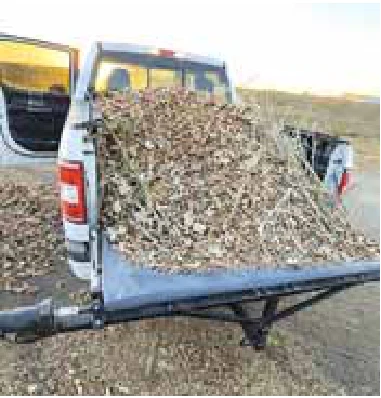
For young sixth-grader Taten Uden, mowing lawns on hot summer days and the frustration of emptying the truck box of leaves and grass clippings inspired the Bed Boss years later.
“I was tired of always raking clumps of grass and leaves out of the back of a truck box,” Uden says.
“Frustrated with the hassle, I took an old pool tarp, spread it out, loaded it up with grass and dirt, but then struggled to unload it, too. Like so many others, I caught myself thinking, ‘There must be a better way.’” This curiosity eventually led to the creation of the Bed Boss, an electronic device capable of conveying up to 3,000 lbs. from a pickup bed in seconds. Uden designed the Bed Boss with the everyday user in mind, saving both a person’s back and their bank account.
“The straightforward design means you just attach the unit to a truck’s hitch receiver, crank and unload,” Uden explains.
“It’s as simple as it sounds, unloading big piles of grass, soil or rocks in seconds. Plus, it’s built for long-term durability.”
The Bed Boss is constructed from durable tarpaulin, and its 3/4-in. steel roller frame is powder-coated and treated to resist rust and corrosion. When installed, the product aligns perfectly with the top of an open tailgate, regardless of the truck model.
The remote-controlled Bed Boss connects directly to the truck battery or an accessory wire. To operate the unit, release the roller clutch to let the tarp extend freely, then lock it to reel the tarp back in with the press of a button. When not in use, the Bed Boss splits into two manageable pieces, each weighing less than 20 lbs. Just pull the pin from the receiver hitch and remove it.
The units are produced on his Nebraska farm and shipped directly to customers’ doors across North America.
“There’s no other electronic units like the Bed Boss,” Uden says.
“I’m also in discussions with major farm stores for wider distribution.”
The Bed Boss is priced at $749.99. Contact: FARM SHOW Followup, TJKrank LLC, 17095 US-6, Kenesaw, Neb. 68956 (ph 402-984-4876; [email protected]; www.tjkrank.com).
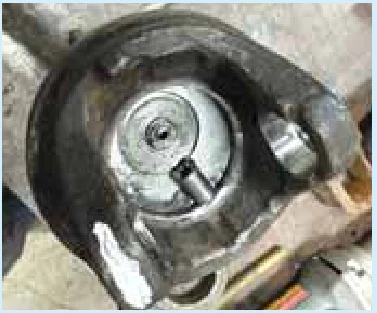
Roger Gutschmidt has a money-saving tip for Constant Velocity (CV) joints. If the joint’s peg breaks off, repair it rather than replace it.
“Drive lines used prior to CV joints were more reliable and cheaper to buy and repair,” says Gutschmidt.
“If the peg in the joint breaks off, that usually means $1,500 out of the farmer’s pocket. I think they were made to fail, costing the customer money and downtime. They’re just another way to suck money out of customers.”
Gutschmidt’s solution to the problem is careful welding and reinforcement to reduce future problems.
“Usually, the piece that breaks off is about 1 in. long and 1/2 in. in diameter,” says Gutschmidt.
“It has a 3/16-in. hole in the center for grease.”
After grinding off the base of the peg to make room for his weld, Gutschmidt aligns the peg using a 3/16-in. drill bit in the center hole.
“The weld flows nicely, and when I finish, I touch up the base with a die grinder,” he says.
“I leave the drill bit in place but cut it off level with the top of the peg. It adds reinforcement, and the grease can still get through its spirals.”
Gutschmidt notes that the welding and reaming take only about 10 min.
“My customer put the U-joint crosses back together on his bale shredder,” he says.
“It was a cheap repair for the customer, and the shredder is still going strong.”
Contact: FARM SHOW Followup, Roger Gutschmidt, Gutschmidt Manufacturing, 202 Elm St. E., Box 311, Gackle, N.D. 58442 (ph 701-269-0537).
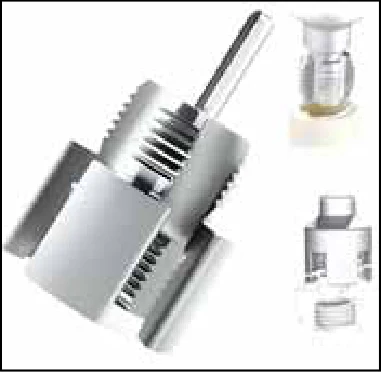
A $10 gadget for cutting pipe threads could save you hours of work on home projects. The Kayannuo pipe thread-cutting tool (available at Walmart and other retailers) cuts helical screw threads onto pipe ends.
The tool features a clockwise cutting action that cleans or rethreads damaged or blocked pipe threads. It can cut and repair both internal and external threads on 1/2-in. and 3/4-in. pipes, providing fast pipe prep on a moment’s notice. It’s designed to work with PVC, PPR, and plastic pipes and isn’t compatible with metal pipes.
The pipe thread-cutting tool, designed to attach to a hand drill, produces both internal and external threads, eliminating the need for multiple dies or adapters. This makes it ideal for fast, accurate work.
Pipe threading tools are excellent to have on hand for home plumbing repairs, bathroom installations, and site work. They make professional-grade pipe threading accessible to home repair and DIY enthusiasts.
You’ll find durable, high-quality alloy steel in the cutter head, ensuring clean, even thread cuts and excellent sealing performance.
Cutting edges stay razor-sharp through dozens of uses, producing clean, tight threads that minimize leaks and maximize flow efficiency. The non-slip, grippy handle makes operations stable and safe, especially for novices. Likewise, the 6.35-mm hex shank creates leak-proof threaded connections.
Thanks to its lightweight carbon-steel construction, the tool is easy to keep on hand.
Kayannuo pipe thread-cutting tools are sold at Walmart for $7.98 per single pack or $13.99 for a two-piece set. A similar tool is sold on Amazon for $6.99. Customer reviews highlight that the tool works well for quickly fixing tricky problems without a trip into town for extra supplies. Many say they keep them in spare drawers for use at a moment’s notice. Most agree that the pipe cutter works exactly as advertised.
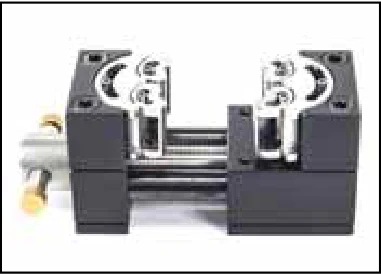
For craftsmen who have struggled to hold odd-shaped parts steady, the MetMo Fractal Vise might be the solution they’ve been waiting for. This innovative desktop tool, available in models made from aerospace-grade aluminum or heavy-duty stainless steel, securely holds irregular objects.
Unlike traditional vises that can let round tubes or irregularly shaped moldings slip, the MetMo’s fractal jaw adapts to almost any shape through six independently moving surfaces.
“Whether filing, painting, drilling or simply fixing something small, this compact vise acts as a versatile ‘third hand,’” says a company promotional release.
“It’s built solid, reliable, and designed for maximum grip.”
Weighing only 14 oz., the black anodized aluminum model delivers over 3,000 Nm of torque at full clamping force while remaining light enough to move around a workspace. The 20-mm jaw depth and 32-mm clamping zone double the gripping height of standard desktop vises, ensuring stability for projects big and small. Each component is precision-machined from premium metals and hand-finished, promising durability and a sharp look. High-tensile cap head bolts hold the pieces together, allowing each component to move easily along precision-ground rails.
The MetMo Fractal Vise features reversible jaws that allow clamping objects from the inside, making it ideal for delicate tasks such as engraving glassware or painting pottery. It can also be used vertically or placed into standard machine vises for even greater versatility.
For those needing extra heft, the all-steel model offers superior stability, making it perfect for metalwork or light machining.
“Even though its size is small, it can be used like a serious tool while cutting and hammering, so it won’t slow down the work. It puts the worker in full control, applying just the right amount of pressure without damaging anything.”
Prices start at $310 for the Black Fractal Vise 32 and $518 for the stainless-steel version.
With limited quantities available, customers can pre-order for May 2026 delivery.
Contact: FARM SHOW Followup, MetMo, Unit 5 Armley Nanopark, Armley Rd., Leeds, LS12 2BJ, U.K. ([email protected]; www.metmo.co.uk).
Rylan Steiner of Dalton, Ohio, makes and sells 3D-printed, Deere-compatible cup holders at his print shop on eBay. Each cup holder is designed to mount on the fender of a Sound Guard cab.
“You can mount the cupholders below the window, on the windowsill, to the right-hand side of the driver, behind the controls,” Steiner says.
“It already has holes made in the back to rivet or screw it to the windowsill.”
The 3D-printed design has holes on the back for easy mounting to windowsills and includes a built-in tray.
“I’ve had an interest in 3D printing since I was younger,” Steiner says.
“I first bought a small Ender 3 Neo, but now I own a Bambu Lab P1S and a Centauri Carbon.”
Steiner sells each cup holder for $69.99.
“We also make small custom plastic parts for modifications or to replace parts that the manufacturers don’t sell,” Steiner says.
“We’ll custom-print anything.”
Contact: FARM SHOW Followup, Rylan Steiner, Dalton, Ohio (ph 330-466-9873; [email protected]; https://ebay.us/m/t1NqJZ).