Practical ideas from FARM SHOW MagazineSubscribe · Free issue · Send us your shop tip
Subscribe to FARM SHOW
Issues / Vol. 50, No. 3 (2026)

Vol. 50, No. 3 (2026)

Money-Saving Repairs & Maintenance Shortcuts · Printed section pp. 32–35

25 selected entries · Complete text of selected entries

This issue’s section includes reader tips and feature-length shop stories. Held items and editorial notices are not reproduced.

Archive text: prices, coupons, availability and contact details reflect the original publication, not current offers. Reader methods are not universal instructions; follow manufacturer guidance and proper safety practices.

Reader shop tips

From the archive · Full text
Reader shop tip

Cal Miner

Cal Miner, Willmar, Minn.

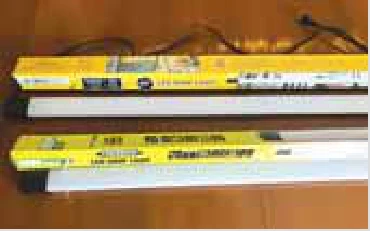
“I’ve found that Menards periodically has 4,000 to 5,000-lumen LED shop lights on sale for under $10. Recently, I saw them on sale for $6 after a rebate. They work great as trouble lights because they stay cool and have a 42-in. reach.”

From the archive · Full text
Reader shop tip

Glenn Reeder

Glenn Reeder, New Tripoli, Pa.

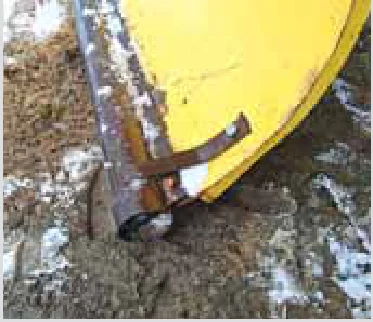
“This is a picture of the pipe I have mounted on my snowplow. I got this idea from a tip in FARM SHOW many years ago. I had the local welding shop cut a slot in a 6-in. dia. pipe. Three straps welded to it fasten it to the plow blade.

“The pipe allows me to plow my crushed-stone driveway without causing too much damage to the surface. It also lets me push snow off grassy areas without tearing up the grass. I plow the snow off a pasture area to help the deer find something to eat, which reduces the damage they do to my shrubbery.

“It works well and is easily removed if needed. I would use a larger, thicker pipe if I did it over again. After 15 years, it’s starting to wear thin at the bottom. I’d also add some weights and cap the ends of the pipe so it doesn’t fill with stones or dirt when angled.”

From the archive · Full text
Reader shop tip

Dr. Karl Spees

Dr. Karl Spees, Port Angeles, Wash.

“In retirement, it seems I have more projects than time. One recurring problem is remembering where I left a specialty tool or piece of equipment. Recently, I couldn’t find my cordless drill (again). After unsuccessfully looking in the usual places, I used an aid that had worked before.

“I used my Mag-Lite to systematically scan the areas where a cordless drill could hide. I found it partially covered in a dimly lit garage, among a collection of tools for a different project. I had looked there, but without a focused search and better lighting, I missed the exposed handle.”

From the archive · Full text
Reader shop tip

Jim Ruen

Jim Ruen, La Crescent, Minn.

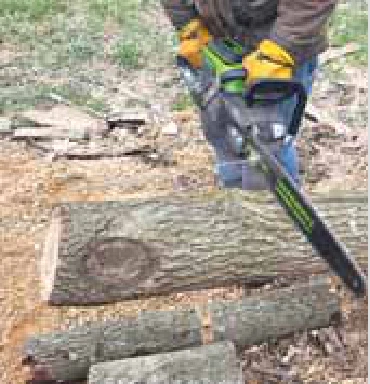
“I cut and split a lot of firewood to heat our house each year (Vol. 42, No. 6), guessing at lengths as I cut. I’ve seen tools that attach to the chainsaw bar, with most starting around $20.

“I put together my own for half that price. I picked up a 2-in. diameter round magnet at Ace Hardware and an 18-in. long, 1/8-in. threaded rod that fit through the magnet’s hole. A nut on either side of the magnet, and I was nearly done.

“The only problem was that the nut stuck out above the face of the magnet. A few minutes with my grinder, and that was no longer a problem.

“I stuck it on the chainsaw bar and cut away, producing 18-in. lengths perfect for my fireplace. It works great, mounts and dismounts easily, and can be used on any of my half-dozen chainsaws.”

From the archive · Full text
Reader shop tip

Dale Freeman

Dale Freeman, Monroe, Va.

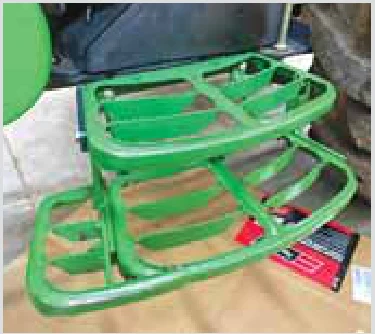
“As I got older, I wanted safer steps on my John Deere tractor when I’m climbing on and off. The top step is 25 in. off the ground, and that’s too far for me with my bad back. I added another step 6 in. below the OEM step, at 19 in. off the ground.

“I hung the lower step from the upper one using straps made from 3/8 by 1 1/2-in. flat bar and 1 1/2-in. channel iron on each side.

“For additional support, I made braces that run at an angle from the tractor to the lower step. The braces use tangs (clips with slotted ends and mounting holes) and 1/2-in. round stock cut on the radius. Two tangs mount to the bolts that attach the upper step to the tractor, and two tangs also mount to the rear of the lower step.

“Once the tangs were in place, I cut the round stock to fit between them and tacked it into the slotted ends.

“I’ve found that using tangs and round stock is the easiest way to brace things without having to bend the end of a piece of steel to fit.

“The lower step was a big help for climbing into the cab; however, backing out and down was still tricky since it isn’t a normal 8-in. step. I decided to widen the lower step. I bought another step from John Deere and cut away about 75%. I welded and bolted the remainder to the side of the lower step. That’s proven to be a big help.”

From the archive · Full text
Reader shop tip

Ken Matthews

Ken Matthews, Boston, Mass.

“I remember reading a shop tip in FARM SHOW about using Gorilla Glue to seal caulk tips (Vol. 43, No. 4). I recently saw a guy on YouTube say he stores his used caulk tubes tip-down in a container of water. He claims he’s never had one fail.”

From the archive · Full text
Reader shop tip

Roger Gutschmidt

Roger Gutschmidt, Gackle, N.D.

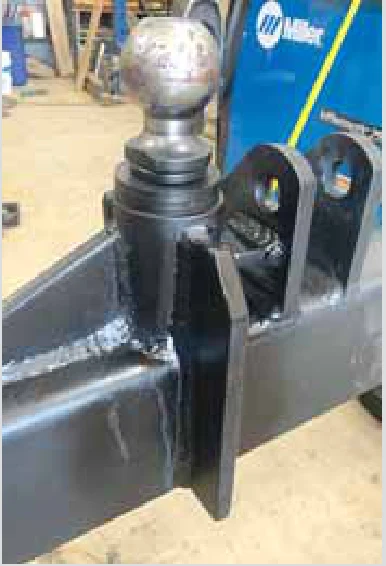
“I’ve been making quick-attach units for 3-pt. hitches for close to 40 years, and I always add a hitch ball to the top of the unit. It’s proven handy for my customers and me when moving hay-bale trailers and other ball-hitch equipment around the farm.

“I position it just to the side of the top link clevis.

“The stress on a ball hitch like this can be significant when pulling loads across rough ground. I use 1/2-in. wall pipe and weld it to the top of the quick-attach frame. I slip a heavy-duty nut into the pipe and weld it in place, to later screw in the ball.

“I like to strengthen the ball hitch by welding a short length of 1/2-in. steel between it and the top link clevis. I also add flanges to the other sides of the pipe.

“It’s a simple add-on, but well worth the time. Done right, it’ll last a lifetime.”

From the archive · Full text
Reader shop tip 1 of 2

Marty Rudd

Individual tip 1 of 2 from this reader’s published contribution.
Marty Rudd, Mannsville, N.Y.

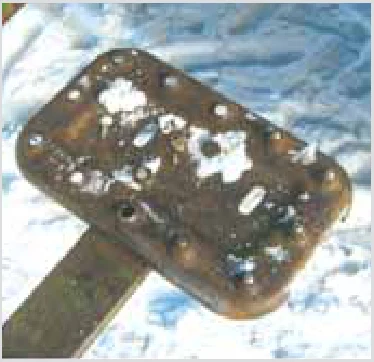
“Tractor steps and running boards can be very slippery in winter when snow gets on them. After a couple of slips that could’ve been worse than they were, I decided to put some 1/4 by 1-in. bolts through the holes in the steps and running boards and nut them in place. It makes getting on and off the tractor much safer.

From the archive · Full text
Reader shop tip

Howard Sklar

Howard Sklar, Aurora

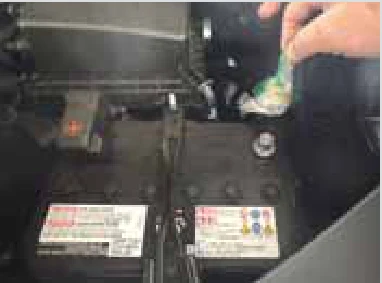
“If you want to preserve a car (or other) battery that won’t be used for a while, especially in cold weather, you don’t need an expensive drip-charge system. Just remove the negative terminal from the battery. I wrap mine in a plastic bag (see picture). This stops electrolysis and preserves the battery’s life. I’ve been doing this for years, and it works.”

From the archive · Full text
Reader shop tip 1 of 4

John Rochester

Individual tip 1 of 4 from this reader’s published contribution.
John Rochester, Charlotte, N.C.

“Battery cables slipping out of the clamp is a common problem. No cable means no battery charge. Try stripping extra wire and putting a bend on the end. Allow plenty of extra stripped wire.

From the archive · Full text
Reader shop tip 2 of 4

John Rochester

Individual tip 2 of 4 from this reader’s published contribution.
John Rochester, Charlotte, N.C.

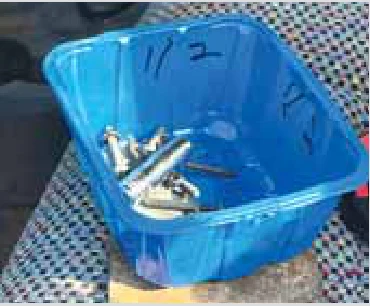
“Take a mushroom box (or other small container) and put a magnet inside to keep small steel bits from spilling or getting lost. It can be stored at any angle as needed. It works great under the truck.

From the archive · Full text
Reader shop tip 3 of 4

John Rochester

Individual tip 3 of 4 from this reader’s published contribution.
John Rochester, Charlotte, N.C.

“Before sorting items on a bench, lay a towel down and place a 4 by 4 near the edge. No more small bits falling off and getting lost, and the towel lets you pour them back into the bin.

From the archive · Full text
Reader shop tip 4 of 4

John Rochester

Individual tip 4 of 4 from this reader’s published contribution.
John Rochester, Charlotte, N.C.

“For many of us, finding the tool we need can be impossible. Try taking the tools you seldom use and store them separately.”

Shop feature stories

From the archive · Full text
Feature story

Reliable Clamp Repairs

Featured source: Niki Schendel, Cape Canaveral, Fla.

“If you’re searching for a fast solution to a leaking hose or a reliable way to secure various materials, from fuel lines to radiator hoses, the ClampTite Tool deserves a spot in your toolbox,” says ClampTite Office Manager Niki Schendel.

“Its innovative design makes it indispensable for professionals and hobbyists alike.”

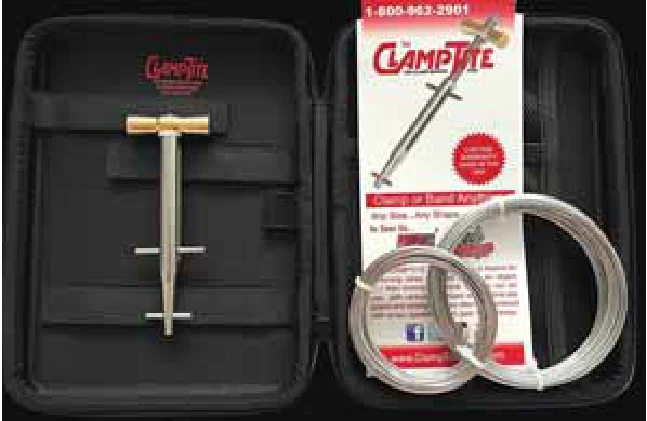
Unlike traditional hose clamps, ClampTite uses stainless-steel safety wire to create a strong, temporary or permanent custom clamp.

Car enthusiasts favor the Premium Clamp-Tite tool and mini kit, but its versatility extends to agriculture, aviation, marine and even medical uses. Each kit includes the specialized tool, a small roll of 304 .032 wire, and a roll of 304 .041 wire.

Constructed from machined stainless steel with a one-piece body, the tool is engineered to handle wire sizes from .19 in. to .062 in.

“It can even handle a coat hanger wire in an emergency,” Schendel says.

“It’s rugged and strong in a smart design.”

ClampTite products, made in California, are available directly, through dealers, on Amazon, and at select small shops.

All ClampTite tools are backed by “The Forever Guarantee.” If a tool ever fails to meet expectations, the company will repair or replace it, regardless of how it was acquired.

Contact: FARM SHOW Followup, Clamp-Tite Tools, P.O. Box 882, Cape Canaveral, Fla. 32920 (ph 321-323-9588; [email protected]; www.clamptitetools.com).

From the archive · Full text
Feature story

Mini-Ratchet Gets Into Tight Spaces

Featured source: Milwaukee Tool, Brookfield, Wis.

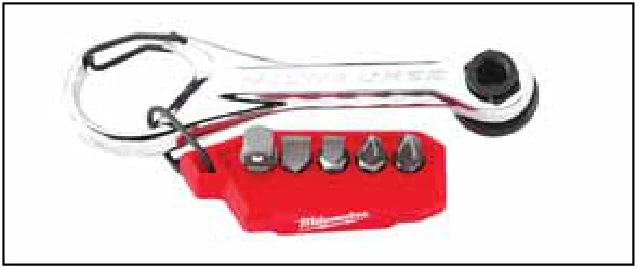
Milwaukee’s 7-in-1 Multi-Bit Mini Ratchet is a handy, pocket-sized tool for reaching spots that standard drivers can’t access.

A practical option for shop and field use, the ratchet’s 4-degree arc swing allows small, controlled movements in confined spaces.

A carabiner-style clip makes it easy to attach and carry. It’s paired with a set of short bits stored within reach for quick bit changes. A thumbwheel is incorporated into the design to help select bits and control the ratcheting action.

The mechanism itself is engineered to provide enough stops so the user can execute modest swings with the handle, a feature that can be helpful when more substantial torque isn’t required or possible.

“Just got my 7-in-1 Multi-Bit Mini Ratchet. It’s tiny but built well. This mini tool helps you get into hard-to-reach spots,” says an online reviewer.

The Mini Ratchet can be purchased in stores and online from retailers such as Ace Hardware, Northern Tool and Home Depot for $20 to $25.

Contact: FARM SHOW Followup: Milwaukee Tool, 13135 W. Lisbon Rd., Brookfield, Wis. 53005 (ph 800-729-3878; www.milwaukeetool.com).

From the archive · Full text
Feature story

Extended Run Fuel Kits

Featured source: Tony Luey, Vancouver, B.C., Canada

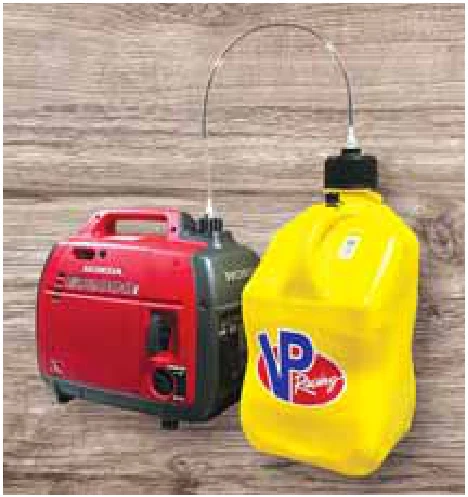
Tony Luey just wanted to keep his diesel tent heater running, but ended up helping others do the same. His Extended Run Fuel Kits keep popular tent heaters and generators running, and Luey’s Unethical Manufacturing company busy.

“I was an avid off-road camper and did a lot of winter camping just as tent heaters became popular,” says Luey of Unethical Manufacturing.

“I picked one up and realized the fuel tank was small. What was missing was extended run time.”

Luey put together a flexible fuel line to connect his heater to a larger fuel tank. When he posted it on Instagram, the internet blew up.

“I got tons of views,” he recalls.

“People loved them. That’s what’s cool about social media. You can have a simple idea, and the whole world can see it and buy it.”

Luey began making kits, redesigning, improving and selling them. He has kits for multiple brands of fuel cans, ranging from 2-gal. to 55-gal. barrels. Buyers can choose plastic or stainless-steel connectors, and the fuel lines won’t drain out when disconnected. The quick connectors lock in the fuel.

Sales boomed as he expanded his product line to include diesel camp generators as well.

“We’ve shipped kits throughout the world, with sales in Italy, Norway, Denmark, the U.K., Australia and Japan, as well as all across Canada and the U.S.,” says Luey.

In addition to the extended run kits, which start at $28.98, Luey offers a range of fuel-related products, including lines, connectors and adapter kits.

As is the case with an increasing number of companies, Unethical Manufacturing is a completely online company. All sales are direct, and Luey maintains no customer service phone line. Instead of working with a distributor, he built his website and distribution system.

“Online self-service ensures consistent quality and keeps our prices low,” he says.

“We do our best to respond quickly to emails, even on weekends. If you don’t use email, direct message us from Instagram, Facebook or other social media. I like being able to reach out to people directly.”

When asked about the company name, Luey describes it as a marketing strategy.

“I wanted a name that would stick with people,” he says.

“I always wanted to be different, and it clicked.”

Contact: FARM SHOW Followup, Unethical Manufacturing, Vancouver, B.C., Canada ([email protected]; https://unethicalmfg.com).

From the archive · Full text
Feature story

Easy Outdoor Service Ramp

Featured source: FARM SHOW

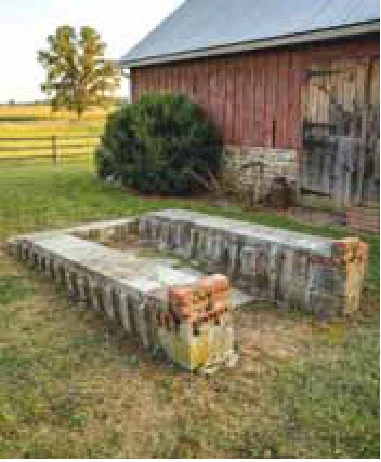
We found several versions online for an outdoor service ramp built from old concrete blocks and bricks.

Handy for a quick oil change or repairs, the concrete blocks are placed on a small slope to provide easy access under a vehicle. Starting with a single course of blocks and adding more as the slope rises creates a ramp.

Most versions we found had some form of block or brick at the end as wheel stops. When set up as a permanent ramp, it’s important to use concrete to secure the blocks and ensure the ramp doesn’t move.

Site choice is also critical, as it can’t be in an area that can be washed out by rain, etc.

Safety is key. You need to be sure that what you are working under is safe, just as when raising any vehicle or implement for service. This is just an easy way if you have the right slope and space, compared to a full-service pit.

From the archive · Full text
Feature story

Nifty Chainsaw Tractor Mounts

Featured source: Dale Freeman, Monroe, Va.

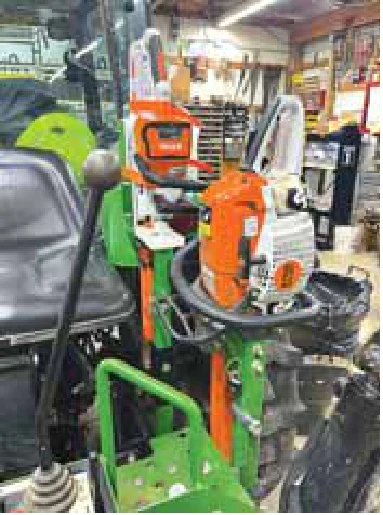
Nylon block chainsaw holders keep Dale Freeman’s chainsaws safe and secure. Modified receiver hitches mounted to the subframe of his tractor-mounted backhoe make chainsaws easy to access whenever needed. One hitch even serves double duty, holding a box for log chains and a cordless chainsaw.

“The receiver hitch mounts make it easy to remove the chainsaw holders and the log chain storage if I want,” says Freeman.

“I often have one or the other, if not both, of my chainsaws with me, but the log chain box is always there. The holders keep them secure and out of the way when operating the backhoe, while the nylon blocks prevent damage to the chains or bars.”

Freeman’s first chainsaw holder was designed for a gas/oil chainsaw with a 20-in. bar. It had 1/4-in. thick steel plates faced with self-adhesive step rubber from Harbor Freight. One plate was welded to 2 by 2-in. square tubing. Nuts welded over holes in one plate allowed clamp-down knobbed studs to secure it to the other plate. Lock nuts on the exposed studs prevented them from vibrating out.

Freeman secured the bar cover to the plate on the tubing with two small button-head bolts.

“When I slid the chainsaw bar into the cover, I was always concerned that the nearly flat bolt heads would scratch the bar or dull the chain,” says Freeman.

“Plus, with the 20-in. bar, I really had to stretch to get it into the sleeve.”

To avoid the potential problem, Freeman decided to fabricate a new chainsaw holder. Having a 55-gal. barrel filled with nylon block scraps from the company where he spent his career, he decided to use them instead of self-adhesive rubber.

“Whenever I build something, I check the scraps and often build it based on what I find,” says Freeman.

“The nylon blocks are easy to slip in a vise and cut to size or mill to the desired shape. When bolting them to a surface, I recess the hole so the bolt head is below the surface.”

Freeman bolted a block of nylon to a steel plate welded to a spacer section of 2-in. tubing, then bolted it to a longer leg of tubing. The spacer prevented the chainsaw bar from rubbing against the receiver hitch for the leg.

He cut out space in the block for the bar’s plastic sleeve and epoxied it in place. He bolted a thinner section of nylon to a second plate facing the first. Again, he used knobbed studs installed through both plates to secure the sleeve and chainsaw when inserted.

Freeman mounted a 2 1/2-in. steel tube to the backhoe’s subframe as a receiver hitch for the vertical part of the chainsaw holder. Instead of using a standard receiver hitch pin, he drilled holes in each side of the receiver hitch and welded heavy-wall nuts over the holes.

“The wall nuts are larger in diameter and easier to weld in place than regular nuts without messing up the threads,” says Freeman.

“Jam bolts threaded through the welded nuts eliminate vibration and noise.”

Freeman welded a short length of Schedule 40 pipe to a corner of the vertical leg to hold a chainsaw tool. He also welded a half-circle to the leg for padlocking the chainsaw in place.

“After undergoing open-heart surgery, I was unsure if I could start the gas/oil chainsaw with its pull rope, so I bought a 10-lb. battery-powered chainsaw with a 12-in. bar,” says Freeman.

“I fabricated a slightly different holder for it.”

While using a similar receiver hitch design, he used more nylon blocks and made the receiver hitch serve two purposes. He started with a piece of scrap angle iron from an old electric panel. It serves as a base for a nylon plate with a slot for the chainsaw bar sleeve. The base is welded to a short length of 1 1/4-in. square tube that slips into a 1 1/2-in. tube and is secured with two D-pins. Two repurposed drawer pulls, bolted to the vertical face of the base plate, hold the bar sleeve in place.

“I bolted a piece of 1 1/2-in. tube to the subframe of the backhoe and slipped a piece of 2 by 2-in. tubing over it,” says Freeman.

“The 1 1/2-in. tube from the chainsaw holder is bolted to it. The 2 by 2-in. tube serves double duty, as the base for the log chain storage box is welded to it as well.”

Freeman bent angle iron to make a frame for the heavy-duty poly battery box and used 1/4-in. thick steel plate to form a trough for the box to sit in.

“Once I had the log chain storage and the chainsaw base plate in place, I realized the cordless chainsaw was top-heavy and needed to be secured to the holder,” says Freeman.

“I welded pieces of scrap metal to build up two sides of the base plate and covered them with pieces of nylon.”

He also added a 2-in. wide aluminum strip to the back side, with two strap loops attached.

“I can strap the motor in place,” says Freeman.

“This eliminates any potential vibration and noise, and I can remove the chainsaw and holder in about a minute.”

Since he found the pull rope on his gas chainsaw wasn’t a problem, he rarely has the cordless one mounted. However, he reports keeping the log chain box on continuously.

Contact: FARM SHOW Followup, Dale Freeman, Monroe, Va. 24574.

From the archive · Full text
Feature story

Handy Work Lift Platforms

Featured source: Dale Freeman, Monroe, Va.

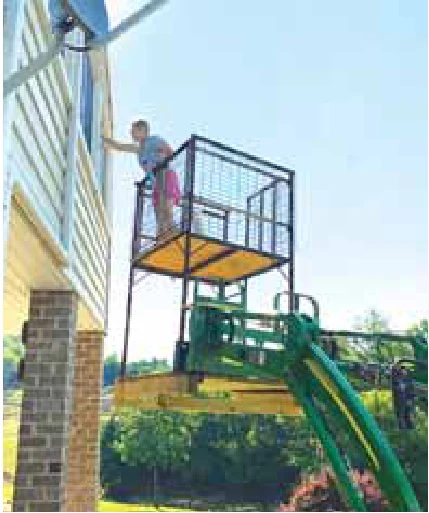
Dale Freeman’s work platforms are compatible with front-end loader forks. He built one with a safety rail on one side and another with a safety rail all the way around. Both are on solid-floor pallets.

“I used 4 by 4-in. lumber for the sides of the pallet on the single-rail platform, but 4 by 6-in. lumber on the four-rail platform,” says Freeman.

“I wanted the extra height so I could run in easier with tractor forks.”

The uprights on the single-rail platform are 2 by 2-in. square steel tubing, with 2 by 2-in. angle-iron cross rails and 3/4-in. Schedule 40 steel pipe bracing the safety rail at 45-degree angles. Hooks at both ends of the top rail provide handy holders for tools or pails.

“I can lift the pallet up from one edge and have a work platform with a safety rail,” notes Freeman.

“If I pick it up from the opposite edge, I have an adjustable-height workbench with open sides.”

When he designed his four-rail work platform, he added an extra 5 ft. of height with a 3-ft. high railing. He used salvaged steel, including 8-ft. long, 1 1/2-in. steel tubing for the support frame and ladder uprights at one corner. He topped out each railing with 1 1/2-in. steel pipe.

“I used 3/4-in. Schedule 40 pipe for the ladder cross bars,” says Freeman.

“The ladder and frame uprights are bolted to the pallet. I also used lots of gussets to stabilize and strengthen the frame. The only thing I bought new was the 5/4 decking for the raised floor.”

Freeman used industrial storage racking to fill in the scrap steel frame and hangs a chain across the gate for security. He can lift his loader arms to their full height and work safely behind the guard rails of either platform.

“With the raised floor, the four-rail work platform puts my feet 13 ft. above the ground,” Freeman says.

Freeman has used the work platforms for various tasks, including insulating the trusses in his shop, trimming tree limbs, and mounting a trail camera on the side of his barn.

“If my wife is around, I have her lift the stand with me on it,” says Freeman.

“If not, I throw a step ladder across the pallet for climbing in. We live on a dusty road, and she really likes it for cleaning windows. I can lift her up with the platform instead of having to balance on a ladder and reach across a window.”

Contact: FARM SHOW Followup, Dale Freeman, Monroe, Va. 24574.
From the archive · Full text
Feature story

Welding Tables Clean Shop Air

Featured source: Melvin King, Honey Brook, Pa.

Welding in enclosed shops can create smoky, unhealthy air. Traditional welding benches and work areas often worsen this problem, and installing ductwork to remove smoky air can be costly.

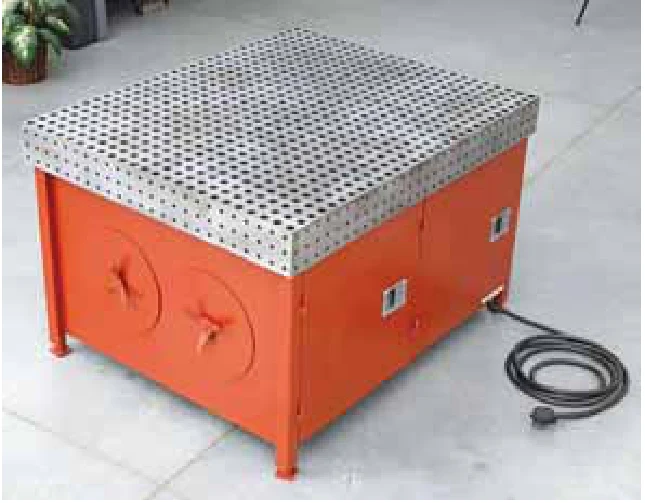
Collector Systems Industries (CSI), an off-shoot of Tigworx, has developed a downdraft welding table that purifies air for welders and surrounding workers without requiring external ductwork modifications.

The CSI welding table features a self-contained system that draws in dirty air from the work surface, filters it, and releases it as clean air below. Its electric motor, equipped with a variable frequency drive (VFD), provides adjustable suction for various tasks. The built-in filter is periodically cleaned by a pulse of pressurized air from an internal tank, ensuring consistent performance and minimal maintenance.

The table operates on 220 single-phase or 240/480 three-phase power, making it compatible with different shop setups.

CSI’s table sizes are flexible. Standard configurations range from 4 ft. by 5 ft. to 4 ft. by 10 ft.

“We’ve even built custom units up to 4 ft. by 17 ft.,” says CSI Shop Foreman Melvin King.

For shops with space constraints, the welding tables can be as narrow as 40 in.

“Our downdraft tables stand out for their tough, self-contained design, tailored specifically for welding with fixture availability on top or on the sides,” King says.

“They’re built to last and are a smart investment in cleaner air and safer working conditions without any extra ducts.”

Manufactured in Honeybrook, Pa., the tables are available nationwide, with prices starting at $12,000 for the 4-ft. by 5-ft. model.

Contact: FARM SHOW Followup, Collector Systems Industries, 293 Old Pequea Ln., Honey Brook, Pa. 19344 (ph 610-273-8563; [email protected]; www.tigworxs.com).

From the archive · Full text
Feature story

DIY Detents For Quick-Connect Relief

Featured source: Dale Freeman, Monroe, Va.

Hydraulic hoses heating in the sun build up pressure, making it difficult to insert the male coupling into a spool valve. Dale Freeman priced commercial detent tools at $100 or more. Even worse, different-sized couplers may require multiple tools.

“I made my own with scraps I had in my shop,” says Freeman.

“You can use whatever you have handy and customize the tool to your quick-connects.”

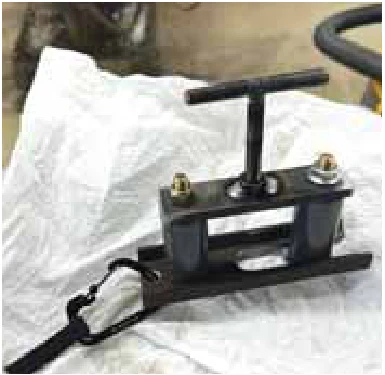
Freemen’s detent consists of two pieces of 3/8 by 1 1/2-in. wide steel bar with a T-bolt made from all-thread rod and sized to match the nipple on the quick-coupler. It also includes connecting bolts and spacers.

He drilled holes at both ends of one bar for connecting bolts and a hole in the center for the detent T-bolt.

“I welded a heavy-walled nut sized to the rod, over the center hole,” says Freeman.

“I like heavy-walled nuts for this, as it’s easy to weld them in place without damaging the threads. It’s easier than tapping the hole.”

He drilled a hole in one end of the second bar and cut a slot in the other end that extends past the midpoint of the bar. The slot needed to be wide enough to slip over the threaded part of the male fixture on the hose.

“Different hose ends may require different-sized slots,” notes Freeman.

“If you have multiple male sizes, only this piece will likely have to be duplicated to match each size.”

Freeman made spacers from scrap pieces of nylon block. He cut them to size, leaving space between the steel bars for the coupler head and the end of the detent T-bolt.

“Nylon blocks are easy to drill and mill to shape,” says Freeman.

He inserted a bolt through one steel bar, a coupler and the second bar. He added a washer and lock nut, tightening it just enough so the bars could still pivot.

To relieve pressure on a coupler, he slips the slot over the coupler’s threads and inserts a bolt through the hole in the bar, with the centered nut, a second spacer and the slot.

“Add a large washer and a nut to the bolt,” says Freeman.

“However, before tightening the nut down, make sure the quick-connect coupler is lined up with the detent T-bolt.”

He recommends wrapping a rag around the male coupler and the detent T-bolt head while applying pressure to the nipple. He notes that it’s always messy, but the rag helps. As always with hydraulic fluid under pressure, especially if the nipple is under high pressure, avoid allowing fluid to penetrate the skin.

“I learned how easy it was to misplace the tool, so I drilled another hole at the pivoting end,” says Freeman.

“I hooked a gear clip to it and hang it up when not in use.”

Contact: FARM SHOW Followup, Dale Freeman, Monroe, Va. 24574.
From the archive · Full text
Feature story

Bearing Cleaning And Packing Tools

Featured source: Derrick Bechel, Elmwood, Wis.

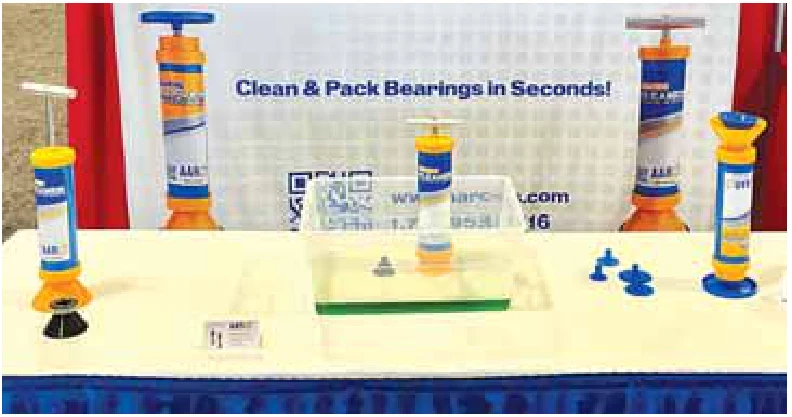
AARC products were designed specifically for cleaning and packing wheel roller bearings in aircraft, trailers, tractors, RVs, ATVs and automobiles of all sizes. The Bearing Cleaner and Bearing Packer provide an easy way to service wheel roller bearings.

“It’s a simple process to clean and pack bearings, and it only takes a matter of seconds,” says Derrick Bechel, an AARC account representative.

The Cleaner aggressively flushes cleaning solvent through roller bearings to loosen and rinse away accumulated bearing grease. Simply place the AARC Bearing Cleaner chamber over a dirty wheel bearing and pull up on the plunger. This creates a flushing action that should be repeated three to five times, leaving the bearing free of grease and debris.

The Packer works by first loading a stan-dard grease tube into the chamber. Make sure the product is inverted during use. Place a clean bearing onto the yellow cone. With the bearing held by hand, apply downward pressure on the plunger. Grease is forced up through the bearing, creating a complete and even pack.

“AARC Bearing Cleaner and Packer is manufactured in Elmwood, Wis., and is sold worldwide through aircraft, trailer and RV supply dealers,” Bechel says.

“The two products are also sold directly to repair shops and end users.”

Interested customers can purchase AARC Bearing Cleaner directly, for $129 and AARC Bearing Packer for $99 plus S&H.

Contact: FARM SHOW Followup, MAI Genesis, 605 Project Dr., Elmwood, Wis. 54740 (ph 715-953-2416; [email protected]; www.aarc-us.com).

From the archive · Full text
Feature story

Door Kit Makes Ceiling Access Easy

Featured source: Todd Carlson, Bloomer, Wis.

AJ Manufacturing sells about 6,000 Ceiling Access Door (CAD) kits a year. Competitors make their share as well. Had Todd Carlson not helped his dad, Gary, a retired carpenter, with a shop update, they might not exist.

“My dad had moved to a new place, and I was helping set up his woodshop,” recalls Carlson of AJ Manufacturing.

“We assembled an access door for the attic. While taking a break, we discussed how nice a pre-hung, preassembled, self-trimming, gasketed door would be to install.”

Carlson took the concept back to the company where he works. It took several months to develop a commercial product. The first version was only 1 in. thick because of the design’s geometry. It measured 24 by 36 in. to fit between framed trusses 24 in. on-center. It featured a prepainted, assembled aluminum frame, a gasket, and a 1-in. polyurethane foam core R6 panel with prepainted white metal skins. The door opened into the attic on hinges, with a handle on the top side for egress.

“The product value for builders or installers was saving time and cost to install an access door with a consistent and predictable appearance and sealing,” says Carlson.

“The gasket ensures the door is sealed to minimize leakage of heated or cooled air.”

While the CAD kits saw rapid adoption, customers requested higher insulation values. The challenge with thicker door panels is that the door swings within a fixed space. A recent breakthrough in hinge design by the company’s engineers made 4-in. (R28) and 6-in. (R32) thick doors possible.

“Several patent-pending features allow the thicker panels to operate smoothly within the frame,” says Carlson.

“The doors feature a hold-open device, and our 24 by 48-in. panel has a bifold geometry for enhanced operator safety.”

Carlson notes that working with his father, Gary, led to the development of the innovative CAD product in the first place.

“After selling over 100,000 of these doors, he deserves to be recognized for his contribution,” says Carlson.

Innovation at AJ Manufacturing isn’t limited to doors and windows. Loose attic insulation is an ongoing problem with attic access doors. One solution is for builders to install a wooden dam around the door. AJ Manufacturing stumbled on an innovative solution to this problem when a 35,000-lb. shipment of mis-coated sheet metal was rejected for its intended use.

“The supplier issued a credit and suggested we recycle it,” says Carlson.

“We don’t like to do that, so we had a contest among employees for ways we could use it where appearance didn’t matter. The winning idea was a sheet metal insulation dam.”

The new product ships flat to the customer, with a hem folded at the top edge. It features perforated fold lines, end tabs and receiving slits for closure.

“It’s 20 in. tall, accommodating up to an R60 insulation depth,” says Carlson.

“With the perforations, it’s easy for an installer to bend it at 90-degree corners with bare hands, quick and easy and perfectly straight.”

Contact: FARM SHOW Followup, AJ Manufacturing, 1217 Oak St., Bloomer, Wis. 54724 (ph 800-328-9448; [email protected]; www.ajdoor.com; www.discountdoorsandwindows.com).