Practical ideas from FARM SHOW MagazineSubscribe · Free issue · Send us your shop tip
Subscribe to FARM SHOW
Issues / Vol. 29, No. 4 (2005)

Vol. 29, No. 4 (2005)

Money-Saving Repairs & Maintenance Shortcuts · Printed section pp. 36–39

33 selected entries · Complete text of selected entries

This issue’s section includes reader tips and feature-length shop stories. Held items and editorial notices are not reproduced.

Archive text: prices, coupons, availability and contact details reflect the original publication, not current offers. Reader methods are not universal instructions; follow manufacturer guidance and proper safety practices.

Reader shop tips

From the archive · Full text
Reader shop tip 1 of 2

Theodore Haugen

Individual tip 1 of 2 from this reader’s published contribution.
Theodore Haugen, Plummer, Minn.

“In a past issue of FARM SHOW there was a write-up by a person doing welding on cast iron using nickel rod. I’ve used that method for some time but on the last cast iron job I didn’t have any nickel rods handy, so I used stainless steel rod. I got a beautiful weld with a lot less stress build-up to contend with.

From the archive · Full text
Reader shop tip 2 of 2

Theodore Haugen

Individual tip 2 of 2 from this reader’s published contribution.
Theodore Haugen, Plummer, Minn.

“Here’s another idea that might help someone. My neighbor wanted me to help him put a fuel pump in his car’s gas tank. He had just filled the tank with gas so it would be a big job to pump out the gas and fighting with rusted bolts to lower the tank. So I just cut out a square piece of metal from the trunk and to get access to the pump. I rebuilt it with a kit, put everything back in place, and then covered the hole with the trunk mat. Took just 1 1/2 hours and we were done.”

From the archive · Full text
Reader shop tip

Dwayne Lowe

Dwayne Lowe, Chanute, Kansas

“I came up with a cheap, portable fan that works great for cooling off on hot days. It’s made from a pair of 14-in. radiator coolant fans out

of front wheel drive cars. I bolted the fans in a fold-up angle iron frame. To operate the fans, I just hook them up to a vehicle’s battery. I can operate either fan independently, or both together at the same time.

“It really comes in handy in hot weather, and I can use it both in my shop and in the field. If I’m in the field and putting up hay on a hot day, I can set up the fans in the shade next to a vehicle. The fans deliver a lot of air, enough to blow my clothes around.”

From the archive · Full text
Reader shop tip

Clint Keeney

Clint Keeney, Creighton, Mo.

“After connecting two wires together with a solderless connector, I seal both ends with silicone. It makes the connection watertight and helps keep the wires secure.”

From the archive · Full text
Reader shop tip

Roger W. Meihak

Roger W. Meihak, 10150 223 rd St. No., Forest Lake, Minn. 55025 ph 651 433- 2600; [email protected])

“Anyone who has worked with stainless steel will probably agree: stainless steel looks nice but is hard on tools. It quickly dulls drill bits, hole saws, reamers, etc. This was shown to be true on one of my projects, and I discovered a way to make holes quickly and easily in the 20-ga. stainless steel I was using.

“My invention uses an air-driven nailer modified with a special punch. The punch attaches to the nailer and, in most cases, it can be used with one hand. The punch can also be used as a center punch. Besides lowering the cost of making holes, another advantage is speed. Holes are punched in one or two seconds. The tool works very well in ordinary sheet metal as well as aluminum.

“I’m not planning on marketing the system at this time, but it has a patent pending on it.”

From the archive · Full text
Reader shop tip

Jay C. Bauch

Jay C. Bauch, Powell, Tenn.

“On my 1950 Farmall Cub tractor I had a broken wooden arm on the mower attachment. I bought a hollow, square metal tube the same size as the wooden arm, drove in a piece of oak wood to strengthen it, and drilled holes for mounting it with bolts and nuts. We haven’t had any more problems since I installed it.”

From the archive · Full text
Reader shop tip 1 of 2

Marvin Kroontje

Individual tip 1 of 2 from this reader’s published contribution.
Marvin Kroontje, Magnolia, Minn.

“I use a 1/2-in. dia., 3-ft. length of galvanized water pipe - with the last foot curved - to tighten belts on vehicle alternators, power steering units and air conditioning units. It makes a great pry bar once the bolts have been loosened and allows me to leverage the unit tight before I retighten the bolts. I got the idea for using it when I was trying to tighten up an alternator but couldn’t get anything in the engine compartment to fit right. I found the pipe laying on the ground. The pipe is straight for about 2 1/2 ft., then makes a gentle curve and continues straight for about another foot. The curve allows it to fit into places where a conventional straight pry bar won’t fit. I’ve used it a lot.

From the archive · Full text
Reader shop tip 2 of 2

Marvin Kroontje

Individual tip 2 of 2 from this reader’s published contribution.
Marvin Kroontje, Magnolia, Minn.

“I wanted to mulch leaves during the fall when cutting my lawn with my Big Mo riding mower, so I duct taped an L-shaped chunk of tin over the mower’s discharge chute opening. The closed-off opening holds leaves and grass inside the mower deck so the material doesn’t shoot out, but instead gets chopped up and exits out behind the deck.

“At the same time I pull a push-type mulch mower behind the riding mower. The two mowers are connected by a couple pieces of flat iron, hinged in the middle to make turning easier. I drilled a hole in the rear mower’s deck and bolted the flat iron on. The other end hooks up to the riding mower’s hitch.”

From the archive · Full text
Reader shop tip 1 of 2

Kevin West

Individual tip 1 of 2 from this reader’s published contribution.
Kevin West, Covington, Ohio

“My 2-ton grain truck had a broken running board, due to the support gusset rusting away from the frame. I wanted to reinforce the gusset with welding material but, unfortunately, there wasn’t room to get my body in there and reach the welding area at the same time. So I came up with the idea of making a welding rod extension for my welder. I fused a full welding rod onto the end of another welding rod at a slight angle, which allows me to get around obstructions.

From the archive · Full text
Reader shop tip 2 of 2

Kevin West

Individual tip 2 of 2 from this reader’s published contribution.
Kevin West, Covington, Ohio

“My buddy uses a 30-gal. barrel to store welding rods. To keep the rods dry, he cuts a hole in the lid and affixes a reflector-type trouble light. An added bonus is that his cat, who likes to hang around in the shop, can lay on the lid next to the light and stay warm even in the coldest weather. It makes a nice, cozy perch for him.”

From the archive · Full text
Reader shop tip 1 of 5

Bill Reeks

Individual tip 1 of 5 from this reader’s published contribution.
Bill Reeks, Cromwell, Ky.

“I have arthri-tis so I always have to find a better way to do things. I’ve discovered that using a bar or pipe clamp with my drill makes it much easier to drill through heavy steel. The whole idea works similar to a drill-press. The drill gets a helping hand from a pipe clamp, which adds the necessary pressure for the bit to cut. I just slowly tighten the threaded part of the clamp. A length of wire around the drill and pipe clamp helps to steady the drill motor and clamp.

From the archive · Full text
Reader shop tip 2 of 5

Bill Reeks

Individual tip 2 of 5 from this reader’s published contribution.
Bill Reeks, Cromwell, Ky.

“Want an easy way to salvage the last few drops of motor oil from its container? Find a large bottle with a neck large enough for the neck of the 1-quart oil bottle to fit inside it and set it upside down to drain.

From the archive · Full text
Reader shop tip 3 of 5

Bill Reeks

Individual tip 3 of 5 from this reader’s published contribution.
Bill Reeks, Cromwell, Ky.

“When I need a short piece of small wire I use a paper clip. They’re cheap, readily available, and provide the size you need when other sources aren’t there. A jumbo size clip will provide 6 3/8 in. of wire.

From the archive · Full text
Reader shop tip 4 of 5

Bill Reeks

Individual tip 4 of 5 from this reader’s published contribution.
Bill Reeks, Cromwell, Ky.

“Attaching a paper clip to the end of a roll of tape makes the tape end easy to find and use when needed. It saves time, frustration and tape, as some folks fold under the end ;of the tape but then that piece is no longer usable.

From the archive · Full text
Reader shop tip 5 of 5

Bill Reeks

Individual tip 5 of 5 from this reader’s published contribution.
Bill Reeks, Cromwell, Ky.

“To place a screw or nail into an inaccessible area where it’s difficult to hold, loop a string through a soda straw and around the screw or nail. Then hold the two ends of string and place the object.”

From the archive · Full text
Reader shop tip

Bayard E. Young

Bayard E. Young, Elkwood, Va.

“Three of the floor chain guides on my New Holland 847 round baler wore all the way through due to the chains wearing on them. The problem is worst on the middle guides, which bear most of the bale’s load. The chains wears grooves in the guides and then through the baler floor. Eventually they get hung up and stop turning, which jams up the machine big time. We kept breaking shear pins, and eventually the main shaft that operates the apron chains broke. I ended up having to replace all seven of the chain guides on my baler.

“Unfortunately these guides aren’t as easy to change as the manual describes. You have to crawl under the baler, where there’s going to be an accumulation of rotten hay and rust to deal with, to unscrew the bolts that hold the guide channels. Someone will have to help hold the bolts while you remove the nuts.

“So if you have a baler with chains instead of belts, my advice is to examine the guides and if they look like they’re wearing, add hard surface welding material to fill in the grooves.”

From the archive · Full text
Reader shop tip 1 of 2

W.A. Gibbs

Individual tip 1 of 2 from this reader’s published contribution.
W.A. Gibbs, Elmwood, Tenn.

“When I lost the ignition key to my 1958 Chevrolet 2-ton dump truck, I was able to come up with a simple, low-cost solution without ever touching the old ignition switch. It was a lot easier than putting in a new ignition switch, and cheaper.

“The truck has an external resistor mounted separately on the engine firewall. I bought a heavy duty industrial type ignition switch which came with one ignition terminal and one battery terminal, and that’s all I used from it. Starting from the battery side of the new ignition switch, I ran a no. 10 wire straight back to the battery. From the ignition side of the new switch I ran another wire straight to the feed-in side of the truck’s ballast resistor.

From the archive · Full text
Reader shop tip 2 of 2

W.A. Gibbs

Individual tip 2 of 2 from this reader’s published contribution.
W.A. Gibbs, Elmwood, Tenn.

“I used the same idea on my 1961 Deere 1010 dozer, except that on the dozer I installed an extra switch. I still use both switches. With the original switch I had trouble burning up ignition points. Now the dozer doesn’t burn points any more. Whenever I start the dozer I turn both switches on, because the old switch has a gauge on the dash that shows me the switch is on. Turning the old switch won’t shut off the engine, but turning the new switch on will stop it.

“I paid $16 for the ignition switch that I used on the truck and less than $25 for the switch that I used on the dozer. Now both vehicles start up like they were new.”

From the archive · Full text
Reader shop tip

Dale Hazelton

Dale Hazelton, New Hampton, N.Y.

“To make cleaning riding mower decks an easier job, I drive the mower up onto my utility trailer, which has an open center. I used to drive the mower onto planks supported by concrete blocks, but this way is much safer.”

From the archive · Full text
Reader shop tip 1 of 2

Bruce Johnson

Individual tip 1 of 2 from this reader’s published contribution.
Bruce Johnson, Osage, Minn.

“I use a wood splitter to break the bead seal on tires. I just place 2 by 6 wooden blocks on both sides of the tire to keep the wedge and back plate from coming into contact with the wheel rim.

From the archive · Full text
Reader shop tip 2 of 2

Bruce Johnson

Individual tip 2 of 2 from this reader’s published contribution.
Bruce Johnson, Osage, Minn.

“When tapping holes in limited spaces I put a nut on the drive end of the tap I’m using. I place the tap on a piece of soft metal (brass or aluminum) and tap on the nut with a hammer until it’s flush with the square drive end of the tap. Then I drive the tap with a socket wrench.”

From the archive · Full text
Reader shop tip

Don Wheeler

Don Wheeler, Columbiaville, Mich.

“To remove broken bolts in aluminum, I spray the bolt with Gibbs penetrating oil and let it stand overnight. In most cases the bolt will come right out.”

From the archive · Full text
Reader shop tip

Roger Kuntz

Roger Kuntz, K-Tech, 5251 County Road X, Grainfield, Kansas 67737 ph 785 673-5560

“My new blade plow leveling guide contains instructions designed to help farmers solve some technical problems with blade plows. I started working for Flex King in 1972 and served in research and development and as the head of the service department. Over the years I traveled from Canada to Australia, making sure farmers and dealers were getting optimum performance and satisfaction from their machines. I found the weak spots and, after enough time and struggle, improved on the key component – the turnbuckle. I took it up from a strength of 1-in. thread size to 1 1/2-in. and also incorporated both left and right hand threads, which allows “on plow” adjustment.

“Finally, I realized farmers would appreciate having a simple guide for annual tune-up of these machines. Adjustment is quite simple. The depth control cylinder is located in the center of the machine, and depth control is delivered through rockshafts that have bearing wear which allows the wings to sag. The turnbuckle takes up the wear and keeps all the plow’s sections operating at an even depth in the ground.

“I’ve invented a ‘bearing width extension kit’ that updates your machine and eliminates this problem. There’s no reason you can’t keep these machines running indefinitely. The blade plow leveling guide is available free to anyone who writes in, and contains information on various components in my upgrade kit.”

Shop feature stories

From the archive · Full text
Feature story

Dent-Fixing Tool Restores Deere Grill Screens

Featured source: Dick Sunsdahl

Nothing is easier to dent and harder to repair than a grill screen on an older tractor. Now owners of many older and late model Deere field and lawn and garden tractors have an-other option besides replacement. They can take the dents out in just a few minutes with a new punch and die set.

“Our customers include mechanics and farmers who want to keep their tractors in good shape as well as tractor restorers,” says Dick Sunsdahl, a former VoTech engineering and quality control instructor.

“The tool pays for itself in one use.”

He discovered the need for the tool when he began restoring antique Deere tractors. Working with his son, who is also a tool-maker, Sunsdahl designed punch and die sets that fit the two basic grill screens produced for Deere tractors between 1949 and 1990. Last spring he also introduced a set for 1963 to 1987 lawn and garden tractors. His sets have also been used on Minneapolis Molines with similar style screens.

The heat-treated aluminum alloy tools are available in 6-in. lengths for $26 to $32, depending on tractor series, plus $5 shipping.

“The grill screen often doesn’t even have to be removed from the hood,” says Sunsdahl.

“Simply lay the hood with screen in place over the die. Place the punch on top of the dent and drive it snug against the die. Often the paint doesn’t even get damaged.”

Severely damaged grill screens may have to be removed from the hood to be worked on. Sometimes they may need to be pried apart before the punch and die can be used. Sunsdahl provides instructions and tips for use. A demonstration video is also available showing Sunsdahl’s young grandchildren repairing a dented screen with the tools.

Contact: FARM SHOW Followup, Dick Sunsdahl, Sunsdahls’ Restoration Tooling, 1703 Greenwood Place, Faribault, Minn. 55021 (ph 507 334-8966; email: [email protected]; website: www.sunsdahltooling.com).

From the archive · Full text
Feature story

Flameless Way To “Solder” Copper Pipe

Featured source: Jackson Industries

Soldering copper pipe could become a job of the past thanks to a new “solderless” copper bonding “glue” that lets you work with copper pipe the way you’d work with pvc pipe.

Just-For-Copper comes in a small applicator tube. When applied to copper it generates a chemical reaction, providing a hermetic weld that’s water-tight and air tight, with no need for solder. It’s said to work up to 70 percent faster than solder welding and is as permanent and durable. There’s no fire or burn risk compared to open flame soldering.

The product can be used on all rigid copper pipes, fittings, and connectors that carry water, as well as natural and LPG gas. It starts to bond, or “weld”, as soon as you insert a treated copper pipe into a treated copper connector or fitting.

Application is easy. Using 60-grit sandpaper (provided), sand the copper or brass until it’s shiny and free of all contaminants. Shake the bottle and squeeze a small bead of the product around the circumference of the leading outer edge of the pipe and also the leading inner edge of the connector. After you insert the pipe into the connector, the bond will be complete in only 5 seconds. However, you shouldn’t move the pipe for at least 45 seconds to avoid breaking the bond. After that, you won’t be able to break the bond apart with your hands.

JFC has an official rating of 500 psi so it will meet all plumbing codes. The product can’t be used on any threaded connectors.

JFC is sold in 10g and 50g bottles. The 10g bottle will make about 40 welds and sells for $14.99 plus S&H. The 50g bottle will make more than 200 welds and sells for $24.99 plus S&H.

Contact: FARM SHOW Followup, Jackson Industries, Inc., 400 Lake Ridge Drive, Russellville, Ark. 72802 (ph 866 304-5335; email: [email protected]; website: www.copperbond.com).

From the archive · Full text
Feature story

“Grease Saver” Keeps Spare Tubes Handy

Featured source: David Mezes

This new “grease saver” lets you securely store a pair of spare grease tubes so they’re always handy and undamaged whenever you need them. They come with a bracket that bolts onto any flat surface, and with a hinged lid that snaps into place.

“It gives you easy access to clean, undamaged grease tubes and keeps them off the floor so they won’t get broken, and it stores them vertically so they can’t leak out the cap,” says inventor David Mezez of Twin Falls, Idaho.

“It’s designed so you can open it with one hand and pull out a tube without ever having to set your grease gun down.

“The holder is designed so you can join several units together, which comes in handy on larger equipment where you use more than two tubes each time you grease.”

Mezes is the manager on a large dairy and farm operation with 140 employees. He came up with the idea after watching spare grease tubes get ruined. He made a prototype in which the tubes were laid flat.

“However, I found that if the sun shined on the tubes and they get hot they could leak out the caps. They can’t leak if they’re in the vertical position,” he notes.

Mezes is looking for a manufacturer. Contact: FARM SHOW Followup, David Mezes, 994 Madrona St. N., Apt. B, Twin Falls, Idaho 83301 (ph 208 280-2704; email: [email protected]).

From the archive · Full text
Feature story

Home-Built Heat Exchanger

Featured source: Roger Foster

Roger Foster, Tower Hill, Ill., has used a home-built wood burner to heat his shop for years. It always bothered him that so much heat went up the flue so he recently added a heat exchanger made from an old propane gas tank.

First he made certain the tank was clear of any old gas. Then he removed all the valves and gauges, closed off all the openings, and installed six 3-in. dia. horizontal pipes inside the tank, through which hot air is blown. He used a torch to cut openings in the end of the tank for the pipes.

He used a short, heavy wall 8-in. dia. steel pipe to connect the wood burner to the heat exchanger. To push air through, he then installed a 10-in. dia., variable speed squirrel cage fan at one end of the tank. The fan pushes air through the pipes and out the other end of the tank.

The last step was to weld a flue pipe to the top of the tank.

“It works great and provides maximum use of the heat generated, so I don’t lose as much heat out the flue,” says Foster.

“The pipes really heat up quick – once I start the fire and turn on the fan I can’t hold my hands near the ports for very long. Before I mounted the heat exchanger, I had hung a fan on a beam above the wood burner tank, but it wasn’t nearly as efficient. Since the photo was taken I have added a metal deflector with vanes that lets me direct heated air left, right, up or down.”

Contact: FARM SHOW Followup, Roger Foster, Rt. 1, Box 108, Tower Hill, Ill. 62571 (ph 217 567-3417).

From the archive · Full text
Feature story

Sand-Rite Sander Sands Right

Featured source: Marcus Kaplan

Sanding uneven contours like gunstocks, duck decoys, furniture and moldings is easier with the contour sander from Sand-Rite Manufacturing. It features both a pneumatic sanding drum and a unique brush-type sanding head.

“It has a direct drive for fewer moving parts and less maintenance,” says Marcus Kaplan, third generation owner of Sand-Rite Manufacturing Company.

“We use only Baldor motors, which are American made and we feel are the best motor in the world for quality and performance. That’s why we give an 18-month warranty while most competitive sanders offer only 90 days.”

The sanding drum is available in five diameters from 2 to 8 in. The operator inflates it with air as needed to match the contour of the piece being sanded. The B-12 brush head sands irregular shapes without loss of detail. As the brushes wear, fresh abrasive stored in the head is released by turning the head.

The pneumatic drum is made from cast zinc. Lower cost imports are made with sand-cast aluminum. Aluminum is softer and can be very porous and go out of round, he explains.

Another feature is that Sand-Rite sanders come fully assembled. The DB-612-DLX sells for $799 FOB, Chicago plus 8 percent S&H in the continental U.S.

Sand-Rite’s specialty is coated abrasives for their machines and others. They stock all grits from #24 to #400. They also can custom make any size belt, sleeve or roll in aluminum oxide with resin over resin bonding on cloth backing in flexible J weights or X weight.

Contact: FARM SHOW Followup, Marcus Kaplan, Sand-Rite Mfg. Co., 321 North Justine St., Chicago, Ill. 60607 (ph 312 997-2200; email: [email protected]; website: www.sandrite.com).

From the archive · Full text
Feature story

55-Gal. Barrel Makes Cheap Parts Washer

Featured source: Dwayne Lowe

Old 55-gal. steel barrels can be turned into cheap parts washers, says Dwayne Lowe of Chanute, Kansas, who used an old 55-gal. barrel and an electric, recirculating submersible solvent pump to make his own parts washer.

“It’s easy to use, and it cost me less than $10 to build,” says Lowe.

He cut away an 8-in. deep quarter section on top of one side of the barrel. He welded in a section of steel plate vertically to both sides of the barrel and then trimmed the part of the lid that he had cut away to fit behind the plate. The top lid hinges on top of the vertical plate.

The barrel has a removable wash tray about 8 in. down from the barrel’s lip. The tray sets on top of a clamp ring that he removed from the top of the barrel and welded to the barrel’s sides. The pump is suspended about two thirds of the way down the barrel and plugs into a 110-volt outlet and switch box that mounts on the cut-away lid. The pump’s electric line and washer hose runs up through a bunge hole in the cut-away lid. By removing two hinge pins, Lowe can remove the top lid in order to clean out the barrel. At the same time, the cut-away lid can be lifted off together with the pump, washer nozzle, and switch box.

When the parts washer isn’t in use, the top lid – which is hinged and has a notch cut into it to make room for the washer hose - can be closed with the pump still inside the barrel.

“It works great and is simple to use,” says Lowe.

“I already had the pump which I bought from Northern Tool (2800 Southcross Drive West, Burnsville, Minn. 55306 ph 952 894-9510; www.northerntool.com). It’s a Little Giant parts washer pump that moves about 2 gallons per minute. It sells for about $50.”

Contact: FARM SHOW Followup, Dwayne Lowe, 88 400th St., Chanute, Kansas 66720 (ph 620 433-1559).

From the archive · Full text
Feature story

Lawn Mower Blade Tool

Featured source: Pete Peters

Here’s a simple tool Pete Peters, Olser, Sask., made to hold a lawn mower blade when taking out the center bolt.

“I bolted a handle to a piece of 3-in. channel iron that slips over the blade,” Peters says.

A couple restraining straps across the open face of the channel iron keep it from slipping off the blade. Peters uses the tool a lot in his lawn mower repair business.

Contact: FARM SHOW Followup, Pete Peters, P.O. Box 166, Osler, Sask., Canada S0K 3A0 (ph 306 239-2045).

From the archive · Full text
Feature story

How To Weld On Used Oil Field Drill Pipe

Featured source: Ron Galloway

In many areas of the U.S. and Canada used oil field drill pipe is cheap and easy to find. But welding it can sometimes be tricky.

The problem is that during normal use, drill pipe acquires the properties of a permanent magnet. The strong magnetic fields at the ends cause the electric welding arc to sput-ter, fluctuate, and leap wildly from side to side of the joint, making it difficult to get a good weld. Retired drill pipe is rarely used outside the oil fields in full lengths. When lengths are cut into two or more pieces, both ends of each segment will exhibit the same permanent magnet properties.

The challenge is to remove or completely neutralize the strong magnetic fields. To do that, we simply take advantage of the basic electromagnetic principle used in creating an electro-magnet - that of wrapping an insulated wire around an iron core and then applying a direct current.

In this case the iron core is the drill pipe, the insulated wire is a few feet of your stinger whip lead, and the direct current is supplied by the welding machine as soon as you strike an arc. It will continue as long as you are welding.

Both north and south polarities can be neu-tralized by this same method, the difference being the direction that you wrap the stinger lead around the pipe. Wrapping clockwise will produce one polarity and counter clockwise will produce the other. Polarity can be established by a simple compass test but it isn’t necessary to use this principle. If you’re wrong you’ll intensify the magnetic field and your arc disturbance will be intensified also. Simply stop and rewrap the other direction.

There is no simple field test to establish the intensity of the existing permanent magnetic field. The intensity of your induced electromagnetic field will be affected by the amperage setting of the machine and the number of wraps of cord you put around the pipe. The amperage is usually set by the rod size and the technicians preferred arc heat so the easiest way to adjust the electromagnetic field strength is with the number of wraps.

Experience shows, if your machine is set for 1/8-in. rod, you would start with six wraps and adjust more or less until you achieve the desired results. It’s important that the lead be tightly wrapped both against the pipe and against each other, while keeping the wraps 4 to 5 in. back from the end being welded so as not to burn the insulation covering the lead. Start your wraps far enough back from you stinger that you don’t restrict your freedom of movement of the stinger. Tests show that once the root pass has been completed the wraps can be removed and normal welding will resume.

Contact: FARM SHOW Followup, Ron Galloway, 70 TeeMont Circle, Afton, Wyo. 83110 (ph 307 886-3673).

From the archive · Full text
Feature story

Handy Folding Multi-Tool

Featured source: John Giza

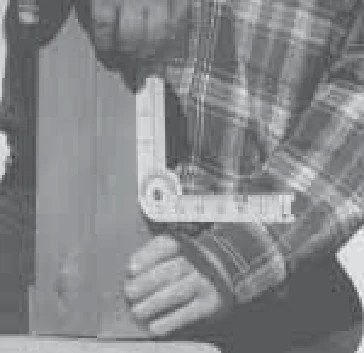
You can do a lot with this new folding multi-tool called the RascalRule®.

It does the job of a level, square, bevel, and ruler.

“It does some things that you can’t do with any other tool,” says John Giza, president of Giza Industrial.

“Best of all, it folds up to fit in your pocket.”

The device can be used to do the following: measure odd or awkwardly shaped items, square 90 ̊ angles, find level, measure any mitre joint, linear measuring (as a stiff ruler to extend your reach 24-in.), determine the pitch of a roof from a distance above or below the rafter, gable end, etc., measure roof pitches over 12/12 or 45 ̊ (just fold over the horizontal section of your RascalRule to 90 ̊ from the level bubble), as a stair gauge, and as a bevel.

RascalRule is made from rugged fiberglass/mineral-filled nylon composite for strength, stability and durability. All of the metal components of the RascalRule are stainless steel except for the rivet, which is composed of a rust resistant alloy.

According to Giza, RascalRule is suitable for use under adverse conditions such as those found in the mining industry (this is what Giza first designed it for).

The tool offers Imperial (inch), metric (centimeter), degree (for measuring angles) and percentage grade measurements (for measuring low angle slopes).

The RascalRule has the inch scale going from left to right on one side of the rule, while on the other side, the inch scale goes from right to left. This is to help when measuring off a center reference line.

For added convenience, the device is designed to “click” on the most commonly used mitre angles of 0, 45, 90, 135, 180 degrees. These pre-set angles make work go quicker and easier.

If need be, the RascalRule will also stand on its own by simply opening one of the arms of the rule to create a stable base. To keep it handy, it can be clipped on to your clothing while working by opening and closing the arms onto the bib of your cover-alls.

This device comes with a one year guarantee (under normal usage conditions) and sells for $24.95 (Can.) plus $5 S&H, regardless of size of order.

The Rascal Rule is also available in a metal version, and custom imprinting of either type is optional.

Giza says his popular, multi-purpose tool has been sold on every continent.

Contact: FARM SHOW Followup, Giza Industrial, Box 48079, Victoria, B.C., Canada V8Z 7H5 (ph 888-972-7225; email: [email protected]; website: www.rascalrule.com).

From the archive · Full text
Feature story

Pneumatic Shift Added To Vintage Versatile

Featured source: Jim Hermanski

While rebuilding the engine on his 1974 850 Series Versatile tractor, Jim Hermanski, Enid, Okla., decided it was time to do something about the old tractor’s inherent shifting problem.

“These are great tractors, and their 3-speed transmissions with four ranges allowed them to be used for a wide range of field work,” Hermanski says.

“The problem was that after you’d used the tractor a little, the remote shifter box wore down and it was hard to keep it from shifting into two gears at once. All the Versatiles with this transmission are notorious for this.”

Having lived with the problem since he bought the tractor used in 1978, Hermanski had given plenty of thought to a solution.

“I worked for years as a truck mechanic,” he says.

“A lot of trucks with that same engine had pneumatic shifters, so I decided I could put one on the tractor and solve the problem.”

His first step was to hunt down a used air compressor and an accessory drive assembly that had been used on the same model Cummins engine in an over-the-road truck.

“The Versatile engine was exactly the same as the truck engine, so all the mounting holes were already there. All I had to do was put it in place and add a coolant line to keep it cool,” he says.

His idea was to replace the manual transmission shift lever with small pneumatic cylinders that would shift the gears.

“I worked for an International Harvester truck dealership here in Oklahoma, and we worked on a lot of oil drilling equipment,” he says.

“So I was acquainted with a type of air spool valve used to control the pto on drilling rigs. They’re small cylinders with a very short stroke.”

Hermanski decided on some dual cylinder spools that had been used on a Speed Star transmission. They have buttons on them to control the rams. Since he was replacing the floor shifter (three forward speeds and re-verse), two dual blocks were enough. He bolted the two blocks together, allowing him to shift using just four buttons.

“When all four are down, it’s in neutral. Then there’s one button for reverse and one for each of the forward gears,” he explains.

“There’s a clevis on each end of the pneumatic cylinder. One end hooks to the shift lever and the other to a stationary point, so I had to build stationary pivot points on the tractor frame for the rams to hook to. On the top shifter, I had to build a bracket that came off the side plate of the transmission. And I had to match the angle for the neutral position on the shifter. It took a little designing to get the stationary points made, but it wasn’t that difficult,” he says.

“I figured I’d have to make new levers on the transmission to get the stroke right, but the ones that were on it worked just right,” he continues.

He found all the parts he needed (except for air lines, which he purchased new) at Southwest Truck Supply, Pratt, Kansas.

“I had to rebuild the spool blocks and, because they were old, I went through several before I could get two that would seal up tight.

“What took the most time was running the air lines. I think there were 10 of them in all,” he says.

“You still have to use the clutch to shift gears. And if you happen to pull up two buttons at once, it’ll still shift into two gears,” he says.

“But it doesn’t jam that way. All you have to do is push down one of the buttons and it corrects itself.”

Contact: FARM SHOW Followup, Jim Hermanski, RR 6, Box 320A, Enid, Okla. 73701 (ph 580 234-0016; email: [email protected]).