Practical ideas from FARM SHOW MagazineSubscribe · Free issue · Send us your shop tip
Subscribe to FARM SHOW
Issues / Vol. 33, No. 2 (2009)

Vol. 33, No. 2 (2009)

Money-Saving Repairs & Maintenance Shortcuts · Printed section pp. 36–38

29 selected entries · Complete text of selected entries

This issue’s section includes reader tips and feature-length shop stories. Held items and editorial notices are not reproduced.

Archive text: prices, coupons, availability and contact details reflect the original publication, not current offers. Reader methods are not universal instructions; follow manufacturer guidance and proper safety practices.

Reader shop tips

From the archive · Full text
Reader shop tip

Peter Hansen

Peter Hansen, Gowen, Mich.

“I do a lot of welding and cutting and during the summer I usually wear a short sleeve shirt or T-shirt, which exposes my arms to a lot of sparks and heat. To solve the problem I made glove extensions for my welding gloves. I bought a pair of women’s tall leather boots at a garage sale for $1 and cut them off at the ankle. I sewed the legs of the boots to the cuffs on my welding gloves. The gloves now come up well past my elbows, providing great protection from flying sparks.”

From the archive · Full text
Reader shop tip

Marvin Bindig

Marvin Bindig, Good Thunder, Minn.

“I have an 18 hp Briggs & Stratton engine on my riding mower. The pin the oil slinger mounted on wasn’t secure. In fact, it was loose enough to allow the drive gear to get out of alignment with the oil slinger to the point that it would no longer rotate. As a re-sult, the engine’s upper rod froze onto the crankshaft and broke the rod and piston. The company won’t do anything about it. I told them I would overhaul the engine if they would furnish the parts, but they refused.”

From the archive · Full text
Reader shop tip

Leonard Seltzer

Leonard Seltzer, Manhattan, Ill.

“The wooden handles on hammers, hatchets, axes, and other tools loosen up over time from use and from changes in humidity. I came up with a way to keep a hammer or hatchet head from flying off and injuring someone.

“I reset the handle until it’s tight, then drill a small hole through the center of the head. The hole should be slightly larger than a 16-penny nail. Then I place a nail through the hole and cut it off about 1/8 in. on the opposite side.

“Now I’m ready to peen the nail over as you would with any rivet. I place the nail head on a vise or anvil and use a ball peen hammer to finish the job.

“This simple process goes a long way toward preventing an accident caused by a hammer or hatchet head from flying off the handle.”

From the archive · Full text
Reader shop tip

Russell Carlock

Russell Carlock, Huntingdon, Ind.

“I made a giant 4 1/2-ft. long fly swatter that looks like an ordinary fly swat-ter except that it’s much bigger and uses a piece of 1/4-in. wire mesh hardware cloth to do the swatting. Works great on carpenter bees or other large flying insects.

“The swatter head measures 8 in. sq. The wire mesh is fastened on with wire and hog rings. A 3-in. long tab fits into notches cut into each side of the 4-ft. handle. The handle is made from 1 by 2-in. wood.”

From the archive · Full text
Reader shop tip

John Nicholls

John Nicholls, South Carolina

“Here’s an idea I came up with several years ago when I couldn’t find a jack stand that could be eas- ily adjusted to the correct height. Everything I had seen was either too short or too tall.

“I used 2 by 4 wood boards cut to a length of 8 3/4 in. I ripped a few of the boards into 1 1/2-in. widths, then screwed and glued them together as shown in the drawing. Then I just stacked the boards up, interlocking them at 90 degrees, until I got to the right height. I can get the jack stand to within 1 1/2 in. of the height I need. The boards will support a lot of weight and are useful for other jobs. They’re particularly handy when standing a ladder sideways on a stairway. And best of all, they’re free.”

From the archive · Full text
Reader shop tip

Luther Newman

Luther Newman, Clinton, Okla.

“I installed an electric plug-in socket on my Lincoln welder so I can use it to operate power tools. I removed the back of the welder and ran wire to the 110-volt socket, including a ground wire. I’ve found this to be a stronger current to use with my chop saw, as it won’t blow a fuse like when it’s plugged into a wall socket. The welder doesn’t even have to be turned on, because the socket is wired separate from the welder switch.”

From the archive · Full text
Reader shop tip

Duane Kuesel

Duane Kuesel, Spring Valley, Wis.

“I have a silage conveyor belt that’s more than 100 ft. long. Occasionally the belt will slip on the drive hub without my knowing it. One time the belt slipped for such a long time that it burned completely through. That’s when I came up with the idea for a bicycle tire monitor. The tire is always in contact with the moving belt, which rotates the tire. As a re-sult, I can tell at a glance if the belt is work- ing properly. I cut down part of the bike frame and used it to hold the tire in position.

“I’ve used this idea every day for more than 10 years, and the bicycle tire has worked flawlessly.”

From the archive · Full text
Reader shop tip

Buddy Hoopes

Buddy Hoopes, Beloit, Ohio

“I like my four cordless Sears Craftsman drills. However, the one thing the company never thought of was to put a hanger hole on these tools. So I made my own using plastic nylon ties. I put one tie through the breather and another tie through the first one so that it sticks up about 2 in. above the drill. Now I can hang the drills up on my tool belt or, better yet, hang them from my work bench.”

From the archive · Full text
Reader shop tip

Ray Bittmann

Ray Bittmann, Anoka, Minn.

“Over the years you’ve published several good ideas on how to free up a stuck engine. Here’s a suggestion for what to do once you first get the engine unstuck. Just take out the thermostat and pour pouring boiling hot water into the water jacket or the radiator. It will expand the cylinders and really free up the engine.”

From the archive · Full text
Reader shop tip

Ronald Post

Ronald Post, Celina, Ohio

“When removing the locking collar from a bearing, I use an air chisel on the side of the collar. I have to be careful because the set screw will come sailing out. The collar will come off with ease, even if it had been rusted on.”

From the archive · Full text
Reader shop tip

Robert Albert Yorkey

Robert Albert Yorkey, Park Falls, Wis

“Here’s a cheap, easy way to get rid of go-phers and moles around your house. Cut a big bag of bubble gum into fourths and drop the pieces into their holes or tunnels. Just don’t leave the gum where birds can get it.”

From the archive · Full text
Reader shop tip 1 of 3

John Stava

Individual tip 1 of 3 from this reader’s published contribution.
John Stava, Bloomington, Ind.

“After retiring from the U.S. Air Force, I worked for a man who operated a small engine shop for many years. I learned many things from him, but one stands out: Don’t use starting fluid to start a small engine. These products contain drying agents, and repeated use will ruin a small engine quicker than Jack can climb the bean stalk. Instead, spray a small amount of WD-40 or fill a squirt-type oil can with the engine’s recommended fuel. Squirt in a few drops through the carburetor or re-move the spark plug and inject it directly into the cylinder. Two or three pulls and the engine should start.

From the archive · Full text
Reader shop tip 2 of 3

John Stava

Individual tip 2 of 3 from this reader’s published contribution.
John Stava, Bloomington, Ind.

“Rounding off corners on table tops with a drawing compass is time consuming and not always accurate. A better way came to me in a flash of inspiration. Take a tin can and set it on the table top so the can is tangent to two of the corners. Then draw an arc and cut.

From the archive · Full text
Reader shop tip 3 of 3

John Stava

Individual tip 3 of 3 from this reader’s published contribution.
John Stava, Bloomington, Ind.

“I’ve read about all sorts of ways to pre-serve a partially filled paint can -everything from sucking out the air with your mouth to using expensive vacuum equipment. The rule to remember is, keep the paint can lid and its insertion lip clean. I use a steel brush on a grinder to clean the lid. I ground down the tip of a screwdriver so it would fit tightly in the lip of the can to clean. I clean out what I can, then spray paint remover in the lip. Leave it there until the paint softens and then use an old cloth or paper towel, as well as the screwdriver, to finish cleaning out the lip. Warning - don’t use compressed air unless you want a face full of paint and paint re-mover - it happened to me. This is a little bit of work, but I’ve used this method for years and the paint will be usable for a long time.”

From the archive · Full text
Reader shop tip

Tom Haire

Tom Haire, Bartlett, N.H.

“In your last issue a fellow recommended using Teflon tape for LP and natural gas connections. This is prohibited by National Fire Protection Association due to danger of small pieces of tape coming loose and becoming lodged in valves, keeping them from sealing completely.”

From the archive · Full text
Reader shop tip

Bob Heslop

Bob Heslop, Warner, N. H.

“I was putting an old Deere 420C tracked tractor back into working condition. The guide flanges on the front idler wheels were so worn the tracks kept coming off. To remedy the problem without spending a lot of money, I measured the gap between the guide flange and the chain on the track. I then divided the measurement by two and bought some hot roll flat steel the thickness of half the gap and as high as the flange. I measured the circumference of the idler wheel and cut four pieces to this length. I then welded a piece of the flat on edge along the flange, welding about 1/2 in. up along the side, then used a 3-lb. hammer to bend the flat around the wheel as I kept welding it down about 1/2 in. at a time. The heat softened the flat steel as I went. I welded to both sides of the flanges on both wheels. The idler wheels are weld-able cast so ordinary welding rod works nicely. Haven’t thrown a track since making the modification.”

From the archive · Full text
Reader shop tip

Aaron Marley

Aaron Marley, Nokomis, Ill.

When Marley wants to air up a tire on a piece of farm equipment, he just pulls out a pressure hose from a reel that he attached to the top of his portable air compressor.

“I can reach out 50 ft. with the hose without having to pull the compressor around with me. The reel actually could hold as much as 100 ft. of hose,” he says. Marley is a farmer and an electrician who also pitches in with carpentry jobs. He recently used the compressor to power a pneumatic stapler used to shingle a roof. He used two lengths of strap steel to make a mounting bracket for the hose reel.

From the archive · Full text
Reader shop tip

Tom Chaney

Tom Chaney, Chrisman, Ill.

“I use an old mini bus as a service truck and got tired of watching caulking tubes and spray cans roll around on the bus’s floor. To solve the problem, I built this can and caulking tube holder, which I mounted on one of the bus’s walls. The holder measures 3 ft. long, 5 1/2 in. deep, and 14 in. high and is made out of 3/4-in. thick plywood. It was put together with wood glue and wood screws. There’s a 4 1/2-in. gap between the front and back sides of the holder, which is perfect for storing spray cans, caulking tubes, quart oil containers, and so forth.”

From the archive · Full text
Reader shop tip

Joseph Ferro

Joseph Ferro, Hodgdon, Maine

“A sprocket on my IH T-46 baler broke apart. A replacement sprocket would have cost $108 from the dealer so I bought a smaller-size sprocket that had the same bore size for just $8. I bolted the smaller sprocket to the broken larger sprocket and then slipped them both onto the shaft and used the original spacing and pin to effect the repair. It worked great.”

From the archive · Full text
Reader shop tip

Robert Rottinghaus

Robert Rottinghaus, Clever Tech, Inc., 4121 South Canfield Road, Jesup, Iowa 50648 (ph 319-827-1311)

“Our new Drive Chain Disconnect for White 5100 to 6100 and 8000 corn planters saves wear and tear on chains, bearings and sprockets. It quickly installs in place of the original chain tightener and you add 4 in. to the drive chain (not furnished). Once installed, you just push down on the spring roller to remove the chain from the drive spocket, letting it ride on the cast iron hub. Sells for $38.50.”

From the archive · Full text
Reader shop tip

Joe Macha

Joe Macha, Plainview, Texas

“Every so often I fill my grease gun with gear oil to grease bearings on field equipment. A little bit of oil keeps the seals moist so they last longer.”

Shop feature stories

From the archive · Full text
Feature story

Nozzle Caps Stop Oily Mess

Featured source:

“To keep my shop cleaner, I use special little covers on the outlets of my bulk oil tanks,” says Gackle, N. Dak. farmer Roger Gutschmidt.

“I have ball valves on the bottom of my tanks, and they used to make a mess because even after you close the valve, a little oil stays in the line and then slowly drips out, making a puddle down below. I didn’t like that happening every time I dispensed oil into jugs for changing or adding oil to equipment.”

To solve the problem, Gutschmidt started using what he calls “Easy-Close Oil Caps,” which screw onto the outlet, sealing it from dripping.

The cap has a little lever (handle) to open and close without getting oil on your fingers, he says.

“They just hinge back and forth on a pivot pin,” Gutschmidt explains.

“They’re real simple, and they really work. When you want to dispense oil, you simply slide the little hinged cover to the side, and open the ball valve.”

Gutschmidt likes the caps so much, he also sells them.

The aluminum cap has an O-ring to pre-vent leakage, and is sized to fit garden hose-size nozzles.

Gutschmidt sells them for $20 each, plus S&H.

Contact: FARM SHOW Followup, Gutschmidt Manufacturing LLC, Roger Gutschmidt, 6651, Hwy. 56, Gackle, N. Dak. 58442 (ph 701 698-2310; [email protected]).

From the archive · Full text
Feature story

Toolbelt Has Clip-On Pouches

Featured source: Iron Dog Tool Gear

A radical new tool belt made its debut at the International Builder’s Show in Las Vegas in January. With dozens of interchangeable pouches, tool holders, organizers and other accessories, the new belt is easy to customize.

“The belt and accessories are made with thick suede and ballistic nylon and feature rivets, double stitched seams and anodized hardware,” says Keith Whitaker of Iron Dog Tool Gear.

Though designed in the U.S., the system is made by European Tools, Ltd. Whitaker described the origin of the belt, which is being introduced April 6 in the U.S. and later this year in Canada.

“The problem with conventional tool belts is that once you load them up with nails or tools you have to carry the full weight until the job is done. With our belt, you can slip a pouch or tool holder on or off, customizing it for the job as you go through the day.”

The secret to success of the new belt is the Versa Clip system. Steel clips attached to pouches and other gear slip into reinforced nylon slots on the suede leather belt. Matching slots on the sides of the tool bags let you attach additional bags to the bags themselves.

The rig belt, which the company claims is built strong enough to tow a truck, will have a suggested retail price of around $27. Individual pouches and tool holders will run from $7 to $40, depending on size and complexity.

“Depending on how you build it out, a full rig could cost as much as $195,” says Whitaker.

“Full-size bags to replace toolboxes will retail from $35 to $70.”

They can also be fitted with clip-on tool or parts holders.

Contact: FARM SHOW Followup, Iron Dog Tool Gear, European Tools Ltd. North America, P.O. Box 7211, Wilton, Conn. 06897 ([email protected]; www.irondogtoolgear.com).

From the archive · Full text
Feature story

“Ship Shop” Built Between Shipping Containers

Featured source:

It looks like any other steel building, but the walls of Tom Schuster’s 36 by 40-ft. shop are 40-ft. containers. He had parked two containers 20 ft. apart on railroad timbers in 1995 when he purchased his Pomeroy, Wash., property.

At first the containers were used individually for storage. Later Schuster decided to build a shop between the two containers. He covered the space between them with a roof with 4/12-pitch trusses he built and bolted on the outside walls of the containers. He framed and insulated the 20-ft. area between the containers, installed a 10 by 10-ft. over-head garage door, and put chipboard on the interior and steel siding on the exterior of the end walls. He cut a door into one of the containers on the interior sidewall for easy interior access.

The area over the tops of the containers makes handy storage space. He also bolted shelves to the containers’ sidewalls. He poured a cement floor in the shop area between the containers and has a wood stove for heat.

“It makes a super building,” Schuster says.

“It’s windy here, but the containers are heavy and the wind doesn’t blow them around. They have hardwood floors and are better built than most storage buildings. I wouldn’t trade it for a commercial-built building.”

Schuster paid $1,200 for each of the containers in 1995. He spent another $8,000 to complete the shop.

Contact: FARM SHOW Followup, Tom Schuster, 10 Connell Hill Rd., Pomeroy, Wash. 99347 (ph 509 8430-3078).

From the archive · Full text
Feature story

Boom-Mounted Electrical Outlets

Featured source:

Gerald Neumann has easy access to an electric outlet wherever he goes in his 30 by 42-ft. shop thanks to a wall-mounted overhead boom.

“I wanted to get electrical cords up off the floor,” explains the retired Spencer, Wis., farmer.

He used 1-in. square tubing to build two 10-ft. boom sections that hinge in the middle and narrow down to a point at the end. It mounts on the wall with gate hinges. A third hinge on the wall above the unit, holds a triangular brace that provides extra support so the boom doesn’t sag.

Neumann ran 12-gauge electrical wire along the bottom of the boom to a 4-plug, 110-volt outlet and a single 220-volt outlet. He left a large loop of wire at the hinge to prevent it from being stretched too tight. Though he hasn’t had any problem with it for 10 years, Neumann said he would probably use flexible conduit if he were to do it again.

The bottom of the outlets are about 7 ft. overhead, within easy reach, and they can be quickly moved around to provide access anywhere in the shop. When not needed, the unit folds up close to the wall. It’s seldom in that position, however.

“I use it everyday I’m in the shop,” Neumann says.

Contact: FARM SHOW Followup, Gerald Neumann, W332 Century Rd., Spencer, Wis. 54479 (ph 715 659-2424, [email protected]).

From the archive · Full text
Feature story

Loft Storage Easy With New Lift Platform

Featured source:

Getting boxes, spare parts, and other supplies up to the upper levels of a garage or shop just got a whole lot easier with the new Versa Lift. Introduced at the International Builders Show in Las Vegas, it’s easy to install and easy to use.

Versa Lift consists of a lifting platform and a docking station on the upper level. It re-quires an opening in the ceiling of 22 1/2 by 46 1/2-in. and a headspace of only 48 in. on the upper level. The platform has a self-adjusting floor with sensors that stop descent at the lower floor and stop ascent when the platform is even with the upper floor.

When lifted into position on the upper level, the bottom of the platform “closes the door” on the ceiling port, sealing off the storage space.

The platform is lifted and lowered by two cables suspended from the docking station framework. All that is required on the lower level is open floor space.

Two models are available. The Model 24 has a 200-lb. capacity. The Model 32 has a 250-lb. capacity. Several variations of each are available with floor to floor distances of up to 20 ft. Wireless remotes are available as an option versus the standard corded remote.

Prices range from $1,185 for the Model 24 with a range of 8 to 11 ft. to $2,895 for the Model 32 with a floor-to-floor range of 14 to 20 ft. and a wireless remote. Contact: FARM SHOW Followup, Byers Product Group, P.O. Box 270366, Oklahoma City, Okla. 73137 (ph 405 943-1468; fax 405 943-7577; www.bpghome.com).

From the archive · Full text
Feature story

Self-Adjusting Pipe Wrench

Featured source: General Tools & Instruments Co., LLC

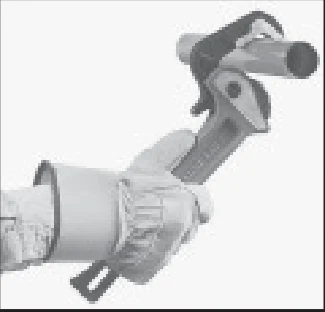
You can use this new self-adjusting pipe wrench with one hand. There’s no need to spin a nut to adjust the size of the opening between the jaws. It lets you quickly switch between different sizes of pipe.

A thumb trigger is used to open or close the spring-loaded jaw which pivots on a ratchet. Pulling on the trigger produces a ratcheting action that allows the jaw to self-adjust to different pipe sizes.

The wrench has an alloy steel handle with a heat-treated alloy steel head. When you push or pull the handle in one direction, the jaws automatically tighten in the other direction.

The wrench has a 2-in. maximum jaw capacity.

Sells for $41.50 plus S&H. Contact: FARM SHOW Followup, General Tools & Instruments Co., LLC, 80 White St., New York, New York 10013 (ph 212 431-6100 or 212 431-6499; [email protected]; www.generaltools.com).

From the archive · Full text
Feature story

Remote-Controlled Battery Disconnect

Featured source:

Roger Gutschmidt loves the system he made to prevent electrical trickle from running down batteries in his grain trucks during the off-season. The add-on relays also safe-guard his stored equipment from fire due to electrical short-circuits.

He calls his device a “Battery Disconnect Relay” and says it provides a simple and safe method of connecting and disconnecting batteries or power circuits via a remotely operated switch.

“It’s a latching relay, meaning that once activated, they stay either open or closed,” he explains.

“They require no power to stay open or closed. Power is only used during switching. The relays are also sealed against the environment and are designed to withstand shock and vibration. However, these relays are not approved for use in an explosive or hazardous environment such as fuel vapors, heavy dust, and so on.”

There are two fuse holders mounted on each relay rated at 5 amps.

Gutschmidt says the latching relays are available from: Intellitec Products, LLC, 131 Eisenhower Lane North, Lombard, Ill. 60148 (ph 800 251-2408 or 630 268-0010). They’re also available from RV dealers, boat shops, repair shops, and even on eBay, he points out.

The Intellitec part number is: 01-00055-000. Contact: FARM SHOW Followup, Gutschmidt Manufacturing, LLC, Roger Gutschmidt, 6651, Hwy. 56, Gackle, N. Dak. 58442 (ph 701 698-2310; [email protected]).

From the archive · Full text
Feature story

Grinder Fitted With Chop Saw Wheels

Featured source:

“I use my bench grinder for many different jobs. One afternoon while working on a project in my shop, I needed a fast cutting grinder for something I was working on. I noticed a few chop saw wheels laying around and an idea popped in my head. I stacked three chop saw wheels together and quickly mounted them onto the bench grinder. I thought to myself the moment I started using it ‘Wow, what a great idea!’ I couldn’t believe how much faster these wheels were,” says Bud Blanton, Gaffney, S. Carolina.

“I found this idea works great for rough grinding to remove a lot of metal from objects.”

According to Blanton, chop saw wheels have a coarser grit than grinder wheels and are made to cut faster, which is why the idea works. You can often get used chop saw wheels for free at local welding shops.

To install the chop saw wheels on the grinder’s spindle he used some leftover grinding wheel bushings, cutting them down to the proper length for the number of chop saw wheels to be used. He also made a bigger shield to handle the larger size of the chop saw wheels.

“I’ve found that chop saw wheels cut at least twice as fast as grinding wheels,” says Blanton.

“I use them to sharpen lawn mower blades and to knock the edges off metal, etc. Chop saw wheels don’t leave a smooth finish but they get the job done.”

Each chop saw wheel measures a little more than 1/8 in. wide, so when three of them are stacked together you get a grinding area about 1/2 in. wide, says Blanton. He says you can stack as many of the wheels together as you want, depending on the job.

“I suggest stacking two chop saw wheels together for normal objects.”

He suggests making the grinder shield 1 1/ 2 to 2 in. larger than the largest wheel, and making the shield 2 1/2 in. or more wider on a steady rest, using 5/16 or 3/8-in. round stock for the steady rest instead of flat steel.

To prevent the metal grindings from building up, he angles the part where the sparks hit, downward instead of toward the back.

Contact: FARM SHOW Followup, Bud Blanton, 1600 W. Rutledge Ave., Gaffney, S. Carolina 29341 (ph 864 489-5466; [email protected]).