Practical ideas from FARM SHOW MagazineSubscribe · Free issue · Send us your shop tip
Subscribe to FARM SHOW
Issues / Vol. 35, No. 6 (2011)

Vol. 35, No. 6 (2011)

Money-Saving Repairs & Maintenance Shortcuts · Printed section pp. 36–39

32 selected entries · Complete text of selected entries

This issue’s section includes reader tips and feature-length shop stories. Held items and editorial notices are not reproduced.

Archive text: prices, coupons, availability and contact details reflect the original publication, not current offers. Reader methods are not universal instructions; follow manufacturer guidance and proper safety practices.

Reader shop tips

From the archive · Full text
Reader shop tip

Don Doey

Don Doey, Salmon Arm, B.C.

“Readers often write in about having trouble charging batteries. Here’s a tip: A warm battery will not charge well. If it comes off a drill and is put on charge right away, it’ll charge poorly. You’ll do better if you put your battery in the fridge overnight to make it cool. But don’t freeze it. Just cool it off and then when you charge it it’ll have nearly double the strength. Often a battery that you think is done can be revived by cooling it before charging.”

From the archive · Full text
Reader shop tip 1 of 2

Harold David Rupard

Individual tip 1 of 2 from this reader’s published contribution.
Harold David Rupard, Winchester, Ky.

“When I tried putting a new starter on my 1997 Deere 6300 tractor, I found there wasn’t room for a wrench. I tried using a special tool borrowed from my Deere dealer, but it didn’t help. So I came up with my own solution. I used a bandsaw to cut a box end wrench in half and put the box end half on the nut. Then I used a cold chisel and hammer to tap around the nut until it came off.

From the archive · Full text
Reader shop tip 2 of 2

Harold David Rupard

Individual tip 2 of 2 from this reader’s published contribution.
Harold David Rupard, Winchester, Ky.

“The lug bolts on the tractor’s dual wheels were too long to get a deepwell socket on them. So I used my bandsaw to cut a socket in half. Then I welded the open end of the socket to one end of a 6-in. long pipe, and welded the drive end to the other end. To remove the wheel, I just connect the socket drive end of the pipe to my air-operated wrench.”

From the archive · Full text
Reader shop tip

John Heide

John Heide, Deerbrook, Wis.

“The electronic ignition on my log splitter’s Wisconsin engine quit working, and they wanted $300 to replace the ignition module. Instead, I took a 4-cyl. distributor I already had and ground 3 of the 4 lobes off the camshaft, then bolted the distributor to the engine.

“Now, instead of the breaker points opening 4 times for every revolution of the distributor, the points open only once. To drive the distributor I drilled through the center of the engine crankshaft and installed a 1/2-in. dia. shaft. A length of hydraulic hose forms a coupling that connects the shaft to the distributor. The original clamp on the distributor is used to adjust engine timing.

“I already had all the parts I needed, including the coil. No problems after five years.”

From the archive · Full text
Reader shop tip

Rod Hancock

Rod Hancock, Nanaimo, B.C.

“When installing rubber grommets to run wires through a metal bulk head I pick the grommet that I want to use, find which hole in my drill gauge it fits, and then use that size drill. It makes a perfect fit every time.”

From the archive · Full text
Reader shop tip 1 of 2

Al Burant

Individual tip 1 of 2 from this reader’s published contribution.
Al Burant, Barrys Bay, Ont.

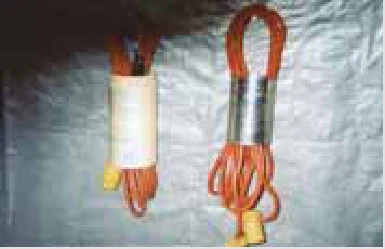
“I find that cans or large pop bottles work well for storing long extension cords. I’ve used this idea for at least 30 years. I just coil up the cord and slip it into a can, which holds it tightly together.

From the archive · Full text
Reader shop tip 2 of 2

Al Burant

Individual tip 2 of 2 from this reader’s published contribution.
Al Burant, Barrys Bay, Ont.

“Old-time watches have crystal faces made of glass. When the glass broke on my mom’s watch she fixed it herself. She took a pane of broken window glass and used a crayon to trace out the circle she wanted to cut, then put the glass under a pan of cold water and used a pair of kitchen shears to cut out the glass. Holding the glass under the water will keep it from shattering – it has something to do with a change in surface tension.”

From the archive · Full text
Reader shop tip

Dan Rallison

Dan Rallison, St. Alberta, Ont.

“The store where I bought my 20 hp Honda ‘clone’ engine doesn’t stock the oil or air filters for it. They said it would cost $25 apiece to order them from China. So I went to the Fram filter website (www.fram.com). They have a page that tells which filters fit which engines, and they also provide filter specs so you can confirm the match before you buy. I ended up buying a Fram filter for $9.”

From the archive · Full text
Reader shop tip

Sunbelt Chemicals Corp.

Sunbelt Chemicals Corp., Palm Coast, Fla. (ph 386 446-4595; www. sunbeltchemicals.com)

Sunbelt manufactures Right Stuff De-Ruster metal conditioner and rust preventer. It converts rust into iron phosphate and can be used for everything from engine parts to car frames, heavy equipment, storage tanks, etc. You just spray onto the surface being treated and it cures out and is ready for primer in about 2 hrs. Available in 32-oz. spray bottles and in 1 and 5-gal. sizes.

From the archive · Full text
Reader shop tip

Russell Delancey

Russell Delancey, Leavittsburg, Ohio

“I made a cheap, heavy duty chain binder out of an old car bumper jack and two chain hooks. I removed the base from the jack, then drilled a hole into one end of the jack post and bolted a chain hook into place. Then I bolted another chain hook to the jack mechanism itself.”

From the archive · Full text
Reader shop tip

James Stimson

James Stimson, St. Peters, Penn.

“I had problems with corrosion of my on-road vehicles due to a brine solution that’s used to pre-treat roads here in Pennsylvania. To solve the problem, I add about a cup of ‘pH Up’ swimming pool stabilizer to one gallon of water and then use my garden sprayer to wash off the vehicle. It neutralizes and removes the brine, and seems safe to use. It ’s available at many stores and websites including www.aquariumguys.com.”

From the archive · Full text
Reader shop tip

Tim Von Ohlen

Tim Von Ohlen, Varysburg, N.Y.

“Don’t throw away your old rechargeable electric razor if it won’t hold a charge any more. Instead, remove the battery pack and wire in a 3-12-volt AC adapter (I used Radio Shack’s no. 273-029) and voila! you now have a corded razor. I’ve been using this idea for three years and it’s still going strong. The battery pack shows you the voltage info, and the AC adapter has multiple settings for different voltages. If it spins the wrong way, I just reverse the wires.”

From the archive · Full text
Reader shop tip

Mike Toppen

Mike Toppen, Burnips, Mich.

“I needed to change hydraulic hoses on the pivot mount on my backhoe but there wasn’t room for a wrench.

“To solve the problem, I used an air hammer and a punch against the sides of the fittings to break them loose. Then I used the same idea to retighten the new hoses. It took no time at all, and the new fittings don’t leak a bit.”

From the archive · Full text
Reader shop tip

Kirk Krofka

Kirk Krofka, Frewsburg, N.Y.

“Older farm vehicles with carburetors can experience severe vapor locking problems during unusually hot days in early spring, before summer-blend gas becomes available. To solve the problem, I add one gal. of diesel fuel to every 10 to 12 gal. of gas. It raises the boiling point of the gas without affecting the performance of the engine.”

From the archive · Full text
Reader shop tip

Melvin Lepper

Melvin Lepper, Weldona, Colo.

“I keep a good supply of maintenance parts such as filters on hand to save time and hassle. It’s especially important to have repair parts for my hay equipment on hand so I can keep on rolling when it’s time to make hay.”

From the archive · Full text
Reader shop tip

Wyatt Parkinson

Wyatt Parkinson, Independence, Iowa

“When installing window glass in cars or grain wagons I use Go Jo hand cleaner to lubricate the rubber weather stripping around the window. The glass slides in slick as can be, and any ‘overflow’ hand cleaner can be wiped up cleanly.”

From the archive · Full text
Reader shop tip

Kenneth G. Gadd

Kenneth G. Gadd, Moose Jaw, Sask.

“The shallow, 3-in. high toolbox I bolted to the side of my Case 9280 4-WD tractor really comes in handy for storing any ‘flat’ hand tools such as pliers, vise grips, and socket wrenches. I made it out of 1/8-in. thick sheet metal. The toolbox bolts onto one side of the tractor just ahead of the operator’s platform and measures 16 in. long by 7 in. wide and 3 in. high. A divider inside the toolbox lets me separate socket wrenches from the rest of the tools. The toolbox lid opens out away from the tractor, providing a place to set wrenches or small pieces while I’m working on something.

“The nice thing about a ‘flat’ toolbox is that I can see whatever tool I need at a glance, without having to dig around for it. A surprising number of the hand tools I use are flat, so it’s a really useful toolbox. The biggest tool I have in it is a hammer.

“I also built a similar toolbox for my Deere 9500 combine.”

From the archive · Full text
Reader shop tip

Roger Foster

Roger Foster, Tower Hill, Ill.

“I needed a way to move my wire welder and tanks around the shop, and occasionally outside.

So I used the running gear and frame from an old riding mower to build a 4-wheeled welder cart.

“The running gear is built heavy enough to support the welder and my argon and carbon dioxide tanks. The real advantage is the mower’s big rubber wheels roll easily across gravel, so if I need to I can take the cart outside. The rubber wheels roll a lot better than the hard plastic wheels found on most commercial welder carts.

“I stripped the riding mower down to the wheels, axles and frame and welded a metal box on back of the frame to hold the welder. The tank sets in a welded-on round metal tray, and is supported about halfway up by a U-shaped metal bracket with a chain welded onto it. The bracket is welded to the top of the mower’s steering column. I replaced the mower’s steering wheel with a handle made from 1-in. dia. tubing.”

From the archive · Full text
Reader shop tip

Dana Curtis

Dana Curtis, Bristol, Vt. (ph 585 703- 2586; [email protected])

“My Wheelhorse 310-8 garden tractor is a well-built old machine, but it’s a bit underpowered. After stumbling across a website that sells universal air-cooled diesel engines, I decided to repower the tractor.

“The entire conversion was completed in one day with only basic fabrication and welding skills. My cost was just under $700, including the new engine. I needed to relocate the battery under the seat to where the gas tank was. The gas tank brackets made great mounts for the battery. I adapted a driveshaft to the original drive pulley and pto clutch. The diesel engine has much more power than the original gas engine and is very fuel efficient. It came with electric start, a charging system, and a recoil backup starter.

“So far I’ve burned a variety of fuels, ranging from regular diesel to used automatic transmission fluid and waste veggie oil. I haven’t had a chance to use the tractor in the cold with the snowblower attachment, but the engine has a glow plug and I’m told it’ll start in the cold with a good battery.

“The company that I purchased the engine from also sells smaller engines that can be used to convert most any machine that originally came with a horizontal shaft air-cooled gas engine. I’d be happy to share any details with anyone who’s interested in a similar conversion.”

From the archive · Full text
Reader shop tip

Bill Moody

Bill Moody, Mountain City, Tenn.

Moody recently sent FARM SHOW photos of a tool he invented for doing metal roofing work.

“It lets me use a cordless screwdriver instead of a hammer and nails to do roofing work. Not only does it save time, but the screws hold better and there’s no mashed fingers from driving nails.

“The tool he made is designed to pre-punch holes in the ribbing. A cordless drill is then used to drive in a 1 1/2-in. roofing screw through each hole.

“The tool consists of a spring-loaded metal ‘striker’ on top of an ‘anvil’, which is welded to a curved handle with a golf club grip. The anvil is grooved at the bottom to match the V-shaped ribbing. To use the tool, the operator sets the anvil over the ribbing and then uses a hammer to lightly tap the spring-loaded striker, which drives a hole into the ribbing.

“It punches a perfect hole every time. One person pre-punches the holes and another person comes behind and inserts the screws. It works two to three times faster than using nails. As far as I know there’s no tool like this on the market to start screws in corrugated roofing, which I find quite surprising.”

Shop feature stories

From the archive · Full text
Feature story

“Home Brewed” Penetrating Oil

Featured source: Steve Coley

One of the most popular articles FARM SHOW has ever run was a short piece reporting on the results of a test of penetrating oils in Machinist’s Workshop magazine (Vol. 34, No. 3). The winner turned out to be a home brewed 50/50 mix of automatic transmission fluid and acetone. It beat out Liquid Wrench, WD-40 and other popular “rust busters”. FARM SHOW reader Steve Coley was fascinated by the idea and decided the market could use a premixed product. He blends transmission fluid and acetone with another proprietary lubricating additive for even better penetration. He’s ready to hit the market in November with half-pint, spouted cans of his penetrating oil, which he calls Metal Liberator.

“It’s a grassroots idea that appeals to me,” Coley says.

“I think most people aren’t going to go out and buy quantities of transmission fluid and acetone and mix them together. They’ll like the convenience of having it done for them.” Coley has used his product extensively. One project was with his children, rebuilding a cast iron fireplace that had been in a fire, and then rusted. He soaked the bolts overnight and the blend worked great. He notes that he is a huge fan of FARM SHOW and respects the opinions of its readers. He’s hoping some of them will try his product and give him feedback, about everything from the oil, to the can and the labeling. Because of shipping and set-up costs, he estimates his Metal Liberator will cost $10 to $12. Eventually he hopes to sell case lots to chain stores.

“This won’t make me a rich man, but I’ll have fun with it,” Coley says. That’s clear with the artwork on his labels. Metal Liberator’s mascot is a squirrel next to the tagline: No frozen nuts. Contact: FARM SHOW Followup, Steve Coley, 1020 Pitkin Ave., Glenwood Springs, Colo. 81601 (ph 970 230-0009; [email protected]).

From the archive · Full text
Feature story

Left Hand Shifter Lets Injured Farmer Drive Pickup Normally

Featured source: Glenn Darlington

“Last spring my son-in-law had surgery on his right elbow and temporarily lost the use of his right arm. While his arm was in a cast, he had trouble driving his pickup. He needed a shift lever for his left hand, so we came up with one that allows him to operate the shift from the left,” says Glenn Darlington, Bronaugh, Mo. He clamped a curved metal rod to the pickup’s right hand shift lever. The curved rod runs under the steering column to the left side. Pushing in and up on the left shift lever lets him control the automatic transmission lever normally.

“It allowed my son-in-law to drive with a cast on. He kept using it even after the cast was removed which enabled the elbow to heal, a process that took four months,” says Darlington.

“The device was easily removed as soon as he could drive and shift again with his right hand. The same idea could also be used by anyone whose right arm is weak or has arthritis.” Contact: FARM SHOW Followup, Glenn Darlington, 26490 S. 625 Rd., Bronaugh, Mo. 64728 (ph 417 922-3384).

From the archive · Full text
Feature story

Minnesota Shop Reconditions Big Sawmill Blades

Featured source: Jim Voigt

From Alaska to Nebraska, sawmill owners seek out Jim Voigt and his saw blade reconditioning service. Customers have good reason to come to him. Voigt charges an average of $150 to hammer a warped circular blade back in shape, a huge savings over the $2,000 cost of a new blade.

“I was 15 when I started hammering saws,” says Voigt, who is now 58.

“It’s Old World craftsmanship. I was fortunate to step in to it with an uncle who was very good at it.” He and his two brothers work out of the same building their father and uncle built in Rice, Minn., in 1945. While the shop has modern tools, it still has the old blacksmith shop including a forge and a line shaft that runs a Little Giant power hammer, grinder and drill press. The business is well-known as the place to go with blades that have warped and don’t run straight.

“My job is to re-tension the steel, so that when they turn it, at say 600 rpm’s, it’s a stiff piece of metal,” Voigt says. He has a special anvil, several hammers in different weights and shapes, and straight edges from 6 in. to 4 ft. long. Voigt figures out where the blade is stretched and hammers other areas to make it even with the right tension.

“My uncle used to say he didn’t charge for hammering. He charged for knowing where to hit,” Voigt says. When reconditioned right, saw blades can last for years. Voigt has worked on blades that are older than him. The biggest blade he ever worked on was more than 6 ft. in dia., but they average between 50 and 60 in. He gets a lot of business from mills in Minnesota, Iowa, Wisconsin and the Dakotas, but customers also ship blades to him and have driven up from as far away as Nebraska. After getting the blade to room temperature, it takes about 3 hrs. to recondition it. As many sawmills go out of business, Voigt has noticed fewer blades coming in, but there’s still plenty of demand as there are only a handful of shops that recondition blades. The Voigts also weld band saw blades and do farm repair including sharpening plow lathes and a variety of machine work. Contact: FARM SHOW Followup, Rice Blacksmith Saw and Machine, P.O. Box 175, E. Main Street, Rice, Minn. 56367 (ph 877 224-5251).

From the archive · Full text
Feature story

Electric Starter Hidden On Farmall F-12

Featured source: Kirk Unzelman

Kirk Unzelman’s F-12 Farmall was great to take to antique tractor shows, but tough to start with its crank. With the help of a friend, Mike Intlekofer, he added an electric starter. Their goal was to keep the starting system hidden as much as possible so it would not be noticeable at a medium distance, such as in a parade.

“We decided to mount the starter motor inside the frame rails, mounting the ring gear on the transmission shaft and mounting the battery inside the left rear wheel,” says Intlekofer.

“It needed to be sized right to fit. We found a 1974 Pinto starter motor and flywheel at a junkyard.”

The first step was to drive the ring gear off the flywheel. Holding the starter motor and ring gear in various positions, they decided the best location for the ring gear would be behind the yoke of the flexible joint that mounts on the transmission input shaft.

They machined an aluminum disk to fit the ring gear, adding a central hole to clear the shaft nut, two holes to bolt to the flexible joint, and a circular groove to clear the oil seal boss on the gearbox.

“We used a rotary table on a small mill to machine the groove into the disk,” explains Intlekofer.

“Then we heated the ring gear and pressed it onto the disk.”

The disk was mounted on the driveshaft by bolting it behind one of the yokes of the flexible joint. A spacer was placed on each bolt between the yoke and the disk.

The starter motor was positioned for proper engagement by fabricating two brackets to hold it inside the frame rail. The brackets and motor were mounted on the right hand side of the frame rail, adjusted for clearance and bolted tight. The solenoid was mounted to the left frame rail.

“We used a curved channel iron to cover the ring gear and formed sheet metal shrouds to cover the aluminum disk and the transmission shaft for appearance sake,” says Intlekofer.

The last step was to form a battery tray using strap and angle iron. It mounts just ahead of the left axle, next to the brake drum. The starter switch was mounted on the left side of the tractor so it can be started when standing beside the engine.

“This lets us operate the throttle, choke, and starter button conveniently,” adds Intlekofer.

“Starting is quick, reliable and easy. Several coats of primer and paint finished the job. We not only had an easy starter, but we also had a good looker.”

Unzelman and Intlekofer first described the starter project in the March/April 2010 issue of Red Power magazine. They have put together an information packet with 14 pages of dimensioned drawings and photos describing the project in detail. They’ll send it out for a fee of $10 to cover copy and mailing costs.

Contact: FARM SHOW Followup, Mike Intlekofer, 4472 119th Ave. S.E., Bellevue, Wash. 98006 (ph 425 641-8471; [email protected]) or Kirk Unzelman, 4635 130th Ave. S.E., Bellevue, Wash. 98006.

From the archive · Full text
Feature story

Deere Crawler Expert Sells Hard-To-Find Parts

Featured source: Larry Wilcox

Lavoy Wilcox has talked to a lot of guys who’ve bought an antique Deere crawler tractor that looked good, but then found out later that it needed a bunch of expensive parts. The parts dealer calls them “drive by shootings”.

“I’ve seen guys spend $5,000 for a crawler with a new paint job without looking at the undercarriage,” he says.

“You can fix a bad engine for less than you can replace an undercarriage. Many undercarriage parts are not available from Deere.”

When Wilcox and his brother first restored a Deere crawler, he quickly discovered how hard it was to find parts. When he did find a supplier, he often had to buy 10 parts to get one. To get rid of the extra parts, he started advertising, and before he knew it, he had a part-time business going.

Today it has grown into a full-time business that leaves little time for restoration. He carries a long list of new parts, as well as parts from around 100 salvaged crawlers.

“A clutch kit can require 15 to 20 parts alone,” explains Wilcox.

“I also carry drivetrains, engine parts, gauges, wiring harnesses and radiators.”

Wilcox also buys crawlers for resale. He replaces all fluids and does basic maintenance to get them running well. Reselling them, he says, is no problem as he often has a waiting list.

Wilcox has shipped tracked tractors as far as Australia. He says those most in demand are B.O. Lindeman crawlers. Starting in 1931, the company modified Deere tractors, mostly orchard series, into crawlers. Deere bought the company in 1947.

“Some of the early crawlers were one of a kind and are very rare,” says Wilcox.

“Some exceedingly rare ones have sold for more than $100,000. Common models sell for $3,500 to $10,000.”

Wilcox says Deere made between 50,000 and 55,000 of the yellow and green agricultural crawlers before stopping production in 1965. However, a newer model continued to be sold in construction yellow. Wilcox, however, doesn’t stock parts for models past the early 1970’s.

“I stick with the small stuff, 60 hp and under,” he explains.

While many of his customers are collectors, they’re often still working machines. For example, Wilcox recently updated a Deere crawler for a pineapple plantation in Hawaii.

“They wanted it converted to electronic ignition and 12-volt electric with a 3-pt. hitch installed,” he recalls.

“They needed it to start and run 12 hours a day. They said there was no modern equivalent to it.”

In fact, Wilcox says most of his customers do use their crawlers, restored or not, for at least limited work. One reason may be that there are still plenty of Deere crawlers available at a reasonable price. In fact, he says, parts are worth more than an assembled crawler.

“You couldn’t build one from scratch,” he says.

“Even the parts from Deere that aren’t obsolete are often too expensive to justify.

What I can do for $500 would cost $2,000 or more from Deere.”

Contact: FARM SHOW Followup, JD Crawlers, 7716 70th St. S., Horace, N. Dak. 58047 (ph 701 361-1006; [email protected]; www.jdcrawlers.com;)

From the archive · Full text
Feature story

Nifty Way To Cut Circles With A Cutting Torch

Featured source: Willard Pearson

“My friend Roland Paul, who passed away a few years ago, came up with a nifty attachment for my acetylene cutting torch. It lets me flame-cut neat circles up to 3 ft. in diameter,” says Willard Pearson, Angora, Minn., who recently sent FARM SHOW photos of the attachment. It consists of pieces of 1/4-in. ready rod and a large cable clamp that fits over the barrel of the torch. He drilled and tapped a 1/4-in. hole in the bottom of the clamp. Then he put a lock nut on the ready rod so he can lock it into a horizontal position with the torch. The rods are bent into S shapes, with the end ground to a point. The small one works great for rounding off plates like hitch irons and other plates. You can cut the rod to any length for different size circles. To set the diameter of the circle, Pearson loosens the clamp and slides it anywhere along the torch tubes. He positions the torch on a center punch mark on a steel plate.

“The ready rod works like a pencil point and lifts the cutting head off the metal I’m cutting. It also locates the torch. As a result, I can cut a much more accurate hole – within 1/16 in. – than if I tried to follow a line visually,” says Paul.

Contact: FARM SHOW Followup, Willard Pearson, 1306 Samuelson Rd., Angora, Minn. 55703 (ph 218 666-5483).

From the archive · Full text
Feature story

Shift Kit For Case IH Magnum Tractors

Featured source: Jerry Krisch

“If you’re frustrated with the way your Case IH Magnum tractor shifts, we can probably help,” says Jerry Kriesch, Abilene Machine, about a new kit designed to solve shifting problems for Magnums built from 1988 to 1996. The problem with those models is the long shift from forward to reverse and vice versa. The kit includes a lock lever that blocks off the lower 6 gears to shorten up your shift movements. Installation involves removing 2 pieces the top shift cover and the park cam – and adding 2 pieces – a new shift cover and the lever.

“It allows easy shifting from forward to reverse without entering the lower gears. As a result, you can shift from high reverse to 7th gear in one easy motion,” says Kriesch. For 2-reverse tractors, the kit expands your reverse options by making the third and fourth gears operational. Essentially, your 2-reverse tractor becomes a 4-reverse tractor like on new models.

“It’s an important feature if you use front-end loaders a lot, because you don’t have to make nearly as many shift movements,” says Kriesch.

“Without the kit if you’re in forward gear and want to shift into reverse, you have to bring the shift lever all the way down and then over 3 in. and up 2 in. With the kit installed, you just move the shift lever left or right and then 1 1/2 in. forward into reverse gear.” Each shift kit includes one shift plate cover, park lock lever, decals and instructions. It can be easily installed in less than two hours. Sells for $450 plus S&H. Contact: FARM SHOW Followup, Abilene Machine, P.O. Box 129, Abilene, Kan. 67410 (ph 800 255-0337; [email protected]; www.AbileneMachine.com) or Belmond, Iowa (ph 800 866-1504) or Bishopville, S.C. (ph 800 543-2451).

From the archive · Full text
Feature story

Fiat-Made Oliver And White Parts

Featured source: Rick Stair

Oliver and White owners having trouble finding parts for Fiat-made models can check with Rick Stair. Stair is owner of Rick’s Ag Parts, offering mainly parts and accessories for the Fiat-made Oliver and White tractors. However, he is expanding his list of parts to Massey and Ford.

“I try to keep in stock the common items that a customer may need in a hurry to keep in the field,” says Stair.

“Water pumps, fuel pumps, starters, wheel bearings and such are priority items. Most other items can be drop shipped from one of several suppliers.”

Stair’s dad bought the Oliver dealership that was the basis for Rick’s Ag Parts in 1971. Stair grew up in the shop and became parts manager in the early 1980’s. When the dealership was sold in 1992, he worked for other dealerships for a time before setting up his own parts shop.

“I have accounts with most of the suppliers I worked with as a dealership, which opens up a wide selection of parts and accessories for other makes,” says Stair.

Stair offers parts online from his website as well as via phone sales. To help customers identify a given part, he offers parts illustra-tions for cooling, drive and other system components on his website.

“It’s often hard to identify the part to order without the parts number,” explains Stair.

“After going to my website, a customer can call and tell me what page he is looking at and, working together, we can then identify the needed part.”

If the parts page has a red dot on the part, the customer can click on it and immediately go to the online store and order the part. If no red dot is on the part, a special order can be made by phone.

Scanned versions of parts manuals is a service he is planning to offer, including parts breakdowns, tractor specifications, wiring diagrams, old literature and other items.

Stair is also expanding his offering of hay and forage equipment parts with a separate website, www.bigbalerparts.com.

Contact: FARM SHOW Followup, Rick’s Ag Parts, LLC, 874 Ridgecrest Dr., Wooster, Ohio 44691 (ph 330 466-2164; www.RicksAgParts.com).

From the archive · Full text
Feature story

Flathead Ford V-8 Repowers Oliver 66

Featured source: Lloyd Stetson

“When I got this tractor it was sitting out in the woods all rusted out and neglected. There were parts missing from the motor, the hood was dented up and the seat was mangled. I didn’t know if there was much hope it could run again, but I was willing to try,” says Lloyd Stetson. He took inventory on the motor and decided it couldn’t be repaired. He visited a nearby auto parts supplier, who suggested that he try retrofitting the Oliver with a 1938 Flathead Ford V-8 that was in his lot.

“The motor was in excellent condition and even had a 3-speed transmission attached to it,” Stetson says.

“I knew I could make it work by grinding down and cutting away some of the cast iron frame of the Oliver.” The Ford engine and transmission eventually slid in place, and with that success, Stetson tackled the gears, electrical system and cooling.

“The 3-speed car transmission worked fine,” Stetson says, “so I figured out a coupling system that mated it to the 6-speed tractor transmission. It gave me a tractor with 18 forward gears and a top speed of more than 40 mph.” For the cooling system, Stetson used the existing tractor radiator and fitted new hoses through tees and elbows. He added a fan that initially ran on a 12-volt motorcycle battery. Later he rigged it to run through a resistor from the 6-volt tractor battery. The tractor’s black grill, which gives the Oliver a “Star Wars-type” look, is made from rolled screen. Stetson says he wanted to make the exhaust system look special so he used 1 1/2-in. stainless steel pipes on both sides of the hood.

“It sounds like a monster truck when I start it,” Stetson says, “but it purrs like a kitten when I idle down the street at local parades.” The rear tires on Stetson’s 66 are conventional tractor rubber, but the fronts are car tires configured to the original Oliver rims.

“The whole project took me something over 100 hrs., which I didn’t think was too bad,” Stetson says.

“The result is a nice parade tractor and one that I can use in the Open class of antique tractor pulls.” Unlike many tractor restorers, Lloyd Stetson isn’t committed to one brand. After rebuilding a 1939 Allis 11 years ago, Stetson moved on to a 1940 Ford 8N, followed by a 1948 Farmall Cub. The Oliver was his latest and most ambitious project. He hopes to move on to another tractor and another brand in the next year. Contact: FARM SHOW Followup, Lloyd Stetson, 1605 Sampsonville, Rd. Enosburg Falls, Vt. (ph 802 933-5532).

From the archive · Full text
Feature story

Where To Buy New Idea Picker Parts

Featured source: Daniel King

Need a part for an old New Idea corn picker? Country Machinery probably has it. If they can’t find one at a price that makes sense, they might make it.

“If the price for new parts is too high, we just make them,” says Daniel King, Country Machinery.

“We make shields, rebuild husking rolls and make 11, 13, and 15-in. finger wheels that go at the top of the husking rolls. New 13-in. wheels are $100; we sell them for $40.”

King makes snouts for single ($135) and two-row ($165-outside snouts) pickers. The center snout is heavier and larger and is priced at $200. The company also makes the boots for the bottom of the elevators. They are priced by size at $38 to $40 each. Replacement parts made by Country Machinery are also sold to other dealers.

Husking and snapping rolls are rebuilt as needed. King prices them at $95 for the husking rolls and $165 for the snapper rolls.

“We can rebuild rolls that customers send us, or we can take theirs on exchange and send them already rebuilt rolls if they are in a hurry,” he says.

“We ship them out UPS.”

King also sells used New Idea corn pickers. He says interest is growing and not just from collectors.

“Our buyers tend to be farmers who use the picker,” he says.

Country Machinery doesn’t limit itself to pickers. The company also makes and sells parts for manure spreaders. They even rebuild them.

“We do a total rebuild on the original frame if needed,” says King.

“That can run as much as $2,000. If the owner wants it sandblasted and painted, that can add $600. They really look nice repainted.”

Contact: FARM SHOW Followup, Country Machinery, 609 Musser School Rd., Leola, Penn. 17540 (ph 717 656-9733).