Practical ideas from FARM SHOW MagazineSubscribe · Free issue · Send us your shop tip
Subscribe to FARM SHOW
Issues / Vol. 37, No. 1 (2013)

Vol. 37, No. 1 (2013)

Money-Saving Repairs & Maintenance Shortcuts · Printed section pp. 36–39

29 selected entries · Complete text of selected entries

This issue’s section includes reader tips and feature-length shop stories. Held items and editorial notices are not reproduced.

Archive text: prices, coupons, availability and contact details reflect the original publication, not current offers. Reader methods are not universal instructions; follow manufacturer guidance and proper safety practices.

Reader shop tips

From the archive · Full text
Reader shop tip

Jeff Kumpf

Jeff Kumpf, Hopedale, Ill.

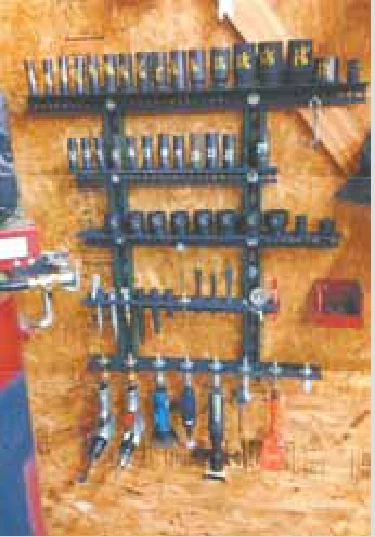
“On a rainy fall day, I decided to address the lack of organization of my air tools. I had been keeping everything in a drawer with almost no hope of finding what I needed. The air tools would leak oil in the drawer so I had to wipe them off before I used them.

“I started out with 2 pieces of 24-in. deep electrical strut mounted to the wall about 12 in. apart. I then found some 2 by 4-in. perforated angle iron for my holders. I used 50 1/4-in. carriage bolts with nuts as pegs for the sockets. The 1/4-in. nut seemed to work well inside the 1/2-in. drive part of the socket to keep it from shifting as the compressor started. The top row holds the SAE sockets and the next couple rows hold the metric. There’s an accessory row at the bottom, complete with extensions, air chucks, pressure gauges, and air chisel tips. I then mounted 8 female quick connects upside down to hold all of my air tools. This seemed to work well for the oil that you put in each tool after each use.

“Once all the pieces were mounted, I took my welding paint stick and marked each socket with its size. I can now pick out the right sockets as I walk across the shop and not have to pick each one up individually to look at their size. It also makes it easy to see if any sockets are missing. This rack took some time but it has made using my air tools much easier, and much more enjoyable.”

From the archive · Full text
Reader shop tip

Eugene Loge

Eugene Loge, Cooperstown, N. Dak.

“I attach a strong rare earth magnet to the fuel tank of each piece of equipment to hold the fuel cap while fueling so the cap won’t be lost if I forget to replace it. Also keeps it from falling off onto the ground.”

From the archive · Full text
Reader shop tip

Richard E. Wilkins

Richard E. Wilkins, Colonial Beach, Va.

“I cut pieces from a skid steer tire to replace the worn out pads on my backhoe’s stabilizing legs. They hold a lot better than the originals and the backhoe now does less damage to the ground where we’re digging than it did before.”

From the archive · Full text
Reader shop tip

Roland J. Begier

Roland J. Begier, Tucumcari, New Mexico

“Here’s an idea for cleaning dirty, acid corroded battery terminals. Just turn on the lights or start the engine so current is running through, and then wash them off with a garden hose. It’s surprising how well it works.”

From the archive · Full text
Reader shop tip

Dennis Strahle

Dennis Strahle, Eagle, Mich.

“I put together my own gen-set with an old engine I had and a 10K generator from Harbor Freight. Instead of putting a gas tank on the engine and letting the gas get stale from sitting for months or years of non-use, I attached a 4-ft. fuel line to the inlet side of the carburetor. When I need the generator, I grab a 5-gal. can of fresh gas off the shelf and insert the fuel hose into the fresh gas. The engine starts right up. Once the power comes back on, I pull the hose out of the gas can and let the engine burn all of the fuel in the hose and carburetor. I insert a bolt into the end of the fuel line to keep bugs and dirt out until the next time it’s needed.”

From the archive · Full text
Reader shop tip

Douglas Hartell

Douglas Hartell, Dallas, Ore.

“Here’s how to stop plug-ups of spray paint cans. After spraying, remove the nozzle and put it on a can of some kind of solvent, like Liquid Wrench, and give it a quick spray. This will clean it out thoroughly so you can put it back on the paint can.”

From the archive · Full text
Reader shop tip

Oran G. Underdahl

Oran G. Underdahl, Fosston, Minn.

“When I have to get a nut on a bolt in a tight spot that I can’t reach with my fingers, I put sticky tape across the opening on the wrench. Then stick the nut to it. You’ll be able to get it started.”

From the archive · Full text
Reader shop tip

Bill Fischer

Bill Fischer, Fremont, Wis.

“We have several Madison stave silos with swinging, or self-storing doors. Several of the bottom hinges rusted and broke off next to the concrete door frame. To repair them, I made some brackets that I drive in behind the hoops. I use a small chisel to bring the hoop out enough to get the bracket started.”

From the archive · Full text
Reader shop tip

Dean Wallace

Dean Wallace, Oconee, Ill.

He set up a temporary hanging storage box that he can raise or lower as needed. It measures 4 by 6 ft. and hangs from the ceiling on four flat steel bars. The bars pivot freely on bolts at each corner. An electric winch cable pulls the shelf up from one end, pivoting to the side to lift up. Dean just flips a switch on the wall to raise or lower the shelf.

From the archive · Full text
Reader shop tip

Loraine Tichenor

Loraine Tichenor, Sparta, Wis.

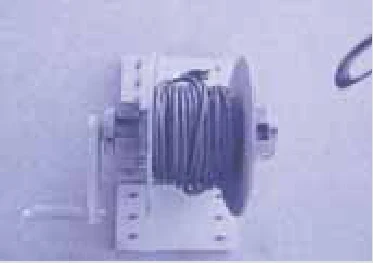
“I made this handy little wall-mounted cord reel out of wood. It comes in handy whenever I need to use my electric string trimmer to cut grass a long distance from our house. The reel can handle 100 ft. of electrical cord.”

From the archive · Full text
Reader shop tip

Ernest Nightingale

Ernest Nightingale, Fairview, Okla.

“I removed the magnet from an old CB antenna and used JB Weld to attach it to the bottom of a pump oil can. Lets me stick the oil can to the side of any equipment I’m working on.”

From the archive · Full text
Reader shop tip

Gerald Westhoff

Gerald Westhoff, New Vienna, Iowa

“Holding pto and driveline components in a vise can be a challenge because it’s hard to hold them in place while turning the handle. After 30 years of working with pto’s and drivelines, we’ve developed a ‘C’ frame press that uses a special hydraulic jack and custom tooling to press bearing caps out of yokes; press bearing caps out of yokes to save the cross and bearing set; install a new cross and bearing kit; and hold pto halves so the safety shield can be removed.

“In addition, we designed a table with the ‘C’ frame press mounted to it, along with tooling to hold and align the pto drivelines while installing new parts. A back panel stores the tooling for easy access. The tooling works with American and Metric ag drivelines.

“We’re selling it through New Vienna Metal Works, Inc., a service center with a large inventory of American and metric pto yokes, cross kits, and shafting from Neapco, Weasler, G&G and others (ph 563 921-3445; www.NVmetalworks.com).”

From the archive · Full text
Reader shop tip

Meredith Knox

Meredith Knox, 1124 Henleaze Ave., Moose Jaw, Sask. Canada (ph 306 692- 8119; [email protected])

“Mice chewed so many holes in my canvas grain aeration duct that I discarded it and replaced it with a tractor inner tube. The 20.8/38 tube fit over the fan’s 9 by 14-in. square outlet with a little overlap, but other tube sizes could be adapted to round outlets. When I store the duct away for the winter, it’s nice to know that mice won’t touch a rubber inner tube.”

From the archive · Full text
Reader shop tip

Bill Baer

Bill Baer, Westville, Okla.

“A FARM SHOW reader said he uses starting fluid to wash grease off hands and parts. As a diesel mechanic, I did the same thing for a long time – until enough fluid soaked through my skin to cause liver and kidney failure. I spent two weeks in the hospital and it took a year to recover. I wouldn’t recommend doing this.”

From the archive · Full text
Reader shop tip

Co-Leash Corp.

Co-Leash Corp., Tampa, Fla. (ph 888 838-2169; www.krypta-glow.com)

Kryptaglow is a glow-in-the-dark fluorescent paint that shines bright for 24 hours after being exposed to light for just 15 min. It can be used on walls, floors, metals, or on just about any properly prepared surface. During the day the paint is relatively clear, but by applying multiple coats and a white base paint, it’ll shine bright at night. Ranchers can use the paint on fences so cattle don’t bang into them at night when they’re running. It also works great on slow moving vehicles, to light up bumpers and tailgates on pickups, or on tractor wheels as a theft preventative. Comes only in 1-gal. cans. Sells for $350 plus S&H.

From the archive · Full text
Reader shop tip

Tim Patterson

Tim Patterson, Gold Plug LLC, 224 New Ventures Dr., STE9, Bozeman, Mont. 59718 (ph 406 600-3103; goldplug@gmail. com)

He sells a new line of magnetic dipsticks to compliment the company’s magnetic drain plug. The dipsticks are precision CNC machined from billet aluminum. The no. 3003 dipstick is designed to replace and protect many Honda and Briggs & Stratton powered generators including the GX110, GX120, GX140, GX160, and GX200 models. Other lengths are available to cover almost all portable generators, and many other engines.

From the archive · Full text
Reader shop tip

Raymond Bricker

Raymond Bricker, (raymondbricker@ hotmail.com)

“I had the opportunity to pick up some wood pallets measuring 10, 12 and 25 ft. long. Each size had three good 4 by 4’s. I needed a way to take the skids apart so I had this hooked bar made. It really saves time. I can take a 12-ft. skid apart in only 10 min. I paid $175, and most of that was to have the bar tempered. So far I’ve taken apart twentyone 25-ft. long skids, sixty 12-footers, and seventy 10-footers. I’ll use the wood to build a machine shed.”

Shop feature stories

From the archive · Full text
Feature story

Old AC Condenser Makes A Powerful Air Compressor

Featured source: August Stark

“I’ve probably got the only one-ton dump truck with an air hose hanging out of the grill and an air compressor mounted under the hood,” says retired but still active handyman August Stark of Merrill, Wis. Stark built his engine-mounted compressor using parts from an air conditioning system that he pulled from a 1968 Chrysler car.

“I got the idea one day and decided to just give it a try,” says Stark, who used to work part time in an auto salvage yard and saw all sorts of unusual work done to old pickups and cars. He pulled the condenser from the Chrysler’s AC system, built a couple brackets, and mounted it on the 350 V-8 engine of his GMC truck. A belt off the fan pulley drives it. Stark says the compressor is a V twin cylinder model that can pump 100 lbs. of pressure in less than a minute. He ran an air line from the compressor in the engine compartment to a 4-gal. pressure tank that’s mounted under the cab of his truck. He fills the compressor crankcase with transmission fluid for lubrication. To start and stop the compressor Stark installed an electric clutch that’s powered by his truck’s 12-volt electrical system. When he needs air, he flips a master switch on his dashboard and the compressor starts. It stops automatically when the tank pressure reaches a pre-set level, then starts again when pressure falls below 65 lbs.

“It’s just a darn simple idea that works really well,” Stark says.

“I know this pumps faster than a compressor on a semi-tractor because I’ve had a lot of experience with those.” Stark built the compressor to have mobile air for pumping up tires and cleaning off equipment. He says it also does a nice job running a paint sprayer, a nail gun and even a 1/2-in. impact wrench.

“It will probably run any type of air tool that a stationary or portable compressor would operate,” Stark says. If someone is interested in building a unit like his, Stark says that any piston-driven air conditioning condenser would probably work. He says the setup would probably cost less than $50.

“My truck doesn’t have air conditioning, so I was able to mount the compressor where the condenser would normally be,” Stark says.

“Plumbing the lines was easy.” Contact: FARM SHOW Followup, August Stark, N4459 Mary Todd Ct., Merrill, Wis. 54452 (ph 715 536-8486).

From the archive · Full text
Feature story

They’re Building A Shop Around Home-Built Lift System

Featured source: Rusty McCombs

As Rusty McCombs and his father, Charlie, were planning their new equipment shop last fall, they knew the shop would need to have a heavy lifting system.

“We run farming, ranching, logging, and sawmill operations, and the need for equipment maintenance is constant,” says Rusty of Hueytown, Ala. Their old 32 by 40-ft. shop had a 2-post vehicle lift and a ceiling-mounted, 20-ft. long single I-beam equipped with 2 manual chain hoists.

“We liked using the single I-beam, but it had limitations when creative lifting problems arose,” says Rusty. So when they decided to build a new shop, they built the lift system first and then started building the shop around it.

“We plan to build the shop with a second floor storage area, and if we had put the building up first there wouldn’t have been enough headroom to fit the I-beams,” says Rusty. The primary lift in the new 50-ft. sq. shop is a parallel 22-ft. H-beam system equipped with a 16-ft. long perpendicular I-beam carriage. Each main 22-ft. long beam carries 2 manual chain hoists, while the carriage beam has a single manual chain hoist.

“The entire overhead carriage places almost 400 sq. ft. of shop floor directly under a chain hoist,” says Rusty. Also new is a jib crane equipped with a 10-ft. long articulating arm and an electric-operated chain hoist. It will be located just inside the shop’s main door.

“The working perimeter of the jib crane will allow the arm to lift objects outside the building,” says Rusty. They also plan to bring the 10,000-lb., 2-post vehicle lift from their old shop into the new one. Charlie fabricated several jigs that enable the vehicle lift to raise everything from riding mowers to larger equipment trailers.

“The vehicle lift will be positioned so it can work together with the overhead carriage to remove engines from vehicles,” says Rusty. He says many of the lift system components were salvage items, which saved a lot of money.

“The main H beams and jib crane pole came from an industrial machine packing crate,” says Rusty.

“Old service station canopy poles support the H-beams. The I-beam carriage originally was used in a warehouse. The jib crane’s articulating arm is off a demolished car wash. We found all 6 of the chain hoists in the barns and sheds of different friends.” The project was a lot of work, but the 2 men say it was worth it.

“In the new shop, no one better be caught lifting heavy objects by hand,” Charlie adds with a laugh. Contact: FARM SHOW Followup, Rusty McCombs, 3712 Virginia Dr., Hueytown, Ala. 35023 (ph 205 497-0994; [email protected]).

From the archive · Full text
Feature story

4-Speed Drill Press Works Great

Featured source: Justin Kelzer

The 1/4 hp, 4-speed drill press Justin Kelzer built consists of an antique Champion #97 post drill with a pulley drive attached. Kelzer added a motor and transmission and mounted everything to a wood frame.

“I wanted a drill press and had been looking for an old post drill I could modify,” explains Kelzer.

“The seller’s wife had given him a posthole auger as a present.” The 1/4 hp motor was an old one Kelzer had found as he cleaned out his grandfather’s farm. Though small, it provides plenty of power, thanks to the 4-speed transmission it drives.

“The transmission is from an old Gamble riding lawn mower,” says Kelzer.

“It lets me control the speed. I can drill as slow or fast as I want. Sometimes I use the neutral, and I’ve run it in reverse to back out of a hole.” To mount the transmission, Kelzer cut out the deck plate from the lawn mower with the transmission’s shift pattern. He welded a piece of angle iron to the plate, mounted the transmission to it and bolted it all to the wooden frame of the press. Contact: FARM SHOW Followup, Justin Kelzer, 1312 Apron Rd., Randall, Minn. 56475 (ph 320 360-5875).

From the archive · Full text
Feature story

Slide Hammer Screws Onto Multiple Tools

Featured source: Robert Stone

“I made a multi-purpose slide hammer that I use with several different attachments including a locking pliers to pull nails, a long reach chisel, a small post driver, and a hammer,” says Robert Stone, Seymour, Mo. The slide hammer consists of a long steel rod with a threaded bolt at one end and a hexagon-shaped, 2-in. long internal coupler at the other end. To fit the locking pliers to the slide hammer, Stone simply threads the bolt into a large nut that he welded to the side of the pliers.

“The slide hammer provides an added jolt of pulling power that really makes a difference,” says Stone.

“I modified the jaws so the pliers work better for pulling roof nails. I used a file to make a small indent in the liner, which I use to grasp the shaft of the nail. However, I can still use the pliers to pull cotter pins, oil seals, dowel pins, and other items.” The other 3 tools are all fitted with a threaded bolt at one end, which fits into the coupler on the slide hammer. The post driver is 1 ft. long and has a large metal ring welded onto it, which Stone uses to pull out small fiberglass fence posts. The hammer was made by welding the head of a railroad spike onto one end of a steel rod. Contact: FARM SHOW Followup, Robert L. Stone, 1504 Dillon Rd., Seymour, Mo. 65746 (ph 417 767-4395).

From the archive · Full text
Feature story

“Clog Hog” Cleans Out Sewer Lines, Pipe Plug-Ups

Featured source: Deb Del Piero

The Clog Hog drain cleaner works with many pressure washers to unclog sewer lines and pipes.

“It’s unique because the designers have ‘done the math’ to properly match jetter hose diameters, jetter hose length, and nozzle geometry to achieve maximum cleaning and pulling (drain travel) with different sizes of gas and electric pressure washers,” says Deb Del Piero, marketing manager for the Austin, Texas, company. Clog Hog comes in different models that work on 2 to 4 gpm gas and 1.5 to 2 gpm electric pressure washers. The Clog Hog jetter can be used from an indoor drain opening or from a main drain cleanout. It has 3 backfiring jets and one forward jet that pull the jetter through the drain. The force of the water jets break up clogs and ice. Though there are similar products on the market, Del Piero says the Clog Hog is unique for its precision design, with a custom-made nozzle that is matched to selected sizes of 4,000 psi jetter hose to maximize cleaning and pulling force without overloading customers’ pressure washers.

“The stainless steel nozzles are made in the U.S., with a different geometry and tighter tolerances than we’ve found on inexpensive, imported nozzles,” Del Piero adds.

“The sizes and discharge angles of the nozzle jets can have a big impact on how the drain cleaner performs.” The industrial-grade quality comes with a reasonable price tag starting at $99 for jetters with 50 ft. of hose. The most popular model with 100 ft. of hose that works with 2.9 gpm (or lower) pressure washers sells for $129. About two-thirds of customers are homeowners and rental property owners. The rest are plumbers and maintenance professionals. Del Piero notes that Clog Hog works on pvc and metal pipes down to 1-in. diameter, but is not recommended for older ceramic (clay) or wood tar composite drain lines, which could have potential structural problems. Many customers also use Clog Hog to clean out blocked and slow-running outdoor septic field lines, frozen drain lines and dirt and yard debris from outdoor landscaping drains. Clog Hog is sold through its website, and staff work with customers to choose the right model to match their pressure washer. Contact: FARM SHOW Followup, Clog Hog, 3736 Bee Caves Rd. #1101, Austin, Texas 78746 (ph 877 992-5644; www.cloghog.com).

From the archive · Full text
Feature story

Chain Slackener Helps Clean Cornhead

Featured source: Tom Pearson

“Before I started using my homemade slackener it used to take me 15 to 20 min. per row to loosen the gathering chains on my cornhead, remove them, clean under the sprockets, then put the chains back on and tighten them,” says Hudson, Iowa, farmer Tom Pearson.

“Now I can remove a chain without having to loosen the chain tightener and clean under the chain and sprockets in just a few minutes.” Pearson’s slackener is made from a simple crank-operated steel bar clamp. He removed the crank handle and replaced it with a 3/4-in. bolt that he can turn with a socket wrench. Then he welded metal tabs about 1 in. wide onto each of the clamp squeeze brackets. The metal tabs fit over a sprocket between the cogs with the cornhead gathering chain still in place.

“When I put the tabs over each sprocket and wedge them between two cogs, I can use a socket wrench to turn the threaded shaft on the clamp and remove tension on the chain. Then I can take the chain off and clean the channel and under the sprockets,” Pearson says.

“I don’t have to loosen the double nuts on the regular chain tightener, which takes a lot of time.” Pearson came up with the idea a couple years ago when he had a lot of weeds in some of his corn after herbicide failure.

“The foxtail took over, and when I was harvesting, the foxtail stems would wrap around the top and bottom sprockets of the gathering chains,” Pearson says.

“I had to clean them out every day, sometimes twice a day. That was a big job because I’ve got an 11-row cornhead with 15-in. rows.”

Pearson says he’s hopeful he doesn’t need to use the slackener too much during future harvests because that means he’s got a lot of weeds in his corn. He’d prefer if the corn was weed free so harvest would go smoothly.

“The slackener worked fine when I used it almost every day a couple years ago,” he says.

“Now I just use it a couple times during the season and even then it saves me time.” Contact: FARM SHOW Followup, Tom Pearson, 11334 Hudson Rd., Hudson, Iowa 50643 (ph 319 988-4434).

From the archive · Full text
Feature story

Table Hoist Helps Mount Motorcycle Sidecar

Featured source: Vern Goodwin

“I needed a hoist to help mount a sidecar on a motorcycle,” says Vern Goodwin, a Lincoln, Neb., cycle shop owner who built what he calls a table hoist.

“It makes it easy to lift to the height we need, then roll it in next to the bike. It’s easy to put the sidecar in the exact place and height we need.” Goodwin’s hoist is a simple apparatus that he made from a heavy-duty work table that a friend gave him. He mounted the table on a sturdy 2 by 5-ft. metal frame made of 4-in. channel iron. He added 500-lb. caster wheels with brakes on the frame’s corners so it became an easy-to-maneuver dolly. Then he made an identical channel iron frame that mounted to threaded shafts on top of the table.

“The sidecar fits onto the top frame,” says Goodwin.

“We put it on there, roll it into position next to a bike, then raise it and level it next to the bike.” A hand crank raises and lowers the hoist. It has 2 settings. One is direct drive that they use for lifting sidecars, which weigh about 350 lbs. The other speed is geared 3-to-1, so the hoist can actually lift nearly 2,000 lbs. He put stops on the base of the threads so the shafts won’t lift the top of the dolly out of the frame.

“It works just like a manual forklift with 2,000-lb. lift capacity,” says Goodwin. Contact: FARM SHOW Followup, Vern Goodwin, Vern’s Cycle Shop, 5681 Raymond Rd., Lincoln, Neb. 68514 (ph 402 785-9201).

From the archive · Full text
Feature story

“Do-It-Yourself” Hydraulic Hose Repair Kit

Featured source: Larry Johnson

You can repair damaged or blown hydraulic hose right in the field with this new replacement hose assembly repair kit.

“This kit lets you easily assemble replacement hose, with no crimping necessary,” says Larry Johnson.

“You can assemble a complete hose in less than 10 min. without any special equipment. The repair can be made on the bed of your truck using wrenches in your toolbox.” The kit is designed to repair 3/8 and 1/2-in. dia. hose. It comes in a durable, water-resistant case and includes 30 ft. of thermoplastic hydraulic hose; a hose cutter tool; a vise holder die set; and 6 different field attachable couplings. To replace a broken hose, you cut the new hose to the desired length, then run the hose through the die and tighten the die in a vise.

Then use a socket wrench or combination wrench to screw a ferrule counterclockwise onto the end of the hose, leaving a 1/8-in. gap. Once the ferrule is secure, remove the die and screw on a threaded coupling, inserting the coupling clockwise into the ferrule until it bottoms out.

“If you want you can use a pair of C-clamps or channel locks to hold the die holder in place, or grip the hose with your hand,” says Johnson. Johnson has a background in logging and was asked by the Nitta Corporation of America to introduce their hydraulic products into end user markets.

“Nitta is a manufacturer that supplies OEM products. They’ve never sold anything to the public, so I’m trying to get the word out now,” says Johnson.

He says the thermoplastic hose has a smaller outside diameter for easier routing than conventional hydraulic hose, and the polyurethane cover is more abrasion resistant than rubber.

“The 3/8-in. dia. hose has an operating pressure of 3,450 psi, and the 1/2-in. hose has an operating pressure of 2,900 psi,” says Johnson.

“Adaptors are also available for connecting unique end configurations.” The standard kit sells for $220 plus S&H.

“This item pays for itself the first time you use it, and the couplings are reusable,” notes Johnson. To see an instructional video about the product, go to: www.nitta.com/linemate.htm. Contact: FARM SHOW Followup, Larry Johnson (ph 678 780-8797; [email protected]). To request literature about all of the company’s products, contact: Nitta Corporation of America, 7605 Nitta Dr., Suwanee, Ga. 30024 (ph 800 221-3689 or 770 497-0212; www.nitta.com).

From the archive · Full text
Feature story

His Portable Vehicle Hoist Works Great

Featured source: Wayne Hopper

“I was sitting on a beach in Florida and this idea just came to me,” says Brussels, Ont. farmer Wayne Hopper, who built his own portable hydraulic car and truck hoist out of steel tubing, loader cylinders and scrap metal. The hoist normally sits in his shop, but he made it portable so he can move it outside to change oil on vehicles without making a mess inside. Hopper’s hoist has two 12-in. wide wheel ramps made from channel iron. They’re adjustable to the wheelbase and are raised and lowered on four lifting posts made from 4-in. square steel tubing. Each post has a 48-in. hydraulic cylinder. Hopper plumbed the cylinders to supply lines that he connects to his tractor for hydraulic power.

“We’ve always got a tractor available, so it made sense to use those hydraulics rather than buy a special power pack to raise and lower a vehicle,” Hopper says.

“Each cylinder is rated for 2,500-lb. lift capacity so the hoist and the tractor have no problem lifting cars or pickups.”

To stabilize the lift he has a 3-in. flat steel X-brace connecting the foot of each leg and an X-brace connecting the two legs on each side. He uses 1/2-in. bolts through each leg when the hoist is in the air, as safety pins.

“The lift is very sturdy when a vehicle is on it,” Hopper says, “so I don’t have it bolted to the floor. That way I can move it outside with a loader or forklift.” Hopper says materials for the hoist cost him about $1,500 and it took him about a week to build it.

“There wasn’t too much head scratching that went into it, which was kind of amazing compared to other things I’ve built. The best part is that it really works. For years and years I’ve rolled under cars on different floor dollies, bumped my head and gotten lots of dirt in my face. This thing makes repair and maintenance a whole lot easier,” Hopper says. Contact: FARM SHOW Followup, Wayne Hopper, 85645 Clegg Line, RR 5, Brussels, Ont. N0G 1H0 Canada (ph 808 431-4488).

From the archive · Full text
Feature story

Custom-Made Grinding Jig For Deere 2020

Featured source: Vince Osburn

Vince Osburn’s homemade grinding tool lets him get inside the differential housing on a Deere 2020 tractor to guide a grinding wheel to resurface the brake contact area. Adding a second plate and spacers make the tool perfect for resurfacing brake pistons, too.

“I don’t know what it would’ve cost to get the housing surface area refinished or replaced,” says Osburn.

“I don’t even know where I would go to have it done.” The grinding tool was designed specifically to fit inside the differential housing of Osburn’s 2020 Deere. He suggests that it could easily be modified for any size cavity that needed to be resurfaced. The tool has an arbor made from a #8 bolt drilled out to hold a standard 4 1/2-in. grinding wheel mounted on a 1/2-in. drill. It also has a steel plate sized to fit the housing and three roller guides fashioned from window cord pulleys. The guides keep the grinding wheel in position while allowing it to move around inside the housing. Osburn’s homemade arbor is reinforced with a 5/8-in. bolt that’s locked tight to the plate with a double set of nuts. At the drill, the bolt is welded to a clamp. Osburn fabricated the clamp from two pieces of pipe cut in half lengthwise and bolted together over the drill drive barrel.

“I didn’t know what the perfect placement would be, so I slotted the holes for the roller guides,” says Osburn.

“They can move about an inch as needed. With the bolt reinforcement, there’s very little flex or bend. It’s very rigid. I just ground a little at a time, rotating the plate to get a decent finish all the way round.” Once the brake contact area was resurfaced to his satisfaction, Osburn modified the tool to work on the brake piston. He added a second steel plate, larger than the first, so it could be clamped to a work surface.

“I replaced the bearings with 3 bolts to serve as spacers between the original plate and a second plate,” he explains.

“The roller guides were remounted on the upper side of the second plate to keep the brake piston in place, yet let it rotate.” With his resurfacing finished, Osburn has no more need for his tool and has offered it on eBay for $75. Interested readers can find it under John Deere Brake Resurfacing Tool, listing #230864203226. He can also be reached at home with questions. Contact: FARM SHOW Followup, Vince Osburn, 8436 Prospect St., Mojave, Calif. 93501 (ph 818 371-5377; [email protected]).