From the archive · Full text
Reader shop tip
Kevin Ericson
“I bought a used 2-post car lift at auction for $800. The capacity is 9,000 lbs., which will handle our pickups. I even trust it with my 1935 Ford.”
Money-Saving Repairs & Maintenance Shortcuts · Printed section pp. 36–39
47 selected entries · Complete text of selected entries
This issue’s section includes reader tips and feature-length shop stories. Held items and editorial notices are not reproduced.
“I bought a used 2-post car lift at auction for $800. The capacity is 9,000 lbs., which will handle our pickups. I even trust it with my 1935 Ford.”
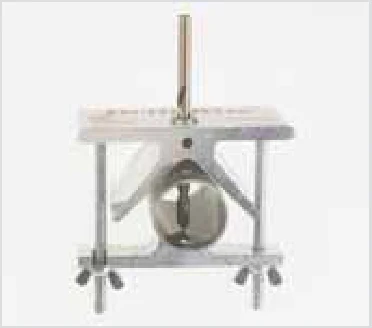
“Precise drilling of holes into pipes and other curved surfaces is a lot easier with our Drill Rite drilling jig. Lets you drill holes in pipe and steel rod with a hand drill. Fits any round material from 1/2 to 2 1/2 in. and includes hardened drill bushings for 3/16 and 1/4-in. holes. Additional bushings are available for most hole sizes.”
“Due to a lot of dampness in this area of the country, I get rust on my tools. I clean them at least twice a year using steel wool and then use a good automotive paste wax to coat them. I also use wax from toilet bowl rings on drills and other things.”
“There was a ‘worst buy’ in a recent issue of FARM SHOW about a fellow who had problems with the oiler on his Husqvarna chainsaw. In my opinion, this was a problem Husqvarna caused themselves because they believed the propaganda published by environmental groups that too much oil was being dumped on the ground by chainsaws. I had the same problem with my Husqvarna until I was told by a company tech to use 20-weight oil in the oiler instead of the recommended 30 weight. Another tech said you can file down the oiler cam to a small degree to allow more oil to pass. There are thousands of saws out there with this problem.”
“For the fellow who had trouble storing his penetrating oil mix of acetone and automatic transmission fluid, I’ve found that toilet bowl cleaner bottles make great storage bottles for corrosive chemicals. I use them to store both lacquer thinner and straight acetone. There are no spills, runs or drops when using.”
“One of your readers commented in the last issue about how the 50-50 mix of ATF and acetone that he uses as a penetrating fluid keeps evaporating. I use a sturdy metal container from Assman Shop Supply (ph 605 223-2432). You fill the container half full with fluid and then air pressure is added from a shop air compressor. The right amount of air will last until the fluid is dispensed, with no evaporation. I always have one of these cans bouncing around in the back of our ranch pickup. This container is a heavy-duty, quality product. Holds about a quart.”
“In a recent issue of FARM SHOW someone said they liked using a ‘home brew’ mix of 50-50 automatic transmission fluid and acetone to loosen up rusted nuts, but had trouble with the plastic bottle melting. I use a 16-oz. Sta-Bil fuel stabilizer bottle to contain the mixture and have never had that problem. The bottle has measuring units on one side which are really handy when filling.
“We put a lot of used tires on our farm vehicles, so slow tire leaks around the wheel rims is a common problem. I came up with a cheap tire seal by filling an empty plastic dish soap bottle 3/4 full of a mixture of 1/2 dish soap and 1/4 acrylic latex caulk, at a 2:1 ratio. I shake up the bottle to mix everything up good, then squirt the mixture into the tire’s valve stem. It does a good job of sealing the rim. After I’m done I rinse the bottle out to make sure there’s no leftover caulk residue that could dry out and keep the mixture from working the next time.”
“To get a tire bead to seat on a car, pickup, garden tractor, or other smaller tires, I wrap a ratchet strap around the outer diameter of the tire and tighten it down to bring the bead close to the rim.”
“Removing axle nuts from a field disk, I tried an impact wrench and a pipe extension, to no avail. Then I sprayed Kroil on them and waited 1/2 hour, and they came right off.
“I purchased a 50-amp plasma cutter, which will cut 3/4 in. thick. Acetylene and oxygen fuel have gotten too expensive. I also use stick welding instead of Mig.
“When I built my shop I installed a heated floor and installed two jib cranes that overlap, allowing me to move heavy parts up to 25 ft. It’s great for breaking down tractors.”
“Installing bearings on shafts usually requires heating the bearing. I use the hot plate from a drip-type coffee maker to heat them up. The thermostat on the hot plate will heat bearings to 180° F in about 30 min. Remember to put the coffee pot back - nobody likes cold coffee.”
“I work on farm tractors and had a Farmall M come in that would not start unless pulled. The problem ended up being that the distributor timing advance weight springs were worn through.
“When cleaning gasket surfaces on engines and other parts, I use 3M’s Roloc plastic brushes on my die grinder because it will clean down to the surface without damaging the metal or the workpiece. Works great.”
“I keep a bottle of red nail polish handy for making ‘witness marks’ on items to be taken apart – works well for marking roller chain connector links. It dries quickly and does have my wife’s approval.
“I keep a turkey baster in my toolbox.
It’s handy for squirting gasoline into a spark plug hole or into the carb of an over-wintered engine.
“I store chainsaw bar oil in a plastic margerine container. I use a paint brush to apply the oil to snowblower chain for storage – among other kinds of chain. It’s sticky and will not wash off in the rain. It’s also useful for oiling threads on wheel bolts, etc.”
“To clean out a plugged grain boot on a seed drill, cut a piece of 1/4-in. steel cable with an arc welder so that it’s 2 in. longer than the grain boot. Chuck the piece of cable in a variable speed drill to clear the obstruction.”
“A used corn cob makes for a good handle. I use them on files and other tools where I need a good grip.”
“I made a pair of ‘pinch off’ pliers, instead of buying them, by slipping a couple pieces of 1/4-in. rubber fuel line over a pair of 6-in. needle nose vice grips. It works great for pinching off fuel lines when removing carburetors from small engines. Or pinching a brake line when replacing calipers. Really, any time you open a line and don’t want all the fluid leaking out. Once you release the pliers, the hose springs right back to its original size.”
“I made a pedal-operated foot torch using a fuel saver valve block, like you can find at any welding supply store. The torch has a pilot light that’s match-flame size. When you step on the pedal, it provides a controlled, even heat. For some applications – such as making tight bends in rebar – it can’t be beat.”
“I have a 1939 Ford 9N tractor and a 1952 Deere A tractor. Both of these tractors were constantly burning up points. New points would last only 3 or 4 hrs. of working time. Both of these tractors have been converted from 6 volts to 12 volts, causing too much voltage to go through the distributor. A simple fix is a +/- 5 resistor wired in-line between the key switch and the coil. These can be bought at some auto parts stores or from online suppliers. Saves a lot of aggravation and time. This is not a new idea but a lot of people don’t know about it.”
“FARM SHOW inspires me to try new ideas. For instance, I had an old snowblower that used a lot of fuel and was starting to smoke. I read the article on Somander Singh’s grooved heads and tried it (Vol. 32, No. 1). Amazing! Fuel consumption went down, it stopped smoking, and I had to lean down the carb. I used it for a whole winter and then took the head off. Clean as a whistle! This is only one reason why I can’t wait for your next issue.”
“People waste a lot of caulk when they get to the end of a tube. I put a golf ball into the caulking gun, ahead of the plunger once I’ve used up about half the tube. Try it and you’ll be surprised how much more caulk you get out of a tube.
“I make different sizes of rubber bands by cutting up rubber inner tubes of all sizes. You can cut crosswise or lengthwise. This idea has been useful to me for 40 years.
“I also sew up old pant legs at one end to store different stuff in my shop or in the house. You can tie string to the other end to hang them up. Works great.”
“I put inner tubes in all my lawn and garden tractor tires as well as wheelbarrows. The tires on smaller wheels don’t have the quality of highway tires and won’t stay inflated for long without tubes.”
“I keep screws and washers and other small parts in Altoids mint tins which are easy to carry around in my pocket. I use a Sharpie to label the tins.
“I had trouble with hammer heads working loose due to handle shrinkage. I tried using a punch to drive in wedges, but soon the wedges would come out again and the heads would almost fly off.
“To fix the problem, I took the head off, removed the wedge, and put the head back on. I then tapped a small piece of pine shim (you can buy 10 or so at Lowes for a dollar or two) about the same size as the wedge into the hole where the wedge had been. Then I tapped the wedge back in beside the shim. No more loose hammer handles.
“Here’s a handy tip for installing the head on a small engine. If it’s an overhead valve engine, make sure both valves are shut when you put the head on, because it’s not easy to put the head on and fight against a valve spring at the same time. Also, take 2 or 3 bolts the same size as the head bolts and cut the heads off.
“Thread the bolts a couple of turns into the block and then slide the head on over the headless bolts. The bolts will align the holes precisely, allowing you to then put in the original head bolts. Bolt the head on with a couple of head bolts, remove the headless bolts, and then tighten the head bolts.”
“I use a hanging closet shoe organizer to store spray cans in my shop.”
“We’re always fighting high pressure in the hydraulic hoses on our Quicke front-end loader when we try to connect the hoses in hot weather. The heat causes the oil in the hoses to expand which causes the pressure to build up. To solve the problem, I came up with this homemade tool that attaches to the loader’s female quick couplers.
“I pulled the inside components out of a regular Pioneer coupling, welded a nut into the threaded end of the coupling, and then screwed a 5/16 by 2-in. fully-threaded bolt with a T-handle into the nut. A few turns of the T-handle forces the internal pin into the female coupling and releases the pressure slowly and safely without blowing out the O-ring seals.
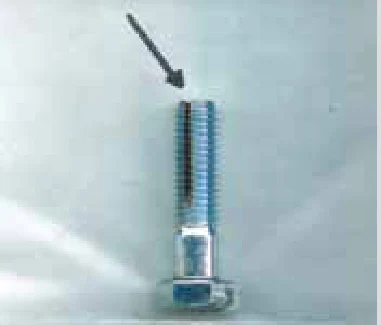
“An easy way to make an internal thread cleaner is to cut a slot into the side of a bolt.
As you turn the bolt in, the sharp edge of the slot will scrape the rust and collect it inside the slot. It’s a good option when you don’t have a threading tap that’s the right size, or when there isn’t enough room for a threading tap. Works great for cleaning out any old bolt or nut holes.”
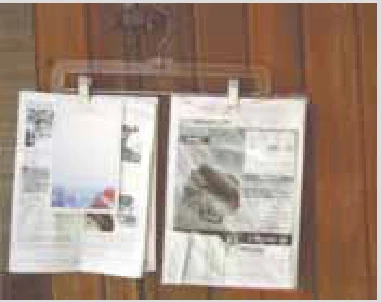
“I use old pants hangers to hold parts and owner manuals. I simply hook a manual onto the hanger’s spring clamps and hang them up. Then whenever I need the manual I can take it with me to the job. All the information I need is right there, and when I’m done I just hang the manual back up. No more hunting through drawers.”
“I use 5-gal. gas/diesel cans to fill my antique tractors, but the fuel flows out really slow and I got tired of holding onto them. The fuel flow is restricted because the air vent is too restrictive. To speed up the flow I drilled a 27/64-in. dia. hole into the air vent and tapped it for a short 1/2-in. dia. bolt. It lets me empty the gas can a lot faster and with much less arm fatigue.”
When Fred Davison looked at a used Case payloader, he couldn’t get the fuel pedal to go down.
“Just stand on it,” said the seller. When Davison pointed out that wasn’t a very good option, the seller dropped the price several thousand dollars. Davison bought it, suspecting he had a quick fix.
“The throttle wire is basically a flexible hose with steel cable inside that was old, rusty and stiff,” says Davison.
“I replaced it with a 1/4-in. cable inside a clear plastic tube. When I attached it to the payloader, I could push the pedal down with my finger.” Davison also put a little oil in the tube. It settled into low spots where the hose stretched from the pedal to the engine.
“Every time the cable moves inside the tube, it picks up a little oil and lubricates itself,” he says. Davison is always on alert for ways to do things easier or with less expense. He drills holes in door knobs and inserts steel rod through them. He also adds levers to faucets for more leverage.
“The rod provides added leverage when opening or closing doors,” he says.
“If your hands are full, you can just bump the rod on the door knob to open it without grabbing it with your fingers.” Contact: FARM SHOW Followup, Fred Davison, 1979 Upper Highwood Creek Rd., Highwood, Mont. 59450 (ph 406 733-5031).
“I couldn’t find a metal cutting abrasive chop saw with an electric motor that wouldn’t burn up within 12 months, so I built my own using a motor with a thermal switch to prevent overheating. It’s built to last,” says John Betka, Walkerville, Mont. He used salvaged parts from a pair of Milwaukee chop saws, including the handle, blade guard, switch, and tilt pivot pin and spring. The rest of the chop saw was made from scrap steel remnants that he already had. The unit is chain-driven using two 2-in. dia. sprockets and a no. 40 chain.
“I built it last fall and so far it has cut anything I put under it without any strain on the motor at all,” says Betka. The chop saw is operated by a 1 1/2 hp Marathon electric motor equipped with a thermal protection switch to prevent overheating. He bought the motor from Surplus Center in Lincoln, Neb. (www.surpluscenter.com; ph 800 488-3407). It was designed to run on 240-volt AC and run at 3,450 rpm’s, which would have made the blade go too fast. So he installed a large sprocket on the motor and a smaller sprocket on the blade’s driveshaft, which slowed the motor down to 1,800 rpm’s. The 1 1/2 hp motor was designed to operate on either 110 or 240-volt AC but didn’t have enough torque to turn the blade adequately, so he replaced the capacitor with a larger one made for a 240-volt motor. He also replaced the capacitor’s cover.
“I couldn’t find a cover that was the right size so I made one out of a 1 3/4-in. piece of schedule 40 pvc pipe and screwed it onto the motor,” says Betka.
“One side of the cover comes off so if I need to I can easily replace the capacitor.” He wasn’t happy with the performance of the original abrasive blade on the Milwaukee chop saw, or with any other abrasive blades that he had tried before because they wore out too fast. Then he discovered Flexovit abrasive blades (Eagle Safety Products, Union, Mo. www.eaglesafetyproducts.com; ph 636 583-4428).
“I first tested out a used 24-in. dia. Flexovit blade that I got from a local steel supplier. The blade was worn down too much for them to use anymore, but it worked great for me and lasted a long time. So I ordered 14-in. dia. replacement blades from the company. The blades are 1/4 in. thick and are made with some kind of compressed grit with a bonding agent. I’ve found they last much longer than anything else on the market.” He made one more improvement to his home-built saw. The Milwaukee chop saw’s deck originally measured only 10 by 14 in., which he found too small, so he installed a 24-in. sq., 1/4-in. thick steel plate on top of it to provide more room when cutting material.
“It’s ugly, but it works great,” says Betka.
“I spent about $135 for the motor and blade, whereas comparable new chop saws sell for $200 and up. Also, all the parts on my chop saw are standard parts that I can buy at any farm and ranch store. With Milwaukee chop saws you can’t buy a replacement motor, armature or field separately, and a lot of their other replacement parts are discontinued after 2 years.” Betka says he’s had a lot of problems with all the current brands of chop saws, including the Milwaukee.
“I don’t know if the manufacturers have lowered their specifications, or if it’s just a matter of poor quality materials. But I’ve had the motors burn out within 12 months on 2 handheld grinders, 2 chop saws, and 3 drills. It doesn’t seem to matter if I upgrade to a company’s heavy duty models or not.” Contact: FARM SHOW Followup, John Betka, 5889 Moulton Reservoir Road, Walkerville, Mont. 59701 (ph 406 490-2980; [email protected]).
John Houston, Davidsonville, Md., was left with a big mess in his shop whenever he used his DeWalt wood planer equipped with a built-in chip blower. To solve the problem, he hooked up a 7-ft. long plastic hose to a port on the planer and ran the hose into a wheelbarrow that he covered with landscape fabric.
“I use the planer for surfacing roughcut wood. The blower on it directs chips outside the machine through a 4-in. port. However, the blower is so strong I can’t use the planer inside my shop without making a mess and having to breathe in a lot of dust. I tried parking the planer in the shop’s doorway and blowing the chips out into my yard, but that made a mess, too.” He clamped one end of the 4-in. dia. hose onto the blower port and placed the other end into the wheelbarrow. Then he laid the landscape fabric over the wheelbarrow and clamped it onto the sides. Contact: FARM SHOW Followup, John Houston, 3821 Patuxent River Rd., Davidsonville, Md. 21035 (ph 301 370-4890; [email protected]).
Anyone who has ever had to fix a broken roller chain will appreciate FARM SHOW reader Monty Rathie’s tip.
“Use a hose clamp between two sections of roller chain. The bigger the chain, the bigger the hose clamp,” he says, noting he’s fixed chain as big as no. 140 . By tightening the clamp as tightly as you can, the two ends of the roller chain pull close enough together to repair the chain with a new link. Rathie came up with the idea in the 1980’s when he worked as a millwright at a big sawmill and dealt with miles of roller chain. It was common for two to four links to break in an 8-hour shift. He recently used a clamp to fix the no. 120 chain on his ranch employer’s swather. Two men tried to fix it for 3 hrs., before Rathie showed up with a hose clamp. Contact: FARM SHOW Followup, Monty Rathie, 1891 Webster Rd., Baker, Mont. 59313 (ph 406 775-6796).
“The lug nuts on my Kawasaki payloader were so tight and rusted I couldn’t break them loose with a 1-in. impact wrench using 145 lbs. of air pressure,” says North Dakota heavy equipment operator Gene Sickler.
“I practically burned out the air wrench and wore out my arms trying to get them loose, but they just wouldn’t budge”. Sickler knew that getting the nuts off was a job for a torque multiplier, but with a price tag of $5,000 to $10,000, he wasn’t about to buy one, and they weren’t available to rent. He also knew that a multiplier worked like a system of planetary gears, so he decided to improvise and try to build one himself.
“I looked through my scrap yard and found a transfer case from a 1996 Dodge pickup,” Sickler says.
“I removed the planetary setup from the case and bolted it inside a large piece of pipe, using bearings on each end to secure the shaft.” Sickler ground the input shaft down to fit a 1 3/4-in. socket and ground the output shaft in the shape of a 1-in. arbor. That setup allows him to use any size socket on the device. A metal handle welded to the casing holds the multiplier against the wheel and keeps it from turning.
“The nuts I needed to remove from the 115Z payloader were 1 1/2 in. in dia.,” Sickler says.
“I tried the multiplier on one of those using a 5-ft. cheater bar on the handle. With that setup I twisted off the output shaft at the socket. I had no idea I was applying that much pressure, but when I did the calculations, I found out the ratio was 2.66 to 1. I was applying more than 2 1/2 times my normal strength.” Sickler repaired the output shaft, then tried turning the same nut again with an 8-ft. cheater bar. This time it came loose.
“It was still a tough pull, but I put all my weight into it and it broke loose,” says Sickler.
“With success on that first one I was able to use my homemade multiplier to remove the 31 lug nuts on each wheel.” Sickler says removing a wheel on the 100,000-lb. payloader is a far cry from changing a tire on a truck or even a farm tractor.
“Each wheel weighs 5,000 lbs or more, so it’s a 3-person job. We use a W14 payloader to lift and move the wheels. Without the torque multiplier we wouldn’t be doing any of this and I’d be paying someone a lot of money to fix the brakes.” Sickler built his multiplier, which weighs about 60 lbs, from spare parts in just a few hours. He says the device probably saved him a couple thousand dollars the first time he used it. Contact: FARM SHOW Followup, Eugene Sickler, 10309 23rd St. S.W., Manning, N. Dak. 58642 (ph 701 225-0395).
Welding cast iron is easy with Magna 777 rod. Starting at $130/lb., the electrodes aren’t cheap but they do what other electrodes can’t. They provide perfect machinable welds on nearly all types of cast iron without preheating. The welds have a higher tensile strength than most types of cast iron so they won’t crack. It even works on oily and dirty cast iron.
“A customer welded one edge of a steel engine valve to a dirty old cast iron water pump,” relates Jimmy Morris, Brecko Corporation, the U.S. distributor for Magna welding rods.
“We repeatedly hit the valve stem with a sledge hammer and even dropped it from a 2-story building. The valve stem bent, but we couldn’t break the weld.” The rod is popular for repairing any type of cast iron that is not easily replaceable. Morris points to one customer who manufactures racing car engines and uses the 777 rod to repair cylinder heads. It easily handles the extremely high rpm’s and compression.
“The 777 also can be used as a transition rod between cast iron and steel,” says Morris.
“If there is a large gap, the welder can build up a layer of the more expensive 777 and then weld lower cost steel rod on top of it.” The 777 comes in three sizes, 3/32-in., 1/8-in., and 5/32-in. It can be used with either AC or DC machines and doesn’t require high amperage.
“The 3/32 and 1/8-in. rods especially work with any cracker box AC welder, even the smallest,” says Morris.
“The 3/32 requires only 40 to 85 amps, and the 1/8 requires 60 to 100 amps. Even the 5/32-in. rod requires only 90 to 140 amps.” Magna makes other welding rods that are equally unique. Magna 303 steel rods will weld any steel to any steel with tensile strength as great as 128,000 psi. If work hardened, tensile strength can reach 180,000 psi. Magna 307 rod can be used in wet (non-flammable) environments. It can be used to weld pipes with fluid still in them. Morris says the contact rod is easy to work with in any situation, as the operator doesn’t need to maintain an arc distance.
“It is so easy to work with that I could go to any elementary school and in 5 min. any student in the school could be trained to work with it,” says Morris.
“It is almost like caulking a seam. If you need to weld in a difficult to reach spot, you can even bend the rod to a 90-degree angle without the flex breaking.” Magna 51 is even easier to work with and can be used to attach nearly any type of metal. The low heat rod can be worked like solder with a blowtorch or less.
“We once set a piece of aluminum and one of copper at 90 degrees to each other on a cookie sheet with a length of Magna 51 at the seam,” says Morris.
“We put it in an oven set at 400°F and shut off the heat when it melted. As it cooled, it hardened, attaching the 2 pieces." Morris warns that welds with Magna 51 rod have only 16,000-psi tensile strength. It also doesn't flow easily or suck into a joint. Even the flux (required for anything other than aluminum) looks and flows like honey. "It isn't designed to have much structural integrity, but it works very well where that isn't needed," says Morris. Brecko sells nearly all Magna electrodes out of open stock. They are available by the piece or the pound. A standard $15 shipping charge is added to orders whether for a single rod or 10 lbs. Morris explains that Magna welding rod and supplies is a subsidiary of Illinois Tool Works. The special-use welding rods have been around for years; however, marketing has largely been word of mouth, with all sales direct from the distributor. "Call for prices and to discuss the job," says Morris." We can help you pick the rod that is best for your needs. If we don't have the answer, we can access Magna corporate engineers." Contact: FARM SHOW Followup, Brecko Corp., 4409 Crawford Dr., Abilene, Texas 79602 (ph 325 698-0462 or 800 720-2887; [email protected]; www.breckocorp.com); in Canada: Eldon Welding Systems, 41 Scotia St., Winnipeg, Manitoba Canada R2W 3W6 (ph 204 586-8336; [email protected]).
Nathan Fleischer needed a piston sleeve puller for the 1941 Allis Chalmers C he was restoring in his Berkeley, Calif. backyard. The sleeves were a mess. He had torn the block apart, but he knew he couldn’t just beat them out with a hammer.
“I only needed to pull them high enough above the block to knock them loose,” says Fleischer.
“I decided to make a sleeve puller using the threaded bolt and jaw from a coil spring compressor.” Fleischer needed a top bridge that would span the cylinder with enough space above the block to pull the sleeve into view. He also needed a push block that fit the bore of the cylinder.
“I could have used some steel tubing, but all I had was some 2-in. channel iron with 3/8-in. sides,” says Fleischer.
“It wasn’t strong enough by itself, so I welded two 5-in. pieces together for the top bridge and two 3 3/8-in. pieces to match the bore.” Fleischer welded 2 short pieces of the channel iron at either end of the top bridge to act as spacers to either side of the cylinder. They would let the sleeves raise just enough to be knocked loose. After drilling holes in the bridge and the push block, he slipped the bolt through the bridge and the cylinder. He slipped on the push block. After reversing the compressor jaws, he threaded them on as a lock nut. With a few turns of the bolt head, the sleeve came into view.
“The reversed jaws hit the engine block after 3/4 in. of travel,” admits Fleischer.
“As it was, that was just far enough. The great thing is that the bolt and jaws can still be used if I need a coil spring compressor.” Fleischer is continuing to work on the model C. He admits there aren’t too many tractors in his urban California neighborhood. He isn’t sure what he will do with it when it’s finished. This past Halloween, he pushed it into the front yard and set a hay bale by it.
“The trick-or-treaters thought it was neat,” he says.
“I expect most of them had never seen a real tractor before.” Contact: FARM SHOW Followup, Nathan Fleischer, 2506 California St., Berkeley, Calif. 94703 ([email protected]).
“I came up with this design when a farrier asked me to carry his anvil without having to lift it into his truck,” says welder/fabricator Keith Davis of Cody, Wyo. He designed and built a foldable hitch that fits a pickup’s receiver hitch. The anvil is secured between angle iron brackets bolted to 2-in. sq. tubing. Davis beefed up the hitch with steel welded to a jack to stabilize the joint next to the rear passenger side. Another jack is attached to the front when the hitch is straightened out for use. When finished, the farrier removes the pin, raises the jacks and folds the unit against the pickup and secures it in place with the pin through the receiver hitch.
“The farrier said that other designs echo, but this is quiet. It relies on the jacks instead of the truck frame to stabilize it,” Davis says. Another benefit is that the design is universal and fits on any truck without a custom bracket. At about hip high, the anvil is at a good working height, and Davis notes the hitch unit could be adapted for other uses for construction workers, for example. He adds that he also designed a hitch for hanging deer or elk for skinning, and is always interested in coming up with designs to meet customers’ challenges. Contact: FARM SHOW Followup, Red-Line Repair Services, Keith Davis, 1737 Bleistein Ave., Cody, Wyo. 82414 (ph 307 578-7910; www.wyomingredlinerepair.com).
When Larry Nelson found out that replacing the hydraulic pump on his New Holland skid steer loader would cost $1,800, he decided to fix it. The splines on the pump’s driveshaft and on the flywheel were stripped.
“It was the first of 3 in-line pumps,” explains Nelson.
“The backs of the first and second pumps have splines with a coupler to the next pump. They drive the wheels. The third pump drives the lift cylinders.” With the first pump out of commission, so was the skid steer. Nelson decided to redo the splined shaft. He ground the end of the shaft down so the sides are flat and measure to 1/2 in. by 3/8 in. He then drilled out the flywheel and welded in pieces of hardened steel from other shafts to make a rectangular hole to match the shaft end.
“I tried drilling out the flywheel hole,” says Nelson.
“The steel was too hard. I had to heat the temper out first. I would have needed a grinder to get through the hardness.” Once he had the hole drilled out and added the new pieces, he remounted the flywheel and slipped the shaft into place.
“It works fine,” says Nelson.
“I have used it almost every day for more than 6 months.” Contact: FARM SHOW Followup, Larry A. Nelson, 26213 Potomac St. N.E., Stacy, Minn. 55079 (ph 763 444-4883).
Norm Dufresne does a lot of wood working so he doesn’t like to spend a lot of time changing router bits and adjusting the depth. That’s why he put together a portable router table with 4 routers set up with different bits at the right depth for the most common cuts he makes. He mounted 4 routers to plywood with 1 1/4-in. holes that line up with holes drilled in the 3/16-in. steel plate work area.
“I use steel because I have a dust pickup that attaches with magnets to whatever router bit I’m using,” Dufresne says.
He can change bits and adjust heights with the routers in place and can move the unit wherever he needs it. There is plenty of room between the routers for him to maneuver long pieces of wood. Dufresne says he doesn’t have a pattern to sell, but he will give more detailed information to anyone interested in making a router table. Contact: FARM SHOW Followup, Norm Dufresne, 2021 3rd St. South, Cranbrook, B.C., Canada V1C 1G1 (ph 250 426-4934; [email protected]).
One of William Tamblyn’s favorite woodworking tools is a microwave oven. Because it heats things from the inside out, the oven works great for drying wood without any cracks after he’s turned it on the lathe.
“I like working with wet wood because it’s easier to turn,” explains the Ontario FARM SHOW reader.
“When I first started turning rolling pins, people complained that they cracked.” He decided to try the microwave and hasn’t had any complaints since about the rolling pins, candlesticks and cutting boards he makes out of walnut.
“I put them in the microwave for a couple of minutes, then open the door to let out the steam,” Tamblyn says. He repeats the process three or four times until the wood starts to feel hot. When dry, Tamblyn coats the wood with vegetable oil. He’s also microwaving apple wood. The only problem, he says, is that the wood has to be small enough to fit in the microwave. Contact: FARM SHOW Followup, William Tamblyn, 4822 Rd. 18, Newtonville, Ont., Canada L0A 1J0 (ph 905 786-2074; [email protected]).