Practical ideas from FARM SHOW MagazineSubscribe · Free issue · Send us your shop tip
Subscribe to FARM SHOW
Issues / Vol. 44, No. 3 (2020)

Vol. 44, No. 3 (2020)

Money-Saving Repairs & Maintenance Shortcuts · Printed section pp. 32–35

31 selected entries · Complete text of selected entries

This issue’s section includes reader tips and feature-length shop stories. Held items and editorial notices are not reproduced.

Archive text: prices, coupons, availability and contact details reflect the original publication, not current offers. Reader methods are not universal instructions; follow manufacturer guidance and proper safety practices.

Reader shop tips

From the archive · Full text
Reader shop tip

Kevin Wideman

Kevin Wideman, Russellville, Mo.

“I don’t have a shop, so I built this outdoor workbench. I use my loader tractor’s forks to move the bench around. The photo shows how I can use the bench to haul my generator out to a field to work on equipment. The bench is fitted with a pair of electrical outlets to operate shop tools, as well as a bolt-on vise. The frame is off an old broken bench that I bought cheap at an auction.”

From the archive · Full text
Reader shop tip

Lee Vangsness

Lee Vangsness, Decorah, Iowa

“I had an auger that got stuck while it was full of corn. To solve the problem, I welded a pto shaft to an adapter that I attached to a rear wheel on my tractor. I jacked the tractor wheel up off the ground, then shifted the transmission into reverse gear to engage the pto shaft, which I had connected to the auger.”

From the archive · Full text
Reader shop tip

Justin Kelzer

Justin Kelzer, Randall, Minn.

“After I bought a used Morgan vise, I made a swivel base for it that bolts onto my work bench. The swivel base allows me to rotate the vise up to 180 degrees in any direction, but most of the time I just position the vise perpendicular to the work bench. When I’m done using the vise I rotate it 90 degrees so it’s out of the way.

“The vise came with three mounting holes at the bottom. I cut a round base plate from 5/8-in. thick steel, and a triangular swivel plate from 7/8-in. thick steel. I drilled four holes in the base plate - three near the plate edges and one in the center that serves as a pivot. I cut the heads off three 3/4-in. bolts, inserted them in the outside holes, and welded them in from the top side of the base plate. Then I drilled 4 holes in the swivel plate and tapped left and right holes for 5/8-in. bolts. The back hole has a bolt welded in from the bottom to hold the vise down to the swivel plate.

“I also welded a 1-in. bolt from the top side into the center of the pivot plate. The 1-in. bolt has just a washer and lock nut on it, which allows the swivel plate to rotate on the base plate. The 5/8 and 3/4-in. bolts have washers, lock washers, and nuts.

“I use a pair of 3/8-in. horizontal slide rods with nuts welded onto both ends to tighten the vise down. The entire setup looks slick and works great.”

From the archive · Full text
Reader shop tip

Ted Lacy

Ted Lacy, Worley, Idaho

“The best $16 I ever spent was for 2 extra transmitters for the Liftmaster opener on the big roll-up door on my shop. I put one on my utility tractor and the other one in my pickup. Sure beats getting on and off the tractor to open and close the door.”

From the archive · Full text
Reader shop tip

Kathy Wilcox

Kathy Wilcox, Warren, Penn.

“One of the leading causes of house fires is lint in dryers. You should clean out the lint after every use. One of the best ways I’ve found to get all of the lint out is to use a wet finger. Really works well.”

From the archive · Full text
Reader shop tip

Gregory Herling

Gregory Herling, Roseau, Minn.

“When changing oil, I like to add an ounce of clean oil once most of the old oil has drained out. It helps to get all the old oil out. I often use a different weight oil than will be going into the engine.”

From the archive · Full text
Reader shop tip

Ray Haselby

Ray Haselby, Marshfield, Wis.

“The Accu-Mix container to mix oil and gas for 2-cycle engines makes it easy to measure ratios in one container. You can mix a little or a lot. The caps have gaskets so they don’t leak even when puffed up in sunlight.”

From the archive · Full text
Reader shop tip

Gerald Ripps

Gerald Ripps, San Antonio, Texas

“I’ve had trouble with Curt wire harness connectors. I had loss of continuity on 2 different 6-way sockets. Internally, the wire end screw connector disconnects from the plug end. I wasted a lot of time checking for power, thinking that a wire was not making good connection. Irritating.”

From the archive · Full text
Reader shop tip

Steve Faber

Steve Faber, Tiffin, Ohio

“I had a hitch that was slightly loose in the receiver tube, as they usually are. Besides the annoying rattle, the utility trailer swayed slightly but continuously. I sorted through my scrap metal until I found just the right thickness to take up the clearance. I cut and bent it to fit, with a small flange on top that keeps it from going in too far when installing. The pin goes through a hole in it to hold it in place. No more sway or rattle.”

From the archive · Full text
Reader shop tip 1 of 2

Gary Swensen

Individual tip 1 of 2 from this reader’s published contribution.
Gary Swensen, Yankton, S.Dak.

“I bought some heavy-duty reusable zip ties from Menards. I use them to connect box-end wrenches together. Keeps them all together. To use one of the wrenches, just push the button and release the zip tie.

From the archive · Full text
Reader shop tip 2 of 2

Gary Swensen

Individual tip 2 of 2 from this reader’s published contribution.
Gary Swensen, Yankton, S.Dak.

“I bought a small 900-watt 2-cycle $99 generator with one outlet from Harbor Freight. It’s handy to carry around to run a battery charger, small air compressor, and lights when out in the field. I used to keep it in the back of my truck but it’s hard to start in cold weather. I tried carrying it in the cab but the gas smell was hard to take. I finally hit on the idea of putting it in a small Rubbermaid container with a lid. Problem solved.”

From the archive · Full text
Reader shop tip

Mike Bell

Mike Bell, Colstrip, Mont.

“I got a kick out of the report in your last issue from a reader who almost injured himself melting wax onto a stuck bolt. I wanted to point out that the best way to take advantage of the fact that wax will penetrate microscopic openings when parts are heated, is to use a torch to heat the nut or bolt to just beyond what you’re willing to touch, then press a small birthday candle against it, melting a small amount of wax into the threads. Come back 20 min. later and try to loosen the part. If it doesn’t come loose, heat it again and hit it with a spritz of PB Blaster or WD40 and try loosening again before the part cools. This will usually work. I’ve also used this idea to loosen rust and corrosion between wheels and hubs.”

From the archive · Full text
Reader shop tip

Cal Miner

Cal Miner, Willmar, Minn.

“Older fuel lines are a larger diameter than newer push-lock type hose. To use newer hose on an older engine, the old clamps won’t work. I made my own using an eyebolt. Just cut off the screw part, slide the clamp in place, and squeeze the ‘eye’ together to clamp it tight. Works great and holds well.”

From the archive · Full text
Reader shop tip

Anton Mickelsen

Anton Mickelsen, Stanley, N.Dak.

“Clutch fingers on your tractor wearing out too fast? Here’s the fix. Buy a new set. When the ones on the tractor wear down a bit, take them to a good welding shop – along with the new set, to use as a pattern - and have the used ones built up to original specs with tempered brass. Once you install those, your problems will be over.”

From the archive · Full text
Reader shop tip

Jim & Ruth Hopkins

Jim & Ruth Hopkins, Nampa, Idaho

“We use our portable engine hoist to lift the front end of our garden tractor to easily remove blades for sharpening and to clean under the deck. Also makes it easier to lube. Helps us keep the mower in good running condition.”

From the archive · Full text
Reader shop tip

Glenn A. Halley

Glenn A. Halley, Andover, N.H.

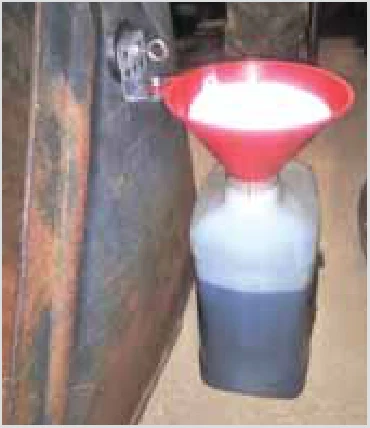
Glen got tired of funnels falling over when pouring in used oil into jugs or handling other fluids.

“I attached a round magnet to an angle bracket with an eyebolt. Then I attached the funnel to the leg of the bracket with a small bolt and washer. I can stick the magnet to any metal surface, holding the funnel tightly in place over the jug. Very handy.”

From the archive · Full text
Reader shop tip

Gary Haak

Gary Haak, The Ultimate Mat (www. theultimatemat.com; ph 605 360-8474)

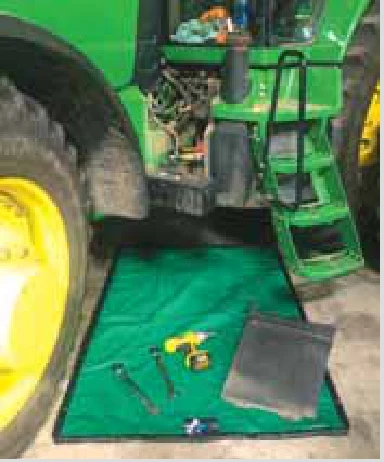
Gary figured there had to be something better than using a big piece of cardboard every time he needed to work under a combine or truck. His answer? The Ultimate Mat, a 4 by 6-ft. heavy-duty fabric mat that’s not only handy for repair work but can also be placed under an unloading auger, in the garage under leaky equipment, or whatever else you can think of. It rolls up for easy storage and is tough enough to stand up to hard use. Sells for $165. Smaller sizes and custom sizes available.”

From the archive · Full text
Reader shop tip

Ned Ransom

Ned Ransom, Henry, Ill.

“When working with wheel weights, I’ve got a trick that makes it much easier to mount them to a tractor wheel when working by myself. I’ve got two 3/4-in. dia. smooth steel rods about 18 in. long. I put these in the hub holes first and then put the weights on the rods and push them up against the wheel. I put in a bolt and tighten it, then remove one rod and insert another bolt, and so on. This works with 1-piece weights or 2-piece ‘half’ weights.”

From the archive · Full text
Reader shop tip

David Walker

David Walker, Arlington, Texas

“The muffler screen plugged up on my Echo weed eater and I had trouble cleaning it out. So I used a small drill bit to drill some holes and let the exhaust flow freely again.”

From the archive · Full text
Reader shop tip

Carman Fedele

Carman Fedele, Tidioute, Penn. (ph 814 730-9377)

Carman has a simple solution for cutting perfect circles in metal. His patented torch guide makes it easy. Just clamp down a shoulder plate, insert the torch, and rotate.

“My prototype can cut out any size circle up to 4 in. in diameter. You can use it to cut out any size washer needed or cut a perfect hole in a piece of metal.” At 83 years of age, Fedele isn’t planning to manufacture the device. He hopes to license or sell the rights as he did with an earlier patented device (Vol. 39, No. 1). His torch guide is a ring within a ring. The outside ring is attached to a 1/8-in. thick steel plate for easy clamping in place. The inside ring has an adjustable inner arm with a cup for the torch head and 4 handle arms that extend outward.

“Adjust the cup arm to the desired diameter, insert the torch and rotate the ring with the handles,” says Fedele. While his prototype has a maximum cut of 4 in., Fedele notes it could easily be scaled up. The larger the ring diameter, the more versatility it offers.

“You could have one that cut out a 24-in. circle and yet still use it to cut out a 2-in. circle just by adjusting the cup arm,” notes Fedele.

Shop feature stories

From the archive · Full text
Feature story

Drill Chuck Makes Great File Handle

Featured source: Edward Fett

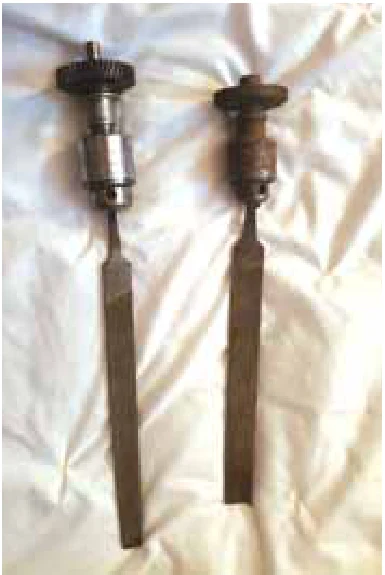
If you’ve got an old drill no longer in use, the chuck can be used to make a solid handle for a file, suggests Edward Fett, Lennox, S. Dak. He removes the chuck and spur gear from old electric drills, then inserts the file tang into the chuck and uses a chuck key to tighten all 3 holes so the chucks are tightened evenly.

“I’ve used this idea for years with no problems. The chuck provides a bigger handle to hold onto and, if tightened properly, it won’t come off,” says Fett.

“It’s important to tighten all 3 holes in the chuck to get the tang tightened as evenly as possible, and check for tightness periodically.” He says one time he tried welding a short pipe onto the tang, but it didn’t work out.

“Files are made from very hard steel, and the heat from the welder caused the tang to break off.” He likes using chucks from electric drills.

“Most electric drills come with either a 3/8 or 1/4-in. chuck. I prefer the 3/8-in. chuck because it’s built larger and therefore can be moved farther up on the tang. The chucks on cordless drills are designed to be hand tightened, and therefore you can’t get them as tight as you can with a chuck key.” Contact: FARM SHOW Followup, Edward Fett, 46656 275th St., Lennox, S. Dak. 57039 (ph 605 647-2399; [email protected]).

From the archive · Full text
Feature story

Welding Table Pivots On Bowling Ball

Featured source: James Muhs

James Muhs built a tilting welding table by using a bowling ball for a pivot point. He got the idea from an adjustable mirror he saw in a jewelry store.

“Once I got the idea of an adjustable welding table, using a bowling ball for the pivot point just came to me,” says Muhs.

“I just let the pressure off a little, tilt or rotate the table to suit, and then lock it down again.” Steel for most of the table came from his scrap pile. Two old brake rotors used to sandwich the bowling ball came from a salvage yard, while the old ball was given to him by an area bowling center. Muhs built the table from the ground up, starting with feet made from 36-in. long, 2 by 3-in., 5/16-in. steel tubing. A 26-in. long crossbeam of 4 by 4-in., 1/4-in. thick steel tubing is centered on the feet. The crossbeam serves as the base for the jack that locks the table in position. It also is the base for the four, 27-in. long legs made from 3/16-in. thick, 1 1/2-in. square tubing. The legs are spaced to allow the brake rotor ring that supports the bowling ball free movement. A piece of pipe welded to the bottom of the rotor, fits over the head of the hydraulic jack’s ram. The top rotor is bolted to pieces of angle iron that are in turn welded to the tops of the 4 legs. When the jack ram is extended, the lower rotor pushes the bowling ball against the upper rotor, locking the table into place.

“Initially, I drilled a hole through the thumb hole and halfway into the bowling ball for a 3/4-in. shaft butt welded to the table,” recalls Muhs.

“It didn’t work as planned. When I took pressure off the ball to turn the table, the shaft would spin in the ball.” Muhs solved the problem by drilling a 1/4-in. hole beside the original shaft hole. He then welded a 1/4-in. rod to the shaft.

“I put J-B Weld around the shaft and put it back together with the ball,” says Muhs.

“Now it works like I wanted.” Muhs added 2 foot pedal controls to make operating the table even easier. A 3 by 4-in. pedal is welded to the end of a length of pipe that fits into the jack’s piston assembly socket. The purchased spring retains the pipe in the raised position. He also welded 2 rectangular plates to a round steel plate. The plate is welded to the end of a 1/2-in. pipe slotted to fit over the release screw on the jack. An L-shaped steel strap supports the pipe.

“I simply step down on one of the steel plates to loosen or tighten the release screw,” says Muhs.

“To tighten the table in place, I step on the spring-retained foot pedal to jack the ball up.” Contact: FARM SHOW Followup, James Muhs, 4962 N. Oak Tree Rd., Claremont, Ill. 62421 ([email protected]).

From the archive · Full text
Feature story

Cart-Mounted Propane Heater

Featured source: Dennis Hartmann

“I bought a portable tank top propane heater equipped with a 20-lb. bottle and built a hand cart to move it around. It’s nice and quiet and can be easily moved anywhere in the shop I need heat,” says Dennis Hartmann, Double D Machine Shop, Yankton, S. Dak. The double burner heater came mounted on a metal stand that bolted to the propane bottle. Hartmann used 1-in. square tubing to build the cart which has an angled handle at the top and a steel ring at the bottom to fit around the bottle. The heater’s stand slips inside a U-shaped bracket and is held in place by a spring-loaded pin. Contact: FARM SHOW Followup, Double D Machine Shop, 2701 E. Hwy. 50, Yankton, S. Dak. 57078 (ph 605 660-8066; [email protected]).

From the archive · Full text
Feature story

Where To Buy New Or Used Tracks, Parts

Featured source: Bryan Haugen, Larry Roed, and Nick Harker

Bryan Haugen, Larry Roed, and Nick Harker have more than 30 years experience supplying tracks, replacement parts for track systems, and track conversion systems direct to farmers. Their business is called TrackFarmer.com.

“Our main concern is meeting our customers’ needs, and we do that face-to-face, on the phone or talking with many of them at farm shows throughout the U.S. and Canada,” Haugen says.

“In some cases we even help with installation if needed.”

Over the past 10 years the trio has built a strong following and now gains many new customers through referrals as well as from the internet. In early 2020 they sold 4 sets of tracks to a farmer in Peru who’d found their website. Haugen says farmers from around the country, even in other countries, use their site as a central point of contact for excellent products and knowledgeable service.

“In addition to selling new tracks for tractors, combines or grain carts, we often take used ones in trade,” says Haugen.

“Some of those we can refurbish, and those can be sold as a set or even individually if a farmer needs just one because of damage. We also sell undercarriage wheel parts, midrollers and track systems for planters, fertilizer carts and grain carts.

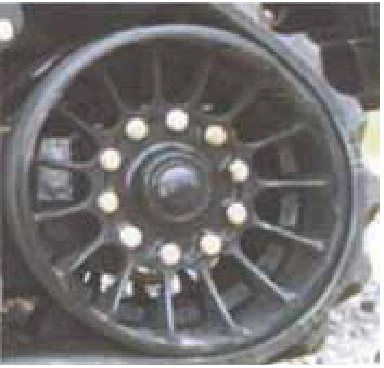
“A few years ago we began improving the products that we sell the most of. Track tractors create a lot of heat if they’re on narrow tracks and wheels, especially when they travel long distances with added weight. We improved the compounds of polyurethane used to make the midrollers and manufactured a spacer which nearly ends heat-related failures.

“We’ve also received hundreds of calls over the years from farmers who can’t get their seals to hold oil on certain 4 track articulating machines. We took the highest quality Hi-Speed oil bath truck seal and engineered a way to use them on these tractors with great success. We found that if we can help solve a frustrating and costly problem, then we earn the business of people who appreciate results,” Haugen says.

In the past few years they’ve seen a growing interest in tracks for larger planters.

“I’ve seen different studies that show tracks can make a 60 to 70 percent improvement on emergence in the wheel track compared to dual wheels that pinch and compact seed rows,” says Haugen.

“Tracks reduce compaction and seedlings emerge and grow better.”

Contact: Bryan Haugen (ph 320 533-0190), Nick Harker (ph 574 870-4437) or Larry Roed (ph 218 431-1454 www.trackfarmer.com).

From the archive · Full text
Feature story

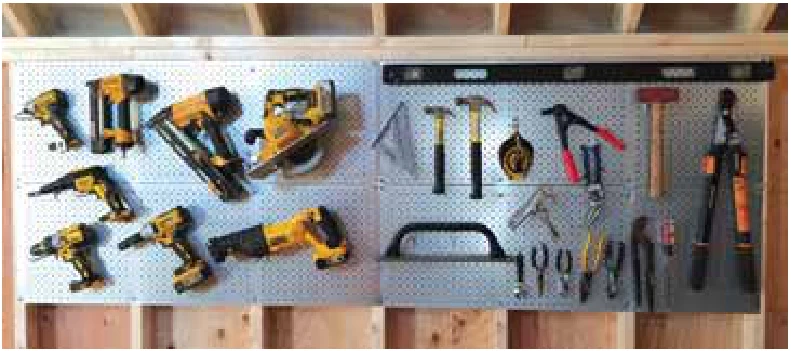
Metal Pegboards Built To Hold Heavier Tools

Featured source: Tag Saunders

“Our new heavy-duty galvanized steel pegboards are designed for unfinished shed and garage walls. They work great to hold everything from cordless power tools to small pliers,” says Tag Saunders, Raytec Mfg., Ephrata, Penn. The steel pegboards measure 48 in. long by 16 in. high, and are notched on back to fit over studs 16 in. on center. As a result, multiple boards fit perfectly both horizontally and vertically. The pegboards come with dual hole sizes in alternating rows to fit 1/4-in. and 1/8-in. pegboard accessories. They have pre-drilled holes on all 4 sides, making them easy to mount.

The pegboards are sold in sets of 4, for less than $100.

“These pegboards are much sturdier than flakeboard or pressed wood pegboards, so you can hang heavier tools and other objects on them,” says Saunders.

“We sell a lot to shed builders, who install them above their built-in workbenches.” The company also sells an alternative pegboard design for finished and semi-finished walls. Those pegboards come with a lip on the edges that provides about 1/4 in. of space behind the board to make room for pegs. Raytec does not sell directly to customers, but says they can direct farmers to a local store or distributor that sells their products. Contact: FARM SHOW Followup, Raytec Mfg., 544 Gristmill Road, Ephrata, Penn. 17522 (ph 877 800-2500; [email protected]; www.raytecllc.com).

From the archive · Full text
Feature story

Rolling Work Bench Lifted By Foot-Operated Jack

Featured source: Rick Young

“I made it to fit into the tight space my small shop office, but I can also quickly move it around wherever I want. Also, I can quickly lengthen it by 3 ft. to work on longer objects,” says Rick Young, Darlington, S.C., about his portable work bench. The work bench rides on 4 caster wheels and measures 5 ft. long by 30 in. wide by 3 ft. high. A foot-operated bottle jack is used to lower the wheels onto the floor for rolling the bench around.

“We use this table all the time. It’s really handy to repair equipment on our poultry farm,” says Young, who notes that employees Robert Dedrick and William Warden did most of the construction work. He started with a table equipped with an attached vise that he bought at an auction for $100.

“The table came with a 1/2-in. thick steel top supported by four 3-in. dia. pipes and weighed 300 lbs., making it too heavy to easily move around,” says Young. He slid short lengths of 3 1/2-in. dia. pipe onto each leg to form sleeves, and then connected each pipe to an X-shaped frame made from 5-in. channel iron.

“A major consideration was to shim each sleeve so that it was centered around the pipe before welding the X-frame in place. Afterward, the shims were removed. This idea allowed the X-frame to slide freely up or down the legs without binding,” says Young. A small steel plate was placed on the X-frame as a platform to support the bottle jack. A 2-ft. long pipe with a small plate on one end was welded under the center of the table, allowing the bottle jack to lift the table from the X-frame on the floor. Swivel caster wheels were then attached to brackets at the ends of the X-frame. A homemade foot pedal made from 1/2-in. dia. pipe is used to operate the jack. Young welded a short pipe into the jack’s socket, and it attaches to a 2-ft. long pipe that has a metal foot peg at the bottom.

“Pushing down on the foot peg raises the jack up against the center-mounted pipe, which pushes the caster wheels down and raises the table. Releasing the jack lowers the table back down to the floor,” says Young. One end of the table can be lengthened by pulling a pair of telescoping steel tubes out from under the table.

“The extension leaves that end of the table open so we can weld from underneath,” says Young. Both sides of the table have an angle iron lip to keep tools from falling off, he adds. Contact: FARM SHOW Followup, Horsebranch Farm, 205 W. Horsebranch Trail, Darlington, S.C. 29540 (ph 843 621-5777; [email protected]).

From the archive · Full text
Feature story

Farmer-Designed Full Feature Plasma Table

Featured source: Paul Devloo

Paul Devloo couldn’t justify the cost of a commercial grade CNC plasma cutting table so he built one himself. He first used the 48-in. sq. table to build access steps to attach to Lexion combines’ grain tanks. The idea was to make it easier for operators to clean the windows or unplug the impeller. Once he had sold the $450 steps to Lexion owners all across Canada, he decided to start building his plasma tables for sale.

“At that point my table had worked flawlessly for close to 3 years, and I knew it would be a great addition to anyone’s farm shop,” recalls Devloo, a mechanical engineer and farmer.

“I knew the technology had improved and I could source better parts to build an even lower cost table. I figured out ways to get it simple enough for anyone to run.” One of the downsides to plasma welders is their toxic outgassing, which also dirties up the shop. So Devloo has included a water tray in his newest tables.

“I didn’t have that on my original table, and after building so many steps, my shop was a mess,” says Devloo.

“The water tray underneath the cutting table absorbs all the toxins and contaminants. It leaves the job and the shop clean, even reducing the slag on cuts.” Software is key to any CNC table.

“I was able to find open-source CAD and low-cost CAN software,” says Devloo.

“Using open-source software instead of proprietary means you have an entire community of users and developers to ask if a problem comes up. You don’t have to wait until business hours to get support. It’s available 24/7.” He is proud of how user-friendly the software is.

“All the parameters are in the software,” says Devloo.

“You just pick out the type of plasma welder and type and thickness of the metal. You just tell it where you want to start the cut and where to end it.” Devloo uses his table with his Hypertherm XP 45 plasma welder. However, he says it can be used with virtually any plasma torch. Not wanting to lose the versatility of a handheld plasma jet, he designed the table with a quick disconnect.

“So many tables require a $1,000 dedicated torch,” says Devloo.

“Mine uses a handheld torch that can be quickly released for use freehand.” The table comes with everything needed except for a torch and a laptop. The total price is $4,000 Canadian. The table has the needed software, computer stand, water tray, V-slot rails, 3 Nema 23 stepper motors, controller and power supply, wiring, steel table legs and frame.

“I sold my first new plasma table to a farmer in the area, and he was cutting with it right away,” says Devloo.

“He’s having great luck with no training.” Devloo suggests that other farmers may find an opportunity to do what he did with his grain hopper steps.

“You can conjure up what you need,” he says.

“If others need it too, you have repeatability to make more and sell them. I don’t encourage people to buy it for that reason, but simply to make the parts you need when you need them.” Contact: FARM SHOW Followup, Paul Devloo, Box 101, Swan Lake, Manitoba Canada R0G 2S0 (ph 204 526-5395; [email protected]; devkoplasmatables.com).

From the archive · Full text
Feature story

Jack-Operated Roller Stand

Featured source: Dennis Hartmann

“I salvaged the hydraulic jack off an old dump trailer to build this infinitely adjustable roller stand. I use it with my lathe and mill, and sometimes my welding table when handling long material. It works great to move objects along as I work on them,” says Dennis Hartmann, Double D Machine Shop, Yankton, S. Dak. The hydraulic jack came equipped with a 22-in. long, 1 1/8-in. dia. cylinder and an internal pump. It came off a wrecked trailer. The top end of the cylinder was damaged so Hartmann cut it off. He made a metal sleeve to slip over the top of the jack’s 22-in. long, 1 1/8-in. dia. cylinder, and welded a V-shaped bracket onto the sleeve that slips over the cylinder. He then bolted a pair of multi directional, load-bearing transfer balls onto both sides of the bracket. The bottom of the cylinder clamps onto a 4-wheeled base made from a 10-in. dia., 1/4-in. thick steel plate.

A pair of levers attached to the top of the cylinder housing are used to operate the pump.

“It works great to keep long material steady, and the transfer balls make it easy to rotate the material,” says Hartmann.

“I use one lever to operate the pump and the other handle to open a valve that lets me retract the cylinder,” says Hartmann.

“At first I attached a foot-operated lever to the pump and ran a long rod from it up to the top of the cylinder. However, I found the foot-operated lever was difficult to operate so I switched to the hand-operated design,” he says, noting that hydraulic jacks similar to the one he used are available at a reasonable price from Harbor Freight. Contact: FARM SHOW Followup, Double D Machine Shop, 2701 E. Hwy. 50, Yankton, S. Dak. 57078 (ph 605 660-8066; [email protected]).

From the archive · Full text
Feature story

UV-Activated Repair Patch

Featured source: Hastings Equity Mfg.

This reinforced self-adhesive repair patch is activated by ultraviolet light so it works fast. The DurapatchUV patch is made from reinforced polyester and comes with a white backing tape over the adhesive. You just clean the damaged area with glass cleaner and select a patch large enough to cover the damage. Then firmly apply the patch over the damaged area and press out any air bubbles. According to the company, the patch cures in just 5 min. of direct sunlight or 50 min. in cloudy weather. The material can be applied to any surface except polypropylene and quickly cures hard as a rock. There’s no shrinkage or expansion during application or after curing. Durapatch is available in 4 sizes – 2 by 3-in., 3 by 6-in., 6 by 9-in., and 9 by 12 in. - although you can cut any size patch you need from a larger one. The patch can be drilled, tapped, sanded or painted in less than 1 hr. after it’s applied. It’s resistant to chemicals, solvents and oils. Prices range from $8.99 to $34.99 depending on patch size. Contact: FARM SHOW Followup, Hastings Equity Mfg., 1900 Summit Ave., Hastings, Neb. 68901 (ph 402 462-2189; [email protected]; www.durapatchUV.com).

From the archive · Full text
Feature story

Grinder Converted To Right Angle Drill

Featured source: Mike Toppen

Mike Toppen, Allegan, Mich., tapped the back side of an old Jacobs drill press chuck with 5/8-11 thread, allowing him to also use his DeWalt cordless angle grinder as a right angle drill.

“By using the angle grinder with the threaded chuck and a drill bit, I can use one piece of equipment to do 2 different jobs,” says Toppen, who works for a mobile repair business.

“I carry my tools with me in my pickup and the fewer tools I have to carry around, the better,” he says. Toppen found the 1/2-in. drill press chuck in a box of junk that he bought cheap at a sale. He used a lathe to bore a tapered hole into the back of the chuck, and then tapped it with a 5/8-11 thread - the same thread found on the cordless angle grinder. Toppen says he’s surprised that DeWalt doesn’t make an adaptor chuck designed to convert an angle grinder drill to a right angle drill.

“Maybe it’s because angle grinders don’t operate with as much torque and the rpm’s are higher, limiting you to bits with higher cutting speeds.

“For example, a DeWalt 4 1/2-in. angle grinder like mine is designed to operate at 5,700 rpm’s, whereas large drill bits are designed to operate at a lower cutting speed with more torque. But my right angle drill conversion is still a handy tool for just drilling a hole through something in close quarters where a drill won’t fit.” Contact: FARM SHOW Followup, Mike Toppen, 3889 1/2 127th Ave., Allegan, Mich. 49010 (ph 269 673-5597; [email protected]).