Practical ideas from FARM SHOW MagazineSubscribe · Free issue · Send us your shop tip
Subscribe to FARM SHOW
Issues / Vol. 48, No. 5 (2024)

Vol. 48, No. 5 (2024)

Money-Saving Repairs & Maintenance Shortcuts · Printed section pp. 32–35

35 selected entries · Complete text of selected entries

This issue’s section includes reader tips and feature-length shop stories. Held items and editorial notices are not reproduced.

Archive text: prices, coupons, availability and contact details reflect the original publication, not current offers. Reader methods are not universal instructions; follow manufacturer guidance and proper safety practices.

Reader shop tips

From the archive · Full text
Reader shop tip

Steve Faber

Steve Faber, Tiffin, Ohio

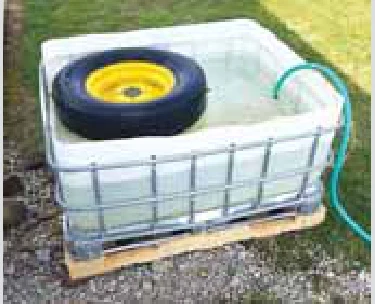
“I had some implement tires with really slow leaks that I couldn’t find, even with brushing soapy water on them. I remembered seeing tanks for finding leaks at tire dealers, so I cut off a chemical tote to make a ‘tank’ for submerging tires. I found the leaks when I saw a stream of tiny bubbles.”

From the archive · Full text
Reader shop tip

Lenus Yeo

Lenus Yeo, Clinton, Ontario

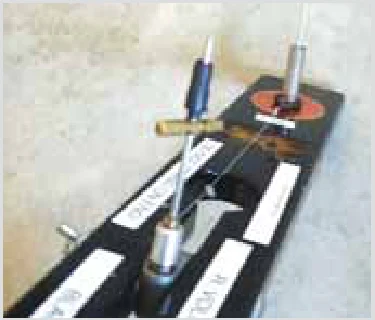
“I had to replace bearings on the header drive shaft on my swather. The bolts holding the flangette went through one side of a partition. The other side was only accessible by crawling under the swather to the other side. My cats were watching me but didn’t offer to help, so I came up with the idea of supporting the bolts and flangettes with magnets in place and was able to put the lock washers and nuts on the other side.”

From the archive · Full text
Reader shop tip

Donald Albright

Donald Albright, Perkins, Okla.

“I discovered that batteries, like those in flashlights, clocks, and appliances, have a film on them which causes them to give out quickly. When they go bad, use a nail file on the finest side to ‘shine’ both ends. Now you have good batteries. You can repeat this process at least twice. This about doubles the life of the battery.”

From the archive · Full text
Reader shop tip

Jim Seaton

Jim Seaton, Delavan, Ill.

“When starting 1-cyl. engines by keeping the valves from sticking open, make sure the piston is all the way at top dead center.”

From the archive · Full text
Reader shop tip

Greg Boyd

Greg Boyd, Berkley, Mass.

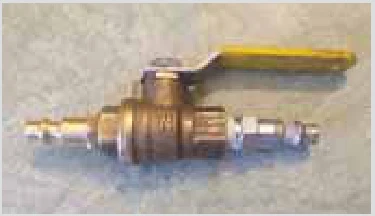
“My air supply tank has a Schrader (or bicycle tire) fitting, and it was constantly jamming or taking forever to fill the portable tank. I remembered an article from FARM SHOW where somebody had a quicker way to go from supply to portable, but I couldn’t find it. After a trip to Harbor Freight and doing a lot of thinking during the middle of the night, I came up with an idea for an air tank assembly to make this work better.

“I used industrial interchange couplings rather than automotive couplings. I took a ball valve, threaded female at both ends, threaded in two quick disconnect fittings, and plugged that assembly in to turn the valve off. I then plugged it into the supply tank, took an air hose and connected it to the other end of the assembly, and plugged it into the destination tank (a portable tank in this case). I opened the valve, and the air went to the destination tank.”

From the archive · Full text
Reader shop tip

Steve R. Gustafson

Steve R. Gustafson, Cambridge, Ill.

“I bought a 12-gal. hydraulic reservoir and mounted it on legs with wheels. I plumbed a ball valve into the bottom port and had a welder friend cut a threaded 2-in. barrel bung into the top for filling purposes. The tank came with a 3/4-in. threaded breather, which is too slow for filling. I use this as a clean source of diesel fuel for cleaning parts.”

From the archive · Full text
Reader shop tip 1 of 5

Doug Comden

Individual tip 1 of 5 from this reader’s published contribution.
Doug Comden, Brethren, Mich.

“I’ve found 150:1 or 200:1 2-stroke oil mix in 4-stroke small engines helps with the ethanol issue.

From the archive · Full text
Reader shop tip 2 of 5

Doug Comden

Individual tip 2 of 5 from this reader’s published contribution.
Doug Comden, Brethren, Mich.

“Don’t keep sharp machine tools (mills, taps, etc.) in piles in drawers. Keep them in original containers or split pieces of rubber hose.

From the archive · Full text
Reader shop tip 4 of 5

Doug Comden

Individual tip 4 of 5 from this reader’s published contribution.
Doug Comden, Brethren, Mich.

“50/50 mix used motor oil/used mineral spirits (from parts washer) for cutting oil on general machine work (drilling, milling, lathe).

From the archive · Full text
Reader shop tip

Steve Crouse

Steve Crouse, Patten, Maine

“Welding two identical profiles together, such as two pieces of 2-in. round pipe, is easy to line up if you have a 2 by 2 or 3 by 3 angle iron welded V down on the edge of your welding table attached at the upper level so that the angle iron is flush with the tabletop.”

From the archive · Full text
Reader shop tip

Gary Meeks

Gary Meeks, Verona, Va.

“Do you have a bathroom sink light with a pull chain that keeps wearing out? Replace the switch with a toggle switch—they’re very durable.”

From the archive · Full text
Reader shop tip 1 of 3

John Rochester

Individual tip 1 of 3 from this reader’s published contribution.
John Rochester, Charlotte, N.C.

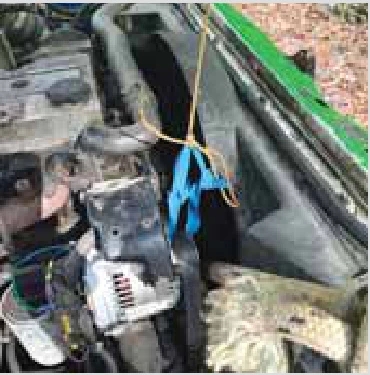
“This may seem strange, but it works. When working with a spring-loaded drive belt that keeps falling off its pulleys, use a strip of rubber and a boot lace to hang the belt under tension while removing/installing the alternator. This rubber strip is left over from having my blood pressure taken.

From the archive · Full text
Reader shop tip 2 of 3

John Rochester

Individual tip 2 of 3 from this reader’s published contribution.
John Rochester, Charlotte, N.C.

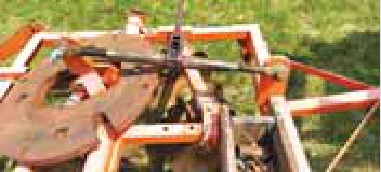
“When reassembling something that uses screws, pinning one corner helps hold parts in line until I get a few screws back in. This is a reused concrete form from a septic tank lid.

From the archive · Full text
Reader shop tip 3 of 3

John Rochester

Individual tip 3 of 3 from this reader’s published contribution.
John Rochester, Charlotte, N.C.

“I couldn’t find a good electrical ground for my test light. So, I ran a long wire from the negative post on the battery back into the truck cab and clipped the test light to that. There are many uses on all kinds of equipment.”

From the archive · Full text
Reader shop tip 1 of 2

Norm Sieting

Individual tip 1 of 2 from this reader’s published contribution.
Norm Sieting, Rapid City, Mich.

“I have a CountyLine wood splitter from Tractor Supply. It works fine except for two problems.

“I’ve had trouble with small pieces getting caught between the splitting wedge and the frame. I welded two small blocks of steel to either side of the splitting edge, taking care of the problem.

From the archive · Full text
Reader shop tip 2 of 2

Norm Sieting

Individual tip 2 of 2 from this reader’s published contribution.
Norm Sieting, Rapid City, Mich.

“Another frustration was with the splitter stroke. The wedge always stopped about 2 in. short of the back plate. Any stringy wood hung together, requiring me to pull it apart or run it through again, but reversed.

“I found a simple fix by adding 2 in. of steel to the backplate. Now, the wedge stops just short. Problem fixed.”

From the archive · Full text
Reader shop tip

David Simpler

David Simpler, Elkton, Md.

“When the electric linear actuator that raised and lowered my disk stopped working, I found an alternative.

“I cut 4 in. out of the center of a top link, cut off a tubular ratchet binder at its largest diameter, and welded them together. I installed it in place of the actuator.

“It’s a Rube Goldberg device, but it works. I have a nice ratcheting device for raising and lowering the disk.”

From the archive · Full text
Reader shop tip

Dale Mayol

Dale Mayol, Belleville, Mich.

“I haven’t purchased chainsaw bar oil in 49 years. At the suggestion of a friend, I’ve been using engine drain oil for bar oil in my chainsaws. I filter it through a paint filter to make sure it’s super clean. Over the years, I’ve done and still do a considerable amount of cutting. I’ve had no issues with the oiling of the bar or chain.”

From the archive · Full text
Reader shop tip

Larry Norris

Larry Norris, Hollister, Calif.

“Safety is no accident. Before starting any task, take a few moments to lay out a plan. Then, before starting, ask yourself, ‘What can go wrong?’ Just a few moments can save injuries and maybe your life.”

Shop feature stories

From the archive · Full text
Feature story

Rebuilt Shop Features Crane And Service Pit

Featured source: Dan Gray, Dewberry, Alberta, Canada

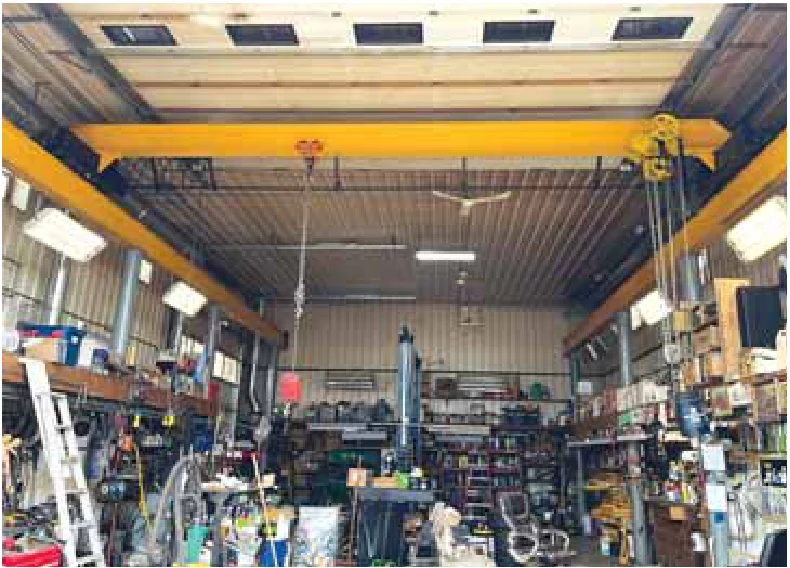
Having your farm shop burn down is never good, but Dan Gray made the best of a bad thing. He spent nearly 20 years thinking about what he would have done differently with the shop he built in 1995. When he rebuilt in 2014, he made some changes. The biggest one was to install a traveling crane, extra storage space and an oil change pit.

“When the shop burned, we were able to salvage the floor, so I built on the same 32 by 48-ft. footprint,” says Gray.

“I made it taller, 18 ft. high so that I could have a 14-ft. doorway for combines. It allowed me to install a 16-ft. high traveling crane with a rolling hoist that the doors could clear.”

Knowing he couldn’t justify a commercial crane the size he wanted, Gray drew up his own design. He had 6 by 12-in. I-beams fabricated for the 48-ft. support rails and the 24-ft. long traveling crane at DW Fab, a local metalworking shop. The shop also welded axle hubs from 3-ton truck rear ends to make the rolling supports for the crane.

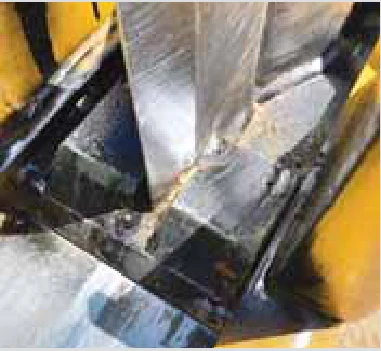
“I was aware the hubs could walk off the rails, so we welded cast iron flat pulleys from an old combine to the hubs to keep them in place,” says Gray.

Gray credits his cousin Alan with helping make the entire project more cost-effective. Alan had 40-ft. lengths of 8-in. diameter oil pipeline pipe. He made them available to Gray for use as support posts at no charge. Gray made flanges for bolting the pipes to the I-beams and the floor.

“I hand drilled all the holes on the flanges, the pipes and the I-beam while everything was on the ground and outside the shop,” says Gray.

“When I set it up inside, everything lined up just like it was supposed to.”

Gray needed a drive mechanism for the trolleys that supported the traveling crane. He used a worm gear gearbox off a manure spreader to keep the two trolleys at either side walking in place. He coupled the gearbox to a high-torque DeWalt mud mixer drill. A roller chain runs from a sprocket on the drill to a sprocket on the gearbox. A self-retracting extension cord reel provides power.

The gearbox drives a cast iron pulley against the edge of the upper flange on the 48-ft. rail. A shaft connects the drive pulley to the crane I-beam.

“The crane I-beam rolls easily, but I wanted the extra torque on the drive,” says Gray.

“I bought an extra handle for the drill and wired it for remote control of forward and reverse, as well as the variable speed. I can walk along with the crane as it rolls up and down the shop.”

Gray mounted trolley hoists to the crane to complete that phase of the shop. A much easier project involved extra storage.

“In my old shop, I had a mezzanine on one end,” says Gray.

“With the pipes in place, I could build 8-ft. high, 4-ft. wide mezzanines along each side. When I built them, I couldn’t imagine they would ever fill up, but they have.”

One mezzanine runs the entire 48-ft. length. The other is only 27 ft. long due to the addition of a door at the far end of the shop for the oil change bay and pit. The pit is 4 ft. wide, 14 ft. long and 6 ft. deep. Gray lined it with LEDs and has a platform he can slide over the pit when not in use. The pit has a sump in the bottom so it can be washed down and the water pumped out.

“I put an oil field platform on the bottom for rails and set a rolling hoist on it with a 12-volt hydraulic pump with a lift cylinder,” says Gray.

“I can roll it back and forth to position it to lift a car or truck end when draining oil.”

Oil is drained into a 100-lb. propane cylinder. It can be pressurized to push the oil through a line to a 1,000-gal. propane tank outside the shop.

Gray has few regrets about his shop, and the crane is definitely not one of them.

“It isn’t as sweet as a commercial hoist, but it serves my purposes,” he says. I couldn’t afford a commercial unit. This was a cost-effective alternative. I probably have only $5,000 invested in it.”

Contact: FARM SHOW Followup, Dan Gray, RR 1, Dewberry, Alberta, Canada T0B 1G0 (ph 780-871-2948).

From the archive · Full text
Feature story

Shop-Built Skid Steer Quick-Attach Converter

Featured source: Charles Bowen, Valley City, N.D.

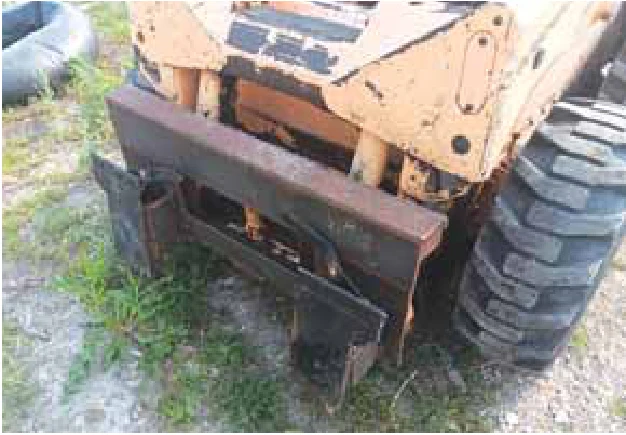
Charles Bowen’s 30-year-old Mustang skid steer still works great, but it won’t work with the broad array of Bobcat-style attachments. Mustang quick attachments have a single locking pin in the center instead of a locking lever on each side.

“I have a welding business and do a lot of repair work on skid steer buckets and other attachments,” says Bowen.

“I needed to be able to move them around the shop, and I couldn’t do it with the Mustang. So, I decided to build a quick-attach conversion plate.” Bowen designed the conversion plate to slip over the top of the Mustang’s quick-attach unit. He started with a 43-in. length of channel iron and welded tabs at either end and 1/2-in. flat plates to its front edge. A 4-in. wide crossbar between the plates provides a mount for the Mustang’s locking pin. It slips through a 2-in. hole in a square plate welded to the rear edge of the crossbar.

“I sized the flat plates for the Bobcat-style mounts, welding them in place to match standard Bobcat-style attachments,” says Bowen.

“The crossbar and mount for the Mustang locking pin were sized and located to match the Mustang plate. You could build a conversion plate for any brand this way.” Bowen admits the conversion plate is a “beast to lift on and off, but I can do it.” He prefers overbuilt to what he sees on many attachments brought in for repair. At one time, he built buckets for Bobcat and has a lot of respect for how they’re made.

“People with heavy-duty skid steers will go to a discount place and buy buckets at half the price of a Bobcat bucket and then have to get them repaired,” says Bowen.

“I have one customer who’s brought his bucket in three times to have the mounts rebuilt.” Bowen isn’t worried he’ll have to rebuild his quick-attach conversion plate. Contact: FARM SHOW Followup, Charles Bowen, 3175 117th Ave. SE, Valley City, N.D. 58072 (ph 701-840-7678; [email protected]).

From the archive · Full text
Feature story

Handy Mobile Workshop Goes Where The Work Is

Featured source: Matt Willard

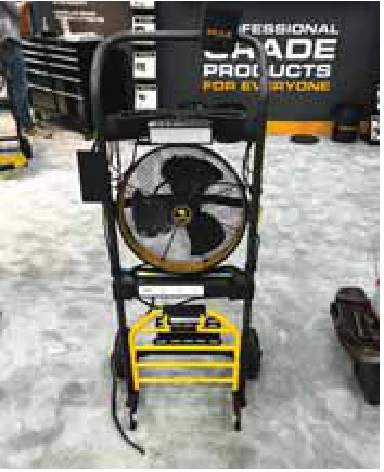
The Mule Mobile Workshop is a professional-grade work cart with a fan, light, and power solution. It transforms any space into a workshop.

“We designed it as a portable fan and light solution on wheels, with a loading foot that will hold up to 300 lbs.,” explains VP of Marketing Matt Willard.

“Whether you’re transporting project materials, feed or shavings, or other equipment/tools, we see it as a super convenient solution for bringing the things you often need wherever they’re needed.” The Mule team was inspired when inconvenienced by the time it took to gather supplies when working together. They put the team’s designers and engineers together to develop an all-in-one solution. Contractors and tradespeople understood the appeal immediately.

“It’s ideal for active DIYers, farm and agriculture enthusiasts, maintenance and ag enthusiasts, and light commercial users,” says Willard. The 5-in-1 Mobile Workshop has an integrated 3-speed fan, LED light, power strip with a 10-ft. cord, tool caddy and 300-lb. capacity hand truck. The adjustable 14-in., 3-speed, high-velocity fan with 2,500 CFM keeps you cool and reduces workspace dust and fumes. The integrated power strip has three 110V outlets and two USB 2.0 ports, while the adjustable LED light provides 1,100 lumens. Portability is ensured with 8-in. solid rubber tires that eliminate the risk of flats.

“There aren’t really any competitors for the Mobile Workshop,” Willard explains.

“You might say that you can use a two-wheel dolly/hand truck and load a portable fan and a work light and power cords/power strip and strap it all together. Our solution has the fan, light, and power strip integrated.” The Workshop retails for $299. Shipping is free for all orders over $99. It’s backed by a 3-year limited warranty. Contact: FARM SHOW Followup, Mule (ph 877-289-8692; www.muleproducts.com).

From the archive · Full text
Feature story

Easy-To-Use Lock-on Grease Coupler

Featured source: Richard Labelle, Napierville, Quebec, Canada

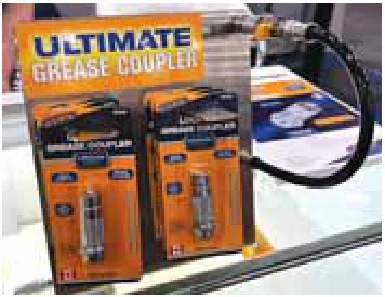
Univer-Co developed a clean and handy tool to consistently apply grease where it’s needed most.

When bearing, roller or bushing grease nipples become worn and rounded, it can be frustrating to secure a grease gun coupler in the correct position to move grease through a zerk fitting.

The UC2121 lock-on coupler from Univer-Co uses a revolutionary mechanism with a four-jaw lock to hold the coupler in place to a maximum pressure of 10,000 psi. It’s made of premium steel and comes with a 1/8-in. NPS thread, fitting all makes and models of grease guns.

“They seal completely and never pass any messy grease around the edges,” says Richard Labelle, Univer-Co Sales Manager.

“It has an integrated release valve to remove it from the nipple. Just pull back on the locking flange, and it lets go.”

The unique coupler also comes standard with an inline pressure release valve in case the downstream pressure becomes too high and threatens to break the zerk or coupler. Simply open the valve and allow some grease to escape, lowering the pressure and releasing the coupler.

A hands-free reach-and-release hook is also available for hard-to-access places and keeps fingers clear of obstructions.

The lock-on couplers are manufactured in Quebec and are available through a network of dealers across North America.

Prices range between $40 and $60 CAD ($30 to $45 USD) plus S&H.

Contact: FARM SHOW Followup, Univer-CO Inc., 713 Montee Douglass, Napierville, Quebec, Canada J0J 1L0 (ph 450-245-7152; [email protected]; www.univer-co.net).

From the archive · Full text
Feature story

Electric Pallet Fork Clamp Uses No Hydraulics

Featured source: Mike Kloster, Litchfield, Ill.

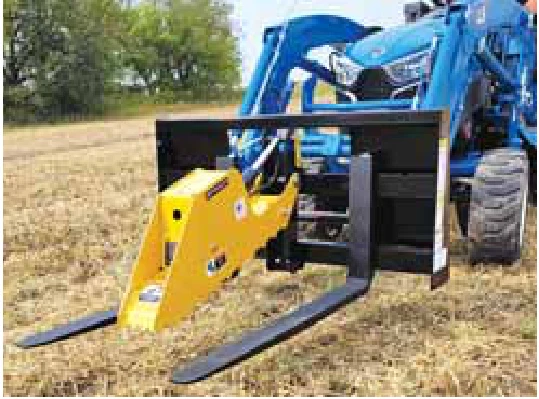
The EPFC-1 pallet fork clamp from Worksaver attaches easily and requires no auxiliary hydraulic valve. Designed for use with compact and subcompact tractors, it uses an electric actuator with an 8-in. stroke to operate the clamp.

“A lot of subcompact tractors don’t have auxiliary hydraulics,” says Mike Kloster, Worksaver.

“Our engineering staff looked at forks for those tractors and suggested making a clamp similar to one we offer for grapples on front-end loaders. Both are ideal for picking up loose brush and holding it in place.”

The EPFC-1 is designed for subcompact and compact tractors up to 48 hp. with Class 1 fork attachments. The clamp mounts at the center point between the rails. Installation consists of running a single wire to the battery and a cable and rocker switch with open and close controls to the operator.

“We’ve been offering the grapple clamp for 2 1/2 years,” says Kloster.

“The EPFC-1 just went into production in late spring. The first run is shipping now.”

The clamp is 5 1/4 in. wide, 12 1/2 in. high and 36 in. in length with an open height of 48 in. It easily locks up in open position for normal fork use. It weighs 75 lbs. and has a list price of $1,795.

Contact: FARM SHOW Followup, Worksaver, P.O. Box 100, Litchfield, Ill. 62056 (ph 217-324-5973; [email protected]; www.worksaver.com).

From the archive · Full text
Feature story

Clamps Make Soldering Easier

Featured source: Matco Tools, Stow, Ohio

Matco soldering clamps make soldering wires easier. Matco offers two models. Both feature spring-loaded, articulated claws that hold wires securely. The clamps handle wires up to 0.177 in. dia. (gauge 7).

The Wire Soldering Clamp (WSC15) costs $81.95. Its weighted base can hold two wires in place with or without its 6-in. flexible cable arm. The company describes it as being like soldering with a second set of hands.

The E-Z Solder Clamp lacks a base but includes storage for a solder coil in the hand grip. The user controls the feed of the solder with their thumb. It’s described as acting like a third hand, holding two wires and directing solder wire to their junction. It’s priced at $89.95.

Contact: FARM SHOW Followup, Matco Tools, 4403 Allen Rd., Stow, Ohio 44224 (ph toll-free 866-289-8665; [email protected]; www.matcotools.com).

From the archive · Full text
Feature story

Magnet Scratcher Bar Makes For Easy Cleanup

Featured source: Terry Jacob, Sedgwick, Kan.

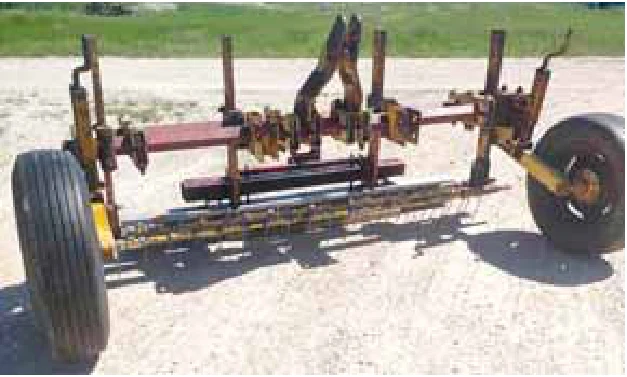
Terry Jacob stirs up surface dirt and grasses to collect metal bits with his magnetic scratcher bar. Jacob previously shared using magnetic bars to pick up scrap metal while grading roads (Vol. 39, No. 3). His latest invention adds teeth to the concept.

“I added New Holland rake teeth to a 6-ft. magnet that I mounted with a Cat. 1 3-pt. hitch,” says Jacob.

“The scratcher breaks loose any metal stuck in the ground surface, and the magnet picks them up.”

Jacob developed the tool so he could go into grassy and rocky areas and recover bits of metal. He notes that the 6-ft. length is handy for getting into tight spaces. The tool has proven useful after a storm at construction sites, in his farmyard and in his driveway.

“You never get it all in one pass, but it’s worth the effort,” says Jacob.

Jacob mounted dual gauge wheels to the 2 by 2-in. solid steel toolbar. They keep the magnetic bar at least 2 in. above the ground’s surface.

He used 3/4-in. by 3-in. cultivator shafts to mount the scratching component just ahead of the toolbar. It has two rows of rake teeth mounted to salvaged swather bars set 4 in. apart. Existing holes in the swather bars let him mount the teeth about 2 in. apart.

The magnet, with its aluminum floor, is also mounted on cultivator shafts and just behind the toolbar. When in use, the aluminum floor is tight against the magnetic bar. When loaded with metal bits, a cam and lever system separate the aluminum floor from the magnet to release collected metal.

“I can raise both the magnet and the scratching bars by adjusting the gauge wheels or raise and lower the magnet bar and the scratching bars separately,” says Jacob.

“Set screws on the shafts and secure them at the desired height.”

Contact: FARM SHOW Followup, Terry Jacob, 9317 SW 72nd, Sedgwick, Kan. 67135 (ph 316-393-7731; [email protected]).

From the archive · Full text
Feature story

He Built A Portable Workbench From A Walker

Featured source: Harlan Nonhof, Philipsburg, Kan.

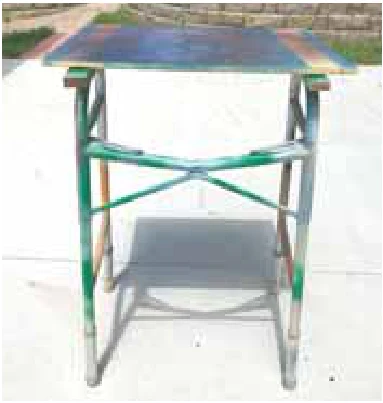
Longtime FARM SHOW reader Harlan Nonhof built a portable workbench from a repurposed walker.

“I wanted to accomplish three basic things with this project: keep my tools handy when using them, off the ground when working outside, and within reach. As I’ve turned 83, the ground seems to be a longer reach than ever.” The custom workbench worked as well as he’d hoped.

“I’ve used it for years just as pictured,” he says.

“It’s very light and portable.” The bench gives him a surface to work on and a place to lay tools instead of on the ground. Nonhof also uses it to hang small objects that need to be spray painted.

“I’ve found it’s convenient for supporting large pieces of material when I use a chop saw. The legs are adjustable.” To make the modifications, Nonhof cut off the plastic hand grips on each side of the walker to create a solid surface for bolting the boards.

“I used a 1-in. by 2-in. board bolted to the walker hand grip area,” he says.

“The top is 1/2-in. by 18-in. by 24-in. plywood. It’s not fastened, but if I need it solid, I can secure it with small bar clamps to the walker frame.” He estimates that construction took under an hour.

“I only needed to purchase the four bolts to fasten the boards to the walker and the plywood top.” He also believes that finding suitable walkers is easier than many people assume.

“I expect you can get walkers like this from county health departments or hospice by asking around,” Nonhof says.

“Maybe estate sales and auctions, too. Many people who use this style of assistance have gone to walkers with wheels and brakes.”

Nonhof has been impressed with the functionality for the price point.

“I made two of these benches for a local hospice auction that they put on the silent bid table, and they each sold for $25, which was just a little more than I had spent on the materials.” Overall, this portable workbench is proving well worth his effort.

“If you ever work away from your normal station and are without a bench, I encourage you to take the time to make one of these,” says Nonhof.

“And if you need to do a fairly large job in the yard or field, you may even want more than one.” Contact: FARM SHOW Followup, Harlan Nonhof, Philipsburg, Kan. 67661 ([email protected]).

From the archive · Full text
Feature story

Nealey Repair Kits Still Patching Tires

Featured source: Douglas Downing, Swan, Iowa

Longtime FARM SHOW readers may have discovered the Nealey Tire Repair Kit when they were first introduced in 1981 (Vol. 5, No. 1). And it’s likely they still use it today to repair tubeless tires on farm equipment, semis, motorcycles and other vehicles.

It continues to be the best DIY tire repair available, says Douglas Downing, who purchased the company with his brother, Joe, in 2022. Charles Nealey’s invention was Downing’s first product as a manufacturer’s rep 37 years ago. After working with many nationally known products, he invested in it when Nealey’s son, Matt, retired. Joe retired as a paramedic and is younger, so the company will be in business for many years, Downing says.

“We call them a permanent repair if done right. The biggest thing is that our product is embedded and vulcanizes with the tire and becomes part of the tire. We’ve had a person brag about fixing the sidewall of a tractor 25 years ago,” Downing says, noting that isn’t recommended for highway vehicles.

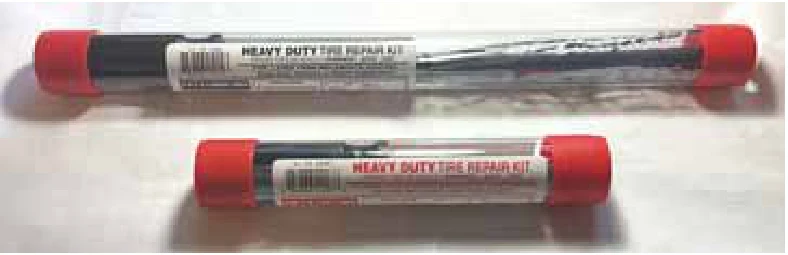
Other similar products use glue or cement and an open-eye needle tool to push the cord in the tire. U.S.-made Nealey kits have uncured butyl and silicone rubber impregnated on a cotton cord inserted with a closed-eye needle tool. For most tires, the standard 7-in. cords are inserted, twisted 1 1/2 turns and the tool is pulled back out and cut free to create a knot inside, leaving four strands in the tire’s hole. Air pressure adds to the seal, and driving on the tire melts the coated cord into the puncture. The kits cost $15 for 10 strands and the tool.

For heavy-duty pickups, semis and vehicles with 6 to 24-ply tires, there are kits with 14-in. strands and the tool (10 and 20-unit packs and tool, $19 and $25), as well as refill kits with just the cords.

Many customers are in agriculture and forestry. However, with Internet sales, vehicle owners, motorcyclists, ATV enthusiasts, garden tractor owners, and people who like fixing things are discovering the 43-year-old product.

“You can repair a tire for less than $2,” Downing points out.

Customers can still call to place their orders or order online.

Contact: FARM SHOW Followup, Kool Tools DBA Nealey Company, 175 Coolidge St., Swan, Iowa 50252 (ph 800-289-9781; [email protected]; www.nealeytirerepairkit.com).

From the archive · Full text
Feature story

Tool Simplifies Checking Tires

Featured source: Al Starry, Alexandria, Minn.

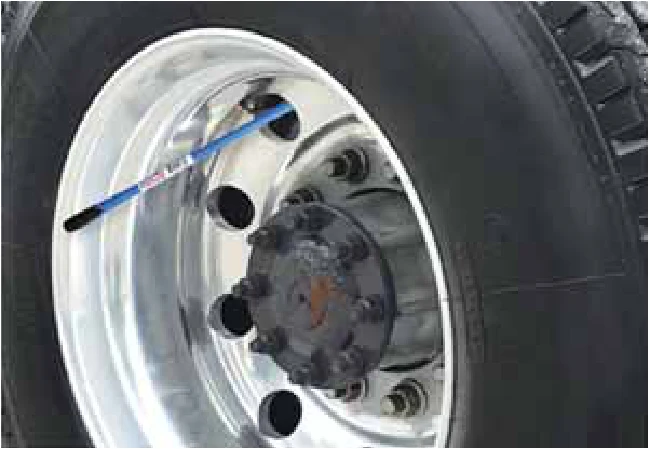
The handiest tools are ones invented by people who actually use them. That’s the case of the Valve Capper, invented by Al Starry, a trucker from Alexandria, Minn. He came up with the idea to create the foot-long device while recovering from an injury. Checking the air in his tires every week was important but tedious since he had to move the truck often to get the valve stems in the right position to reach them.

With a rubber end that firmly grips and holds the valve cap on a long shaft, he could check the air pressure in all the tires without moving the truck. Later, he designed a valve core removal tool for the other end of the Valve Capper.

“It has an insert that holds the core,” says Josh Krause, sales and customer service representative for Country Enterprises, Inc., which manufactures and sells the Valve Capper.

With its dual purpose, the $13 tool is a staple for many truck drivers, especially in the Midwest. Country Enterprises recognized it was a good tool and purchased the rights from Starry, who couldn’t keep up with making and shipping them himself.

The company redesigned it slightly, added a new patent and set up equipment to assemble the Valve Capper. It fits well with the markers for tile, hydrants, driveways, plows, fencing and other ag products that the Minnesota company manufactures and sells on its website.

The simple tool is popular with truckers and farm operations, Krause says.

Contact: FARM SHOW Followup, Country Enterprises, Inc., 410 North St., Lucan, Minn. 56255 (ph 800-349-8752; www.countryent.net).

From the archive · Full text
Feature story

Mid-Range Welding Helmet Loaded With High-End Features

Featured source: ESAB Welding & Cutting Products, Denton, Texas

By Jim Ruen, Contributing Editor

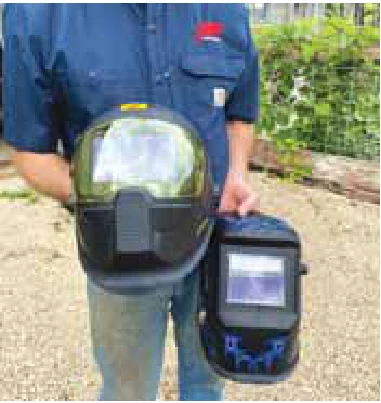
The Sentinel A60 is an auto-darkening filter (ADF) variable-shade welding helmet from ESAB. It has everything you need for most welding applications except overhead applications. Its wide shade range of 5 to 13 with a passive shade of 3 fits most welding applications.

The Sentinel doesn’t have the curved glass technology of the Speedglas G5-02 from 3M (Vol. 48, No. 3). However, Kevin Beckerdite, ESAB, suggests that curved glass comes at a cost in dollars and restrictions in use.

“The Sentinel is a more versatile helmet at a much better price point ($369 vs. $860 for the G5-02),” notes Beckerdite.

“Curved ADFs (auto-darkening filters) require using very thin glass. We’ve received feedback that they can become damaged if doing higher amperage MIG welding in close proximity.”

The Sentinel features a more traditional flat ADF. It achieves perfect 1/1/1/1 EN optical ratings, the highest possible for optical class, light diffusion, light homogeneity and angle dependence. In layperson’s terms, it delivers a clear view with even shade across the full height and width of the viewing area. The welder sees the arc and the workpiece without distortion.

Beckerdite adds that the enhanced true-color OpTCS technology reduces eye fatigue while helping identify changes and impurities in the arc.

While this writer has not worked with the Speedglas G5-02, ESAB did provide the Sentinel for a trial. It lived up to the claims of quality optics and responsive auto-darkening. There was no comparison between its 0.04 millisecond switching time and other features and the entry-level ADF welding helmet previously purchased at Harbor Freight.

The Sentinel’s Halo headgear was easily adjusted and provided good fit and balance. Beckerdite notes that it and the shell (1.4 lbs.) are designed to minimize neck fatigue while maintaining good clearance.

Switching between welding and grinding can be frustrating as sparks from the angle grinder set off ADF sensors. ESAB eliminates the frustration with a quick-access, external grind button.

The A60 is an improved version of ESAB’s earlier Sentinel helmet. It has a 40 percent larger viewing area (4.65 in. by 2.80 in.) Its 3/5 to 13 shade range is adjustable by half-value digital increments. Four hyper-acting arc detection sensors offer automatic light recognition in any work environment. A replaceable ADF battery with solar backup powers the helmet.

A dual-color LED control panel inside the helmet offers up to nine programmable ADF memory settings that can be saved for use with different welding profiles. A graphical meter displays shade sensitivity and delay settings. When desired, a shade-lock feature maintains the ADF at its selected shade until turned off. Warning lights alert the user to grind mode, ADF shade lock and low battery levels.

This user noted only two frustrations with the helmet. The first was the poor quality of the instruction manual. The icons were too small and unclear. The second involved installing the button battery. While the manual didn’t call for doing so, removing the head-gear assembly simplified access.

When these were pointed out to Beckerdite, he responded immediately, agreeing that the manual needed work, particularly on the clarity of icons. As for battery access, he admitted it’s not ideal due to the legal requirement to use a tool when installing.

“Future helmets will see something much better,” says Beckerdite.

Contact: FARM SHOW Followup, ESAB Welding & Cutting Products, 2800 Airport Rd., Denton, Texas 76207 (ph toll-free 800-372-2123; www.esab.com).