Practical ideas from FARM SHOW MagazineSubscribe · Free issue · Send us your shop tip
Subscribe to FARM SHOW
Issues / Vol. 22, No. 2 (1998)

Vol. 22, No. 2 (1998)

Money-Saving Repairs & Maintenance Shortcuts · Printed section pp. 30–32

35 selected entries · Complete text of selected entries

This issue’s section includes reader tips and feature-length shop stories. Held items and editorial notices are not reproduced.

Archive text: prices, coupons, availability and contact details reflect the original publication, not current offers. Reader methods are not universal instructions; follow manufacturer guidance and proper safety practices.

Reader shop tips

From the archive · Full text
Reader shop tip

Rod Van Overscheld

Rod Van Overscheld, Letcher, S.Dak.

“I had trouble with the belts on my 1973 Deere 6600 combine that turn the auger takes the grain into the hopper. At times it would stop turning. I solved it by using a hydraulic orbit motor. I control the speed in the cab. To run the reel on the straight head or bean head I use the same hydraulic sysstem. The oil goes first to the orbit motor on the hopper. The return line goes to the orbit motor on straight head, then back to the oil reserve. It works perfect this way. You cannot put a “T” in the hydraulichose line and send it to both motors at the same time.”

From the archive · Full text
Reader shop tip

Ken Craven

Ken Craven, Byars, Okla.

“We make skid shoes for our disc mower that last three times longer than original equipment and cost only about $1.50 per shoe versus $20 per shoe from the dealer. We cut them out of 3/16-in. thick AR plate steel. They measure 5 by 8 in. and weld to the bottom of the existing shoes.”

From the archive · Full text
Reader shop tip

Robert L. Kuhlmeier

Robert L. Kuhlmeier, Salina, Kan.

“I had a problem with the lift brackets on my Allis Chalmers 1300 field cultivator wings breaking when raising and lowering. I solved the problem with $50 worth of cable and brackets. It was a cheap way to make things right.”

From the archive · Full text
Reader shop tip

Joe Abba

Joe Abba, Acampo, Calif.

“I paint V-belt sizes on guards or other parts as close to the belt as possible. That way, when a belt goes out I know the size at a glance.”

From the archive · Full text
Reader shop tip

William G. Gladstone

William G. Gladstone, Worth, Mo.

“I have noted with interest two recent reports from Douglas McKenzie, Stony Point, Alberta, which were very critical of Ford’s 7.3 diesel engine. We operate a Ford 350 pickup with a 7.3 engine. Admittedly it may lie down and die tomorrow but it hs 104,000 miles on it. In addition there are countless hours on the engine as it idled away outside the coffee shop in cold winter weather as I sat inside swapping tales with fellow farmers.

“In addition to my pickup, there are five other 7.3 diesel Fords in our immediate neigh-borhood, one with 175,000 miles on it, and none of them have experienced any engine troubles.

“I’m certainly no expert on diesel engines but I have had a long association with diesels. I was first introduced to them at Naval Diesel Engineering School at Cornell University in Ithaca, N.Y. I was engineering officer on four different minesweepers and all of the engines on those sweepers were diesels.

“The first diesel tractor on our farm was a 960D Ford purchased in 1958. Every tractor which came on the farm after that was a diesel. We still have that first 960D as well as a TW10 Ford and a Belarus 825.

“I’m sure the Ford Motor Company would have acquired another supplier for thier diesel engines if they were as unsatis-factory as Mr. McKenzie claims them to be.”

From the archive · Full text
Reader shop tip 1 of 3

Bill Reeks

Individual tip 1 of 3 from this reader’s published contribution.
Bill Reeks, Cromwell, Kent.

“I find that zip-lock clear plastic bags work well to hold many small parts. You can put a hole in one corner of the bags and hand them up so the contents can be easily seen.

From the archive · Full text
Reader shop tip 2 of 3

Bill Reeks

Individual tip 2 of 3 from this reader’s published contribution.
Bill Reeks, Cromwell, Kent.

“Many people use plastic peanut butter jars to hold parts but some parts are too long. I solved the problem by cutting the center section out of one jar and splicing it to the center of another one, and then taping it together with duct tape. Makes a great container for welding rods, or other long parts.

From the archive · Full text
Reader shop tip 3 of 3

Bill Reeks

Individual tip 3 of 3 from this reader’s published contribution.
Bill Reeks, Cromwell, Kent.

“Another handy idea I had was cutting teeth into the sides and end of a square point shovel and then grinding them down sharp. Works great to remove weeds and grass. You can swing it from side to side or push it straight out in front of you.”

From the archive · Full text
Reader shop tip

Donald Struckhoff

Donald Struckhoff, Augusta, Mo.

“The ‘cut-offs’ in Deere 71 planter units (part #Y2598B) were replaced several years ago by another part number that is narrower by about 1/32 of an inch. In corn, sunflowers and milo, there is enough space for the narrow pointed ends of the seed to jam the cut-offs in the up position. It takes about an hour of welding, measuring and grinding on each of the new cut-offs to get them to work like the old style, but it’s worth it to make the planter work right.”

From the archive · Full text
Reader shop tip

Bobby Ogletree

Bobby Ogletree, Griffin, Ga.

“I’ve found a way to change the opener discs on a Deere 750 drill without having to remove the depth wheel arm. The problem with removing the arm is that it increases the chances of introducing dirt into the hub and bearings, causing unnecessary wear and problems with bearings.

“The trick is to grind away just enough at the center of the disc to allow the disc to slip over the depth arm. I used a grinding rock to do the job. It doesn’t affect operation of the disc since it bolts into place.

“To take the old discs off, I use a torch to trim a small area from the old disc right on the drill. You have to be careful not to over-heat the grease seals.”

From the archive · Full text
Reader shop tip

Gerald Oloske

Gerald Oloske, Vimy, Alberta

“I put together custom lighting packages for farm equipment. They consist of 50-watt Halogen floods that mount on any farm implement you can think of.

“Pictured are a lighting system for a Flexi Coil air seeder tank and a 54-ft. wide cultivator. The first light mounts vertically on the tank to provide at least 12 ft. of illumination into the tank and down to the ground. The other lights mount horizontally on the outer wings of the cultivator so you can see the outermost rows.

“Cost of each of these systems was about $400 (Canadian), including lights, mounting brackets, wiring connectors, tie wraps, etc. The lights simply wire into accessory outlets on newer tractors; on older tractors, some modifications to the electric system may be necessary.

“Prices vary according to implement, application, etc.”

Contact: FARM SHOW Followup, Cross Country Electric, 10415 120 Ave., Vimy, Alberta, Canada T0G 2J0 (ph 403 479-4868).

From the archive · Full text
Reader shop tip

Robert H. Eure

Robert H. Eure, Hertford, N.C.

Robert has used this “poor man’s” tank filler for years. It doesn’t leak, it’s easy to handle and it saves him having to crawl up on spray tanks when filling them with chemicals, he says.

“I cut a hole in the bottom of a heavy-duty 5-gal. plastic bucket and fitted it with a male hose coupling, sealing it with gaskets. I use the device to inject chemicals into the water line without having to climb up on the tank. You simply connect it up to the water supply line and dump in the chemicals. Works great and the only cost was for the hose coupling.”

From the archive · Full text
Reader shop tip

Kendal Robinson

Kendal Robinson, Portland, Ore.

“Because FARM SHOW previously featured the Premier Power Welder that mounts under-neath the hood of a pickup (Vol. 19, No. 4), we thought your readers might be interested in our new UniPower multifunction alternator welding system that was invented in South Africa.

“A notable feature with all UniPower units is that the voltage is regulated so that irre-spective of the engine rpm’s, the voltage stays constant at 110 volts, safeguarding your appliances and tools.

“This simple system can be used to run both ‘wire feed’ and TIG units. Up to 1/4-in. rods can be used on Turbo models. All units come complete with wiring, welding and charging cables and the necessary welding and battery clamps.

“The system can also be used to provide DC or AC power to run lights, heaters, power tools or appliances like TV’s, microwaves, etc. Different models are available. No other system on the market can be used for so many jobs.

“Prices range from $1,300 up to $2,000.” Contact: FARM SHOW Followup, UniPower USA, 7061 SW Benham Ct., Portland, Ore. 97225 (ph 888 213-4531 or 503 297-3224; fax 292-7459; E-mail [email protected]).

From the archive · Full text
Reader shop tip

Bernard Sterk

Bernard Sterk, Lost Nation, Iowa

Ber-nard uses lock washers to repair broken links on small chains.

“I’ve got an 80-lb. black Labrador dog I keep chained up in the yard on a 30-ft. chain. He’s really strong so I often have to repair the chain. I tightly clamp a lock washer in my shop vise and spread out the ends with a wrench. Then I drop each end of the broken chain over the opened ends of the lock washer. Next, I simply close the washer. Lock washers are made of good spring steel so they’re strong. I’ve been doing this for years and have never had one come apart. Of course, you can’t repair a log chain this way because you won’t find a lock washer that’s big enough. But, for smaller chains, this is the ticket.”

From the archive · Full text
Reader shop tip

Charles Inman

Charles Inman, Seymour, Iowa

Charles’ neighbor had problems harvesting corn with his Case-IH 1660 combine equipped with 6-row (30-in.) head last fall. In muddy conditions, corn had a tendency to lean in toward the combine and the slightly splayed out design of the header’s outer snouts ran down the row.

“I took an old bent up snout out of a scrap pile and cut off the strap and bolt hole,” Charles says.

“I welded it onto the strap and bolt hole on the header snout, which pulled it inward 2 in., enough to solve the problem. My neighbor said it works great.”

From the archive · Full text
Reader shop tip 1 of 3

Glenn E. Congdon, Jr.

Individual tip 1 of 3 from this reader’s published contribution.
Glenn E. Congdon, Jr., Weaver, Iowa

Glenn keeps his shop in order and his tractor clean with these ideas he came up with in the past couple of years.

“I built a ‘Ferris wheel bolt bin’ to hold bolts and spare parts by cutting a sheet of 4 by 8 plywood in half and rounding off the corners so each section is a circle. I ran a 1 1/ 2-in. dia. pipe through the center of each circle section and mounted 12 rows of five elevator grain cups between the ends. I mounted each row of cups on a 5/8-in. dia. rod that runs through the center of each cup and attaches to each end wheel, permitting them to rotate with the Ferris wheel, which rotates on a stand I built out of scrap iron. The unit stands about 6 ft. high and everything’s at eye-level so I can instantly identify the bolts or spare part, such as sickle sections or bearings. I bought brand new grain cups at $2.75 apiece for my bin so my cost was about $250. But you could just as easily use used cups or ones that an elevator’s throwing away to keep the cost down.

From the archive · Full text
Reader shop tip 2 of 3

Glenn E. Congdon, Jr.

Individual tip 2 of 3 from this reader’s published contribution.
Glenn E. Congdon, Jr., Weaver, Iowa

“I also built what I call my ‘page turner’ tool rack. It keeps all my tools within arm’s reach, instead of having to dig through a tool chest drawer to find them.

“I used five sheets of 16 in. wide by 48 in. long peg board to make the ‘pages’. They hinge to a column made out of 1 1/2-in. dia. pipe and screwed into the center of a heavy-duty 24-in. dia. cast iron wheel I picked up at a junk yard. I fitted the pages with regular peg board hooks I hang my tools on.

“The unit stands 5 to 6 ft. high in the work area of my shop and saves a lot of time, compared to a tool chest.

From the archive · Full text
Reader shop tip 3 of 3

Glenn E. Congdon, Jr.

Individual tip 3 of 3 from this reader’s published contribution.
Glenn E. Congdon, Jr., Weaver, Iowa

“We also do a lot of driving on gravel roads in our farming operation and the mud after a rain is really a pain to clean off our tractor’s windshield. Fenders would solve the problem, but I priced a set for our Deere 30 series tractor and they cost almost $500.

“So I built my own fenders for about $100. I used two pieces of 16-ga. sheet steel, 11 in.

wide by 25 in. long. Strap iron welds on each end and a 1/4-in. rod welds underneath to form mounting brackets. To install, remove the bolt in the wheel spindle and bolt on the fenders by simply replacing the bolt. They do a great job of keeping the windshield mud-free.”

From the archive · Full text
Reader shop tip

Rod Rhoades

Rod Rhoades, North Star, Alberta

Rod discovered a simple, no strain method of driving nails with an air hammer fitted with a straight punch attachment.

“You can drive nails all day and never get tired,” Rod says.

“You simply take a piece of tubing a little larger in dia. than the 7/8-in. dia. straight punch attachment and a little longer than the nails you’re driving. Slip this ‘guide’ over the nail and hammer away. The punch will never slip off the nail head, as it would without the guide, and nails go in ef-fortlessly. It even works to drive bent box nails or 12-in. spikes. If I am working on a large project, I start a bunch of nails, then come back and run them all in with the air hammer. I use a Snap-On model 50 air hammer.”

From the archive · Full text
Reader shop tip 1 of 2

Don Williams

Individual tip 1 of 2 from this reader’s published contribution.
Don Williams, Clarinda, Iowa

“I’ve found that by filling an oil filter full of oil before installing it on engines brings oil pressure up faster because it doesn’t have to travel through the filter before reaching the bearings. This reduces wear on bearings, I believe.

“This works on all type of engines, but is best suited for Chevys since their oil filters often install vertically so less oil runs out than if the filter installs semi-horizontally.

From the archive · Full text
Reader shop tip 2 of 2

Don Williams

Individual tip 2 of 2 from this reader’s published contribution.
Don Williams, Clarinda, Iowa

“I also built a tire bead-seating tool similar to some commercial models available, but for a fraction of the cost.

“I used a 5-gal. air tank I bought on sale for $19. I drilled a hole in the side of the tank and welded in a 3-in. length of 1 in. dia. pipe. I fitted it with a plastic ball valve and ran a 6 in. length of 1 in. dia. pipe out from it. I fitted it with a 6 in. length of exhaust pipe I’d hammered flat on one end. I made a stop to hold the piece of tail pipe against the rim as close to the tire as possible.

“To use you simply inflate the tank with about 70 lbs. of air, insert the flattened tail pipe between the tire and rim and open the ball valve. The tire will expand and finish seating the bead as the air rushes in.

“Cost only about $50 to build, compared with some commercial bead seaters that run up to $300.

“One caution: It’s essential to do a good welding job or the pipe or pipes could fly off and injure someone when this tool is used.”

From the archive · Full text
Reader shop tip

Ken Albrecht

Ken Albrecht, Prelate, Sask.

Ken says Deere combine pickups are the best ever built, but the stamped tin flanges on the end of the castor wheels cause problems.

“When the flanges break, as they do frequently, the corner of the pickup runs in the ground. That puts stress on the swath hold-down tines, eventually breaking the mounts and sending the tines through the table auger.

“I replaced the flanges with rigid steel mounts that swivel but keep the wheels and the frame square. This eliminates bearing stress and prevents the drapers from burning through the side panels.

“I built a few extra sets of the mounts, which install in minutes, that I’d sell for $130 (Canadian) per pair, complete with bolts and hardware.”

Contact: FARM SHOW Followup, Ken Albrecht, Box 136, Prelate, Sask., Canada S0N 2B0 (ph 306 673-2345).

From the archive · Full text
Reader shop tip

Henry A. Kubischta

Henry A. Kubischta, Dickinson, N. Dak.

The fuel tank on Henry’s late 1970’s 170 Allis-Chalmers tractor didn’t come equipped with a screen and that caused frequent headaches.

“The float from my sending unit deteriorated into pieces that were too little to get in the tank fitting but too large to go through the shutoff valve,” he says.

“Since there were no screens available, I built my own to save the time and trouble involved in taking the tank off the tractor, blowing it out and putting it back on.

“I took out the plug in the bottom of the tank and drilled and tapped a hole for a 1/4-in. dia. piece of brass pipe. I drilled about 50 tiny holes in three rows in the pipe, then capped one end and drilled about five holes in the cap, too. The pipe, which installs above the shut-off valve, extends up 2 in. inside the fuel tank and acts as a screen you can remove and clean by itself.

“Took about a half hour’s work and cost $1.00.”

From the archive · Full text
Reader shop tip

Avre Papst

Avre Papst, Fullerton, Neb.

“There are a lot of ways and a lot of products available to treat corrosion on battery posts, but there’s nothing else like the product I sell. When used as directed, one application will prevent corrosion on posts for the life of your battery - guaranteed.

“‘Goo-It’ seals and protects alloy surfaces, neutralizes the effect of acid and enhances electrical contact. To use, you remove the battery clamps, clean the posts, clamps and terminals, and dry thoroughly. Apply moderately to battery posts and clamps, preferably with a paint brush with bristles cut down to about 1/3 in. long. Or you can apply ‘Goo-It’ with your fingers - it’s that safe. The only time a re-application will ever be needed is if clamps are removed from terminals.

“Comes in 2-oz. tool box container enough to service 8 batteries or 1-lb. economy size enough to service 100 batteries. Sells for $9.95 and $39.95, respectively, plus $3.50 S&H.”

Contact: FARM SHOW Followup, “Goo-It”, R.R. 1, Box 35, Fullerton, Neb. 65638 (ph 308 536-2618).

From the archive · Full text
Reader shop tip

Josh R. Hofer

Josh R. Hofer, Ponteix, Sask.

Josh came up with this simple-to-build truck box brace that keeps sides from bowing while hauling heavy loads. He’s used it on both his 1990 Ford and 1975 Chevy 3-ton trucks equipped with 8 1/2 by 16-ft. Midland dump boxes but says it can be easily adapted to fit most any truck box.

It consists of an arch-shaped brace built of scrap 1 1/2-in. dia. pipe. The 8-ft. long and 20-in. high brace is fitted with a horizontal foot built of 12 in. flat iron on each side. Flat iron simply bolts to the truck box with five 3/8 in. dia. bolts.

“We use it to be on the safe side when hauling snow in winter and manure in spring,” Josh says.

“It’s easy to put on and take off and doesn’t interfere with dumping at all. We use a front end loader with 2 cu. yd. bucket to load the truck with four bucket fulls of snow or manure and have never had the sides bow out since we installed them.”

From the archive · Full text
Reader shop tip

Franklin Pacey

Franklin Pacey, Miltonvale, Kan.

Franklin uses a handy tractor-mounted air compressor to blow dirt off radiator fins and air up low tires in his custom-baling business.

“We built the first one out of odds and ends five years ago and it worked so slick, we’ve put them on two more of our tractors by this time,” Franklin says.

“We started with a single-piston air compressor we got out of a junked Ford car. We mounted it on a bracket we made out of scrap iron and bolted it to the tractor frame near the alternator so the compressor could be belt driven off an existing extra pulley on our Massey tractors. We mounted a 7-gal. air tank off the air brake system from an old semi tractor/trailer on front of the tractor and plumbed the intake side, which is fitted with a small filter, underneath the hood and the pressure side to the tank with hydraulic hose. We installed a 1/4-in. dia. ball valve just before the pressure hose to prevent air leaking out loose chucks. We installed a pressure gauge on one end of the tank so we can see from the cab the amount of pressure in the tank. We installed an electronic automatic pressure switch on top, which connects with a switch in the cab we use to turn the unit off and on.

“Works great for blowing dirt off radiators to keep them from getting hot and for filling low tires. Out-of-pocket expense wasn’t more than $30 per unit. Incidentally, any size air tank will do, including 10-gal. oxygen supply tanks used in airplanes. You can buy them cheaply at any Army surplus store.”

From the archive · Full text
Reader shop tip 1 of 2

Robert House

Individual tip 1 of 2 from this reader’s published contribution.
Robert House, Grace City, N. Dak

“If a bolt breaks off in the head of an engine you’re overhauling, you can remove it quickly and easily like this.

“First, drill out the center of the broken bolt. Then, use your die grinder to chew away at it until all that remains are the disconnected spirals of thread. You can easily pull them out with your fingers or a pliers.

From the archive · Full text
Reader shop tip 2 of 2

Robert House

Individual tip 2 of 2 from this reader’s published contribution.
Robert House, Grace City, N. Dak

“I also always brush Permatex anti-seize lubricant on new bolts when I’m putting engines back together. They come out much easier the next time.”

Shop feature stories

From the archive · Full text
Feature story

Battery-Powered Portable MIG Welder

Featured source:

“Our new battery-powered portable MIG welder isn’t much bigger than a hair dryer, but it can weld steel and stainless steel up to 1/2 in. thick as well as aluminum up to 3/4 in. thick. It’s amazing how much work it can do, working with or without gas,” says Ron Lister, Ready Welder Corp., San Pedro, Calif.

The “Ready Welder” kit consists of a MIG gun with 9 1/2 ft. long cables, 10 ft. of gas hose, a 1-lb. spool of flux-cored .035 wire, extra tips, and a gas hose connector. Welding power is provided by two 12-volt batteries (not supplied) connected in series to supply 24 volts, or by an optional battery power pack that’s equipped with an on-board battery charger. The basic unit weighs only 10 lbs. not including batteries.

“People have a hard time believing that a welder this compact has the power to weld 1/2-in. thick steel, but it’s true,” says Lister.

“It’s much more useful than conventional MIG welders powered by a generator because you can take it with you wherever you go - just hook it up to batteries and start welding. Two 12-volt car batteries have enough power to keep the welder going for at least 15 minutes of continuous welding. Unlike a conventional MIG welder and generator, the Ready Welder produces very little noise. One Arizona rancher told us that he was able to repair a fence right next to some horses without spooking them.”

Ready Welder systems start at $995 and go up to around $3,000 for systems that include power packs, resistors, MIG, TIG, and stick arc welders as well as helmets, gloves, etc.

For more information, contact: FARM SHOW Followup, Ready Welder Corp., 1931 N. Gaffey St. Ste. B, San Pedro, Calif. 90731 (ph 800 935-3644 or 310 832-2541; fax 310 832-9958).

From the archive · Full text
Feature story

“Kord Kaddy” Keeps Cords Untangled

Featured source:

Cords and ropes will not get tangled with this new “Kord Kaddy” from Double “D” Designs.

It’s a plastic bracket with 4 1/2 in. deep grooves and a hand grip.

To use, you simply loop your cord or rope around the grooves. The design prevents tangles and allows you to simply unwind the cord or rope when you need it, Double “D” says. It hangs on the wall on a short length of PVC pipe.

They sell for $4 apiece, three for $11, or six for $20 plus S&H and sales tax.

Contact: FARM SHOW Followup, Double “D” Designs, Box 449, Milbank, S. Dak. 57252 (ph 605 432-5969).

From the archive · Full text
Feature story

“Extend-A-Wrench” Loosens Stubborn Bolts

By By Janis Schole
Featured source:

Have you ever slipped a piece of pipe over a wrench to get more leverage?

John Bellamy often found himself in that situation but he decided to design a tool that would be more secure.

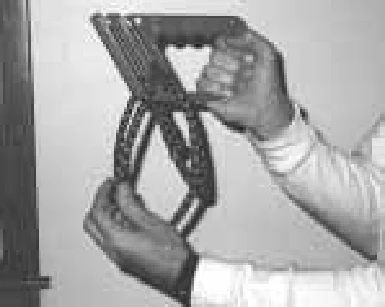
His “Extend-A-Wrench” tool holds tight and makes it easy to loosen bolts that might be impossible to remove otherwise.

The tool has an angled slot that “wraps around” the arm of an open-end wrench. Bellamy made it by bending a piece of heavy gauge flat iron and welding it to the end of a metal rod.

The tool is patent-pending in Canada and the U.S. Bellamy, who is a licensed welder and mechanic, as well as a farmer, intends to market the tool.

Contact: FARM SHOW Followup, John Bellamy, Box 22, Dapp, Alberta, Canada T0G 0S0 (ph 403 954-2404).

From the archive · Full text
Feature story

“Caddy” Cleans Up Grease Gun Mess

Featured source:

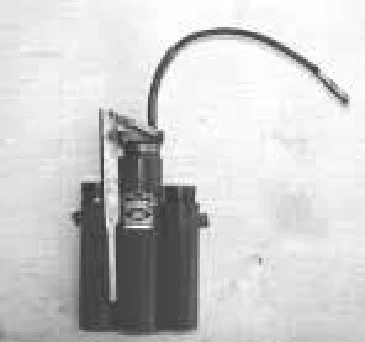
You won’t have to search for mislaid grease guns or slip in grease leaking from punctured cartridges if you install this new grease gun “caddy” in your shop.

The “Dobel Grease Gun Caddy” holds two tubes of grease and a gun. It’s made from heavy gauge steel tubing and can be mounted in the shop or on a tractor, combine or other farm equipment.

“It’s easy to accidentally step on a tube of grease in the tractor cab or slip on grease that oozed from a dropped tube on your shop floor,” says John Bellamy who, along with Joe Dobyanski, invented the caddy.

“Some-times you can’t remember exactly where you left the grease gun and eventually find it buried underneath chains or other things in the tractor cab, or rolling around in your truck box. Other times, you go to the field, start to grease up a machine for the day, only to find the gun empty after a couple of pumps, and no more tubes nearby.

“The Caddy is a quality, durable product that will last indefinitely. The bottom of each tube is covered with expanded metal mesh so dirt and water can fall through,” Bellamy said.

“A mounting bracket is part of the construction and each one comes with bolts and sheet metal screws for mounting.”

The caddy is available in a variety of colors to match customers’ equipment. There are a number of different models, from the economy model, which has storage spaces for a grease gun and one cartridge, to the shop model, which holds two guns and five grease cartridges. They can also be custom built to hold more guns and tubes if the customer desires, according to Bellamy.

Standard model sells for $24.95 (Canadian); shop model for $29.95.

Contact: FARM SHOW Followup, John Bellamy, Box 22, Dapp, Alberta, Canada T0G 0S0 (ph 403-954-2404).

From the archive · Full text
Feature story

Rolling Toolbox Doubles As A Workbench

Featured source:

Moving your tools around your shop or farmyard is easy with this new portable toolbox that doubles as a work bench.

The all-steel “Tool Buddy” mounts on four steel legs but tips back onto two big rubber wheels like a “two-wheeler”.

Another unique feature is that unlike other toolboxes, there are no drawers. Tools hang from “swingout” tool arms on either side of the frame.

“It’s much handier than conventional drawer-type toolboxes because your tools are always in plain view and you don’t have to search through drawers. Also, you can be easily move it around so you don’t have to walk back and search for the tools you need,” says Jeff Schultze, J.S. Ag Innovations, Inc., Ewing, Mo.

“It weighs 195 lbs. empty. The big rubber wheels allow it to be easily rolled over gravel and dirt. It holds about 300 tools, standard or metric.”

Unit can be locked to prevent theft. Sells for $499. Contact: FARM SHOW Followup, J.S. Ag Innovations, Inc., RR 2, Box 125C, Ewing, Mo. 63440 (ph 573 494-3698).

From the archive · Full text
Feature story

Use Your Drill To Extract Broken Bolts

Featured source:

Extracting a broken-off bolt or screw is quick and easy with the “Drill-Out” power extractor. It’s a bit and extractor rolled into one.

It consists of a left-handed, self-center-ing bit that you use to drill down into the broken-off bolt. After making a 1/4 to 1/2-in. deep hole, you spin the extractor fitting and hex head down close to the cutting tip.

“The torque of the drill in reverse action allows the extractor to grab the inside shoulder of the bolt and pull it out without spreading it out tighter than it already was,” says Steve Reisinger, NR Specialist Group, Omaha, Neb.

“So even if the bolt resists extraction the drill-out won’t lodge itself into the bolt and become impossible to remove. You’ll never end up with the extractor stuck in the bolt.

“If the drill runs out of torque or if you can see that the bolt won’t come out, you can put an end wrench on the the hex head and turn it 1/4 turn in order to remove the extractor from the broken bolt.”

Available in two sizes, regular and micro. The regular handles 1/4 to 3/4-in. dia. bolts and the micro handles 1/8 to 1/4-in. dia. and bigger bolts.

The two sizes are sold individually in 4-piece kits or together in a 7-piece kit and come with a lifetime guarantee. The 7-piece kit sells for $89.95.

Contact: FARM SHOW Followup, NR Specialist Group, Box 45282, Omaha, Neb. 68145 (ph 800 772-1450 or 402 891-8292).