Practical ideas from FARM SHOW MagazineSubscribe · Free issue · Send us your shop tip
Subscribe to FARM SHOW
Issues / Vol. 33, No. 4 (2009)

Vol. 33, No. 4 (2009)

Money-Saving Repairs & Maintenance Shortcuts · Printed section pp. 36–38

31 selected entries · Complete text of selected entries

This issue’s section includes reader tips and feature-length shop stories. Held items and editorial notices are not reproduced.

Archive text: prices, coupons, availability and contact details reflect the original publication, not current offers. Reader methods are not universal instructions; follow manufacturer guidance and proper safety practices.

Reader shop tips

From the archive · Full text
Reader shop tip

Matt Studer

Matt Studer, New Washington, Ohio

“Have you ever wondered what to do with that old gas grill that has rusted out? Instead of taking it to the landfill or turning it into scrap iron, why not make yourself a rolling tool cart. That’s what I did. I removed the grill section and screwed a 24 by 36-in. piece of plywood to the frame. It works great around the shop, holding tools or parts wherever I’m working.”

From the archive · Full text
Reader shop tip

Mark Eilers

Mark Eilers, Tower Hill, Ill.

The steel roof on Mark Eilers’ farm shop leaks over his workbench. It only happens when the wind’s coming from a certain direction.

“It’s not worth fixing because it doesn’t happen too often but it’s annoying when it does. To eliminate the problem with a minimum amount of work, I stretched a sheet of lightweight plastic tarp under the rafters in such a way that water dripping through is directed over to the edge of the wall.”

From the archive · Full text
Reader shop tip 1 of 3

Dennis Martin

Individual tip 1 of 3 from this reader’s published contribution.
Dennis Martin, Live Oak, Fla.

“I use aluminum conduit to make replacement handles for shovels and post hole diggers.

From the archive · Full text
Reader shop tip 2 of 3

Dennis Martin

Individual tip 2 of 3 from this reader’s published contribution.
Dennis Martin, Live Oak, Fla.

I’ve also used stainless steel 1/2 in. dia. pipe to make a handle for a garden rake, putting a hoe on the other end so I’ve got two units in one.

From the archive · Full text
Reader shop tip 3 of 3

Dennis Martin

Individual tip 3 of 3 from this reader’s published contribution.
Dennis Martin, Live Oak, Fla.

In addition, I made a good hoe by attaching half of a coulter blade to a piece of pipe.”

From the archive · Full text
Reader shop tip

Edwin Burtness

Edwin Burtness, Orfordville, Wis.

“It’s often frustrating to try to get newly mounted tires to hold air because of small gaps between the tire bead and rim. You can’t get enough air in through the valve stem to seat the bead. I solved the problem by removing the valve stem core and using a 3/8-in. hose and blow-off gun with the safety tip removed, allowing a larger volume of air to enter the tire. When the tire seats on the rim the valve core can be replaced, and then the tire is aired up normally.”

From the archive · Full text
Reader shop tip 1 of 2

Dennis McCarville

Individual tip 1 of 2 from this reader’s published contribution.
Dennis McCarville, Two Harbors, Minn.

“Here’s a foolproof rust removing idea I discovered after many years of experience. If you have a part that is rusty or seriously corroded, simply soak it in water. Water is the best corrosion remover in the world, and it’s free. I have dug up old pliers and old crescent wrenches which were hardly identi-fiable. After soaking them in water for an extended period of time, I was able to free them up and now use them as daily tools. Water always works.

Editor’s Note: We were skeptical about McCarville’s idea of using water to remove rust so we decided to test it out. We put a bunch of badly rusty nails and fence staples in a can of water and let them sit. A couple hours later, we checked and nothing had happened. So we let it sit for about three days. At the end of that time, most of the rust had fallen off and the rest came off with a gentle wipe of a paper towel. The nails and staples were totally cleaned.

From the archive · Full text
Reader shop tip 2 of 2

Dennis McCarville

Individual tip 2 of 2 from this reader’s published contribution.
Dennis McCarville, Two Harbors, Minn.

“Also, water is the best metal and drill bit cooler there is. Don’t use oil. Water keeps the contact points cool and increases the cutting power of the bit. It’s also a lot less messy to use.”

From the archive · Full text
Reader shop tip

Marvin Wells

Marvin Wells, Spencerville, Ind.

“If you have trouble keeping your chuck key handy for a drill, just take a speaker magnet out of an old radio and stick it to the side of the drill (must have a metal casing). Then stick the chuck key to that. I’ve used this idea for 10 years. It’ll work anywhere else you have to keep track of a small metal part or a key.”

From the archive · Full text
Reader shop tip

TP Tools

TP Tools, 7075 State Rt. 446, Canfield, Ohio 44406 (ph 800 321-9260; www.tptools.com)

They make a wall-mounted Spark Plug Cleaner that works like a mini sandblaster. It measures 6 1/2 in. high by 3 1/2 in. wide and comes with a cloth bag that holds 3/4 lb. of abrasive material.

The operator connects an air hose to the bottom of the cleaner, then inserts the spark plug into an opening on top that’s equipped with a rubber grommet that holds it there. Then he sets the control lever to “blast”, pushes an air button, and manually rotates the plug for 5 to 10 seconds. Then he sets the control lever to “air” to blow the plug clean.

The abrasive is contained inside the bag so there’s no mess. Accepts many different plug sizes. Requires a compressor with at least 90 psi.

The cleaner sells for $25 plus S&H. The cloth bag sells for $3.95 plus S&H; one pint of abrasive sells for $5.95 plus S&H.

From the archive · Full text
Reader shop tip 1 of 2

Zachary Vahlkamp

Individual tip 1 of 2 from this reader’s published contribution.
Zachary Vahlkamp, Oakdale, Ill.

“I own two older Grasshopper riding mowers that are simple, reliable and easy to maintain. However, I had a problem keeping the deck drive belts, especially the rear belt, from falling off the pulleys. The tensioning pulley is flat and doesn’t have any grooves for the belts to ride in, making it easy for a foreign object to nudge the rear belt off.

“I tried to shim the pulley to center the belts, and I also replaced the belts, idler spring, and bushings in the idler arm. I even added a grease fitting to the idler arm in order to avoid premature wear, but nothing helped. The rear belt still occasionally jumped off the pulley.

“One day I looked at a newer Grasshopper 7210 riding mower and noticed they had changed the tensioning pulley to a double-grooved pulley with the drive and driven pulleys on the same belt. So I bought a double-grooved pulley and mounted it on my mower. It fit with very little modification, just some ‘shimming’ using machinery bushings I had laying around. I kept the mower’s original belts, bolt, and idler arm. Three years later the mower still works good and the belts have never jumped off.

From the archive · Full text
Reader shop tip 2 of 2

Zachary Vahlkamp

Individual tip 2 of 2 from this reader’s published contribution.
Zachary Vahlkamp, Oakdale, Ill.

“I’ve worked on farm and construction equipment for more than 10 years and have noticed that people tend to bend the parking lock linkage on IH 06, 56, and 66 series tractors. Tisco makes a spring-loaded replacement linkage that can solve this problem. The original linkage bends if the operator forces the handle down when the park latch is on top of the gear tooth. With the Tisco linkage system the operator can pull the park lever up and, if the park latch is on top of a gear tooth, it simply compresses a spring. If the tractor rolls slightly, the spring forces the park latch into place when everything lines up. I’ve installed at least 30 of these systems with no complaints from my customers.”

From the archive · Full text
Reader shop tip

John Stava

John Stava, Bloomington, Ind.

“Here’s an easy way to preserve paint and paint brushes. Get a lidded bucket - one with a good seal like a kitty litter bucket. Soak some cardboard with paint thinner or mineral spirits and line the bucket with it. Cut holes on each side of the bucket below the top edge and run a rod through the bucket. Clean your paint brushes in the normal way and put a rubber band on the brushes a little above the end of the bristle. Then hang the brushes on the rod inside the bucket and seal the lid. The bristles will absorb the fluid from the cardboard, which keeps them clean and straight. Periodically resoak the cardboard with the paint thinner or mineral spirits. The size of the bucket depends on the number of paint brushes.”

From the archive · Full text
Reader shop tip

Scott Elias

Scott Elias, Standard, Alberta

“To re-move seized bolts or fittings from a casting such as a cylinder head, I just use a little heat and wax. I heat the area around the bolt and the bolt itself, then apply some wax (a small birthday candle works good) around where the bolt screws in. The wax will work its way down into the threads and then the bolt will easily come out.

“I’ve used this method many times with great results. I’ve even used it on an aluminum cylinder head, being careful not to apply too much heat. I’ve never had much luck with penetrating fluids, but the wax method works every time.”

From the archive · Full text
Reader shop tip

Dean Larson

Dean Larson, Tescott, Kan.

“I recently put up some fencing using 5 by 100-ft. rolls of 6 by 6-in. wire. It looks much like concrete reinforcing wire but is heavier gauge and galvanized. To bend the wire around itself I used a homemade metal tool that’s about 6 in. long by 1 in. wide by 1/4 in. thick, with three holes in it. My homemade tool works a lot better than pliers for bending such wire.”

From the archive · Full text
Reader shop tip

Randy Boykin

Randy Boykin

“In a recent issue William Merendini of Brodheadsville, Penn., reported that his 2008 Deere 3720 tractor was unstable and felt dangerous to use. In my opinion, the problem isn’t with the tractor but with the operator and the dealer who sold him the tractor. In the first place there’s too much air in the tires. The air pressure should be adjusted to the amount of weight he’s carrying. Also, my guess is he doesn’t have any ballast in the tractor’s rear tires. He needs to fill them with calcium chloride or a similar product for weight, especially if the tractor has a front-end loader on it. Also, slow down.”

From the archive · Full text
Reader shop tip 1 of 2

Jim Kissock

Individual tip 1 of 2 from this reader’s published contribution.
Jim Kissock, New Bloomfield, Mo.

“My youngest son, David, has a good idea on how to get ice out of a livestock water tank. Just break the ice like usual and then use a fish net to scoop it out. Works great.

From the archive · Full text
Reader shop tip 2 of 2

Jim Kissock

Individual tip 2 of 2 from this reader’s published contribution.
Jim Kissock, New Bloomfield, Mo.

“If you have a small hole in a metal water tank, use a roof washer that has metal on one side and a plastic washer on the other side to bolt through the hole. Tighten the nut on the bolt so the washer covers the hole, and it won’t leak.”

From the archive · Full text
Reader shop tip

Shoup Mfg. Co.

Shoup Mfg. Co., 3 Stuart Drive, Kankakee, Ill. 60901 (ph 800 627-6137; www.shouppar ts.com)

This company sells a handy operator’s manual storage canister. The sturdy plastic canister measures 12 in. long with an inside diameter of 3 1/4 in. It comes with a screw-on cap that has a neoprene seal, and with a mount- ing bracket with pre-drilled holes so you can mount it permanently anywhere on your equipment. The nice thing is that you’ll never wonder where your operator’s manual is when you need it. That way you can use a cell phone to order parts right from the field.

Sells for $12.95 plus S&H.

From the archive · Full text
Reader shop tip

Barry Laybourne

Barry Laybourne, Tugaske, Sask.

“If you own a Deere 50 or 60 series tractor built in the 1990’s that has a warning light for the oil instead of an oil pressure gauge, the light will not warn you soon enough to save you from serious engine damage. The light may not come on until the damage is done. To solve the problem all you need is a $50 oil pressure gauge tied into your engine block somewhere. It could save you thousands of dollars in parts and labor. This advice also applies to Case 2090 and 2290 tractors.”

From the archive · Full text
Reader shop tip

David Chalmers

David Chalmers, Mancelona, Mich.

“I bought a Farmall Super C tractor equipped with a 1-row cultivator but without a 3-pt. hitch or a quick hitch. I made a front-mounted 3-pt. hitch using Ford 8N tractor parts and some ingenuity. I can operate a rear-mounted grader at the same time.”

Shop feature stories

From the archive · Full text
Feature story

Self-Tightening “Pocketwrench”

Featured source: Don Burke

“It’ll grab onto fasteners that standard wrenches can’t handle,” says Don Burke, BurkTek Inc., Kansas City, Mo.

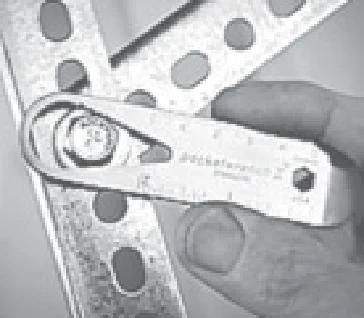
Made from high carbon stainless steel, the Pocketwrench II measures 4 in. long by 1 in. wide by 1/8 in. thick and weighs just 2 oz. It comes with a V-shaped opening at one end that has a variable pitch tooth design, allowing the tool to grip almost anything including hex and square heads, and in both inch and metric sizes. To reverse the direction of the rotation you simply turn the tool over.

“The tool’s design allows you to easily grip irregular shaped fasteners, and even use it on round fasteners like socket head cap screws. There are probably 50 different objects you can use this tool on, everything from allen heads to torque bits to regular or Phillips screws,” says Burke.

“It works almost like a pipewrench with its ability to grip things, but is quicker and easier to use, The teeth become smaller as the opening gets narrower, which allows them to keep a constant grip.”

A 1/4-in. socket at the end of the tool lets you insert screwdriver bits.

One end of the tool tapers off at an angle, allowing it to be used as a variable width, straight blade screwdriver or as a mini prybar.

“It works great as a mini prybar for opening paint cans, stubborn windows, and so forth,” says Burke.

The tool also has a laser-engraved inch and metric ruler for measuring fasteners and other small items.

Sells for $15 plus S&H. Contact: FARM SHOW Followup, BurkTek Inc., P.O. Box 10736, Kansas City, Mo. 64188 (ph 800 700-6784; [email protected]; www.pocketwrenchtool.com).

From the archive · Full text
Feature story

How To Repair Grainhead Augers

Featured source:

Grainhead auger centers get messed up pretty bad over a couple of seasons. Instead of re-placing the entire auger, Marshall Enterprises will just replace the damaged center. Or they can ship you a kit so you can do the work yourself or have it done locally. Grainhead auger centers are generally not available from manufacturers, says Ron Marshall.

“We started repairing grainhead augers nearly 20 years ago,” he says.

“We try to keep centers on hand for 200’s, 900’s and 600’s Deere and Gleaners going back to the old G series. If we don’t have them, we can get them for most makes. We can roll one for any odd style that we don’t have.”

Thanks to jigs they have developed, replacing a center is easy for Marshall. Once the old center has been cut out, the jigs keep the new center true with the two auger halves. Mig welders are used to first spot weld and then seam weld the centers in place.

“Mig welders don’t create the heat of a wire welder,” says Marshall.

“With the jigs, if a guy gets here first thing in the morning with a stripped head, we can have him back on the road by early afternoon.”

Marshall charges around $600 to have a new center installed. Most kits with instructions sell for $250 to $275 plus S&H.

Marshall also offers full finger conversion of Deere and Case-IH table augers to improve feeding from cutterbar to the feeder chain and reduce bunching for better separation and more even spreading at the back of the machine.

Contact: FARM SHOW Followup, Marshall Enterprises, R.R., Varna, Ill. 61375 (ph 815 866-0029 or 309 463-2251; [email protected]).

From the archive · Full text
Feature story

Intake Air Pre-Heater Solves Problem On 1941 Farmall M

Featured source:

Frank Slapar, Pittsburg, Kansas, used scrap sheet metal and some plastic pipe to come up with a better intake air pre-heater for his 1941 Farmall M tractor.

“It solved the problem of sweating and ic-ing around the carburetor,” says Slapar.

His father bought the tractor new and it’s been in their family ever since, says Slapar.

“It was a multi-fuel tractor that ran on kerosene, powerfuel, or gas. It came with a 1-gal. fuel tank for gas that was used as a starter fuel, and a 22-gal. tank for other types of fuel. It also had a multi-fuel intake manifold with heat shield, which assisted in keeping the manifold and carburetor hot after it was started.

“The multi-fuel exhaust manifold developed cracks in it so we replaced it with a manifold designed for another tractor that runs on gas. However, we found that on cool, humid mornings the new intake manifold would sweat and, in some cases, form frost on the outside just above the carburetor. That didn’t happen with the tractor’s original multi-fuel manifold.”

Slapar says he searched various Farmall internet forums for anyone who might be able to help.

“Most respondents indicated that Farmalls were noted for this problem,” says Slapar.

“I couldn’t find an intake manifold pre-heater that would warm the air before it enters the carburetor so I built one myself.”

He started with a 16-in. length of 6-in. dia. stove pipe and a can that originally contained hand cleaner, and pop riveted them together. He made a 2-in. dia. hole in the stove pipe and fabricated an outlet to which he attached a 1 1/2-in. dia. plastic pipe, in order to route warm air to the air cleaner. He also placed sheet metal between the radiator and carburetor in order to route warm air coming off the tractor’s radiator to the outside of the carburetor and to the intake manifold.

Contact: FARM SHOW Followup, Frank M. Slapar, 705 Osage St., Pittsburg, Kansas 66762 (ph 620 231-1366; [email protected]).

From the archive · Full text
Feature story

Custom AC For Your Old Classic

Featured source:

There’s nothing like the feeling of cruising around in a classic car or pickup, but in the summer it can get too hot for comfort. Old Air Products has a solution. Replace that old square heater with a Hurricane custom A/C system that heats and cools.

“We have a different approach,” explains Clint Millican, Old Air Products representative.

“We have a pull-through system. It pulls the air through instead of pushing it through. That allows for compact unit designs. Our units have a square, modular design that looks like heaters used in the 40’s and 50’s.”

Old Air Products makes Hurricane units to fit almost any classic vehicle.

“It doesn’t matter if you have a Ford car with a Chevy motor. All our system components are interchangeable,” Millican says.

“We custom package each system per vehicle. We allow our customers to pick and choose from a variety of options such as round or rectangular louvers, various condenser sizes and mounting brackets to create a custom unit for their vehicle.”

The systems can be easily adapted to tractors and other farm equipment.

“We have a dealer installing them on Kubota tractors,” Millican says, “because our units are less expensive than AC units from the company.”

Cost for custom units starts at about $1,000, with upgrade options such as chrome compressors and electronic controls.

Old Air also sells factory A/C replacement parts for vehicles from 1960 to 1984.

Contact: FARM SHOW Followup, Old Air Products, 8744 Forum Way, Fort Worth, Texas 76140 (ph 817 531-2665; www.oldairproducts.com).

From the archive · Full text
Feature story

New Way To Remove Rust

Featured source:

“I recently came up with a way to use potatoes to clean rusty iron,” says Ron Bennett, Rochester, N.Y., in a recent issue of the National Hay Tool Collectors Association newsletter.

“Slice up 10 lbs. of potatoes. Place a large plastic bag into a box or tub large enough to hold the part that you want to de-rust. Place the part in the bag, and add the potatoes and enough water to cover the part. Seal up and come back in two weeks. Remove the part and power wash clean. The rotting potatoes clean off all the rust.”

From the archive · Full text
Feature story

Mower Graveyard Is Parts Heaven

Featured source: Bill Rust

If you think your riding lawn mower or garden tractor can’t be saved, call up the Mower Graveyard. That’s what Bill Rust calls his collection of hundreds of old garden tractors and riding mowers waiting to be broken down for parts.

Rust says his “graveyard” includes at least 20 different brands. He notes that parts sales and repairs are up due to the poor economy while antique collectors are less active.

“People are mainly trying to keep their old mowers going,” he says.

“We send parts all over the U.S. and send quite a few parts to Australia and some to England and Canada.”

Rust also carries after-market parts, as well as quite a few Briggs and Stratton parts bought from different dealers. In addition, he maintains an inventory of engines from Kohler, Briggs and Stratton, Wisconsin and Tecumseh for repowering mowers and tractors.

“If you need a part, send us an email or call with the tractor brand and model and the parts number if you have it,” says Rust.

“If you don’t have the parts number, anything that will help us identify it will help. A picture of the part or where it goes will never hurt.”

If you have an old tractor or mower sitting around, give him a call.

“We are always buying more,” says Rust.

“We can’t sell it if we don’t have it.”

Contact: FARM SHOW Followup, Rust’s Jamestown Lawn & Garden, 240 Ray Rd., Jamestown, Penn. 16134 (ph 724 932-2195; [email protected]; www.mowergraveyard.com).

From the archive · Full text
Feature story

Upgrade Brakes To Stop Faster, Last Longer

Featured source:

If you pull heavy loads with a truck or van, Off Road Unlimited has a brake upgrade for you. Both rotors and pads are specially designed to give extended brake life and extra stopping power.

“I’ve been building brake systems for 42 years for everything from race cars to the catapults on aircraft carriers,” says Warren Gilliland, known as “The Brakeman”.

“I apply a thermal process to stabilize the material and toughen it to tolerate more heat and handle a more aggressive brake pad.”

Gilliland’s process is dif ferent from cryogenically treated rotors. While they treat the rotor surface, his affects the entire rotor. His brake pads are also thermal-treated. In addition, his rotors are slotted to release hot gasses.

Gilliland’s brakes have been installed on ambulances and fire department equipment in California, extending brake life four to five times normal.

“They’re going 40 mph through traffic and have reduced their stopping distance from 100 ft. to 70,” says Gilliland.

“That’s a car length and could pre-vent an accident.”

He makes brake systems for every 3/4 and 1-ton truck as well as most 1/2-ton pickups. He also sells a lot of them to owners of Toyota Tundras and Nissan Titans and Armadas.

“The Titans and Armadas have big problems with their brakes. Owners have had to go back to their dealerships continually for new rotors and pads,” says Gilliland.

“We can do any rotor. We just need a source for good quality castings to begin with.”

Gilliland markets his brake kit upgrades through distributors and dealers like Off Road Unlimited. An upgrade kit for a Ford F-250, F-350 or Excursion is priced at $1,058.58.

He also makes custom kits for anyone with a special need.

“A lot of vehicles used on farms carry loads that would be obscene on the highway,” notes Gilliland.

“There are a lot of things we can do to help.”

He invites FARM SHOW readers to visit his website (www.thebrakeman.com) and review some of the technical papers he has posted. They explain in detail how brake systems work along with other information of interest.

Contact: FARM SHOW Followup, Off Road Unlimited, 300 N. Victory Blvd., Burbank, Calif. 91504 (ph 818 563-1208; toll free 888 365-0244; www.offroadunlimited.com).

From the archive · Full text
Feature story

“Grease Bank” Lube System

Featured source:

If you’ve ever cussed at hard-to-get-at grease points, you’ll be interested in a new grease bank that’s designed to lubricate from cen-trally located banks.

“It lets you grease all the fittings from a standing position without having to crawl on the ground or on top of equipment,” says inventor Brice Custer.

“Really, it extends the zerks out to the edge of your equipment. It results in greater safety because you don’t have to climb onto equipment, and longer component life because of regular greasing.”

The system consists of banks of zerk fittings that attach to the implement frame in place of the original zerks, and 1/4-in. dia. tubes that attach to threaded fittings that mount at the original zerk fitting locations.

The grease banks are available in kits for 30, 36, 40, and 42-ft. Deere 1890, 1990 and 1995 air seeders. However, Custer says the kits can be made for any brand of air seeder, and for other types of machines such as disks and sweep plows.

“If a machine has grease zerks, I can run tubes to it. I’ve installed grease banks on everything from tractors to combines,” he says.

A grease bank for a 42-ft. air seeder equipped with 10-in. openers sells for $2,900; for an air seeder equipped with 7-in. openers, $3,900.

Contact: FARM SHOW Followup, Custer Farms LLC, 1453 Postrock Drive, Hays, Kan. 67601 (ph 785 639-1202; [email protected]).

From the archive · Full text
Feature story

He Makes John Deere Hoods

Featured source: Darrell Boren

Darrell Boren bends 18-gauge metal sheets into Deere tractor hoods, specializing in the styles that are the most difficult to make without using expensive dies and presses.

“Years ago, my friend who does lots of tractor restoration couldn’t find 320 and 420 Deere hoods,” Boren explains.

“So in 2004, I went to sheet metal school and learned how to bend metal.”

The rolled edges and the outside and inside radius in these models are difficult to bend, so most people who make hoods don’t like to make them. Boren designed his own tooling and system to make the proper bends. Besides Deere 320 and 420’s, he makes hoods to fit Deere M’s, 40 Series, and 330 and 430 Deeres. Boren has the metal laser cut, including the holes for the exhaust and other tractor parts. He uses a sheet metal brake and tooling to bend the hoods to match precise measurements taken off a tractor.

“Everything that gets sent out is tried out on tractors in the shed,” Boren says.

“Then the hoods are ready to be primed and painted.”

All style hoods are $465 plus S&H. They’re wrapped in newspaper and packed in special boxes to be shipped by UPS; packages are 52 in. long and weigh about 42 lbs.

Contact: FARM SHOW Followup, Darrell Boren, Rocky Mountain Tractor Accessories LLC, 20375 Rd. 17, Ft. Morgan, Colo. 80701 (ph 970 867-8345; [email protected]).

From the archive · Full text
Feature story

Homemade Penetrating Oil

Featured source:

Mixing kerosene and automatic transmission fluid together in a 50-50 mix produces a low-cost penetrating oil, says Bill Burlew of Savona, N.Y., who has successfully used the idea for years.

He pours the two fluids into an old dishwashing soap squeeze bottle, which holds about 1 1/2 pints of liquid.

“I call it jungle juice. It’s super stuff and works as well or better than the high-dol-lar penetrating oils on the market that cost up to $15 per can,” says Burlew.

“My total cost per bottle is no more than $2. The kerosene breaks down the viscosity of the transmission fluid and allows it to penetrate easier. If you want you can use diesel fuel instead of kerosene.

“I came up with the idea one day when I ran out of penetrating oil. I didn’t want to drive to town so I thought I’d give this idea a try. I’ve used it on stuff that was rusted all to heck, such as when I took the seats out of a van. The bolts were so rusty that when I tried turning them they just made a screeching noise. After I applied some of my homemade penetrating oil I had no problem loosening the bolts.”

Contact: FARM SHOW Followup, William W. Burlew, 8961 Cty. Rt. 16, Savona, N.Y. 14879 (ph 607 776-4696).