Practical ideas from FARM SHOW MagazineSubscribe · Free issue · Send us your shop tip
Subscribe to FARM SHOW
Issues / Vol. 35, No. 4 (2011)

Vol. 35, No. 4 (2011)

Money-Saving Repairs & Maintenance Shortcuts · Printed section pp. 36–39

27 selected entries · Complete text of selected entries

This issue’s section includes reader tips and feature-length shop stories. Held items and editorial notices are not reproduced.

Archive text: prices, coupons, availability and contact details reflect the original publication, not current offers. Reader methods are not universal instructions; follow manufacturer guidance and proper safety practices.

Reader shop tips

From the archive · Full text
Reader shop tip 1 of 2

Chuck Knipp

Individual tip 1 of 2 from this reader’s published contribution.
Chuck Knipp, Palco, Kan.

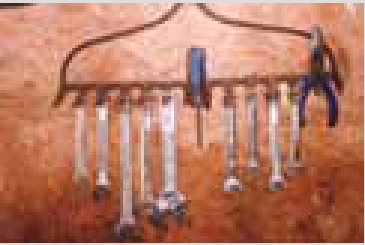
“I have a lot of sockets in my shop without cases and nowhere to put them. So I made a socket holder using a piece of 1 1/2-in. angle iron mounted to the wall. I spaced the sockets out on the bar and then marked each location with chalk. Then I ground down the points on some nails and tack-welded them to the bar. After a little paint, I had a cheap, durable socket holder.

From the archive · Full text
Reader shop tip 2 of 2

Chuck Knipp

Individual tip 2 of 2 from this reader’s published contribution.
Chuck Knipp, Palco, Kan.

“I made a rotating screw and nail holder by welding a piece of 3/4-in. sucker rod to an old disc blade to make a stand. Then I attached metal grain leg buckets to pieces of strap iron that fit over the sucker rod. Four buckets weld to each strap iron bracket, which has a 3/4 in. hole in it. I tack-welded large washers to the sucker rod to hold each set of buckets in place. They spin freely around the rod. It took only a couple hours to build but is a great way to organize screws, nuts, bolts, nails, staples and other small parts.”

From the archive · Full text
Reader shop tip

Warren Lauppe

Warren Lauppe, Merced, Calif.

“I made a small cart to carry my welder, cut-off saw and air compressor. It’s designed to make a tight turn to fit into a small space in my garage. And it has large tires so it will move easily over uneven surfaces. The top shelf is cantilevered over the back without rear posts so it’s easy to remove the cutoff saw from the bottom when needed.”

From the archive · Full text
Reader shop tip

Edward E. Eveleigh

Edward E. Eveleigh, South Coffeyville, Okla.

“You had an article in FARM SHOW a while back comparing different penetrating oils and the torque needed to bust a rusty nut loose after using them (Vol. 33, No. 4). It said the best one was the cheapest, a homemade 50-50 solution of acetone and transmission fluid. We started using it and it works very well. My son used it to break loose a stuck motor on an Allis tractor and a rust-frozen chain on a kid’s bike. My son says he’s never seen anything work this well. The only problem is that it smells a bit like cat urine. Good stuff.”

From the archive · Full text
Reader shop tip

Donna Barber

Donna Barber, Crestview, Fla.

“We found mildew on the vinyl window seals in a used RV we recently purchased and couldn’t remove it with conventional cleaners. We decided to try some carburetor cleaner sprayed on a rag. It worked like a charm with very little rubbing. Just don’t get it on painted surfaces or decals. We now use it for all sorts of oddball cleaning. It takes ink and grease off clothes without damaging the dye in clothes or carpet. We usually try brake cleaner first, since it doesn’t contain MEK, as do most carb cleaners, so there’s less chance of damage.”

From the archive · Full text
Reader shop tip

Larry J. Snaza

Larry J. Snaza, Brooklyn Center, Minn.

“I’ve been a mechanic for 45 years and have found that saving bearing races of different sizes has been very useful for installing seals in tight spots. I use them to push the seals into place.”

From the archive · Full text
Reader shop tip 1 of 2

Chad Travis

Individual tip 1 of 2 from this reader’s published contribution.
Chad Travis, Drasco, Ark.

“I used scrap metal to make a safety cap for the oxygen cylinder I use with my acetylene welding torch. Safety caps are used when storing or transporting the cylinder. Commercial stem caps sell for about $50, but my only cost was time. The top ring is made from a length of 1/2-in. dia. rod rolled into a circle, and the base plate from 10-ga. metal. The ring and base plate are connected by a pair of welded-on metal plates. The cap’s threaded collar, which screws onto the oxygen cylinder, is off a commercial storage cap - I simply cut the bottom off. The safety cap is designed so I still have full access to the cylinder’s shutoff valve at the center top, and to a pair of gauges on one side.

From the archive · Full text
Reader shop tip 2 of 2

Chad Travis

Individual tip 2 of 2 from this reader’s published contribution.
Chad Travis, Drasco, Ark.

“I made a C-clamp so I could replace a U-joint on the driveshaft on my 1995 Chevy 2500 pickup. The driveshaft and yoke on older pickups like mine are made from aluminum so I didn’t want to risk beating on it with a hammer. Commercial clamps sell for $130, but I used scrap metal for mine.

“To make the clamp I first measured, then made a pattern, traced it and cut it out of 1-in. thick plate steel. I welded one nut on top of the clamp and another nut at the bottom that serves as a spacer. To press the yoke out, I place it inside the clamp and then use a socket wrench to turn a threaded bolt that goes through the top nut.”

From the archive · Full text
Reader shop tip

Joe Staadegaard

Joe Staadegaard, Lynnville Farm Equipment Ltd., 808 Regional Road No. 4, RR 1, LaSalette, Ont., Canada N0E 1H0 ph 519 443-7591

“We offer carburetor kits for the English Zenith carburetors found on old British-made David Brown Leyland tractors; Nuffield tractors; the IH B250 series tractors and up; the Ferguson TEA; and the Fordson Dexta. We have a lot of hard-to-find carburetor parts and gasket sets.”

From the archive · Full text
Reader shop tip

Mike Genovese

Mike Genovese, 3607 Justine Dr., San Jose, Calif. 95124 ph 408 728-5281; www. wrencherstoolchest.com

“As a contractor, I specialize in kitchen remodels with custom cabinetry,” says Mike.

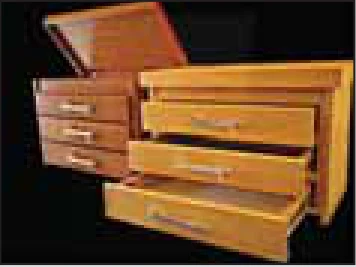
“One day I realized I could use my woodworking skills to build a wooden rollaway tool chest to store my mechanics tools. That was the start of what is now Wrenchers Tool Chest.

“I use only the finest materials and custom build each tool chest by hand. They’re stained and sprayed with multiple coats of a satin clear acrylic urethane to provide a rich look with a hard finish.” His 7-drawer solid walnut chest measures 32 in. wide by 24 in. deep by 54 in. high. It weighs about 385 lbs. and has solid 1/2-in. maple dovetail drawers on full extension, soft close glides. It has 1,000-lb. capacity swivel wheels with locks. The top has a hinged storage area. Includes solid billet handles with logo, rubber-lined drawer bottoms. Sells for $3,795 plus S&H. An 8-drawer chest with center pull-out shelf measures 38 in. wide by 24 in. deep by 60 in. high. Sells for $3,595 plus S&H. A 6-drawer chest with stainless steel work top that measures 32 in. wide by 19 1/2 in. deep by 48 in. high. The customer has a choice of drawer handles – rocker arms, vintage car door, or solid billet. Sells for $2,895 plus S&H. A 5-drawer under-counter unit measures 38 in. wide by 23 in. deep by 34 1/2 in. high. Sells for $2,395 plus S&H. A 7-drawer upright with stainless steel top measures 23 in. wide by 23 in. deep by 54 in. high. Sells for $1,795 plus S&H. A 3-drawer bench top unit measures 25 1/2 in. wide by 14 in. deep by 18 in. high. Sells for $725 plus S&H.

From the archive · Full text
Reader shop tip

Gordon Easton

Gordon Easton, Clayton, Calif.

“I cut off the bell from old semi truck air horns to make nice-looking funnels for changing oil. I used a hacksaw to cut the air horn off at the skinny part, leaving a tube with a big, wide mouth at one end. Horn-funnels are easy to clean, especially the chrome ones.”

From the archive · Full text
Reader shop tip

Donnie Mathews

Donnie Mathews, Stockbridge, Ga.

“I had some rusted wheel bolts that were stuck. I soaked them with WD-40 but it didn’t help, and I tried heating them with a torch with no luck. I considered trying a cheater bar but was afraid I’d break the bolt off. Finally, I decided to heat the area around the bolts again and then touch a wax crayon to the threads. It worked. The wax was sucked into the opening around the threads, causing the bolts to come right off when I turned them. Crayon wax also makes it easy to turn a bolt in.”

From the archive · Full text
Reader shop tip

Hobart Stewart

Hobart Stewart, Republic, Mo.

“When I built my 32 1/2 by 82 1/2-ft. shop, I embedded a pair of steel rings made from 3/4-in. stock in the floor, about 25 ft. apart. The rings, which have an inside diameter of 6 in., are recessed below floor level so no one can stumble over them. A cover fits on top of each hole so we can drive or walk over them.

“They’re very handy for pulling or straightening equipment. We’ve used them to pull cylinders apart, to straighten vehicle frames, and to bend metal on equipment.

“As we built the shop. I dug a square hole about 1 ft. deeper than the floor and filled it with concrete. There’s about 1 1/2 in. of clearance between the top of the floor and the rings to make room for the cover.

“The rings are embedded deep enough that we can wrap chains or cables on them.”

From the archive · Full text
Reader shop tip 1 of 2

David Paul

Individual tip 1 of 2 from this reader’s published contribution.
David Paul, Warroad, Minn.

He recently sent FARM SHOW this easy-to-use tip for cleaning out the jets on carburetors.

“I’m in the lawn mower repair business and consider galvanized aircraft cable to be the perfect tool for cleaning the jets on any carburetor. It’s quick and cheap,” says Paul.

“The carburetors on most modern lawn mowers are equipped with fixed jet orifices, which are very small and tend to plug up with debris. Sometimes they’re so small it’s difficult to physically clean them out.”

He says aircraft cable comes in 6 or 12-in. lengths and is available at most hardware stores.

“I like the 6-in. length because it makes a nice working length, but you can cut the cable to whatever length you want. I use my fingernails to unweave a single strand from the cable. Then I pass the strand through the jet, drawing it back and forth 2 or 3 times,” says Paul.

“I’ve used this method to clean orifices for more than 20 years. I like it much better than using chemicals. It also works great for cleaning sprayer nozzles and fuel oil gun nozzles. The cable strands are stiff but not brittle, so there’s no danger they’ll break off inside the jet. The strands keep their wavy braided shape, which helps provide more contact area for cleaning.

“You can buy different size cables with different strand diameters. For example, a 1/16-in. dia. cable yields a single strand with a diameter of .006; a 1/8-in. dia. cable yields a strand of. 008; and a 3/16-in. dia. cable yields a strand of .011. Larger sizes are also available. If the jet is real big, you can wrap some strands together. You can even use the entire cable depending on the size of the jet. A 6-in. length of cable typically sells for about 30 cents.”

From the archive · Full text
Reader shop tip 2 of 2

David Paul

Individual tip 2 of 2 from this reader’s published contribution.
David Paul, Warroad, Minn.

Paul says there’s another neat use for aircraft cable – it can be used to remove hair from drains.

“Just fray up one end of the cable, shove the cable down into the trap, and give it a spin. It’ll collect every hair in there,” he notes.

Shop feature stories

From the archive · Full text
Feature story

They Built Their Own Shop Floor Heat System

Featured source: Bob Bugger, Jr.

Bob Bugger, Jr., Effingham, Ill., built his own shop furnace out of old welded-together truck wheels. He uses it to heat his shop floor. Bob worked with his dad, Bob Sr., to build the system.

“We wanted a more efficient wood burning system so we decided to build our own,” says Bob.

“We installed the system when we built our shop, and it really works great. We use wood in the stove so it provides very cheap heat,” says Bugger. They welded truck wheels together, one on top of the other. The base wheel is from an old Budd semi and it supports the grate for the wood fire. On top of that wheel they welded 3 Dayton wheels. To add wood to the fire they simply lift a lid on top. Next, they enclosed the stacked wheels with a water jacket made from a used oil tank. The heated anti-freeze mixture is then pumped through plastic tubing that runs through the shop’s floor. The heat is thermostatically controlled.

A pair of homemade water manifolds mount on the wall and are connected by PEX Schedule 80 pvc tubing. Eight runs of the tubing were laid out over the shop floor before the concrete was poured. A pump circulates the water through the stove and floor. The Buggers heat the water up to as high as 140 degrees. It’s not boiling, but to be safe they installed a shut-off valve in the manifold just in case anything goes wrong and the water gets too hot.

“We spent only about half as much to build our manifold as a new one with copper tubing would have cost,” says Bugger.

“We don’t use the system for air conditioning because cooled concrete can sweat from high humidity,” he notes. Contact: FARM SHOW Followup, Bob Bugger, Jr., 10095 N. 900 St., Effingham, Ill. 62401 (ph 217 433-3781).

From the archive · Full text
Feature story

Pickup Repowers Made Easier With DCS Kits

Featured source: Diesel Conversion Specialists

A new kit makes it much easier to convert a Ford engine-powered truck to a Cummins diesel engine. Diesel Conversion Specialists (DCS) will do it for you or help you do it yourself with complete kits or individual components. They also offer some conversion parts, such as adapter plates and custom flexplates, for most Chevy automatics and later model Chevy NV4500 standard transmissions.

“I bought the business 11 years ago from a guy who was doing conversions himself,” says Dave Bradley, owner, DCS.

“I wanted to make conversions easier, simpler and less expensive. Today we have a staff of 15 and are doubling business every year. We provide everything needed and help you choose the kit, truck, engine, transmission and other variables.”

DCS uses aircraft grade aluminum on most parts and does high grade machining. Mounts are designed to be durable and easy to install. Adapter plates bolt to existing transmissions with no modifications. Modification wiring, gauge sensor bushing kits and other components are also available. In some cases, electric cooling fans replace belt drive fans to provide the extra room needed for the Cummins engine.

“Depending on the engine selected and the truck it’s going into, we may have 4 or 5 different kits available,” says Bradley.

“Right now, replacement kits for 6.0 and 6.4 Ford Powerstroke engines are our most popular.

Some of those engines have had so many problems that there are class action suits with Ford. We can solve those problems for a fraction of the cost of a new truck.”

DCS offers its conversion kits and components for installing any 5.9 Cummins engine in any F Series Ford truck going back to 1969 through 1997. Conversion kits and components are also available for 5.9 and some common rail engines for Super Duty Ford trucks and Ford Excursion SUV’s from 1999 to 2007. Kits can also be used on full-size Ford Broncos with beefed up front suspension or a solid front axle or heavy suspension lift.

Bradley reports that the company website will soon allow customers to place orders over the internet 24/7. Depending on the engine and transmission variables, the customer will design their own conversion kit or be able to order individual components as needed.

“We listen to our customers and change to meet their needs,” says Bradley.

Check the company website, and you’ll even find rebuilt engines for sale. Conversion kits range from less than $2,000 to nearly $4,000, depending on the original vehicle, engine and transmission and the replacement Cummins engine.

Contact: FARM SHOW Followup, Diesel Conversion Specialists, 220 Lost Creek Dr., Kalispell, Mont. 59901 (ph 406 755-8878; [email protected]; www.dieselconversion.com).

From the archive · Full text
Feature story

Rolling “Wheelchair Workbench”

Featured source: Ken Grazier

“Ordinary wheelchairs can be used to make a low-cost portable workbench,” says Ken Grazier, Havre, Mont., who attached a 6-ft. long bed frame to a set of wheelchair wheels.

“Wheelchairs work for rolling work tables because they’re built strong and can hold up to about 400 lbs. per wheel,” says Grazier. He cut off the wheelchair’s seat and front wheels, leaving just the rear wheels and handle. Then he bolted a 6-ft. bed frame to the handle. The bed frame is supported on front by the wheelchair’s front wheels. The workbench has 2 levels made out of 1-in. pine boards. Toolboxes set on the top level and shop tools on the bottom level. Grazier extended the brakes for the wheelchair’s wheels by fitting a small metal wrench onto the end of each brake handle.

“I have another wheelchair caddy with a hinged plywood lid over the seat to store tools and other objects. The lid folds up, so if I want I can still use it as a chair,” says Grazier. Contact: FARM SHOW Followup, Ken Grazier, P.O. Box 1746, Havre, Mont. 59501 (ph 406 265-7670; [email protected]).

From the archive · Full text
Feature story

Special “Tops” Turn Buckets Into Work Bench, Table

Featured source: Handy Bucket Builder

You can set up a work bench instantly with Handy Bucket Builder (HBB) bucket tops and 2 by 4 studs. The heavy-duty, hard plastic tops fit any standard 5-gal. bucket.

Flip a bucket over and set an HBB top in place. Set a second bucket in place, upside down over the first top, and place a second HBB top on it. Repeat once for a narrow two-column work surface. Repeat three times for a four square workbench. Rim tabs lock on the bucket edge lip. Set 2 by 4’s in place, and screw or clamp plywood to them for a stable work surface or picnic table.

FARM SHOW recently tried out a set of HBB tops. With the 2 by 4’s in vertical position, the workbench is 34 in. tall. In the horizontal position, the workbench measures out at a 32-in. height.

For simple handsaw or power saw work, two lengths of 2 by 4’s one bucket high make a nice kneeling surface while cutting. They also make a quick bench when additional seating is needed.

While the company warns against using the system as scaffolding, the stability is exceptional. Tabs and bulges in the molded plastic help to hold the 2 by 4’s in place. For added stability, the HBB tops have indents for toe-screwing the tops to the 2 by 4’s. In the case of FARM SHOW’s trials, bottom buckets were weighted with sand. This made for exceptional stability even when using only two sets of HBB tops.

HBB tops are available from a growing list of retailers who carry other products from the maker. They have a suggested list price of $9.99 each.

Contact: FARM SHOW Followup, Bercom, 1709 Lake Drive West, Chanhassen, Minn. 55317 (ph 952 448-2766; toll free 877 464-1170; [email protected]; www.handypaintpail.com).

From the archive · Full text
Feature story

Hydraulic Coupler Kit

Featured source: Jesse King

You can fix hydraulic couplings yourself with reusable, two-piece hose fittings from Do-More Hydraulics. While more expensive than having a hydraulics shop do the repair, time savings and ease of assembly make the couplings worth it.

“Hydraulics shops can justify the presses needed to crimp standard hydraulic fittings,” says Henry King, Do-More Hydraulics.

“However, in an emergency or when the shops are closed, you may still need to re-pair a problem coupler. These fittings will do the job.”

King began selling the couplings a year ago. When he began farming 20 years ago, he used similar couplings all the time. After going to work in a hydraulics repair shop, he noticed they didn’t even keep the reusable couplings in stock. After talking with other farmers, he decided to start offering them himself along with replacement hydraulic hose and other related items.

“With the two-piece option, you can buy ahead and do emergency repairs yourself,” says King.

The fittings consist of a simple socket that screws counterclockwise into the hose end. An insert is then screwed clockwise into the socket.

Hose fittings are priced by the size and type of hose. A 1/4-in. single wire hose coupler costs $12. A 3/8-in. single wire hose coupler costs $13.57, and a 1/2-in. single wire hose coupler runs $15.58. A 1/2-in. double wire hose coupler costs $17.72, and a 3/4-in. double wire hose coupler is priced at $20.50.

Contact: FARM SHOW Followup, Do-More Hydraulics, LLC, 1026 Deaver Rd., Quarryville, Penn. 17566 (ph 717 284-3867).

From the archive · Full text
Feature story

Grooving Heads To Save Fuel Catching On Fast

Featured source: Fred Balk

As gasoline hovers near $4 a gallon, everyone paying at the pump is looking for ways to economize. In the past few years FARM SHOW readers have written us describing how a simple process of “grooving heads” can cut fuel use by 20 to 40 percent. FARM SHOW reader Frank Akins of Leavenworth, Kan. wrote that a friend of his had grooved cylinder heads on his Dodge 360 cu. in. race car engine (Vol. 32 No. 1). He experienced greater mid-range torque and better fuel efficiency. John Schrock, a repairman from Jamestown, Penn. and his uncle Robert grooved pistons on an Imperial Diesel and saw 25 to 30 percent fuel savings. Robert also ground a 3/32-in. deep by 1/16-in. wide groove in heads on a small diesel engine and says, “I figure I gained 50 percent more power.” Fred Balk, a retired millwright in Michigan, contacted us recently and said he has used the grooving process on three Cub Cadet KT17 engines.

“I put the heads in a Bridgeport milling machine at a 2 degree angle. I use a 1/16-in. ball nose end mill and put a shallow groove at the squish area and deeper toward the center.” Balk says the first heads that he grooved were on a Cub Cadet 782 that was very difficult to start, especially in cold weather.

“After I did the grooving, we couldn’t believe how well it started. It turns over once and pops to life.” Balk has since done two more KT17 engines with the same results and will be grooving an Onan engine this summer.

“This process has been around quite a few years,” Balk says.

“In fact there’s a patented process claimed by an Indian engineer Somender-Singh (www.somender-singh.com). I’ve heard of people in the drag racing and high performance car business that have done it with good success,” Balk adds.

Somender-Singh claims that additional nitrogen being squeezed through the grooves disperses the combustible oxygen molecules more efficiently into the fuel. That efficiency leads to increased torque, increased low-end power, and overall fuel savings with lower emissions. Engines burn cleaner at lower operating temperatures and the capacity for a more efficient engine without the dreaded “Mr. Knock” or “Miss Ping”. Somender-Singh writes that “this simple but radical design change to squish areas and configurations enhances progressive turbulence in the charge close to the skin of the combustion chamber and further directs the (added) turbulence toward the igniter followed by multiple flame front propagation.” That’s a complex technical explanation for a laymen’s benefit that shows more power and fuel savings of up to 42.5 percent. Balk agrees with that assessment and says if more people are interested in having it done, “I’ll have to change it from a hobby into a part time business.” Contact: FARM SHOW Followup, Fred Balk, 3119 North Custer Rd., Monroe, Mich. 48162 (ph 734 243-6364; [email protected]).

From the archive · Full text
Feature story

Where To Get A Custom Exhaust System

Featured source: Heartthrob Exhaust

Heartthrob Exhaust is in the business of bending tubes for exhaust systems. Their high-flow kits can improve hp output on diesel trucks or simply change the sound or look on cars and trucks. However, if you need a tube bent, shrunk, or expanded for any other reason, they can probably do it for you.

“We have the capabilities to make almost anything out of tubing,” says John Forbes, Heartthrob Exhaust, Inc.

“We do industrial work for different companies, including a lot for Cummins Engines. We’ve done overhead conveyer systems for barns and playground equipment for parks. We have a bender that can do arcs of 10 ft. on 4-in. tubing.”

While such custom work is a big part of the business, exhaust system kits and components are still the core. Heartthrob makes DPF-Back diesel exhausts as bolt-on kits for older GM, Dodge and Ford trucks. When combined with upgrade chips for more hp, the tubes offer a minimum of 100 cfm increased flow.

“Earlier models were getting big hp gains with upgraded chips and our exhaust tubes,” explains Forbes.

“They can’t be used on newer models with their particulate traps, sensors and computer management systems.”

Exhaust kits for newer models have shown modest hp increases on Ford and Dodge trucks, but better improvement on GM Duramax 2007 through 2010 models. All kits are EPA legal, as they keep the DPF and catalytic converters on the truck and do not void warranties. However, they do eliminate the muffler, which can be a concern in states requiring mufflers.

The company also makes Deep Tone Dual kits for trucks; CAT-Back kits for older and newer cars and trucks; Flowpack Performance exhaust kits for late model muscle cars; and a variety of other exhaust systems.

Products and services include custom mufflers, water jet cutting and a wide range of specialty design and fabrication tools.

“Frankly we are not sure where most items we make end up,” says Mike Forbes, Heartthrob Exhaust, Inc.

“Some of it’s on ag equipment, stand alone power generation units, off-road specific purpose vehicles and military vehicles. We even do a lot of fixes for local farmers, such as reproducing a worn-out exhaust.”

Contact: FARM SHOW Followup, Heartthrob Exhaust, 60819 U.S. Hwy 12 West, Litchfield, Minn. 55355 (ph 320 693-0222; [email protected]; www.heartthrobexhaust.com).

From the archive · Full text
Feature story

He Tightens Flywheels On Deere 2-Cyl. Tractors

Featured source: Dave Darr

If you’ve got a loose flywheel on your 2-cylinder Deere tractor, Dave Darr is the man to see. He makes cast iron replacements for some and rebuilds others.

“I cast new ones for the popular 720 and 730 diesels,” he says.

“For others, if there are no cracks, I can rebuild them, replacing the OEM hub with my Steel Draw-In Taper-Loc Hub.”

The new hub replaces the bolts originally used to tighten flywheels to the shaft. On older flywheels, the bolts have often been tightened so far and so hard that they crack the cast “ears” they extend through.

“Once the ears crack, there is no way to tighten the flywheel, and once the splines wear, the flywheel won’t stay tight,” explains Darr.

“Two slots in my Taper-Loc Hub allow it to tighten down on the shaft as the tapered flywheel is pushed onto it.”

Rebuilding the flywheel consists of taper-ing the center that fits over the hub. Before tapering an old flywheel, Darr checks it carefully for cracks. One customer took his flywheel to a machine shop and had it Mag-nafluxed, which Darr says is a good idea.

“It’s cheaper to pay $125 for Magnafluxing than shipping it to me with cracks,” he says.

“I will just reject it, and you are out shipping and a flywheel. If there are fine cracks and I put it in a lathe at high speed, it can be very dangerous.”

If the flywheel doesn’t have to be replaced, Darr removes the old splines from the flywheel center, fits it in a lathe, and cuts a taper into it. This matches the taper in the Taper-Loc Hub.

To install the flywheel, you slide the Taper-Loc Hub onto the shaft and then slide the flywheel into place up and onto the taper. As the flywheel is bumped into place, the hub tightens down on the shaft. A lock nut holds the pressure against the flywheel.

Darr explains that the process requires precisely following instructions. He includes two pages of directions with his product.

“The Taper-Loc Hub fits even a fairly worn crankshaft,” says Darr.

“If a crankshaft is new or extremely worn, a specially fabricated hub may be needed.”

New flywheels carry a suggested retail price of $800 to $1,000. Rebuilds usually cost around $360. With shipping both ways, a rebuild can cost $500 to $600.

Contact: FARM SHOW Followup, Allen Machine Works, 100 Fairview Circle, Jones-borough, Tenn. 37659 (ph 423 753-5738; [email protected]).

From the archive · Full text
Feature story

“On The Tractor” Crankshaft Spline Repair

Featured source: Glen Delisle

Before you replace a worn down crankshaft, consider reconditioning the splines. Glen Delisle did just that on a John Deere Model A two-cylinder tractor. Best of all, he did it without removing the crankshaft from the tractor.

“I needed to recondition a shaft to fit the clutch hub,” recalls Delisle.

“I used a welder to build it up and then used a compound machinist vice to grind it down.”

Drive splines inside the clutch hub were squared and trued with what Delisle calls an “overgrown” hacksaw. That was done by hand.

Delisle says the complicating factor is having to address rotational and centering tolerances on the shaft splines. He bolted a special bracket to the engine block alongside the shaft.

The bracket was a piece of channel iron with a floating steel plate that could be raised, lowered and moved in and out on threaded rod. He then mounted the machinist vice to the plate to hold a high speed, air powered die grinder. The rods allowed him to get the exact height and placement he needed.

“The compound machinist vice has a double set of V’s like a tool post on a lathe, so you can feed the die grinder in and out,” says Delisle.

“I adjusted it so it was dead center over the crankshaft. This allowed me to slide the die grinder parallel to the shaft and grind it to the required tolerances.”

The tapered centering splines required a light cut taken off of each as the shaft was rotated.

Although it took him two attempts at rebuilding and grinding, Delisle says he succeeded. As he worked, he tested the out-of-true wobble of the the clutch face many times. When he reassembled the clutch hub and shaft for the final time, it rotated with a wobble of less than 1/5000 of an inch.

“The clutch works very smooth now,” he says.

“I was stuck at first, but this method works.”

Contact: FARM SHOW Followup, Glen Delisle, P.O. Box 464, Spiritwood, Sask., Canada S0J 2M0 (ph 306 883-2144).

From the archive · Full text
Feature story

Ventilated, Lighted Shop Pit

Featured source: Larry Brown

“When I put up my new shop I wanted to make it easier to change oil and work under my vehicles,” says Larry Brown, “so I built a pit that’s 5 ft. deep, 4 ft. wide and 16 ft. long in the floor of the shop. Now I can stand up when I work under a vehicle and actually see what I’m doing.” Brown used 2 by 6 rough-cut boards to form the sides and ends of the pit. The concrete walls are about 4 in. thick on the bottom and 6 in. thick on the top, reinforced with scrap steel. In one sidewall he made inset pockets that are 6 in. deep so he could install recessed fluorescent lights.

“I’ve seen a lot of pits where a trouble light is all a guy has to work with, and that’s not very bright. I put those fluorescents in, painted the walls white and it’s much brighter than any trouble light,” Brown says. For ventilation, which is important in pits to remove CO2 gasses, Brown ran a 4-in. pvc pipe from the ceiling of the shop down a side wall of the building and into the pit. The pipe is connected to an old furnace fan that blows air from near the ceiling down into the pit. One switch runs the fan and lights.

“The ventilation system does double duty,” Brown says.

“It takes the chill out of the pit on cold days, and keeps fresh air coming in when I’m down there working.” On the floor of the pit Brown laid pieces of 1-in. thick metal grating, material that’s normally used for stairs and floors in manufacturing plants.

“It isn’t slippery, my feet stay dry and if I spill anything, it’s easy to lift a section of grate and clean it up,” Brown says. When he isn’t using the pit, Brown can cover it with 2 by 6 rough-cut boards that lay on top of the pit walls and level with the shop floor.

“This pit isn’t anything fancy,” Brown said, “but it’s probably the best $200 I’ve ever spent. It sure beats laying on a roller under a jacked-up vehicle.” Contact: FARM SHOW Followup, Larry Brown, RR1, Box 20, Site 7, Grande Prairie, Alta., Canada T84 2Z8 (ph 780 532-0178).