Practical ideas from FARM SHOW MagazineSubscribe · Free issue · Send us your shop tip
Subscribe to FARM SHOW
Issues / Vol. 40, No. 1 (2016)

Vol. 40, No. 1 (2016)

Money-Saving Repairs & Maintenance Shortcuts · Printed section pp. 36–39

36 selected entries · Complete text of selected entries

This issue’s section includes reader tips and feature-length shop stories. Held items and editorial notices are not reproduced.

Archive text: prices, coupons, availability and contact details reflect the original publication, not current offers. Reader methods are not universal instructions; follow manufacturer guidance and proper safety practices.

Reader shop tips

From the archive · Full text
Reader shop tip

Kenneth Jones

Kenneth Jones, Leslie, Ark.

“I had trouble with wheelbarrow tires going flat. I tried tubes but they just kept going flat. So I bought a can of foam insulation and drilled 2 holes in each tire and then filled both of them with the foam until it came out the other hole. That was 2 years ago and I haven’t had a problem with the tires since.”

From the archive · Full text
Reader shop tip

Charles Matthews

Charles Matthews, Petersburg, Tenn.

“When I use a piece of rubber or plastic hose to protect hydraulic lines, electrical wiring, air pressure lines or something else that requires abrasion protection, I cut the hose in a spiral pattern rather than straight down one side. Once I get it on whatever I’m protecting, I hold the hose in place with zip ties. The spiral cut makes it almost impossible for the protected item to be exposed.”

From the archive · Full text
Reader shop tip

Dale Rogers

Dale Rogers, dalecmrogers@gmail. com

“In your last issue (Vol. 39, No. 6), Herman Vander Vos wrote about his problems with push rods in his Husqvarna riding mower bending and breaking. My guess is the sticky engine valves were caused by using stale gas.

“A few years ago I poured 5 gal. of old gas into my 1985 Oldsmobile. The gas didn’t smell bad and looked good. I drove about 40 miles the first day. The next morning, when I tried to start it up, a couple push rods bent. I thought it was just coincidental, so I replaced the bent push rods and drove it again. Next time I started up, the rods bent again. So I drained out the gas and put in fresh. No more problems.

“I think the old gas gummed up the valves and when the engine cools down, the valves get really draggy, resulting in bent push rods. The only thing old gas is good for is starting fires or washing off engine parts.”

From the archive · Full text
Reader shop tip 1 of 2

Jim Bowser

Individual tip 1 of 2 from this reader’s published contribution.
Jim Bowser, Saxton, Penn.

“I use anti-skid tape in short strips on both husking rolls on my cornhead to grip stalks better. These strips, which are normally used on stairs and walkways, can be purchased at any hardware store. Once the strips are applied, they help tremendously with harvest and do not come off.”

From the archive · Full text
Reader shop tip 2 of 2

Jim Bowser

Individual tip 2 of 2 from this reader’s published contribution.
Jim Bowser, Saxton, Penn.

Another idea Jim has is to color code his tools by size. For example, he takes all his 7/16th-in. wrenches – open end, sockets, nut drivers, combination wrenches – and spray paints them blue. All 1/2–in. wrenches are painted red and all 9/16th-in. wrenches yellow, and so on.

“That way, no matter what I’m working on, I can quickly grab the right-sized wrench,” he says.

From the archive · Full text
Reader shop tip

Alan L. Carender

Alan L. Carender, Williamsburg, Ind.

“I’ve heard other people suggest this idea and I wanted to say that it really does work. If you have to replace a pressed-in bearing race, you can loosen it up by welding a bead all the way around the center of the race, then allow it to air cool and pull out the race. I have used this method hundreds of times in the last 40 years. I’ve also used this method on dry sleeves. I use 1/8-in. 6013 rod @90 amps or 1/8-in. 7018 rod @100 amps.”

From the archive · Full text
Reader shop tip

Jim Stricker

Jim Stricker, Helena, Ohio

“I have a bunch of plastic fuel cans that originally came with flexible accordian-type spouts, which deteriorated after a few years. I replaced them with 3/4-in. dia. CPVC plastic pipe by cutting off the flex part of the old spout. I left the base of each spout so I could fit a piece of pipe into it. I cut about 3/8-in. off the end of a pipe fitting and slipped it over a piece of 3/4-in. pipe so I could slip it into the old nozzle stub. I glue that into the old nozzle. Then add a 45 degree “L” and another short pipe and a pipe cap on the end. You can glue the pipe together because the entire assembly will still pivot on the cap. This cheap do-it-yourself nozzle doesn’t leak.”

From the archive · Full text
Reader shop tip

David L. Vandevender Sr.

David L. Vandevender Sr., Durbin, W.Virg.

“I use a grease gun adapter with a needle point to grease axle bearings on my farm equipment. I drill a 5/32 or 1/8 in. hole in the center of an axle bearing dust cap and grease with 2 to 4 pumps until grease comes back out of the small hole when I stop to check. No need to ‘pack’ bearings anymore. I also drilled holes in sealed bearings on a 40-year Massey-Ferguson side delivery rake and greased it with the needle point. It’s still going strong.”

From the archive · Full text
Reader shop tip 1 of 4

Gary Holland

Individual tip 1 of 4 from this reader’s published contribution.
Gary Holland, (ladybug06@wildblue. net)

“Here are some ideas that have helped me: “Buy 1-in. foam pipe wrap and cut it to fit over your windshield wipers. It shields them from heat and cold so they don’t deteriorate. Just take the wraps off when you need to use the wipers. You’ll never buy wiper blades again.

From the archive · Full text
Reader shop tip 2 of 4

Gary Holland

Individual tip 2 of 4 from this reader’s published contribution.
Gary Holland, (ladybug06@wildblue. net)

“Save hydraulic lines on your tractors and other equipment by covering them with insulated pipe wrap. It keeps fluid from cold in winter and heat in summer and prevents rot from sunlight. Most lines can be covered with 3/4-in. wrap, which can be held in place with zip ties.

From the archive · Full text
Reader shop tip 3 of 4

Gary Holland

Individual tip 3 of 4 from this reader’s published contribution.
Gary Holland, (ladybug06@wildblue. net)

“Put a strong magnet on your drill press to hold bits. The bits will become magnetized and shavings will adhere to them. Old speaker magnets work well.

From the archive · Full text
Reader shop tip

Denny Rawlings

Denny Rawlings, Ehrenberg, Ariz.

“When a 12-volt pulsating fuel pump quits working, they will generally pulse in but not release. I figured out I could install a 12-volt turn signal flasher unit in the positive lead to the pump and it will work again. If you want it to pump a little faster, just install a 6-volt flasher unit.”

From the archive · Full text
Reader shop tip

George Burkhardt

George Burkhardt, San Antonio, Texas

“George came up with the Drain Plug Pro to eliminate the need to touch hot drain plugs or get hot oil on hands when changing oil. You simply loosen the plug and magnetically attach the one-size-fits-all head of the tool.

Then turn to remove the plug. No more dropping a plug into hot oil and it keeps splashing to a minimum. He came up with the tool after many years of changing oil on all kinds of equipment and getting hot oil splashed into his eyes, on the floor, and so on. The tool is sold at Amazon.com and is also available from Snap-on Tools, Matco Tools, Napa Auto Parts, and many other professional parts suppliers, as well as Sears and Walmart. Sells for $15.90 on Amazon. Commercial models to fit sockets and other drain plugs sell for more.”

From the archive · Full text
Reader shop tip

Gary Oberg

Gary Oberg

“My lawn mower is powered by a Briggs & Stratton engine that has a safety cable lever that has to be applied for the engine to start and stay running. When the cable broke, I used a 1/4-in. eyebolt, a 1/4-in. wing nut, and a 5/16-in. coupling nut to make a repair so I could still start and stop the engine.

“It normally requires considerable force to compress the engine’s start-up spring, but with a few turns of the wing nut I can easily start or stop the engine. I tighten the nut to start the engine and loosen it to stop.”

From the archive · Full text
Reader shop tip

Ollie Maier

Ollie Maier, San Marcos, Texas

“Our air compressor came with a pair of small wheels spaced closely together under the tank, which caused it to tip over sideways on uneven ground.

“To keep that from happening, I installed larger front wheels off an old riding mower. I had to extend the compressor’s axle by slipping a 1-ft. length of pipe over each end. Then at the point where the hole was on the axle to hold the original wheel on, I drilled a hole into each pipe and inserted a pin to hold the pipe on and to provide the inner limit for the new wheel. I then drilled another hole near the end of each pipe and inserted a pin to provide the outer limit for the wheel. Riding on bigger wheels that are spaced farther apart, it’s now almost impossible to tip the compressor over.”

From the archive · Full text
Reader shop tip 1 of 2

David Prause

Individual tip 1 of 2 from this reader’s published contribution.
David Prause, China Spring, Texas

“Because of sprocket wear, the reel drive chains on my 1968 New Holland 469 and 479 9-ft. haybines kept jumping off. Replacing the sprocket and the chains got expensive, so I got a small, flat idler pulley with ‘ears’ on either side of it and made a bracket for it with an adjustable arm that takes up any slack in the chain. The bracket is located between the haybine’s main drive sprocket and the reel sprocket. I installed the brackets 10 years ago and have never had to replace the chains since.

From the archive · Full text
Reader shop tip 2 of 2

David Prause

Individual tip 2 of 2 from this reader’s published contribution.
David Prause, China Spring, Texas

“Used motor oil or 80-weight transmission oil works good to keep roller chains greased. In the field I use a paint brush to apply the grease every 2 or 3 hrs. as the chains are moving. It reduces sprocket wear and keeps chains from becoming loose. I’ve used this idea for about 15 years and have seldom had to replace any chains. Of course, it can be dangerous to brush oil onto a moving chain so I’m very careful.”

From the archive · Full text
Reader shop tip

Cecil Slater

Cecil Slater, Buckeye, Ariz.

“I have eight 4 1/2-in. angle grinders fitted with different sanding or cutting wheels, sitting on my welding table. The angle grinders plug into a power strip ready for immediate use. The problem was that whenever I needed to take one of the grinders to a job site, I would routinely unplug the wrong cord.

“So I came up with an easy and cheap cure. I painted the grinder head and its corresponding electrical plug the same color. Now I just look at the grinder color, pull the corresponding plug out of the power strip, and I’m quickly on my way.”

From the archive · Full text
Reader shop tip

John Wolfe

John Wolfe, Buffalo Head Prairie, Alberta

“To fix a slow-leaking tire, first remove the valve stem core. Then using either a tiny funnel or a cheap plastic syringe, add about a half can of carbonated soda into the tire. It doesn’t matter whether it’s Coke or Pepsi or another flavor, just be sure to use carbonated sugar water. After reinstalling the valve stem core, fill the tire to the proper psi and take the vehicle for a short drive. As you’re driving, centrifugal force will cause the soda to escape through the slow-leak point. The soda then solidifies, sealing the tire. I’ve used this method on 5 different tires with 100 percent success.”

From the archive · Full text
Reader shop tip

Mark Yax

Mark Yax, Solon, Ohio

“It took too much time to replace the grinding wheels on my bench grinder with buffing or deburring wheels, especially to remove the guards. Instead, I’ve found that old swimming pool pump motors can make excellent polishers and eliminate the need to replace anything. These motors are usually 3/4 hp and operate at 3,450 rpm’s. Removing the motor’s impeller leaves a 1/2-in. standard shaft with a threaded end, which can be used with a nut and some washers to secure the deburring wheel or buffing wheel.

“I mounted my pump motor on a steel plate that clamps onto my workbench when needed. When you use a swimming pool pump motor this way I’d recommend always wearing safety glasses or a face shield because this setup has no guards. And never use a grinding wheel this way unless you make up some kind of guard that covers about 3/4 of the wheel, like you see on bench grinders. The wheel could explode and send chunks flying in all directions.”

From the archive · Full text
Reader shop tip

Bill Smith

Bill Smith, Cherokee, N.C.

“Plastic underarm stick deodorant containers can be used to make handy tool oilers. Once all the deodorant is gone I remove the cap, fold a piece of 1/2-in. thick felt, and push it down inside the container. Then I pour oil on the felt so it works like a big wick.

“This idea works great for applying a coating of oil on very small things such as a drill bit or the edge of a saw blade. I just rub the felt across the object, and when I’m done I put the deodorant container’s cap back on. The felt wick applies a nice, even coating of oil. There’s no need to spread the oil around with a rag or my hands like with a squirt can so I don’t get my hands messy. And I never have to worry about oil leaking inside a toolbox like with an oil can.”

From the archive · Full text
Reader shop tip

Glen Goddard

Glen Goddard, Corinth, Miss.

“We use a golf car at home with six 6-volt batteries connected in series to provide 36 volts. The batteries gave out, and a new set would have cost $1,000 to $1,200. Instead, I went to Wal-Mart and bought three 12-volt, deep-cycle marine batteries for $100 each. They’re the same size as the old batteries, but we can use them 3 or 4 times for an hour or two at a time with no problem. It takes about 2 hrs. to charge the batteries. If you wanted a longer operating time for the golf car, you could connect 3 more batteries in parallel with the other 3 for twice the range - and still save a lot of money.”

From the archive · Full text
Reader shop tip

Abram R. Hoover

Abram R. Hoover, Fortuna, Mo.

“Instead of buying a new pump to remove the liquid from 15-gal. plastic barrels, I bought a 1-gal. chemical jug fitted with a hand pump and set it on top of the barrel.

I drilled a 7/16-in. dia. hole through the side of the jug and also drilled a matching hole in the barrel’s small bung. Then I got a 5-ft. length of 7/16-in. clear plastic tubing and pushed one end down into the barrel’s small hole until it reached the bottom. I inserted the other end of the tube into the hole in the jug. The last step was to connect that end of the tubing to the hand pump. Works great.”

From the archive · Full text
Reader shop tip

ProVisionTools, Inc.

ProVisionTools, Inc., Franklin, Tenn. (ph 888 511-0579 or 615 771-7245; www.provisiontools.com)

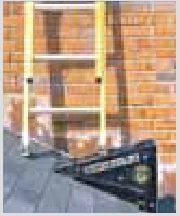
This wedge-shaped LadderTool is designed to be positioned under an extension ladder, allowing the user to climb the ladder safely on stairways, roofs and uneven ground. It requires no bolts or clamps so it can easily be moved from ladder to ladder. It supports up to 500 lbs. and sells for $82.95 plus S&H.

Shop feature stories

From the archive · Full text
Feature story

5-Ft. Long Grease Gun Hose Extension

Featured source: Tom Lass

“I often have to work by myself and sometimes have trouble reaching grease zerks on equipment. So I decided to solve the problem,” says Tom Lass, Cromwell, Minn.

“I removed the hose from my grease gun, went to a hydraulic hose store, and had them make a 5-ft. hose extension. They fitted a male end to the grease gun and a female end to one end of the original hose so that it could be screwed onto the grease gun. I carry the grease gun in a homemade holster that hangs from my belt.” Lass says that with the original 18-in. long hose he often couldn’t get the hose on the zerk and maneuver the grease gun at the same time. However, with the 5-ft. long hose he can reach just about any zerk even if it’s located above his head. He made the holster out of 3-in. dia. pvc pipe.

“I glued a cap onto one end, then cut a 1 1/2-in. wide slot all the way down through the center of the pipe and set the grease gun in it. I bent a 1-in. metal strap and riveted it to the other end of the pipe to form a loop that fits over my pants belt.” He paid $15 for the 5-ft. long hose, including the male and female ends. Contact: FARM SHOW Followup, Tom Lass, 5502 Hill Rd., Cromwell, Minn. 55726 (ph 218 644-3235).

From the archive · Full text
Feature story

Old Bar Makes Chainsaw Sharpening Easier

Featured source: Bob Stewart

Bob Stewart likes his Timberline crank-type chainsaw sharpener that has been featured in FARM SHOW (www.timberlinesharpener.com; ph 208 405-2020). You operate it by turning the crank and the carbide cutter does the rest. Once in place, the body rides the bar as the operator pulls the chain through to quickly sharpen each tooth. Every tooth is sharpened to the same height, length and angle.

“This is a great in-the-field sharpener that clamps onto the bar,” says Stewart.

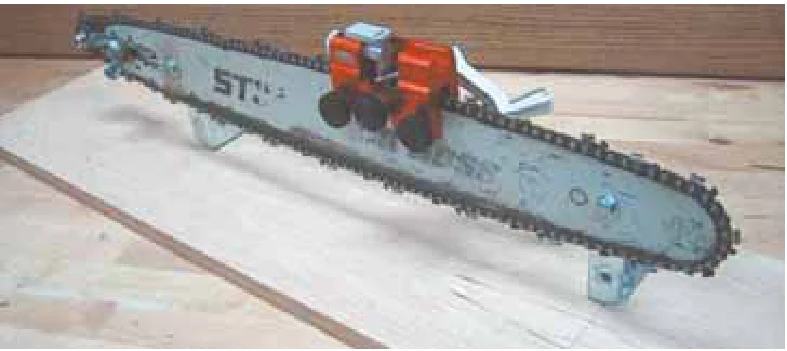
“I have several spare chains and I usually find that switching chains is faster than sharpening them while working, so I use the Timberline sharpener in my shop.” Rather than mounting dull chains on his chainsaw and then sharpening them, he built a chain-holding fixture from an old worn bar.

“I mounted the bar on a plywood base with 2 angle brackets and made a chain tensioner using hardware from my junk bin. The tensioner slides in the bar slot so the chain can be quickly mounted and removed with a single bolt and wing nut. The chain wraps around a pulley made from 2 plastic bushings separated by a washer mounted on a bolt.

“Clamping the fixture to my work bench makes sharpening faster and easier than trying to balance the chainsaw while you sharpen it,” says Stewart. Contact: FARM SHOW Followup, Bob Stewart, 35672 Road R, Mancos, Colo. 81328 (ph 720 289-4687; [email protected]).

From the archive · Full text
Feature story

Auger Gearbox Used To Start Dead Tractor

Featured source: Maurice McCutchan

Maurice McCutchan collects old tractors that often won’t start after sitting unused for long periods of time. The collection includes a pair of Minneapolis Molines. He didn’t want to tow the tractors to start them because that requires another person, and it can be hard on the tractor’s starter and ring gear. To solve the problem, he uses an old Mayrath grain auger to start the dead tractors through their pto shaft. He bolts the gearbox to a metal bracket that hooks up to the 3-pt. hitch frame on his Kubota tractor. The gearbox is driven by the Kubota’s pto and hooks up to the dead tractor’s pto. He engages the pto on the Kubota tractor with the Moline’s transmission in neutral, which turns the engine over to start.

“The engine oil is on top of the pistons so the engine doesn’t turn real hard. It turns at a consistent, slow speed so that I can work on it even with the spark plugs removed. That way I can check the oil pressure and also work on the carburetor and set valves and tappets, and so on,” says McCutchan.

“The gearbox I use turns in the right direction to crank the dead tractor. Going the wrong way would ruin the engine. I use the turnbuckle on the Kubota’s 3-pt. top link to hold the gearbox level.” Contact: FARM SHOW Followup, Maurice McCutchan, 2025 150th Ave., Aledo, Ill. 61231 (ph 309 372-8940; [email protected]).

From the archive · Full text
Feature story

“Single Pour” Floor Eliminates Need For Separate Foundation

Featured source: Matt Eby

Matt Eby saved time and money when building a new workshop by drilling holes for concrete piers and filling them with concrete at the same time as he poured the floor. When complete, the slab floor and in-ground columns were one solid base.

“It was a lot cheaper than a traditional foundation,” says Eby.

“A standard pole shed would have been a little less initially, but when I go to insulate and finish out the interior, I’ll be money ahead.” Eby’s plans for the 24 by 36-ft. workshop included an insulated slab with in-floor heat. He sloped the ground so the outside three feet of the slab would be 6 in. thick and the interior 4 in. thick.

“We drilled 15-in. dia. holes, 42 in. deep, every 6 1/2 ft. around the load bearing sides of the slab,” says Eby.

“Holes at either end, which only support the walls and not the roof or snow load, were spaced every 8 ft.” A uniform 2-in. thick layer of foam insulation was laid down with PEX waterline, floor drain and rebar laid out above the foam. Three pieces of rebar were placed in corner holes with right angle bends at about a 46-in. height. Two rebars with similar right angle bends were inserted into the remaining holes. Two pieces of rebar also passed over each hole. The top legs of the bent rebar were tied into surrounding rebar. These further reinforced the connection between the concrete slab and the in-ground columns after the concrete was poured. Once the concrete cured, Eby put up the stick-built structure. About half the materials were recycled at little or no cost.

“I picked up fiber cement siding at a farm sale for pennies on the dollar,” says Eby.

“The total cost was about $7,000 compared to about $30,000 with all new.” Contact: FARM SHOW Followup, Matt Eby, 56641 Glenwood Rd., Cassopolis, Mich. 49031 ([email protected]).

From the archive · Full text
Feature story

Patio Doors Used To Help Keep Shop Warm

Featured source: Nelson Brubaker

When Nelson Brubaker of Lena, Wis., built a big new 50 by 64-ft. shop building, he used the sun to help keep his heating and air conditioning bills down. But he didn’t install new solar panels. Instead, he bought 19 used kitchen patio doors and installed them in a row along the entire south side of the building, just underneath a 2-ft. overhang. The insulated building has 16-ft. high sidewalls and an uninsulated floor. Brubaker uses the building to construct storage sheds for sale. A wood stove provides additional heat during winter. The patio door windows measure 80 in. high and range from 30 to 48 in. wide. They’re screwed to a wooden frame at the top and bottom.

“The large windows take advantage of free sunshine and provide both heat and light,” says Brubaker.

“It’s really nice to walk into the shop on a cold winter day when the wind chill is at 30 degrees below zero, but the thermometer inside shows 50 degrees -with nothing more than God’s good gift of sunshine keeping it warm. On days like that the sun pours in like heating oil.” He paid $15 apiece for the doors and spent a total of $285.

“If I had bought all new glass windows I would have had to spend about $3,000,” says Brubaker.

“When I bought the windows I had no idea if the seals were good or not. I’ve had trouble in the last couple years with some of the windows fogging up because the seals went bad, but it isn’t a big problem.” He lives close to the 45 degree latitude and uses a simple 2 to 1 rule of thumb to determine how much sunlight the building can expect to receive.

“On December 21 the sun is at its lowest point on the horizon. The tops of the windows are 16 ft. high so the sun shines 32 ft. into the building at noon, which is about two thirds of the way across the floor. This 2 to 1 ratio also works on June 21 when the sun shines in only one foot for every 2 ft. in height. But with the 2-ft. overhang and the high summer sun, the windows are almost completely shaded.” People often comment to Brubaker that it must get pretty hot inside the building during summer, but he says that’s not the case.

“Sunrise on the longest days of the year is far to the northeast and sunset is far to the northwest. As a result the sun only shines inside the building for several hours during the middle of the day, and even then it’s only a thin 4-in. line.”

He says he doesn’t expect to achieve normal room temperature every day during the winter with his system, “but you can count on temperatures in the 40’s on any given winter day, and on days when the sun shines it’ll often reach 50 degrees.” Contact: FARM SHOW Followup, Nelson Brubaker, 5515 McCarthy Rd., Lena, Wis. 54139 (cell ph 920 373-4782; [email protected]).

From the archive · Full text
Feature story

“Built With Quality” IH Carb Kits

Featured source: Steiner Tractor Parts

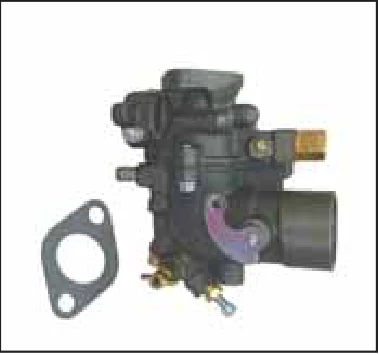
Steiner Tractor prides itself on parts, with more than 5,200 products stocked in their 45,000-sq. ft. warehouse, many of them made by the company. They’re especially proud of their new comprehensive carburetor kits for Farmalls.

“Our goal is to produce premium kits,” says Dan Steiner.

“Our kits have 90 percent of the internal components of a carburetor, so customers don’t have to piece their own kit together. A lot of kits are incomplete, and many use throttle shafts with plastic index stops. We have the original steel design.” Steiner offers carburetor kits for a wide variety of Farmall tractors including the M, H, Super H, MTA and more. Steiner says aftermarket parts are traditionally about getting a bargain. That is the way Steiner Tractor Parts began in the 1970’s. Started by his father Dave as a salvage business, he soon began making low-cost, hard-to-find parts. With a background as a finish carpenter, Dan changed priorities when he took over.

“We changed the focus to produce the best quality possible, not the cheapest part,” he says. Parts made by the company go through a rigorous process. Prototypes are designed with a CAD program on the computer and then produced in plastic with a 3D printer, measured and checked for accuracy and then installed on a tractor to ensure fit. Only then is it produced in the appropriate metal and tested in a working tractor.

“Every part we produce goes through 14 steps of development with an electronic history of who signed off on what,” says Steiner.

“Quality control for every part we distribute has 7 steps. Every part that is returned is documented and reviewed.” In the case of carburetors, parts are tried on the original tractors for which they were made. A tractor is fired up and run on a dynamometer. While they don’t have a formal testing lab, Steiner feels it’s the next best thing.

“We try to buy original tractors to test parts on,” says Steiner.

“We also have some sophisticated equipment, including hand held spectroscopy. There is always room for improvement. We try to do better all the time.” Steiner has 10 employees in quality control and 4 in the technical department. They each have decades of experience to back up the advice they share with customers. The company website is designed to share that knowledge with product details, specifications and instructions on installation. The website offers a wide range of videos and other support materials. Steiner says the company tries to make a new video weekly on everything from identifying parts to replacement and installation. However, it is parts that drive the business.

“We encourage customers to offer reviews of parts online,” says Steiner.

“We welcome feedback and constructive criticism.” Free 2016 catalogs are available from the company. Contact: FARM SHOW Followup, Steiner Tractor Parts, 1660 S. M-13, Lennon, Mich. 48449 (ph 800 234-3280; [email protected]; www.steinertractor.com).

From the archive · Full text
Feature story

Deere 5020 Repowered With Detroit V-12 Diesel

Featured source: David A. Will

“I bought a well used Deere 5020 tractor at an auction with a locked-up engine. It sat around for about a year before I decided to replace it with a Detroit V-12 diesel engine with about 450 hp,” says David Will, Wadesville, Ind. The tractor rides on 20.8 by 38 radial dual tires filled with fluid on back and on 20-in. tall, 22-ply truck tires on front. It weighs about 22,000 lbs. Will installed air cleaners out of a Freightliner semi truck on both sides of the tractor and also added a pair of 5-in. chrome stacks off a Peterbilt semi truck. A pair of gear-driven blowers force air into the engine.

“I use it to pull a 30-ft. field cultivator. It’s a lot of fun to drive,” says Will.

“It’s really loud - you can hear it 2 to 3 miles away when I’m using it in the field.” He found the V-12 diesel engine in Illinois.

“It had come out of a Manitowoc dragline in a Kentucky coal mine, where it was used to mine hundreds of thousands of tons of coal. But the engine was locked up due to spun main bearings. I sent the bare block to Republic Diesel in Louisville, Ky., to have it line-bored. They also bored out every cylinder hole to install oversize sleeves.” The entire winter of 2013 was devoted to assembling the engine and then installing it in the tractor. It has about 450 hp.

“It now pulls anything I hook on behind it and is quite competitive at local tractor pulls,” says Will. He cut the frame in 2 and welded in new material to lengthen the tractor by 15 in.

“I added part of the frame off a Deere 4840 underneath to strengthen the frame so that it wouldn’t break the flywheel housing,” says Will.

“The 4840 frame is bolted to the the 5020 frame and also to the tractor’s planetary housing.

“It was a lot of work, but I’m pleased with how it turned out,” says Will.

“I spent about $10,000 just to rebuild the engine. I also added two big 12-volt batteries hooked in series to provide 24 volts to start the engine.” Contact: FARM SHOW Followup, David A. Will, 10920 Diamond Island Rd., Wadesville, Ind. 47638 (ph 812 963-6503; cell ph 812 204-4587).

From the archive · Full text
Feature story

Fast Way To Clean Dirty Bolts

Featured source: Marc Golat

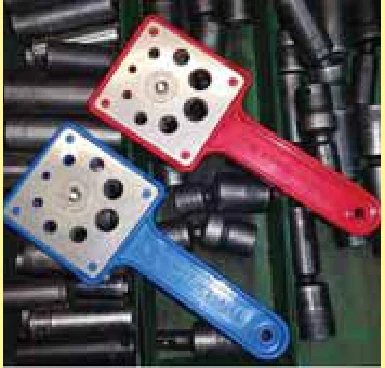
“Cleaning dirty bolts is easy with our new Thread Wizard,” says Marc Golat of Fairbanks, Alaska. The patent pending bolt cleaning tool has a durable handle that can be handheld or clamped in a vise. A wire wheel protrudes into size-specific holes surrounding the wheel. Rotating a bolt inside a hole removes all the grime, dirt, and surface rust.

“The Thread Wizard leaves the bolt clean and ready to be used in seconds without using solvents, wire brushes or wire wheel grinders. It’s the safest, fastest way to clean bolts,” says Golat.

“It won the Global Media award at the recent SEMA auto parts show in Las Vegas and was featured on Performance TV and Race Talk radio. It works great with ratchet wrenches, power tools and hand tools. When the wire wheel starts to wear, it’s designed to move to a new position or it can be replaced.” The Thread Wizard is available in both standard and metric. Standard cleans bolts from 3/16 to 9/16 and metric from 5 to 14 mm. Sells for $24.95 plus S&H. Golat says he’s looking for distributors. Contact: FARM SHOW Followup, GolaTTaylor Tools, P.O. Box 10399, Fairbanks, Alaska 99710 (ph 907 374-0471; [email protected]; www.threadwizard.us).

From the archive · Full text
Feature story

Foot-Operated Grease Gun Works Fast, Eliminates Mess

Featured source: Russell Barnes

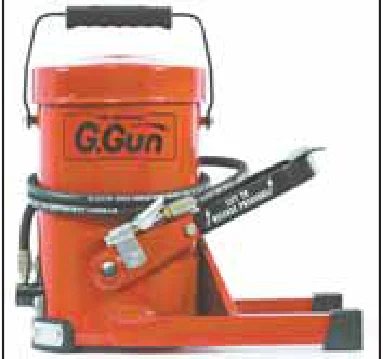
“Our new foot-operated grease gun makes it easy to grease machines quickly, safely, and with no mess,” says Russell Barnes of LocknLube, located in Lyme, N.H.

“It comes with a large canister that holds up to 16 lbs. of grease - the equivalent of 20 standard-size grease tube cartridges - that allows regular greasing without endless refilling.” The unit is equipped with the LockNLube grease coupler and a pressure release foot pedal. A 6 1/2-ft. long hose comes standard, with longer hoses available. A unique 2-stage pump creates a wave action in the grease, eliminating air locks.

“The combination of a pressure return valve and a check valve on the LockNLube coupler gives you near waste-free disconnection,” says Barnes.

“You simply lift the pedal to relieve back pressure and return grease to the canister.” The LockNLube grease gun coupler comes with a sliding sleeve that’s activated by a thumb lever. The unit’s 4 spring-steel jaws lock onto the grease zerk. With the jaws locked onto the zerk a leak-proof seal is created, preventing the coupler from coming loose and breaking the seal, says the company. Activating the trigger releases the coupler from the zerk.

“The tool’s design doesn’t require a messy follower plate, and there are no troublesome seals to replace. A clip-on lid keeps rain and dust out, and the carry handle hinges away for easy filling,” says Walton.

“No external power source or batteries is required. The grease gun is industrial strength, and able to pump at more than 10,000 psi.” Sells for $295 including S&H. Contact: FARM SHOW Followup, Russell Barnes, 343 Dorchester Road, Lyme, N.H. 03768 (ph 603 795-2298; [email protected]; locknlube.com).

From the archive · Full text
Feature story

Portable Workbench Lifted By Jacks

Featured source: Eugene R. Schwanbeck IV

“I made it to fit into the tight space my garage offers, but I can also quickly move it around wherever I want,” says Eugene Schwanbeck, League City, Texas, about his portable workbench. The cart rides on four caster wheels and measures 84 in. long by 37 in. high. A pair of modified trailer tongue jacks - operated by a cordless drill fitted with a socket adapter - are used to lower the wheels onto the floor. He used 2 by 2 by 3/16-in. thick angle iron and sq. tubing to make the workbench frame. The jacks are on either side of the table and are accessible with a socket extension through a hole in each of the table’s front legs. The bottom of each jack has a metal bar with 2 caster wheels on it that fit between the front and back legs on either side of the workbench. When each jack is extended, the wheels are lowered onto the floor as the table is lifted up.

“Each side of the workbench is lifted independently, but since I use a cordless drill it only takes a few seconds to extend or retract each jack,” says Schwanbeck. Once raised, the table can be moved around effortlessly with tools and material on top. Each jack is rated at 3,000 lbs. Since Schwanbeck’s garage floor isn’t completely level, he added non-skid leveling rubber feet to each leg.

“The feet can be screwed in or out to level the table and make the work surface more stable wherever the workbench is located. The rubber feet also help to dampen vibration from power tools,” he says. Contact: FARM SHOW Followup, Eugene R. Schwanbeck IV, 420 Jessamine Way, League City, Texas 77573 (ph 281 483-0722; [email protected]).