Practical ideas from FARM SHOW MagazineSubscribe · Free issue · Send us your shop tip
Subscribe to FARM SHOW
Issues / Vol. 41, No. 3 (2017)

Vol. 41, No. 3 (2017)

Money-Saving Repairs & Maintenance Shortcuts · Printed section pp. 32–35

33 selected entries · Complete text of selected entries

This issue’s section includes reader tips and feature-length shop stories. Held items and editorial notices are not reproduced.

Archive text: prices, coupons, availability and contact details reflect the original publication, not current offers. Reader methods are not universal instructions; follow manufacturer guidance and proper safety practices.

Reader shop tips

From the archive · Full text
Reader shop tip

Timothy Clark

Timothy Clark, Pearland, Texas

“After moving to the wetter climate of Houston, Texas, we experienced ‘wet’ shoulder seat belts in our Dodge Durango after heavy rains. Our dealer and the company were of no help solving the mystery. We disassembled the cover paneling around the ‘B-pillar’ but couldn’t find a path for how the water was entering. Finally, I removed the rooftop luggage rack rails and caulked around each of the 4 threaded fasteners with bathroom tub and tile sealer and then quickly replaced the rails. The seatbelts have remained dry ever since.”

From the archive · Full text
Reader shop tip

Bob Nance

Bob Nance, Kitts Hill, Ohio

“I have a Bolens 20-in. front-wheel self-propelled lawn mower. The solid rubber tires wore down smooth and wouldn’t pull the mower up hills. Buying new wheels wouldn’t make sense. So I took 1-in. drywall screws and inserted them into the tires, about 1 in. apart around both drive tires, leaving the heads sticking out about 1/8 in.

“I did this about 6 years ago and the mower is still working well.”

From the archive · Full text
Reader shop tip

Roger Gutschmidt

Roger Gutschmidt, Gackle, N. Dak.

“When installing a new roller chain it can be difficult to get the ends close enough to put on the connecting link. I use a heavy-duty zip-tie to snug up the slack and leave my hands free to install the connector link. It’s not in the way and you can snip it off when you’re done. I always keep a few in my toolboxes. Works much better than a piece of wire or a needle nose pliers.”

From the archive · Full text
Reader shop tip

Clarence McCourt

Clarence McCourt, Webster Springs, W. Va.

“I have a Yanmar 135 2-cyl. diesel tractor that was designed to run without a water pump, even though it has a radiator and fan. It constantly overheated and the manufacturer told me there was no way to put a water pump on it.

“I bought a DC-powered heat circulation pump from Bus Parts Warehouse in Syracuse, N.Y. (www.buspartswarehouse.com; ph 800 635-5567) for $163.20. Then I picked up some 1-in. radiator hose and clamps at an auto parts store along with a simple toggle switch. I mounted the pump behind the front bumper, splicing it into the bottom radiator hose, which was also 1 in. dia. Then I mounted the toggle switch, which has an indicator light on it, to the dashboard. A good mechanic could wire it directly to the ignition switch.

“It has been a year and the only time the tractor has overheated was the one time I forgot to turn the switch on.”

From the archive · Full text
Reader shop tip

Uniburr Tool Bit

Uniburr Tool Bit

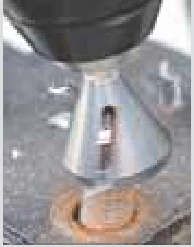
A new deburring tool makes it easy to repair bolts with damaged threads. It fits in a power drill and grinds down the end of a bolt, shearing off threads rather than folding them over as can happen with a grinder. The company says it doesn’t “chatter” and won’t overheat the work piece. The standard model sells for $44.95 and is available at Amazon or www.uniburr.com (ph 800 864-2877). A Uniburr Plus model for harder steel sells for a bit more.

From the archive · Full text
Reader shop tip

Andy Sewell

Andy Sewell, North Yorkshire, England

“FARM SHOW ran a piece on a valve I made for a vacuum hose that sucks fine glass bead dust out of my bead blasting cabinet (Vol. 40, No. 6). A reader kindly contacted me and suggested that he had used a similar idea when working with wood shavings, but with the addition of a DustDoctor cyclone. I couldn’t find one in England so I made my own using a 7-in. clear plastic funnel. At the bottom I cast a block of poly to act as a base to mount it over a bucket. The air inlet enters the top of the funnel at a shallow angle, with a piece of thin plate an inch below it to control the direction of flow. My bleed valve remains in place so I can still regulate the amount of vacuum at the blast cabinet.

“It worked great the first time I fired it up. Total cost was just a few dollars and the benefit is a huge increase in vacuum cleaner bag life. So thanks to FARM SHOW and its readers.”

From the archive · Full text
Reader shop tip 1 of 2

Eli Yoder

Individual tip 1 of 2 from this reader’s published contribution.
Eli Yoder, Haven, Kansas

“As the owner of a tree care business I recently made a money-saving repair on my pto-operated Vermeer wood chipper. I had repowered the machine a few years ago with a Kohler 22 hp engine, but after about 150 hrs. a bushing on the pto shaft that drives a set of pulleys wore out and began leaking oil. A local shop wanted almost $1,000 just to replace the bushing and housing.

“Instead, I decided to replace the bushing with a bearing. I bought a new 4-flange, 1 1/4-in. sealed bearing for $75 and slipped it over the pto shaft, then bolted it to the engine mounting plate. The flanges didn’t quite line up with the original holes on the bearing housing so I redrilled a couple of them. I also replaced a seal. It works perfect now and doesn’t leak any oil at all.

From the archive · Full text
Reader shop tip 2 of 2

Eli Yoder

Individual tip 2 of 2 from this reader’s published contribution.
Eli Yoder, Haven, Kansas

“I bought an old tile cutting saw with stand at an auction for $20 and converted it to a portable steel-cutting chopsaw. The saw’s electric motor didn’t work so I replaced it with a Honda 9 hp gas engine. I also installed a new driveshaft and replaced the saw’s belts and pulleys to fit.

“It works great to cut up pipe that we use to build fences on our farm and will cut 4-in. dia. pipe with no problem. I use my loader tractor with forks to move the saw from the shop to my pipe pile. The saw stand rides on small wheels inside a metal track. It came with a rolling table, which I replaced by welding in a 1/4-in. thick steel plate. The engine mounting plate is welded to a length of 1 1/2-in. sq. tubing. To adjust the belt tension, I just step on the tube.

“My converted tile cutting saw works great and cuts twice as fast as my old handheld Stihl chopsaw. It also cuts much more accurately.”

From the archive · Full text
Reader shop tip

Steve Nichols

Steve Nichols, Galesburg, Ill. ( ph 309 337-7141; [email protected])

“The headlights on my Deere 445 garden tractor came equipped with standard automotive, single filament backup light bulbs. I wanted better lighting for pushing snow at night, so I found some LED-type replacement bulbs at Walmart that were surprisingly inexpensive. These bulbs put out at least twice as much light and draw much less amperage, and they’re cooler than Halogen lights so they won’t melt the headlights’ plastic lenses. I may also mount LED lights on the tractor’s rear fenders to help when hooking up implements.”

From the archive · Full text
Reader shop tip

Menno L. Chupp

Menno L. Chupp, Arthur, Ill.

“I bought a used Peerless roller mill mixer 3 years ago with an unloading auger that didn’t work due to a stripped gearbox. I couldn’t find another mixer auger to replace it, so instead I used an old 12-ft. long gravity wagon auger that I bought at an auction for $50.

“The mixer came with a short auger at the bottom that delivered feed through a slide gate and then into another auger mounted outside. I removed both augers and reinstalled just the gravity wagon auger. It came with a metal chute, hydraulic motor and hoses, shut-off valve, and a hand-operated winch to raise or lower the auger. The gravity wagon mounting bracket didn’t match up with the mixer auger’s original bolt holes, so I installed a pair of homemade metal brackets on either side of the auger to hold it in place.”

From the archive · Full text
Reader shop tip 1 of 2

Ryan Riemer

Individual tip 1 of 2 from this reader’s published contribution.
Ryan Riemer, Shiocter, Wis.

“I replace the bulbs found in trouble lights with new LED bulbs. They don’t create heat and can take a drop to the floor without breaking. No more scorching hot light shields, either.

From the archive · Full text
Reader shop tip 2 of 2

Ryan Riemer

Individual tip 2 of 2 from this reader’s published contribution.
Ryan Riemer, Shiocter, Wis.

“I drew up a chart inside my oil storage cabinet that shows the type of fuel and oil filter, oil viscosity, quantity, and other important information.”

From the archive · Full text
Reader shop tip

Delbert D. Hayes

Delbert D. Hayes, Norwalk, Iowa

“If my deep impact socket gets worn down at the end, I use a chopsaw to cut off about 1/2 in. of the worn end. I use a grinder to smooth out the rough edges made by the chopsaw.”

From the archive · Full text
Reader shop tip

Mike Zimmerman

Mike Zimmerman, Elizabethtown, Penn.

“I had trouble with fouled spark plugs in several older gas engines, but as soon as I quit using multi-viscosity oil with detergent, the problem disappeared. I think it’s best to use straight SAE oil without detergent in it for antique engines.”

From the archive · Full text
Reader shop tip

Roy Wimer

Roy Wimer, Greenville, Penn.

“I came up with an easy way to clean out old gas tanks on tractors. I throw a handful of small bolts or ball bearings into a tank, add a little kerosene, then bunge strap the tank to a tractor’s rear wheel and jack it up in the air. I put the tractor in gear and let the wheel rotate for a few minutes, then put the transmission in reverse to rotate the wheel in the other direction. I then flip the tank over and strap it down from the other side, and repeat the process.

“I’ve used this idea for years to remove sludge and rust from gas tanks on tractors I restore. The photo shows the gas tank off an old Allis Chalmers B.”

From the archive · Full text
Reader shop tip

David Simpler

David Simpler, Elkton, Md. ([email protected]; ph 443 350-1199)

“While rebuilding my Brillion Culti-packer, I discovered that an end bearing and its housing were completely frozen. I didn’t want to beat on them with a hammer because they’re made of cast iron, but I knew that just spraying solvent on them wouldn’t help, either. So I decided to soak the axle for a few days. I cut off about 1/4 of an old wheelbarrow tire and clamped it onto the axle, then filled it with diesel fuel to soak the bearing. Worked great.”

From the archive · Full text
Reader shop tip

Marcus E.T. Schwartz

Marcus E.T. Schwartz, Monroe, Ind.

“I reuse fouled or dirty spark plugs by soaking them in kerosene to loosen up the ‘gunk’. I throw the plugs in a plastic jar filled with kerosene, and whenever I need one I use a wire brush wheel to remove any dirt or debris. The spark plugs will then work like new again. I’ve used some plugs 6 to 8 times with no problems.”

From the archive · Full text
Reader shop tip

Bob Kleiman

Bob Kleiman, Evansville, Ind.

“If you want to remove a broken axle from an axle housing but there’s no way to reach it, try using an electric welding rod. Ground one lead on the axle housing and put the other lead up against the end of the broken axle. Then have someone quickly turn the welder on and off, which will make a small weld so the rod sticks enough to let you pull the axle out. I’ve used this idea several times over the years and it really works.”

From the archive · Full text
Reader shop tip

Phil Whitmoyer

Phil Whitmoyer, Leesport, Penn.

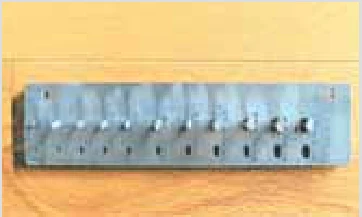
“I didn’t like having to guess which size bolt thread I was dealing with when making repairs. So I took a length of 1/4-in. thick scrap steel plate and tapped 2 rows of every size of American thread, ranging from 3/8-24 down to 4-40. I stamped the thread size onto the plate next to each hole. I also inserted a row of bolts of different sizes through the plate from the back side. Now I can quickly check any bolt or nut to see which size I need. If nothing fits I know it’s metric. The plate hangs above my workbench so I use it a lot.”

From the archive · Full text
Reader shop tip

Phil Tilley

Phil Tilley, Aragon, Ga.

“I bought a 12-volt fuel pump for just $29 from Advance Auto Parts and use it to pump diesel fuel directly into my Kubota 4-WD tractor. It’s handy and easy to use,” says Phil Tilley, Aragon, Georgia, noting that you can buy similar inexpensive pumps at Amazon.com, Northerntool.com, or Harbor Freight. The pump mounts on a metal bracket fastened to a post in Tilley’s machine shed. He plugs the pump into a portable 12-volt “jump box”, then places one end of the pump’s hose into a 55-gal. barrel and the other end into the tractor’s fuel tank and turns the pump on.

“It doesn’t work fast, but it’s reliable and inexpensive,” says Tilley.

“If the jump box isn’t available, I can always hook the pump up to my tractor’s battery.” He had been using a hand-cranked pump to deliver diesel out of the barrel and into a 5-gal. fuel can, which he then used to fill the tractor.

“The hand-cranked pump wasn’t nearly as handy to use. Also, I’m getting older and lifting a 5-gal. can of diesel 4 ft. high and then pouring it is hard work. Now I just plug the 12-volt pump into the jump box and turn it on,” says Tilley.

From the archive · Full text
Reader shop tip

Gary Swensen

Gary Swensen, Yankton, S. Dak.

“To keep a gas can from tipping over or sliding around when it’s in the back of my pickup, I throw an old tire in the box and set the can inside.”

Shop feature stories

From the archive · Full text
Feature story

Step-On Toolbox For Deere Combines

Featured source: Rob Skiles

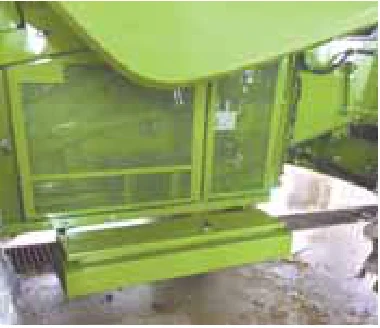
Ag Dryer Services makes an extra large toolbox that fits Deere combines from 1987 to the present. Demand has been so strong from owners of other makes that they are planning to expand. It all started with one special request.

“An area farmer said the new combines didn’t offer enough tool storage and asked if we could make him one,” says Rob Skiles, Ag Dryer Services.

“When his neighbors saw what we had done, they wanted one too. We started making them about 6 months ago and taking them to farm shows. They go like hotcakes.” The toolbox is 4 ft. long by 10 in. deep and 13 in. wide. It’s made from 12-ga. steel and is designed to replace the lower step on the left side. It has a locking handle and a rubber seal on the lid.

“No holes need to be drilled,” says Skiles.

“Simply remove the step and mount the toolbox in its place.” The toolbox is painted Deere green and sells for $345.95.

“We’ve had a lot of interest from owners of other makes,” notes Skiles.

“We haven’t developed any toolboxes for them yet, but we will.” Contact: FARM SHOW Followup, Ag Dryer Services, P.O. Box 450, Elm Creek, Neb. 68836 (ph 308 856-4636; toll free 800 657-2184; www.agdryer.com).

From the archive · Full text
Feature story

Rubber Plugs Stop All Kinds Of Leaks

Featured source: Dennis and Lauren Volzke

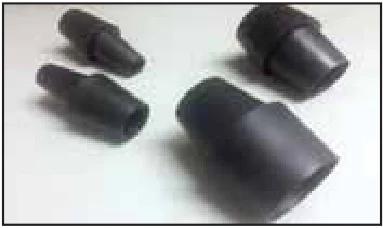
New flexible LDV plugs are made from a soft, flexible rubber that’s resistant to most shop chemicals and automotive fluids. They work great to plug oil lines, spark plug sockets, radiator hose lines, and just about any opening when working on equipment. They’re available in different styles and sizes, with either tapered or concave ends so they can either go inside the line or over it.

“LDV stands for liquid, dust, and vacuum, and our plugs can be used on all 3 kinds of lines,” says Dennis Volzke.

“They will stop any non-pressurized leaking.

“You can use them to form a seal when pressure washing, sandblasting, painting, or power washing. They can keep contaminants from getting into the oil whenever you change hydraulic hoses. The plugs are made of FDA formulated rubber so you can even use them with food service equipment and for plumbing work. One customer uses them on his meat smoker to control the volume of air coming through an opening in the smoker. The rubber has a working range of minus 40 degrees to positive 250 degrees.” LDV plugs are sold in 1/2, 1, 2, and 3-in. dia. sizes. Price for a bag of six plugs of the same size ranges from $9.99 to $16.99 plus S&H. A kit including 12 plugs with all 4 sizes, contained in a plastic “service tray”, sells for $49.89. A service tray kit with 12 plugs containing just the 3 largest sizes sells for $59.99.

“The service tray is vacuum formed and keeps the plugs from rolling around in your toolbox,” says Volzke. Contact: FARM SHOW Followup, Dennis & Lauren Volzke, LDV Plugs, Aberdeen, S. Dak. (ph 605 216-7516; www.ldvplugs.com).

From the archive · Full text
Feature story

New Tractor Carb Kits Fit Many Models

Featured source: Steiner Tractor Parts

Steiner Tractor is now selling premium repair kits for Marvel Schebler carburetors. Schebler carburetors were used by multiple tractor manufacturers and are often called “universal” carburetors.

“We started with kits for carburetors used on the John Deere letter series tractors and then added kits for a lot of the numbered International Harvester tractors,” says Dan Steiner.

“Now we’ve moved on to doing kits for the more universal carburetors built by Marvel Schebler.” Steiner notes that some originals are very difficult to replace, such as ones used in the Allis Chalmers WD 45. He recalls seeing them listed at as high as $200, due to the difficulty in finding a core. As a result, many were adapted by people who worked on them. Thus what is in place may not be original.

“I’ve seen where people have taken the same throttle body and fuel bowl and reconfigured them for different applications,” says Steiner.

“The linkage might vary or have different connections. Sometimes the only difference between 2 carburetors is the index stop on the butterfly or choke plate, while other times there may be a different orifice, nozzle or jets. Sometimes the difference is pretty subtle.”

Another challenge for restorers is figuring out what make carburetor was used. Steiner points to the Super 8 Farmall as an example.

“Some were from Zenith, others from Schebler, and others were from Carter,” says Steiner.

“If the owner doesn’t know what brand was used, we can’t help them. However, we do offer a number of videos on carburetors and how to identify them and find their serial number.” Without the number in hand, Steiner warns that choosing the right kit can be difficult. To make it easier, the company does offer economy kits with universal parts and multiple gaskets or nozzles.

“If you can identify the series a carburetor is a part of, we can ship an economy kit to work with,” says Steiner.

“Call our tech line, send in a photo or just walk in the door with the carburetor. We’ve even had people send us their carburetor. We’ll send it back with the parts needed.” Free 2017 catalogs are available from the company. Contact: FARM SHOW Followup, Steiner Tractor Parts, 1660 S. M-13, Lennon, Mich. 48449 (ph 800 234-3280; [email protected]; www.steinertractor.com).

From the archive · Full text
Feature story

“Carpeted” Tires Stop “Goathead” Flats

Featured source: Melvin Hagen

Melvin Hagen puts carpet lining inside his tires to solve the problem of flats caused by sharp goathead – also known as puncturevine seeds.

“Goathead seeds are about the size of a pea with sharp barbs. They’ll poke right into a car tire or small tractor tires,” says Hagen.

“Sit on them or get one in your hand, and you won’t forget it.” Goathead plants are commonly found in dry sandy areas. Although Hagen lives in Grand Junction, Colo., the worst infestations are found in Arizona, California, New Mexico, Nevada, Oregon and Texas. Hagen’s solution for tube-type tires is to cut a strip of 1/4-in. thick carpet the width of the tire face and a bit longer than the inside diameter of the tire. He first inserts the carpet and then puts in the tube. He adds a tube to tubeless tires.

“I used to cut it to length and use duct tape to connect the ends, but now I just overlap it a bit,” says Hagen. After breaking the tire loose from the rim, he slides the carpet in and positions it against the tire’s inside surface. After re-setting the tire, he removes the tire stem to make it easy to inflate and deflate the tire quickly several times. Once he is satisfied, he reinserts the stem.

“The repetition pushes the carpet out so the goatheads sink into it and stop there instead of pushing into the tube,” explains Hagen. Prior to using the carpet, Hagen tried adding silicone to tires. It cost nearly $20 per tire and it didn’t work. The goatheads just pushed through,” he says. Hagen has been using his carpet treatment successfully for the past 10 years.

“It works on everything from bike tires to skid steer tires,” he says. Hagen also has advice for people with goatheads in their yard.

“I take an old blanket or burlap bag and drag it around,” he says.

“It sucks up the goathead like a magnet. Of course, then you have to throw it away, so don’t use anything you want to keep.” Contact: FARM SHOW Followup, Melvin Hagen, 159 Sundance Dr., Grand Junction, Colo. 81503 (ph 970 234-4706).

From the archive · Full text
Feature story

Salvage Yard Specializes In Combines

Featured source: Randy Davidson

If Bryant Combine Parts doesn’t have the used combine parts you need, they can often supply a new aftermarket part. Either way, you’ll get a 6-month warranty and parts that work.

“We offer a better warranty than some brand retailers,” says Randy Davidson, Bryant Combine Parts.

“We test what we can and inspect the rest. In the case of fast moving parts that are difficult to keep stocked, we offer new, aftermarket parts at a significant savings over OEM replacement parts.” While their new parts sales are growing, the heart of Davidson’s business is the salvaged parts. With more than 500 combines from all brands plus shelves loaded with new and used parts on hand, there is plenty to choose from. While a few combines are for sale intact, nearly every one on the lot will be parted out. That includes combines that are in excellent shape.

“I’ve had customers tell me the combine I’m getting the part from is in better shape than the one they are repairing,” says Davidson. Although some parts may not be taken off the donor combine until a customer calls, other parts are removed as the combine arrives on the lot. That includes any parts that may be weather sensitive or particularly hard to pull off.

“We keep them stored inside and ready for sale,” says Davidson.

“If a FARM SHOW reader needs a part, call with the make, model and serial number. Increasingly, we need the serial number to access the correct parts book. The more information you can provide, the better.” Davidson says the business has changed a lot in the 30 years since he started it. While most parts go to repair operating combines, Davidson says they do get requests for older parts for restorations. At the same time, local and regional customers have evolved into a national and international clientele. They now ship throughout the U.S. and into Canada, as well as a growing overseas market. Contact: FARM SHOW Followup, Bryant Combine Parts, P.O. Box 176, Bryant, Ind. 47326 (ph 260 997-6940; toll free 800 255-1071; [email protected]; www.bryantcombineparts.com).

From the archive · Full text
Feature story

He Uses Canola Oil To Lube Chainsaw

Featured source: Gerry Hawkes

“I’ve been using canola oil as bar and chain lubricant in my 6 chainsaws for about 2 years. I’m very pleased with how it works,” says Gerry Hawkes, Woodstock, Vt.

“It’s far better for operator health to not be breathing in petroleum oils and better for the environment. It lubes just as well or better and comes from a crop grown on the farm. What’s more, it costs less.

“But you don’t have to believe me. There are both European and Canadian studies showing how effective it is as a lube oil.

There’s a good online article at http://learn. eartheasy.com/2010/11/using-vegetable-oil-to-replace-chainsaw-oil/.” Hawkes is a forester with several successful inventions. His latest is the “WHaTS” hand cart – an innovative leverage and transport cart that can do a number of jobs around the farm. Check it out at www.WheeledHandToolSystems.com. Contact: FARM SHOW Followup, Gerry Hawkes, 796 Wayside Road Ext., Woodstock, Vt. 05091 (ph 866 638-7337).

From the archive · Full text
Feature story

Electronic Ignition Conversion Keeps Old Welder Welding

Featured source: Clifford Byer

Clifford Byer converted the Wisconsin V-4 engine on his Lincoln arc welder to electronic ignition when a distributor and magneto were no longer available. Along the way he also learned to cast aluminum.

“I knew that Chrysler and Wisconsin parts matched up pretty well, so I started with an electronic ignition system from an older Chrysler V-8,” says Byer. The older electronic ignition system still used points, but the V-4 only needed half of them. Byer ground out the extra points, leaving the ones needed for the V-4 firing order. He had to make a few slight modifications, such as filing down a flat spot on the stem so the Autolite rotor would slide on. He wired up the module with the Chrysler coil and ran into a problem. The Wisconsin distributor was cast iron, and the coil kept picking up stray current and firing on different cylinders. With the help of a neighbor and the use of his forge, Byer cast an aluminum replacement.

“I welded some washers and pipes together that were slightly bigger than the cast distributor,” he says.

“We melted down aluminum scrap and poured it into the mold. When it cooled, I milled out the new distributor. It worked like a charm.” Contact: FARM SHOW Followup, Clifford Byer, Box 201, Alonsa, Manitoba, Canada R0A 0A0 (ph 204 767-2159).

From the archive · Full text
Feature story

“Quick Release” Magnet

Featured source: Roger Kuntz

Hot parts produced by plasma cutting torches are easy to pick up with this new “quick release” magnet from K-Tech, Grainfield, Kansas.

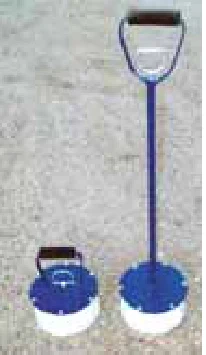
“It can lift up to 25 lbs. of solid steel, or a little less if the parts are loose. Anyone who does any welding or metal fabrication will find it useful,” says Roger Kuntz. The 2-ft. long magnet comes with a foam grip metal handle with a trigger inside it. A hollow stem runs from the handle down to a large 5-in. dia. magnet contained in a pvc housing with an aluminum base. A plunger runs from the trigger down through the stem to the magnet. When you pull the trigger, the magnet pulls away from the base and the object drops off.

“We came up with the design because many farmers are now using plasma cutting torches which cause material to get much hotter,” says Kuntz.

The company also offers an 8-in. long quick-release magnet that works the same way. Both models sell for $45 apiece plus $5 S&H. Contact: FARM SHOW Followup, Roger Kuntz, K-Tech, 5251 Co. Rd. X, Grainfield, Kansas 67737 (ph 785 673-5560).

From the archive · Full text
Feature story

Self-Propelled Workbench Drives To The Job

Featured source: Chad Goetzinger

“This portable work bench saves a lot of steps and makes my job as a self-employed mechanic a lot easier. I think farmers with big shops could benefit from the same idea,” says Chad Goetzinger, owner and operator of Chad’s Tire and Repair Service in Plainview, Neb. He recently sent FARM SHOW photos of his modified electric golf cart that carries all kinds of different tools and supplies. The cart is fitted with a big metal frame that wraps around 3 sides of the vehicle and attaches to it with 4 bolts on front and back. The frame supports a metal platform that serves as a workbench. There’s a Montezuma toolbox on one side just behind the driver, and a fold-out compartment covered by an expanded metal “rack” on front for storing air, standard jacks, and a set of acetylene tanks. A pair of scissors jacks on back are used to stabilize the workbench. A Wilton vise fits onto either end of the workbench. Each scissors jack is attached to a threaded rod that runs up through the frame.

“I use a cordless impact wrench to buzz the jacks down to the floor or ground. It keeps the whole workbench solid so that it doesn’t wiggle from side to side,” says Goetzinger. On the passenger side of the cart there’s a pair of big built-in drawers and a half dozen bins, as well as 6 smaller drawers lined up vertically.

“It’s a real conversation piece around here,” says Goetzinger.

“A lot of people have come in to see it, and everyone wants to take photos. A lot of farmers with big shops in the area want me to build one for them.

“I came up with the idea because I operate a one-man shop where I work on farm tractors, trucks and other equipment. There’s a big lot behind my shop where I’m often working, but it seemed like I never had the right tool with me so I had to walk 50 or 60 ft. back to get it. One day I was installing an air bag on a truck outside the shop, and I counted 11 different trips that I had to make back to the shop just to get a different tool or part.” The rack on front is supported by a pair of light chains and can be used as a base for either jack.

“It works great to change tires. I flip the rack down to the ground and set the jack on top of it,” says Goetzinger.

“I can also use the rack on the ground to drag big truck tires into the shop.

“When I’m done at the end of the day I throw everything on the workbench or rack and drive the cart back into the shop, and then put everything away.” He says he uses the drawers to keep small tools and parts such as cotter pins, clevises, hose clamps, electrical wire, and connectors, punches, small bolts, and all kinds of other stuff including bolts and washers – anything that he might need when working on equipment.

“The whole works comes off with 4 bolts and an overhead crane, but I seldom take it off because it’s so handy,” says Goetzinger. This isn’t the first time he has modified a golf cart.

“I’m an avid prairie dog hunter and about 20 years ago I converted a gas-powered golf cart into a portable shooting table. It’s fitted with 4-wheeler tires, a shooting bench, and a place to put ammunition. I widened the seats on it so that I can drive around prairie dog towns and shoot from it,” says Goetzinger. Contact: FARM SHOW Followup, Chad Goetzinger, 208 1/2 South Main St., Plainview, Neb. 68769 (ph 402 582-4581 or cell ph 402 841-9006).

From the archive · Full text
Feature story

Shop Tool Can Make “Almost Anything”

Featured source: Marshall Bulle

“About 7 years ago I designed and built a portable universal fabricating device. To advertise the machine, I used a picture of a pedal-powered playground-size yellow Ferris wheel that I built for my grandkids, and sales took off,” says Marshall Bulle about his UF-25H Universal Fabricator. He says the Fabricator is ideal for any project that requires forming square and round tubing, pipe, flat and solid bars. Most bending is done in 45, 90 or 180 degree bends, and he says that’s where the device really shines. He’s used it to build a merry-go-round, swing sets, lawn furniture, a greenhouse, 4-wheeler racks, ladder racks, brush guards, dune buggys, go carts, trailer hitches, ornamental railings, gates, and fences. The Fabricator has a standard lock-n-stop gauge with an engraved numbering system. The gauge allows the user to repeat precise angles at a later time. Bulle has written plans books that include step-by-step directions for many different projects which he’s first built himself. In 7 years of selling the Fabricator he’s never had a complaint about the machine and very few questions about how to use it. He’s had industrial arts teachers tell him that students can easily understand the directions and many have used the fabricator to build projects that they’ve sold to bring in money for their schools. The Universal Fabricator sells for $6,998 plus shipping. Different attachments for producing scrolls, twists, bending square and round tube, flats and angles are available. The company also sells two different sizes of ring rollers.

He built the wheel in about a week, which included drawing up the plans, fabricating the parts, assembling, welding and painting. The triangular base frame is made of round tubing and the wheel frame is made of square tubing. The wheel rides on bearings at the top of the base frame and is driven by a bicycle-type pedal system on one side. The pedaling, typically done by an adult, turns the wheel slowly with a chain drive. Both seats on the wheel have safety restraints so kids can’t accidentally tumble out. Says Bulle, “I’ve had a lot of experience fabricating and building, so I probably made the wheel faster than most people can, but anyone who’s adept at building can quickly learn how to use the fabricator and build the wheel and other things.” Contact: FARM SHOW Followup, Shop Outfitters, P.O. Box 20106, 4932 Graneros Rd., Colorado City, Colo. 81019 (ph 719-676-5555; www.shopoutfitters.com).

From the archive · Full text
Feature story

Quick Way To Fix Worn Tie Rods

Featured source: John Owens

When a tie rod gets worn or comes apart, John Owens has a “fast fix” solution. His Ford 5000 tractor came with a non-greasable, permanently lubricated tie rod joint. When the piece of nylon that provided the non-lubricant lubrication wore out, Owens was in the middle of a job.

“I didn’t want to stop and order parts,” says Owens.

“A new tie rod would have cost $220, but I figured out how to fix it with a $1 washer.” The first step was to take it to a shop that had a tie rod knocker. The removal tool is a tapered fork that slides under the tie rod end. With the help of a hammer, it is driven in to knock the pivot pin out. He then put the pin bolt back in the socket and secured it in place with a 7/8-in. steel washer that fits over the end of it.

“I welded the washer around the outside rim on the top of the socket and put the tie rod back in place on the tractor,” says Owens. Later Owens had to do the same thing to the other tie rod on his 5000. Both have held up just fine.

“I always figured that when they wore out, I would get the parts to replace them,” says Owens.

“However, the first one has lasted for many years and so has the second. All I do is squirt some oil into the socket once in a while.” Contact: FARM SHOW Followup, John N. Owens, P.O. Box 875, Paris, Texas 75461 (ph 903 982-6952).