Practical ideas from FARM SHOW MagazineSubscribe · Free issue · Send us your shop tip
Subscribe to FARM SHOW
Issues / Vol. 27, No. 1 (2003)

Vol. 27, No. 1 (2003)

Money-Saving Repairs & Maintenance Shortcuts · Printed section pp. 36–39

42 selected entries · Complete text of selected entries

This issue’s section includes reader tips and feature-length shop stories. Held items and editorial notices are not reproduced.

Archive text: prices, coupons, availability and contact details reflect the original publication, not current offers. Reader methods are not universal instructions; follow manufacturer guidance and proper safety practices.

Reader shop tips

From the archive · Full text
Reader shop tip

Keith Schole

Keith Schole, Pickardville, Alberta

He likes the Allied 795 loader on his Deere 4450 tractor. The only problem is that since the loader frame was not made especially for that tractor, it blocks access to the tractor’s oil reservior.

Schole had to re-move the loader every time he wanted to change oil. So he decided to make a “reach funnel” to solve the problem.

He used two 1-liter oil bottles and an 18-in. piece of pipe. He cut the bottom off one bottle, turned it upside down, and taped it to the top of the pipe. Since the pipe was too big to fit into the tractor’s oil reservoir, he cut off the small end of another jug and taped it to the bottom end of the tubing, making a spout that is just the right size.

Now he just uses the funnel to reach between the loader frame and the tractor, eas-ily adding oil without any fuss.

From the archive · Full text
Reader shop tip 1 of 2

M. Hochstetler

Individual tip 1 of 2 from this reader’s published contribution.
M. Hochstetler, 174 Vogel Rd., Cumberland, Va. 23040 ph 804 492-4295

“I never used the depth stop on my drill press much because it took too long to adjust. To solve the problem I found a nut that would fit the adjustment bolt and welded it between the jaws of a spring clamp. Then I sawed the nut in half. To adjust the depth stop I just lower the spindle on the drill press and slip the nut in place onto the adjusting bolt. It eliminates the need to run the nut up or down the adjusting bolt.

From the archive · Full text
Reader shop tip 2 of 2

M. Hochstetler

Individual tip 2 of 2 from this reader’s published contribution.
M. Hochstetler, 174 Vogel Rd., Cumberland, Va. 23040 ph 804 492-4295

“I ran PVC air lines in my shop with several outlets. I hooked a portable air tank up to one of the outlets. Since the air tank had a female fitting on the hose with an automatic cut-off, I don’t lose pressure on the line whenever I unhook it. The portable tank is always full when I need it.”

From the archive · Full text
Reader shop tip

Pat Field

Pat Field, Box 93, Pendroy, Montana 59467 ph 406 469-2299

“We were breaking a lot of flywheel shear pins on our 1991 New Holland D1000 mid size square baler. The metric shear pin on it measured about 5/ 16 in. in diameter. A neighbor had a New Holland 1282 self-propelled baler that used 3/8-in. dia. shear pins. We decided the same shear pin would work on our baler, so we had a local machine shop drill the shear pin hole out to a 3/8-in. diameter. It worked. We made this modification several years ago and it has saved us a lot of downtime over the years.”

From the archive · Full text
Reader shop tip

Charles M. Hoyt

Charles M. Hoyt, Medina, Ohio

“Several acquaintenances of mine have had problems with the front-mounted coil burning out on their Ford 9N tractors, probably as the result of switching the tractor’s charging system from 6 to 12 volts. I had the same problem on my 9N tractor. A new coil is quite expensive. To save money I gutted the old coil and epoxied a coil tower to it which I got from the distributor cap off a junked car .

“The tractor’s distributor is mounted up front next to the fan blades where you can hardly see it or get to it, and the coil is clamped on top of it. I removed the guts from the burned-out coil, then epoxied the car coil to the housing so that it sticks out to the side. Then I ran a wire from the center of the car coil to the top of the distributor. The car coil mounts on the side of the engine where I can see it and where it’s easy to work on.”

From the archive · Full text
Reader shop tip

Leon Allison

Leon Allison, Doylestown, Ohio

“I’ve replaced numerous worn bearings with nylon bearings that I make myself. I buy solid round stock nylon stock from Universal Plastics in Akron, Ohio. The nylon can be purchased in various sizes - I usually buy it in 2 or 2 1/2-in. dia. chunks. I use my small lathe to cut it to the size I need. I always make sure I leave ample clearance, because if the nylon bearings are too tight they will get hot and swell and then seize up.

“I’ve made nylon bearings for my hay rake and manure spreader and for a 4-ft. dia. decorative water wheel in our yard. When I made a nylon bearing for my New Holland small square baler, I split it in half to get it around the shaft and then clamped it in place so that it won’t slide out. It eliminated the need to take the entire shaft apart. Being able to make my own bearings saves a lot of money.”

From the archive · Full text
Reader shop tip

J.L. Vaughan

J.L. Vaughan, Hallsville, Texas

“I store some of my 3-pt. equipment on old wooden pallets. That makes it easier to manhandle equipment around for hookups, especially when I don’t have any help.”

From the archive · Full text
Reader shop tip

Shambaugh Farms

Shambaugh Farms, Oakley, Ill. ph 217 763-6156

“To heat our shop during the winter, we cut up scrap lumber and store it in any of a half dozen metal hoppers. The hoppers measure about 3 ft. square and are designed to be handled by a forklift. We bought them at an auction for about $25 apiece. The hoppers were originally used by manufacturing plants as parts containers.

“The scrap lumber we use comes from wood pallets which we get free from local seed companies. We cut the wood into 30-in. lengths. Whenever we need wood for the stove we just use the forklift to bring in a hopper full. The hoppers can be stacked on top of each other to save space. It eliminates the mess of having boards laying around everywhere and keeps the shop neat.”

From the archive · Full text
Reader shop tip

Len Corzine

Len Corzine, Assumption, Ill.

“I built my own shop table and mounted it on caster wheels. It’s made from 2-in. angle iron and steel tubing and measures 3 ft. wide and 5 ft. long. I’m 6 ft. 3 in. tall so I made the unit higher than most commercial shop tables. It has a plywood top that’s about waist high so I don’t have to bend over. There’s also a plywood shelf down below. The table really comes in handy for working on objects such as small engines, etc. I can roll the table close to the tools I need to use.”

From the archive · Full text
Reader shop tip

Roger Burgess

Roger Burgess, Modesto, Ill.

“I needed a standby generator in case of power failure. I had Lloyd Meffert of Hettick, Ill., build this

one using the chassis of an old garden tractor as its power source. I started with an Ariens GT 12 tractor powered by a 12 hp engine. I

removed the rear deck and axles and created a hitch point to allow the unit to be towed around. On the former front end I welded the steering mechanism to make it trail straight. The generator was rigged to take its power from the front of the engine. There’s an electric clutch on the engine pulley. I used a 5,000-watt generator. I rigged the electrical system to where a single plug-in can run the power for all my needs.”

From the archive · Full text
Reader shop tip

Ron Kesler

Ron Kesler, Backwoodsman Magazine

“This simple device comes in handy to re-pair wire fences. It makes a neat splice. It consists of a metal strip that’s 1 in. wide and 1/8 in. thick. One end is cut narrow and is bent into a hook that’s large enough to fit over the wire. At the sides of this, two notches are filed off.

box “The other drawing shows the splicer in position on the wire. The splicer should be turned backward, as shown in the drawing, to make the splice. A pair of large pliers should be used to hold the two wires between the coils while turning the splicer.

“The splice as finished appears in the third drawing. A 6 or 7-in. piece of metal can be used to make the splicer. This will be about right for no. 8 wire. If it is to be used only for smaller wire, the length of the handle can be reduced for the sake of convenience.”

From the archive · Full text
Reader shop tip

S & S Products, LLP

S & S Products, LLP, Box 142, Maywood, Neb. 69038

“Our durable nylon Rench Rap tool pouch replaces the original, easily torn plastic pouches that new tools normally come in.

“The pouch has a fold-down top that assures your wrenches are secure in their pocket and easy to carry when the pouch is rolled up. The size of each wrench is printed right on the individual pocket for that wrench.

“You can hang the pouch up in your shop, carry it in your vehicle, or keep it in your toolbox. Sells for $19.95. Order online at www.renchrap.com or call 888 561-0213 (U.S. only) or 308 367-4467; fax 308 367-5592.”

From the archive · Full text
Reader shop tip

Robert Boone

Robert Boone, Intacap, 207 East Main St., Union City, Ohio 45390 ph 800 333- 8718; E-mail: [email protected]

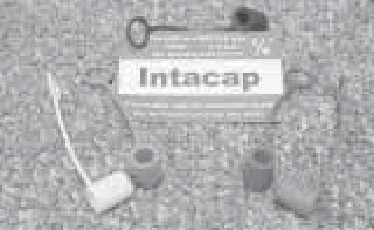
“Our company recently introduced an intake cap for pneumatic tools that fits tightly over the tool’s intake coupler. It protects the inner workings of the pneumatic tool from dirt and grime when a tool is not in use. It’s molded from durable and flexible Santoprene material for long life. The cap has a tether to secure it to the tool when it’s in use in order to prevent loss of the cap.

“The cap is currently available for 1/4-in. couplers. We plan to offer caps for 3/8 and 1-in. couplers in the near future. Intacap sells for $1.99 MSRP. Contact us for sales outlet information.”

From the archive · Full text
Reader shop tip

Brian Dickinson

Brian Dickinson, Rocky Mountain House, Alberta

“I used 3/4-in. thick plywood to make a toolbox that mounts on back of my ATV. It measures 9 by 44 in. and has a hinged, lockable lid. I use the toolbox to store a lot of different things, including an axe, small hand saw, shovel, frying pan, medical kit, cell phone, poncho, fence pliers and stretcher, snatch blocks for my ATV-mounted winch, a rifle, ammunition, gloves, knives, and rope.”

From the archive · Full text
Reader shop tip

Marty Garrett

Marty Garrett, Louisville, Ill.

“I use a radial arm saw in my shop and often had problems with dust flying up everywhere. I solved the problem by connecting the hose on my shop vac up to the discharge port on the saw. The hose fit perfectly onto the discharge. All I had to do was tape it on.

“The saw came factory-equipped with the discharge, which was designed to be used with central vacuum systems that some woodworking shops use. I use a brush occasionally to remove any fine dust from the filter in order to keep it from plugging up.”

From the archive · Full text
Reader shop tip 1 of 2

Roy Klindt

Individual tip 1 of 2 from this reader’s published contribution.
Roy Klindt, Crane Valley, Sask.

“I had difficulty seeing the twine when baling with my round baler. I couldn’t tell if the twine was moving or not so I often dumped out bales that weren’t tied. I also had bales with twine wrapped all through them because the twine didn’t cut off and I didn’t realize that it was still going out. I solved the problem by mounting a wooden sewing machine thread spool on front of the baler. The twine travels over this spool, turning it, so I can see at a glance whether the twine is moving. I painted a dark stripe on the spool to make any movement easy to see.

From the archive · Full text
Reader shop tip 2 of 2

Roy Klindt

Individual tip 2 of 2 from this reader’s published contribution.
Roy Klindt, Crane Valley, Sask.

“The pto-operated hydraulic pump on my New Holland haybine is quite heavy and tended to sag on the tractor’s pto shaft. The resulting vibration caused the hydraulic hoses to rub against the haybine frame. I was afraid the hoses would wear through and also that the steel lines they were connected to would fail due to metal fatigue.

“To solve the problem I made a sling for the pump that keeps it running nice and straight. I wrapped a piece of baler belt around the pump and used a pair of square steel plates to bolt the top ends of the belt together. The plate connects to a steel bracket that’s welded to the top link on the tractor’s 3-pt. hitch. The pump can be raised or lowered by turning a 2 1/2-in. long bolt that connects the bracket to the flat plates.”

From the archive · Full text
Reader shop tip

Steve Devaney

Steve Devaney, Merkel, Texas

“I cut the caster wheels and handle off an old hydraulic floor jack that didn’t work any more and use them to move my table saw around my shop. Two wheels and their adjoining support brackets are permanently bolted to a square wooden base that’s bolted to the bottom part of the table saw’s legs. A small steel ring is bolted to the front side of the base.

“The bottom part of the jack handle has a metal bracket with two small caster wheels and a hook on front. By inserting the hook into the ring and prying up on the handle, I can raise the front part of the base off the floor and then pull or push the table saw wherever I need it. It really works good. An-other advantage is that the base catches a lot of the sawdust that falls from the table, which makes cleanup easier.”

From the archive · Full text
Reader shop tip 1 of 2

Karey Waldrop

Individual tip 1 of 2 from this reader’s published contribution.
Karey Waldrop, Walterboro, S.C.

“I used a 55-gal. barrel and lengths of old railroad track to make a combination vice table and anvil. The drum was filled with sand to within 8 in. of the top and finished off with rebar and cement. The vise is fastened to bolts that are anchored in the cement.

“I started the project by cutting into the barrel until the tops of the railroad irons were just above the top of the barrel and then spot welded the irons in place. Then I put in the rebar, positioned the bolts for the vise, and poured the cement. If I want to lay something big on top of the anvil I can unbolt the vise and take it off. The railroad irons will take all the pounding I can give them without cracking.

From the archive · Full text
Reader shop tip 2 of 2

Karey Waldrop

Individual tip 2 of 2 from this reader’s published contribution.
Karey Waldrop, Walterboro, S.C.

“I also converted an old gas grill that didn’t work any more into a portable parts washer, by replacing the grill with a 3-gal. electric-operated parts washer. I use the grill’s folding front and end sections to hold parts. The nice thing about my parts washer is that I can take it anywhere I want. If I’m working on a tractor on the cement pad in front of my shop I can just roll the parts washer out there and wash parts on the spot. It’s amazing how much that helps. It saves hundreds of steps and also eliminates the possibility of dropping parts that I’d otherwise have to carry into my shop. It also avoids making a mess in my shop.”

From the archive · Full text
Reader shop tip

Jerry Fisher

Jerry Fisher, Ronan, Mont.

“I found an old buzz saw in the junkyard and mounted it on a trailer. I use a 16 hp Briggs & Stratton gas engine to belt-drive it. The engine had been attached by a shaft to a generator that was worn out. I also rigged up a couple of other pulleys and a belt tightener, which I borrowed from the power steering pump on a car.

“The saw frame and engine mount on a 2-in. thick wooden deck that I mounted on top of the trailer. A tray at the back of the trailer that’s hinged at the bottom is used to support the log. The operator pulls and pushes on the tray to cut the log.

“I pull the trailer behind my pickup and cut wood for area farmers and ranchers. I also use the saw to cut old fence posts into firewood for the wood burning stove I use in my shop. My total cost to build the saw was only about $600.”

From the archive · Full text
Reader shop tip 1 of 3

Dennis Albright

Individual tip 1 of 3 from this reader’s published contribution.
Dennis Albright, Springfield, S.Dak.

“I extended the life of a 1986 Pontiac 6000 station wagon. The problem was that the engine would die from low idle RPM’s. There’s no adjustment on injector engines that I know of. Dealers just tell you to replace the injector pump, which can cost $700 or more. I looked at it and decided I could beat that. I simply taped a small piece off plastic credit card to the stop plate on the throttle. That made it just a bit thicker, speeding up the idle just enough to keep it from dying. Worked great.

From the archive · Full text
Reader shop tip 2 of 3

Dennis Albright

Individual tip 2 of 3 from this reader’s published contribution.
Dennis Albright, Springfield, S.Dak.

“Diesel trucks often have trouble with the air brakes freezing in cold weather. It’s a lot of work to take the air lines off and pour fluid into them from a gallon bottle, or whatever. I just put some air line dryer fluid into a kitchen-type spray bottle, and then loosen a hose clamp and use a screwdriver to make a small opening where I can squirt in some fluid. IN most cases it will thaw ice in the lines nearly instantly.

From the archive · Full text
Reader shop tip 3 of 3

Dennis Albright

Individual tip 3 of 3 from this reader’s published contribution.
Dennis Albright, Springfield, S.Dak.

“Here’s another idea I’ve used for years on crawler tractors, from the smallest to the biggest. When bushing or tapered roller bearing-type tracks start to leak oil, I fill them with regular grease gun grease. They’ll go a long time that way. When they start getting warm, just add more grease. Works best with the bronze bushing rollers – it can double their life. I’ve also used this idea on older manual transmissions or gearboxes that normally use 90-140 weight oil.”

From the archive · Full text
Reader shop tip 1 of 2

Brent Norton

Individual tip 1 of 2 from this reader’s published contribution.
Brent Norton, Lodi, Ohio

“I recently bought a frozen-up small engine at a very good price because I knew I could loosen it up with my best buy product called Gibbs, which frees up frozen pistons. It’s an excellent penetrant for all kinds of uses and is also a rust preventative. You can find out more at www.gibbasize.com.

From the archive · Full text
Reader shop tip 2 of 2

Brent Norton

Individual tip 2 of 2 from this reader’s published contribution.
Brent Norton, Lodi, Ohio

“Another great product that I use a lot are Metrinch wrenches. Very handy to have when you’re away from the shop. The open end wrenches and socket sets fit both metric and standard nuts and bolts. I like to take a small set to auctions where you often have to disassemble something to load it up.”

From the archive · Full text
Reader shop tip

Bill Reeks

Bill Reeks, Cromwell, Ky.

Bill converted his grease gun to run on “toe power”.

“By mounting it on a 1 by 8-in. board and adding a toe-stirrup as well as a 6-ft. length of hose, it’s a lot easier to reach grease fittings in places where both hands are needed. The grease gun handle can be pumped by one toe and held in place by the other foot by standing on the board. The toe stirrup is fitted to the handle by tach-welding, or using JB Weld epoxy.”

From the archive · Full text
Reader shop tip

Art Leefers

Art Leefers, Carlinville, Ill.

Art never sweats when working in his shop or around the yard on a hot summer day thanks to his portable high-volume fan, which was built for him by a friend, Dale Johnson. A squir-rel-cage fan out of a junked furnace mounts on the frame of a cart fitted with high wheels and stationary front legs. The big wheels make it easy to move around.

From the archive · Full text
Reader shop tip

Marion Calmer

Marion Calmer, Alpha, Ill.

Adding portability to his mig welder and cutting torch has made both tools much more useful to Marion. He built a simple frame on wheels and casters. It holds the welder about 15 in. off the floor. A gas bottle, which rests on the lower part of the frame, lowers the center of gravity and adds stability to the unit.

From the archive · Full text
Reader shop tip

David Snider

David Snider, Minier, Ill.

“A reader in your last issue showed how he welded up a device to keep a Cat. I drawbar from rotating in the balls.

“I wanted to say that he should have the forged fitting that I have had on my Ferguson TO-20 for over 40 years. It is made so that the drawbar nests into it along with the brace to the top link pin. It also nests into the draft arm so that the drawbar cannot rotate.

“I don’t remember if this was an aftermarket item or a Ford accessory. I do remember that it was painted red when it was new.”

From the archive · Full text
Reader shop tip

Sam McConnell

Sam McConnell, Bogata, Texas

“I’ve got a question for tractor manufacturers. How come auto manufacturers can make fuel gauges that work for the life of the car but tractor manufacturers can’t seem to make one that works for more than a couple years. I’ve got three tractors – a Deere 4050, Deere 3020, and a 282 Massey - and none of the gauges work.”

From the archive · Full text
Reader shop tip

Steve Devaney

Steve Devaney, Merkel, Texas

“I made a portable battery charger using a 2 1/2 hp Briggs & Stratton gas engine to belt-drive an automotive alternator. Both the engine and alternator mount on the frame of a push-type, 3-wheeled lawn edger.

“It’ll completely charge a battery in 15 or 20 minutes. To start the charging process, I just hook up the wires to the battery and flip a switch to complete the circuit from the alternator to the battery. I use it to charge batteries on farm vehicles and also to charge my electric fence batteries. It’s easy to move around to wherever I need it.”

From the archive · Full text
Reader shop tip

EZ Glide

EZ Glide, Weather Guard Truck & Van Equipment, Knaack Manufacturing Co., 420 E. Terra Cotta Ave., Crystal Lake, Ill. 60014 (ph 800 456-7865; E-mail

[email protected]; Website: www.weatherguard.com): “If you wrestle ladders on and off of a rack on top of a van or pickup every day, you’ll appreciate our new EZ-Glide aluminum ladder rack. It lets you lower the ladder down to the side of the truck for easy loading and unloading.

“Made of sturdy aluminum, with stainless steel hardware, it’s strong, lightweight and rust resistant. The hydraulic cylinder that powers the ladder lifter is operated by a detachable lever at the back of the rack. Suggested retail price is $1,229.”

Shop feature stories

From the archive · Full text
Feature story

Where To Buy Solid Rubber Tires

Featured source:

Tired of punctures in the tires on your garden tractor or bush hog mower? You might want to check out AEG Enterprises, Inc., Houston, Texas.

The company sells a variety of solid rubber tires, with or without wheels, for use on mowers, brush cutters, tillage equipment, planters, go karts and other machines where you want to replace pneumatic tires.

Tires are available to fit wheels from 6 to 9 in. in widths from 4 to 8 in. Several wheel options are available, including bolt-together split 6-in. wheels, with or without hubs, and with a number of different bolt hole configurations.

If you’re looking for larger tires, the company also sells several sizes of recapped aircraft tires for low speed uses. They also make cast or machined hubs in a range of sizes and specifications for various applications, as well as dust caps for hubs, turnbuckles, latches, hinges, bushings, bearings, hitch pins, flail blades, and more.

Contact: FARM SHOW Followup, AEG Enterprises, Inc., 14027 Memorial Drive, #231, Houston, Texas 77079-6895 (ph 713 490-5380; fax 713 490-5381; E-mail [email protected]).

From the archive · Full text
Feature story

Great Portable Farm Shop

Featured source:

There’s nothing better than having a fully-equipped shop on wheels, says Mark Gordin, Jamestown, Ohio, who put together a “tool bus” from a 25-ft. bus designed for handi-capped passengers.

Gordin, who bought the 1991 model bus for $2,400, totally remodeled the interior. On one side of the bus he installed a gas engine-powered air compressor, a 7-ft. long workbench, a roll-around toolbox, and a welding torch and acetylene tank. On the other side of the bus there’s a 50-ft. air reel, 4-drawer bolt bin, electric-operated grinder, and a 110 and 220-volt AC/DC Hobart welder-genera-tor. Each side of the bus is wired with three 110-volt outlets, eliminating the need to run an extension cord from tools to the generator.

He converted a remote-controlled wheelchair lift on one side of the bus into a welding table that’s fitted with a vise. The wheelchair lift automatically lowers to a horizontal position, providing a handy work station.

Gordin, who grows corn, soybeans, and wheat, says he needed a mobile shop because his fields are located up to 25 miles apart.

“The bus lets us carry many more tools than a pickup or cargo van and we can work inside during bad weather. The bus is equipped with a Chevrolet 6.2-liter diesel engine and Allison automatic transmission. It had been well maintained and everything on it worked and was ready to go. All the tires were new.

“I spent about $7,200 for tools to go inside it. Some farmers spend $30,000 just for a 1-ton pickup equipped with a utility box, and that doesn’t include the cost for tools. Even a used 1-ton pickup equipped with a utility bed costs about $10,000. Unlike with a pickup, on my bus everything is enclosed so nothing gets wet. The bus has dual wheels on back so it’s not likely to get stuck in the field.

“All the equipment inside the bus is bolted to the floor. I had a local muffler shop custom build an exhaust system, which hooks up to the gas engine on the air compressor and also to the engine on the welder-genera-tor. Exhaust pipe runs through the bus floor and out the back to keep fumes out of the bus.”

Contact: FARM SHOW Followup, Mark Gordin, 7290 U.S. Route 35 E., Jamestown, Ohio 45335 (ph 740 948-2838).

From the archive · Full text
Feature story

Shift Kit For IH 86 Series Tractors

Featured source:

Anyone who owns an International Harvester 86 series tractor will appreciate this new chrome shift lever kit designed for 86 series tractors equipped with 4-speed transmissions. It makes it much easier to get in and out of the cab.

The kit includes a new shifting gate and two chrome shift levers with new-style knobs.

The new kit allows the operator to more easily enter the cab and shift gears without having to lean or bend over. The shift levers angle back farther than the original ones and are also longer, which makes them easier to grab.

Fits all 86 series tractors except for the 1586 model. Suggested list price is $155.71. Contact your farm implement dealer and ask for parts number C86SLK.

Contact: FARM SHOW Followup, Hy-Capacity Engineering and Mfg., Box 156, Hwy. 169 South, Humboldt, Iowa 50548 (ph 515 332-2125; Website: www.hy-capacity.com).

From the archive · Full text
Feature story

He Built His Own Electric Shop Lift

Featured source:

After building a new shop three years ago, Larry Zimbelmann needed an easier way to get up to his parts storage area which is 10 ft. above floor level. So the Milford, Neb., farmer decided to build an elevator.

The elevator cage measures 40 by 45 in. and runs up and down on two 20-ft. lengths of channel iron mounted about 1 ft. out from the wall. Adjustable rollers guide the cage along three sides of each channel iron. Power is provided by a 1/2 hp electric gear motor connected by chain and sprockets to a drum with cable that lifts the cage. There’s a safety switch at the top, and a 200-lb. counterweight that gives the elevator a 700-lb. lift capacity.

“It takes up less space than stairs and works fast,” says Zimbelmann.

“The cage is big enough that I can load tools and other parts and equipment on it.”

A big 25-tooth sprocket and a smaller 15-tooth dia. sprocket serve as the gear reduction drive for a cross shaft at the top of the frame. A spool with 3/8-in. winch cable raises and lowers the lift. The elevator is equipped with a spring-loaded brake that applies or releases pressure on the cross shaft via a solenoid wired into the electric motor.

The elevator is operated from a waist-high, push-button control arm.

“I looked at a lot of commercial elevator hoists and winches before I built it and discovered that most of them go too slow for my needs. With most commercial elevators, it takes 30 seconds to go up 10 ft., but with mine it takes only 11 seconds,” says Zimbelmann.

“I use the loft area to store small parts for my tractors and other machinery that would otherwise get in the way on the shop floor.”

Contact: FARM SHOW Followup, Larry Zimbelmann, 2337 Superior Rd., Milford, Neb. 68405 (ph 402 643-2310 or 402 643-0138).

From the archive · Full text
Feature story

Oil Changer Works Quick, Clean

Featured source:

Russell Flock, Maywood, Nebraska, is an in-novator when it comes to changing oil in tractors, combines, trucks, and pumps.

Several springs ago, he was frustrated because he couldn’t get to the oil dipstick on his Case 2170 during planting.

“With saddle tanks for the sprayer on the front of the tractor it was impossible to open the doors that gave us access to the engine,” he says. He couldn’t have added oil if the tractor had needed it without removing one of the tanks.

“That got me thinking about other ways to change and add oil,” he says.

After eight years of experimenting with 15 or 20 different designs, Flock put together what he calls the Able Oil Changer. It consists of a pump, a container for fresh oil and one for used oil, and a small hose and will pump out used oil and refill the engine in just a few minutes.

“You can use any reversible power drill to power the pump,” he says.

Flock installed Pioneer hydraulic couplers and 1/2-in. hoses on his vehicles, so all he has to do to change oil is hook a couple of hoses together, pump out the used oil, and then, after reversing the drill through the same hose.

“I also relocated the oil filters using a couple hoses and the same kind of couplers so I don’t have to get under the vehicles at all,” he says.

Flock’s Able Oil Changer comes with a 5-gal. bucket for fresh oil and a 2 1/2-gal. container for waste oil. He says the pump can be mounted on any size container, including 30 and 55-gal. barrels.

“I’d be happy to advise anyone on how to add hoses and couplers to their own vehicles, tractors, combines, or irrigation pump engines,” he says.

“For some engines, you can pump out used oil through a small hose inserted through the dipstick tube,” he says.

“It takes a little longer, but is not nearly as messy as draining oil from the plug in the pan.”

“In addition to using it for engine oil, you can also use it to change transmission fluid or even empty the oil from gear boxes or differentials,” he says.

“It can be set up to filter oil as it pumps it out, so it can be reused if you want.”

The Able Oil Changer sells for $299, plus shipping.

Contact: FARM SHOW Followup, Russell Flock, Able Farm Products, Box 42, Maywood, Neb. 69038 (ph 308 362-4869; E-mail: [email protected]).

From the archive · Full text
Feature story

Dolly Stands Make Repair Work Easier

Featured source:

Avon, Ohio brothers Eric and Steve Wise spend their winters repairing, overhauling and restoring farm tractors.

“We do our own maintenance plus some restoration work, and we’re always looking for ways to make things easier and faster,” Eric says.

For years they’ve made tractor-splitting stands for their own use to work on engines, clutches, and rear ends. Recently, the brothers say they’ve been asked to make splitting stands for others. That prompted them to launch a sideline business, manufacturing stands and dollies for sale.

Their product line now includes stands to support engine and clutch assemblies, dollies to handle the front end of tricycle-type tractors, dollies to handle the entire rear end of 1939-1956 Farmall rear ends, and more.

They use heavy carbon steel to construct their stands and mount them on Faultless heavy-duty casters.

“Most of our customers so far have been individuals or small independent farm machinery repair shops,” Eric says.

“Our goal is to provide a solution for someone who wants to make a tractor repair job easier. We can design stands and dollies from the ground up for any tractor or other machine.

“Our main focus in on the IH Farmall line, but we can make stands for other makes, too. We recently adapted a set of stands and dollies for a man who restores Deere tractors.”

A complete set of stands and dollies would cost $500 to $1,000, depending on how much the stands have to be modified from the Farmall specifications.

They have some stock on hand and can ship immediately. Shipping weight is less than 300 lbs.

Contact: FARM SHOW Followup, Eric and Steve Wise, 1182 Windmill Way, Avon, Ohio 44011 (ph 440 934-3393; E-mail: [email protected]).

From the archive · Full text
Feature story

Understanding Tire Talk

Featured source:

If you’re confused by all those numbers and letters printed on tires, you’re not alone.

Typically on a tire’s sidewall, you’ll find the model or name of the tire and opposite that, the manufacturer. On the space between the model and manufacturer, you’ll find something like “LT 245/75R16 90H” on one side and something like “TRACTION A TREADWEAR 220 TEMPERATURE B” on the other. In smaller type near the bead, you’ll find information on maximum cold inflation and load limits, tire ply composition and materials used, and even the U.S. Department of Transportation safety standard codes re-lating to that particular tire.

Okay. But what does it all mean? This diagram from Cooper Tire Company should help.

If we break down the coding on a pickup tire, this is what it says: LT - This is the type of tire. LT means light truck. You’ll find these on pickups and some SUVs. P means passenger car.

275 - Width of the tire, in millimeters. 75 - Designates the aspect ratio, or ratio of height to width so 75 means the tire is 75 percent as tall as it is wide.

R - Designates radial construction. For a bias tire, you might find D, for diagonal, or B for belted bias.

17 - Indicates the nominal wheel dimension to fit the tire, in inches. The wheel diameter on the vehicle and this number on the tire must always match.

95H - These are load and speed ratings for the tire. Such information is not required on the tire, so don’t panic if it’s not there. But if you’re concerned about your tires’ performance under load or at certain speeds, you should probably look for this information or ask your dealer before you buy the tires. The number relates to load. The higher the number, the greater the load carrying capacity of the tire. The letter is the speed rating, based on indoor wheel tests and doesn’t represent a safe or acceptable driving speed.

Other information that might be important is treadwear, traction and temperature, which appear opposite the size and load ratings.

The treadwear number compares the tire against a government-mandated standard that is equal to 100. A treadwear rating of 220 means the tread should last 2.2 times as long as the federally imposed standard.

The traction scale is from C to AA, meaning that a tire with a C rating has the lowest level of road grip and an AA traction tire has the most.

The temperature rating indicates the tire’s ability to disperse heat. This may not be important on tires that run at low speed on soft surfaces, but it is something to look for on tires that will see high speeds on hard surfaces under load. The rating scale is C to A, with an A rated tire being best able to resist heat buildup.